Profile Tab
Details
The Details section is where you can enter or update the Prospect’s basic personal information, such as name, contact details, address, and date of birth.
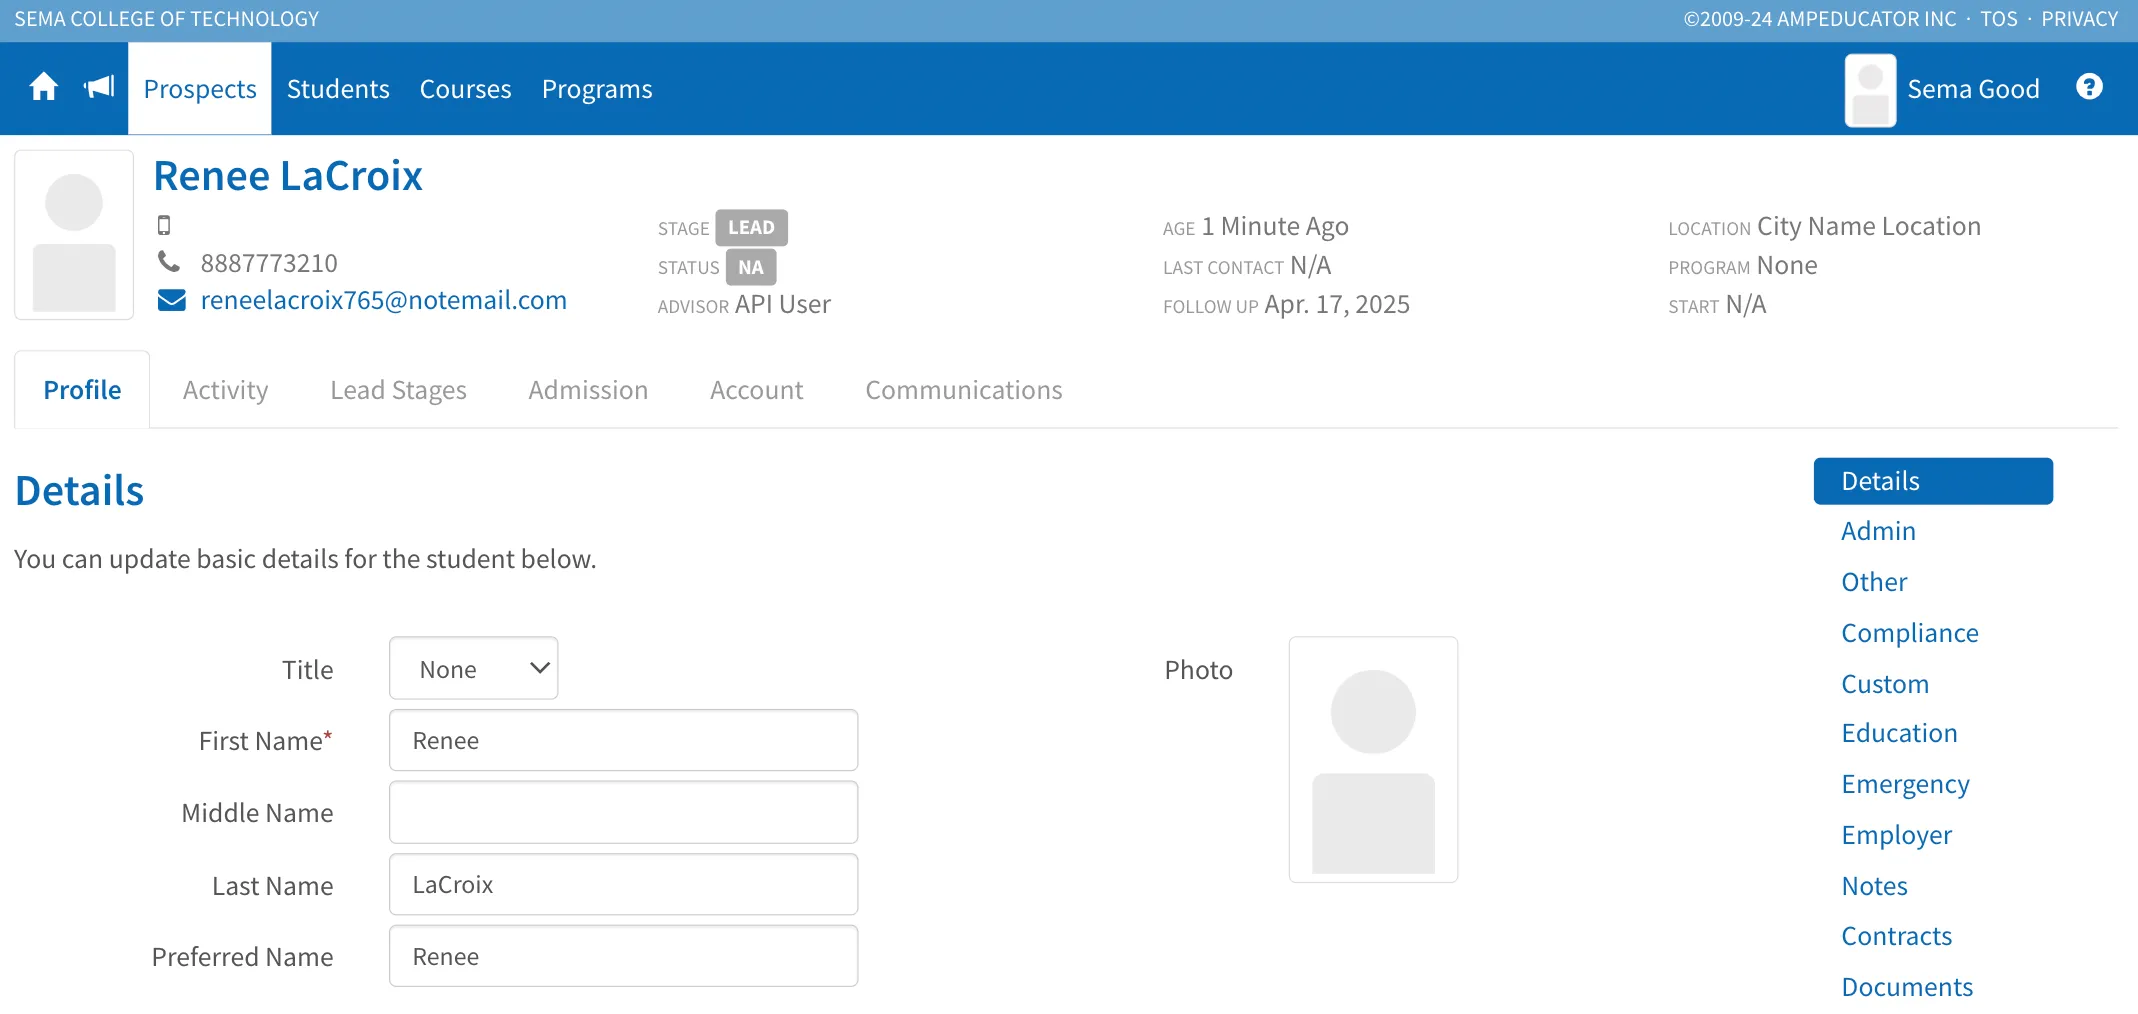
This section helps build out the Prospect’s profile for future communication, follow-up, and enrollment steps. Any custom fields you've added will appear at the bottom of each section.
Admin
The Admin section contains administrative details related to the Prospect:
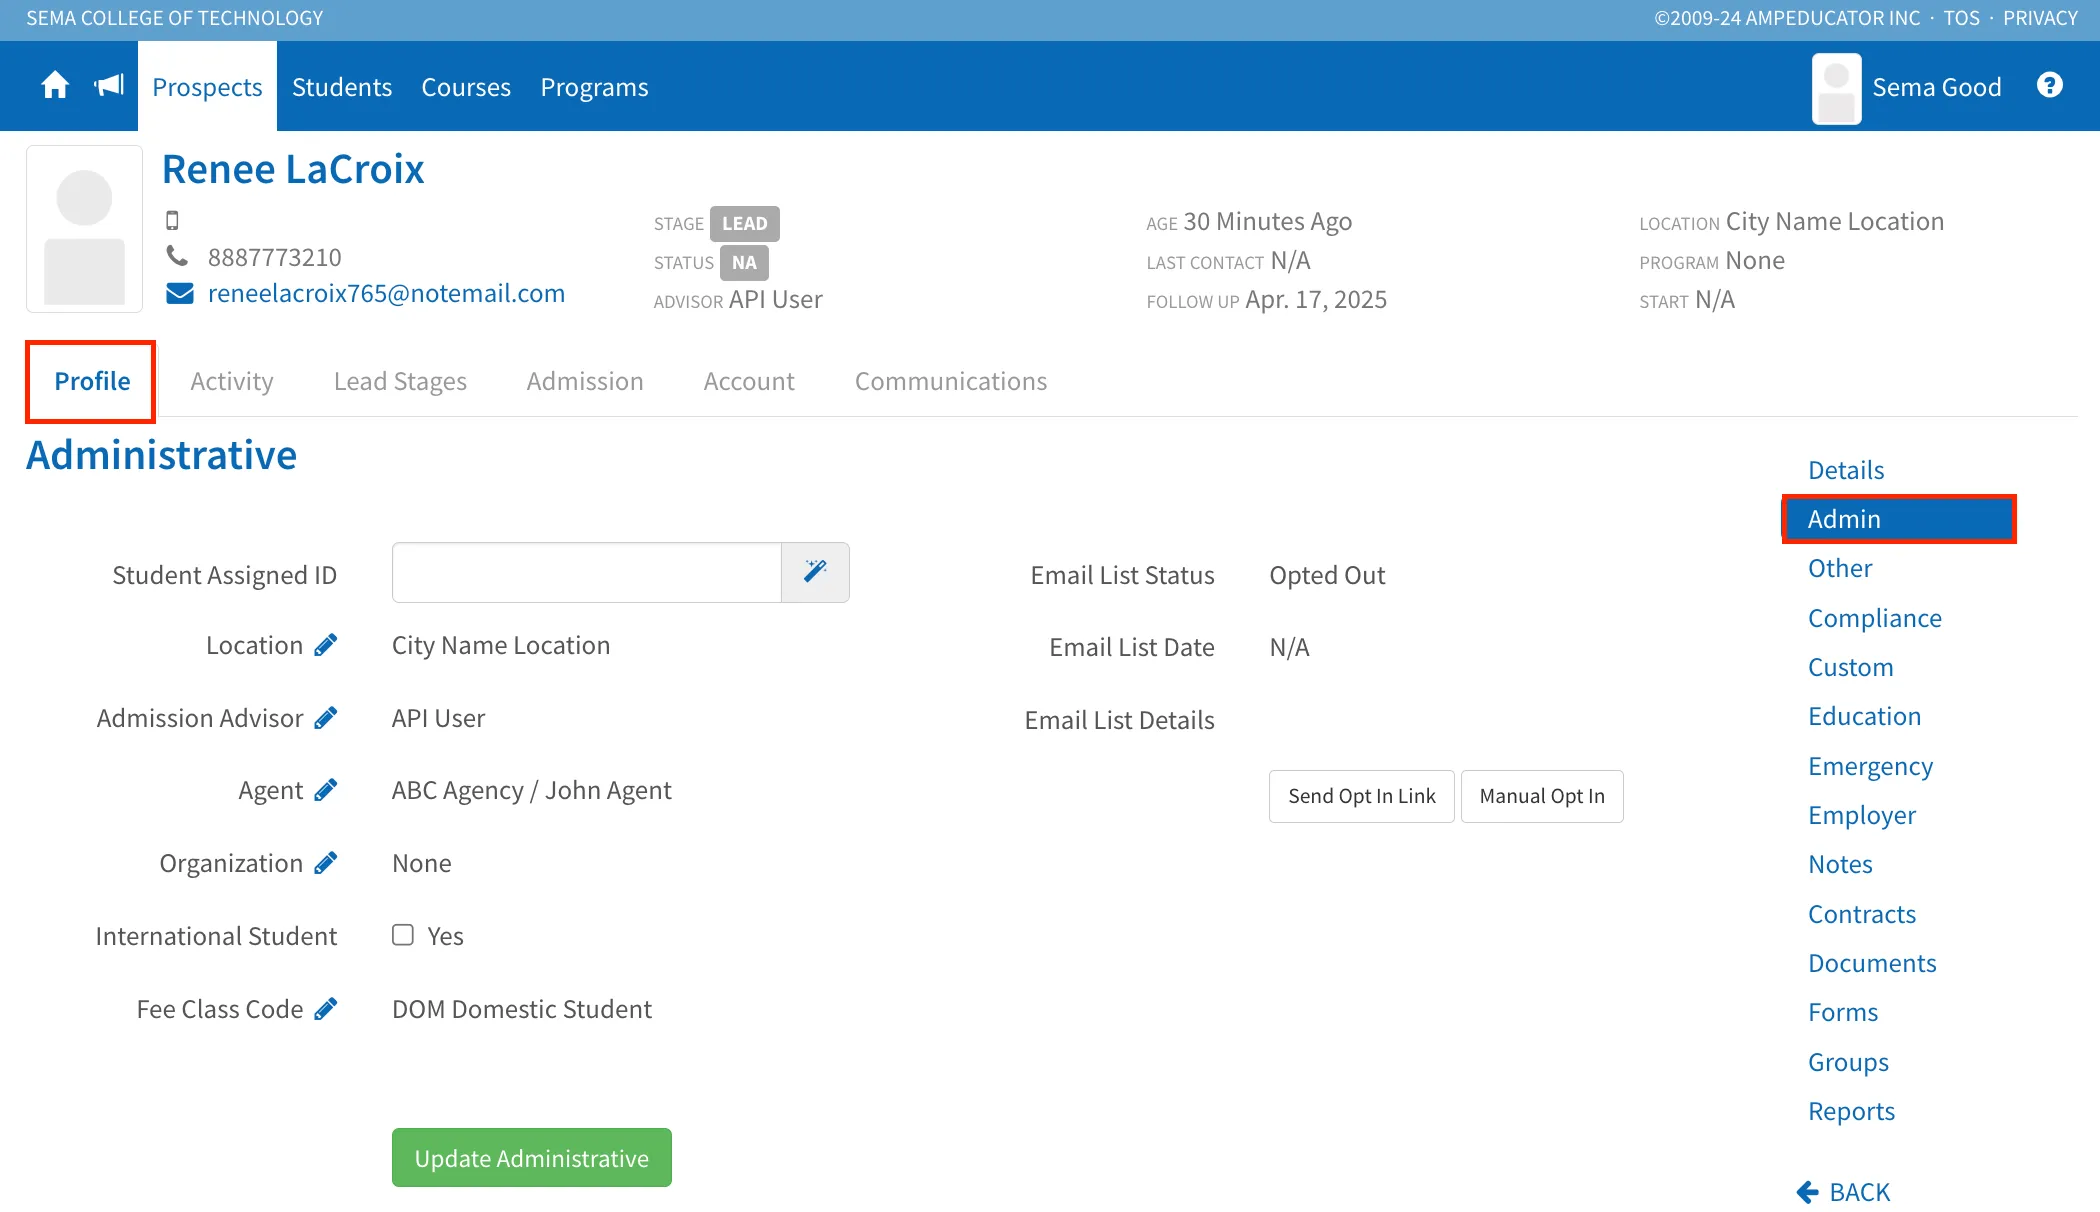
- Student Assigned ID – You can manually enter an ID or click the wand icon to have ampEducator generate one automatically.
- Location – Indicates the campus the Prospect is applying to.
- Admission Advisor – Automatically assigned based on your settings but can be changed if needed.
- Agent – Shows the referring agency or agent.
- Organization – Used to track the school, business, or group the Prospect is affiliated with (if applicable).
- International Student – Check this box if the Prospect is applying as an international student.
- Fee Class Code – Determines the appropriate tuition structure (e.g., domestic vs. international).
Communication Consent (Email Opt-In)
Prospects must opt in before they can receive any bulk or automated emails through ampEducator. On the right side of the Admin section, you'll see the Email List Status. This shows whether the Prospect has opted in to receive email communications. If they are Opted Out, you have two options:
- Send Opt In Link – Sends the Prospect an email to request consent.
- Manual Opt In – Use this option if consent has already been received outside the system.
Click Update Administrative to save any changes.
Other
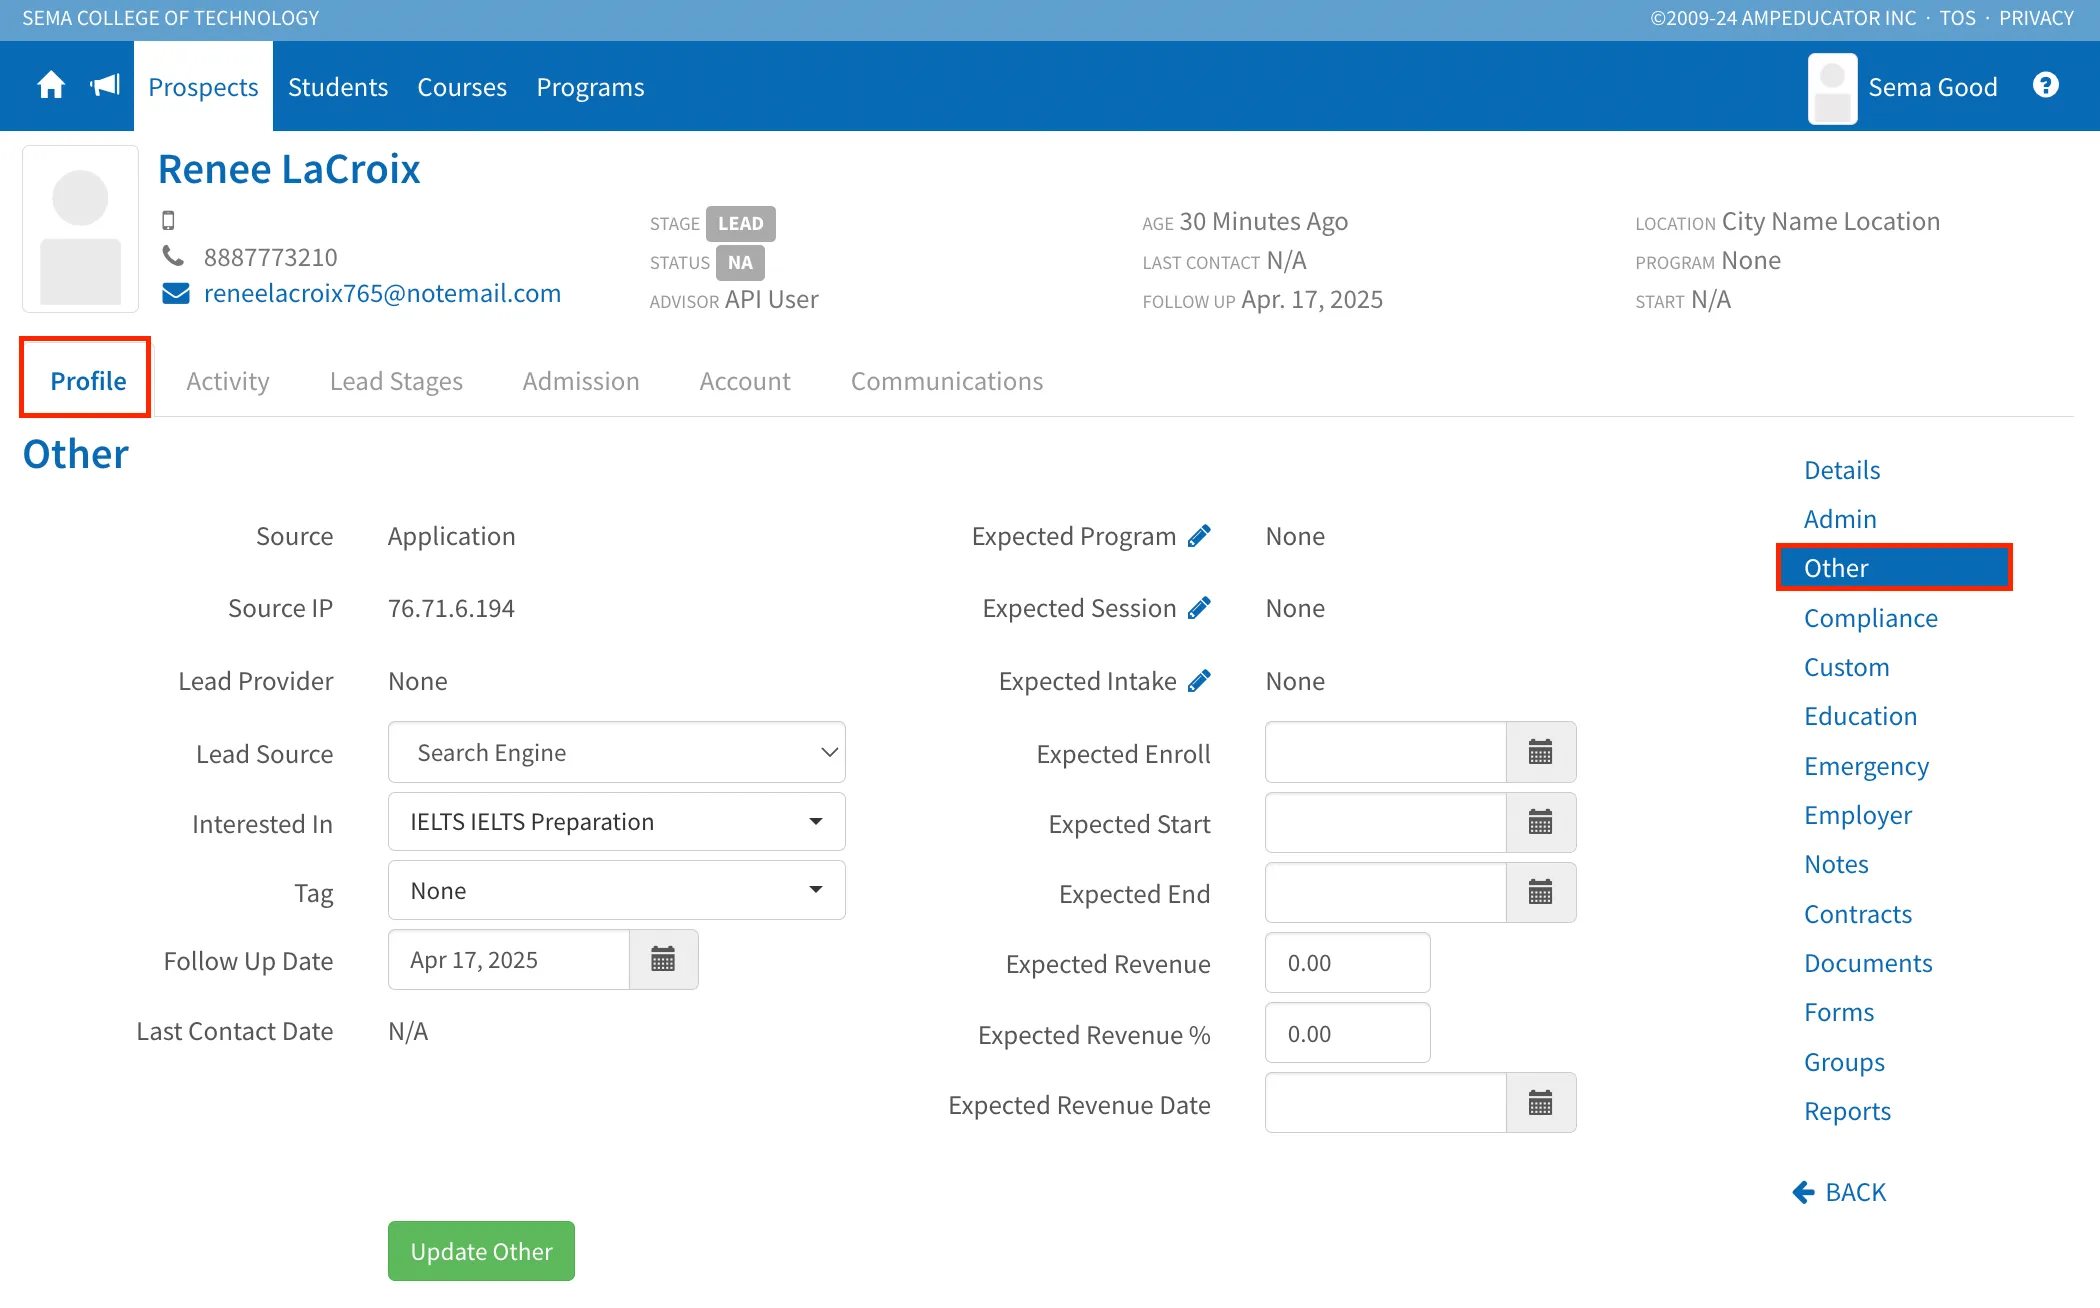
This section is divided into two parts: one for tracking lead details and the other for managing expected program and enrollment information.
Prospect Tracking Fields
The left side of the Other section includes important fields used for organizing and tracking Prospects:
- Follow Up Date – Used to schedule your next contact with the Prospect.
- Last Contact Date – Automatically updates based on recent communication.
Expected Details (Planning & Merge Fields)
The right side of the Other section contains optional Expected fields that support planning, communication, and documentation:
- Expected Program, Session, Intake
- Expected Enroll Date, Start Date, End Date
- Expected Revenue, Revenue %, Revenue Date
These fields are especially helpful for international students, as they’re often required for visa paperwork. They can also be pulled in as merge fields when generating contracts, offer letters, and other templates—making it easy to personalize documents.
Additionally, all Expected fields can be used as filters to help with reporting, organization, and timely follow-ups.
Click Update Other to save any changes.
Compliance
The Compliance section is only available for Ontario institutions that have specifically requested it. If your school is outside Ontario or hasn’t enabled this option, this section will not appear in the Prospect profile.
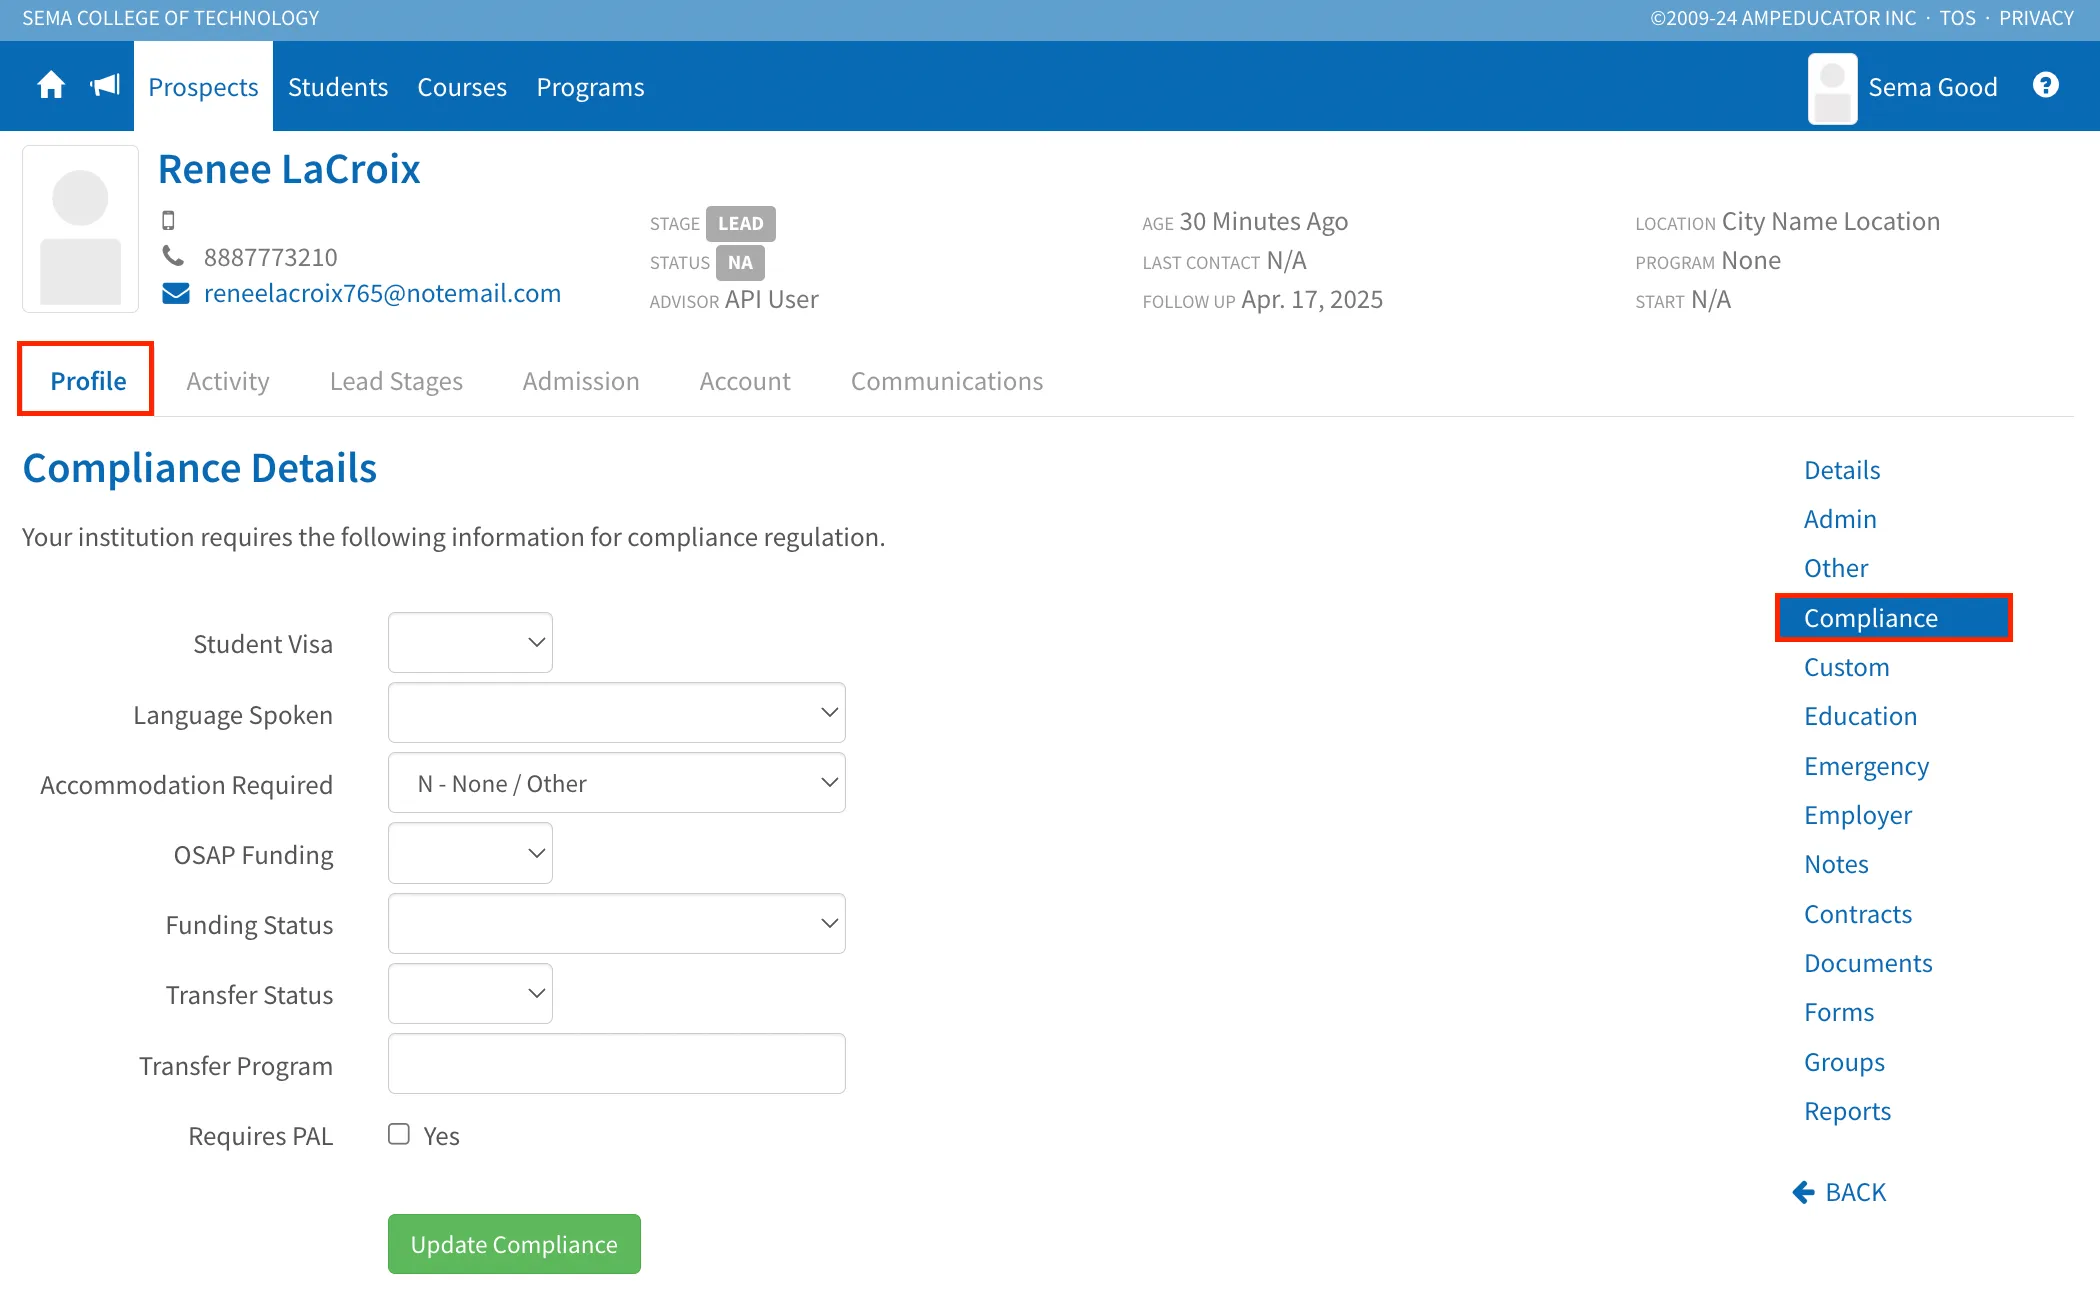
For institutions that do use it, this section is designed to capture required information for regulatory reporting. Fields include student visa status, language spoken, whether accommodation is required, OSAP and funding details, transfer status and program, and whether a Provincial Attestation Letter (PAL) is needed.
Once complete, click Update Compliance to save any changes.
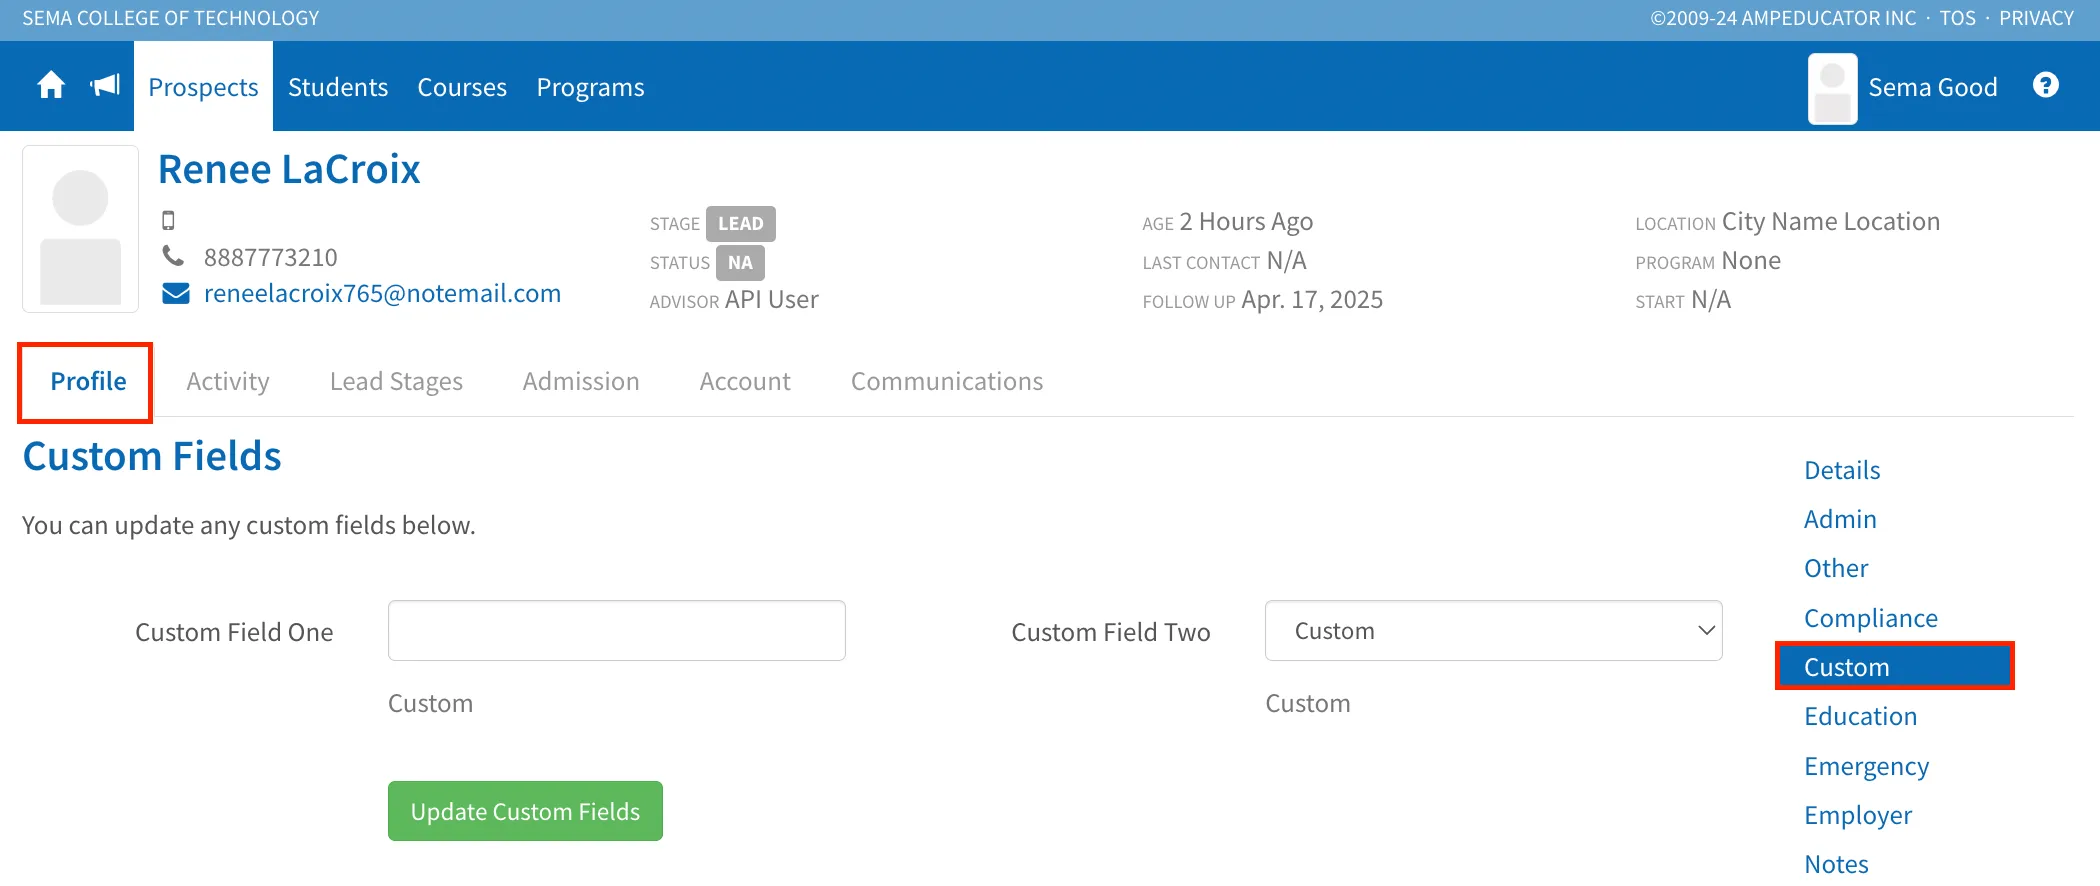
Custom
The Custom section is where any custom fields will appear if they haven’t been assigned to a specific section. Previously, all custom fields were stored here by default, but now you have the flexibility to move them into other sections. Any custom fields you leave in the Custom section will still display here and can be filled out or updated as needed.
Education
The Education section allows you to record a Prospect’s academic background. It includes options to indicate whether the Prospect has completed high school, post-secondary studies, or both.
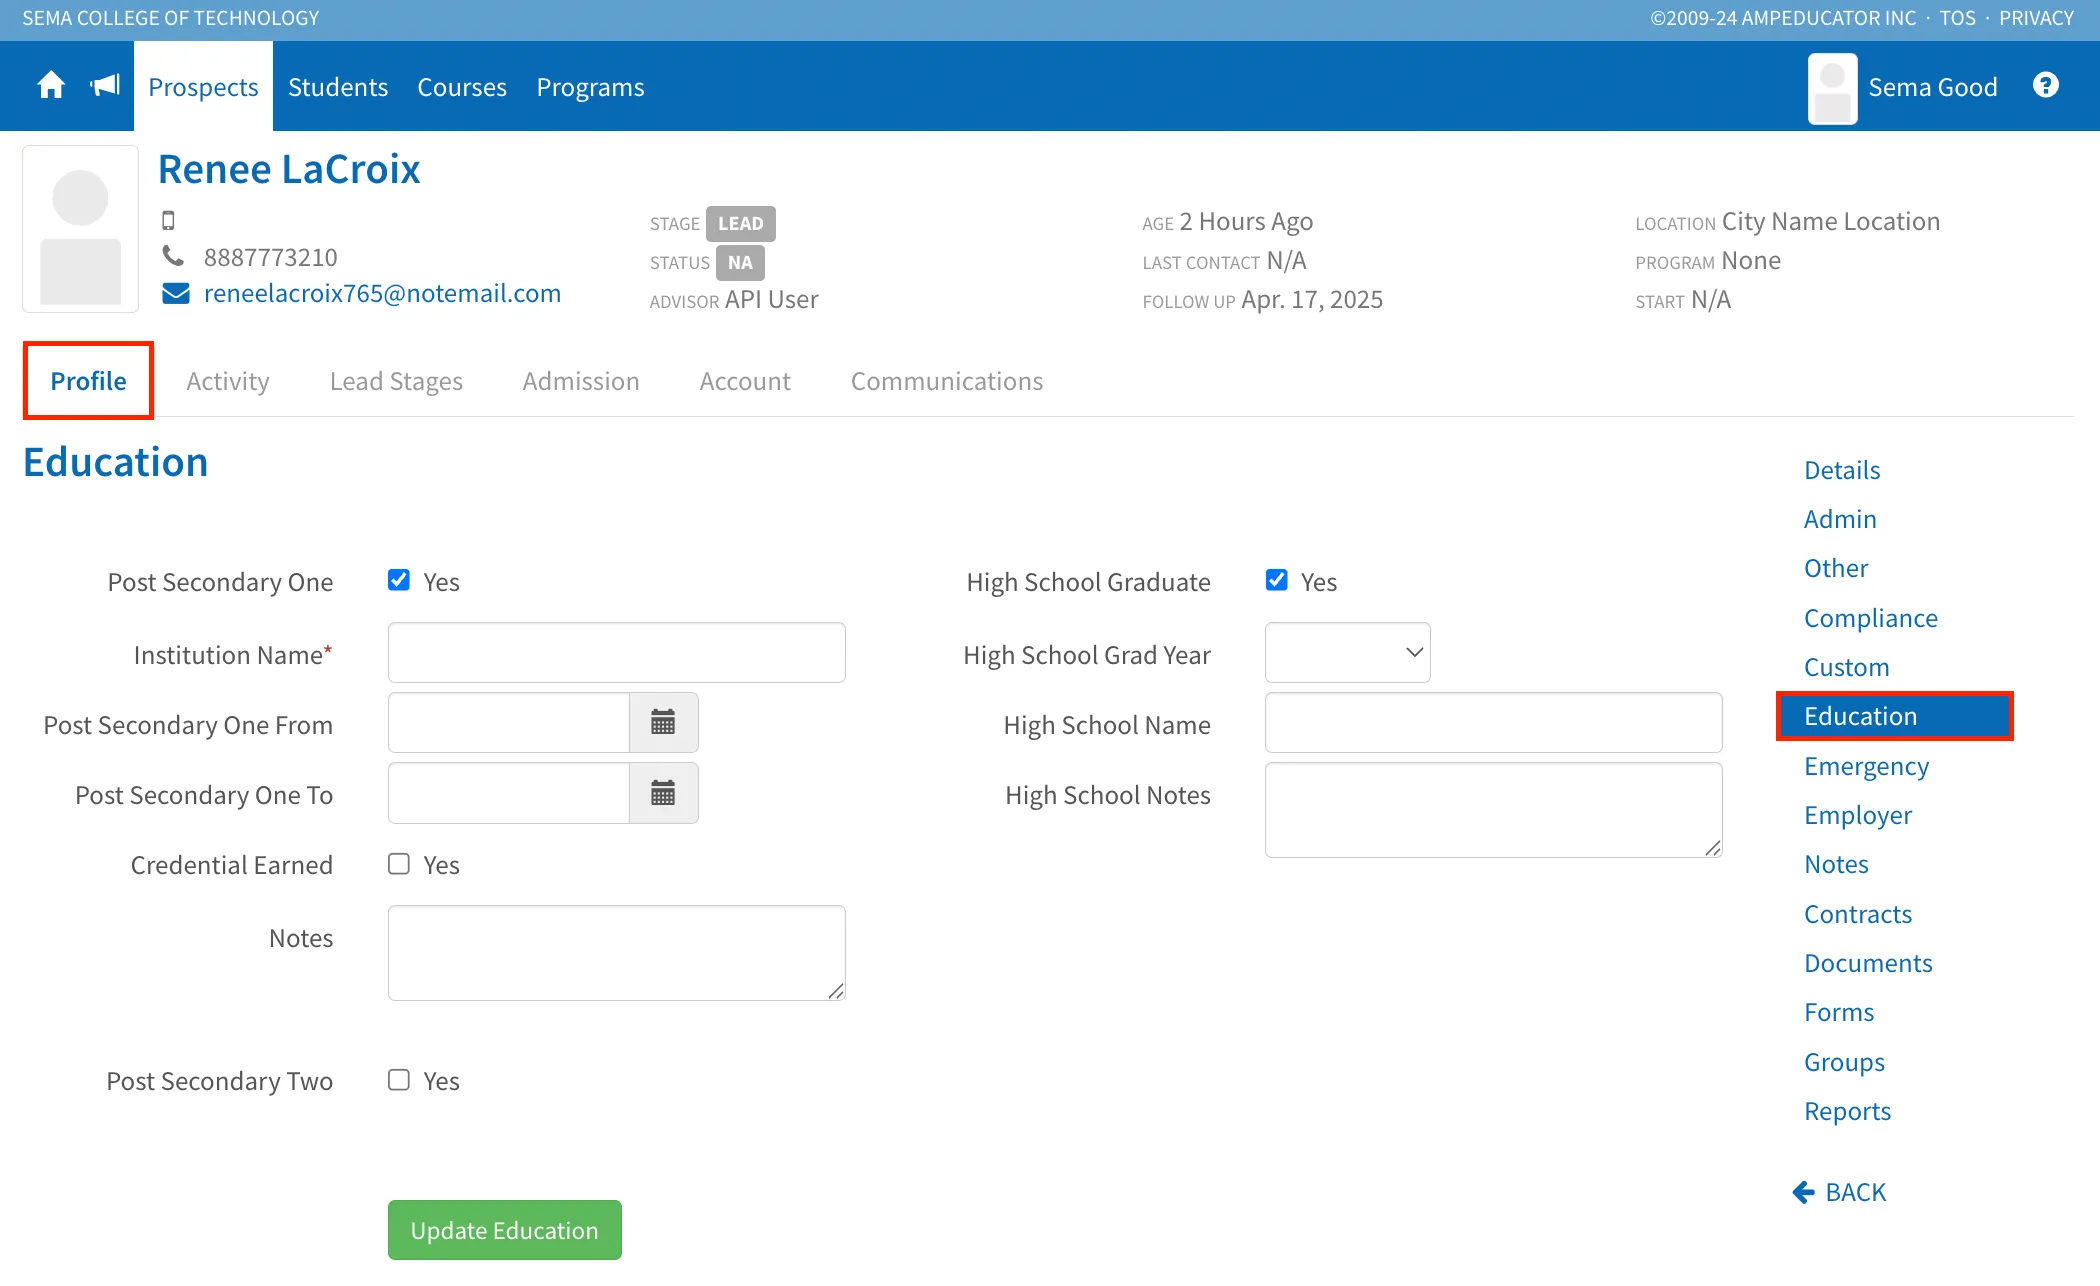
When you check High School Graduate, additional fields appear where you can enter the graduation year, school name, and any notes. Similarly, selecting Post Secondary One or Post Secondary Two will expand fields to enter the institution name, study dates, and whether a credential was earned. Notes can also be added for each post-secondary entry.
Click Update Education to save any changes.
Emergency
The Emergency section allows you to store up to two emergency contacts for each Prospect. For each contact, you can enter their name, relationship to the Prospect, address, and phone numbers.
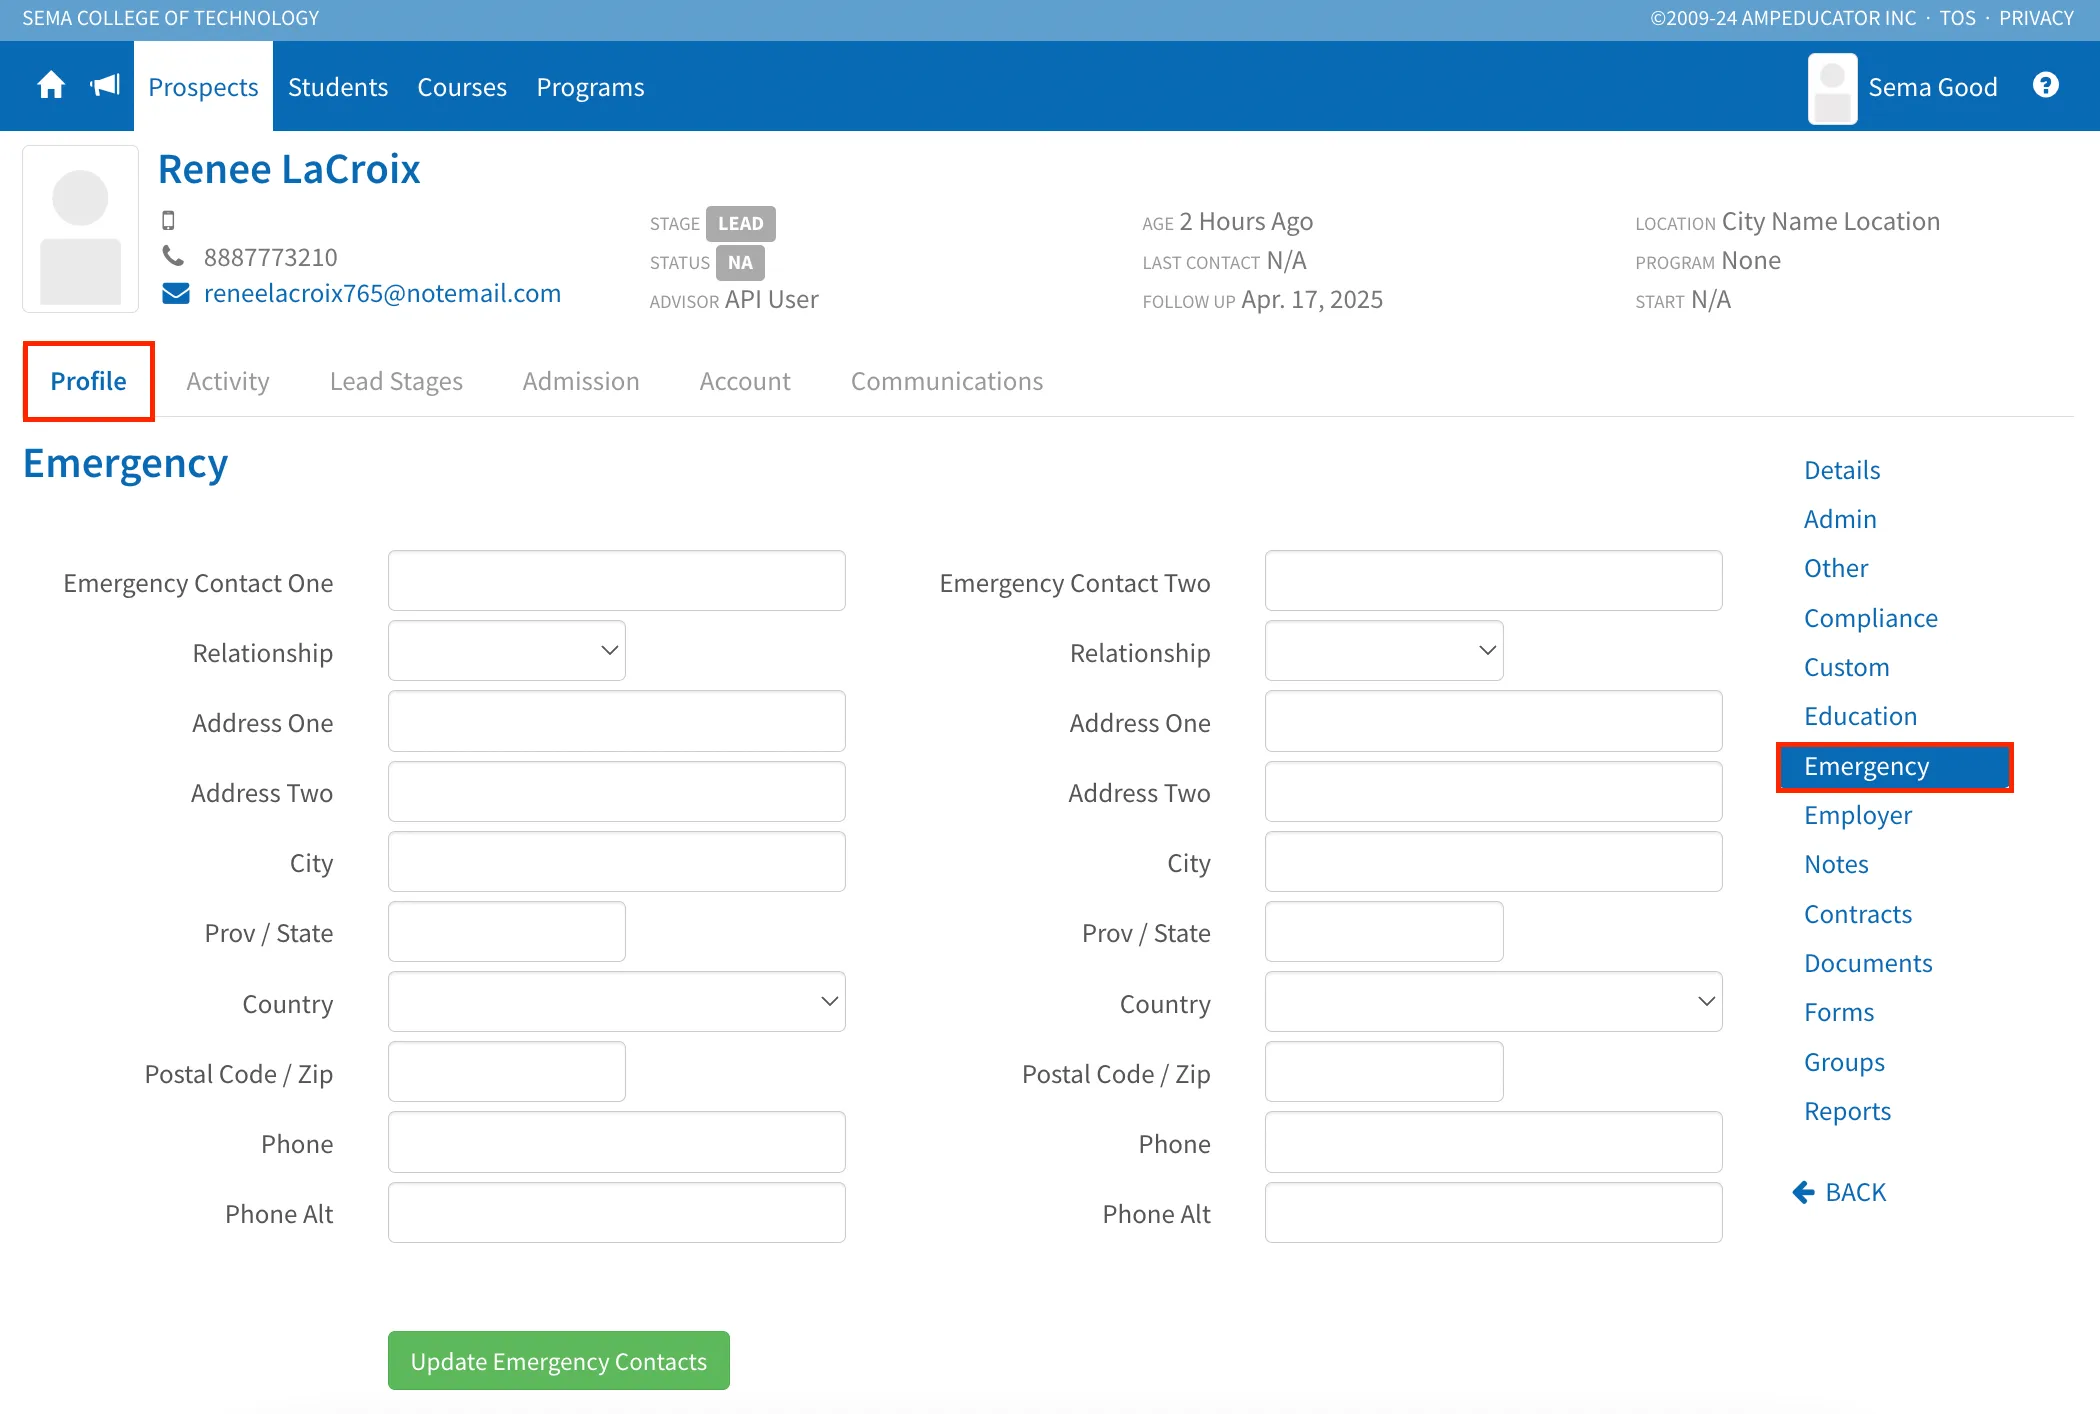
This information may not always be collected during early stages of admissions but can be added at any time if required by your institution.
Click Update Emergency Contacts to save your changes.
Employer
This is where a Student’s employers will be listed once added. This section is useful for tracking employment details for programs that include co-op, work placements, or where employment history is required for admission, immigration, or visa documentation.
Note: If an employer is responsible for covering tuition or fees, that setup is managed under Home / Organizations. From there, the employer can be added to invoices and billed directly.
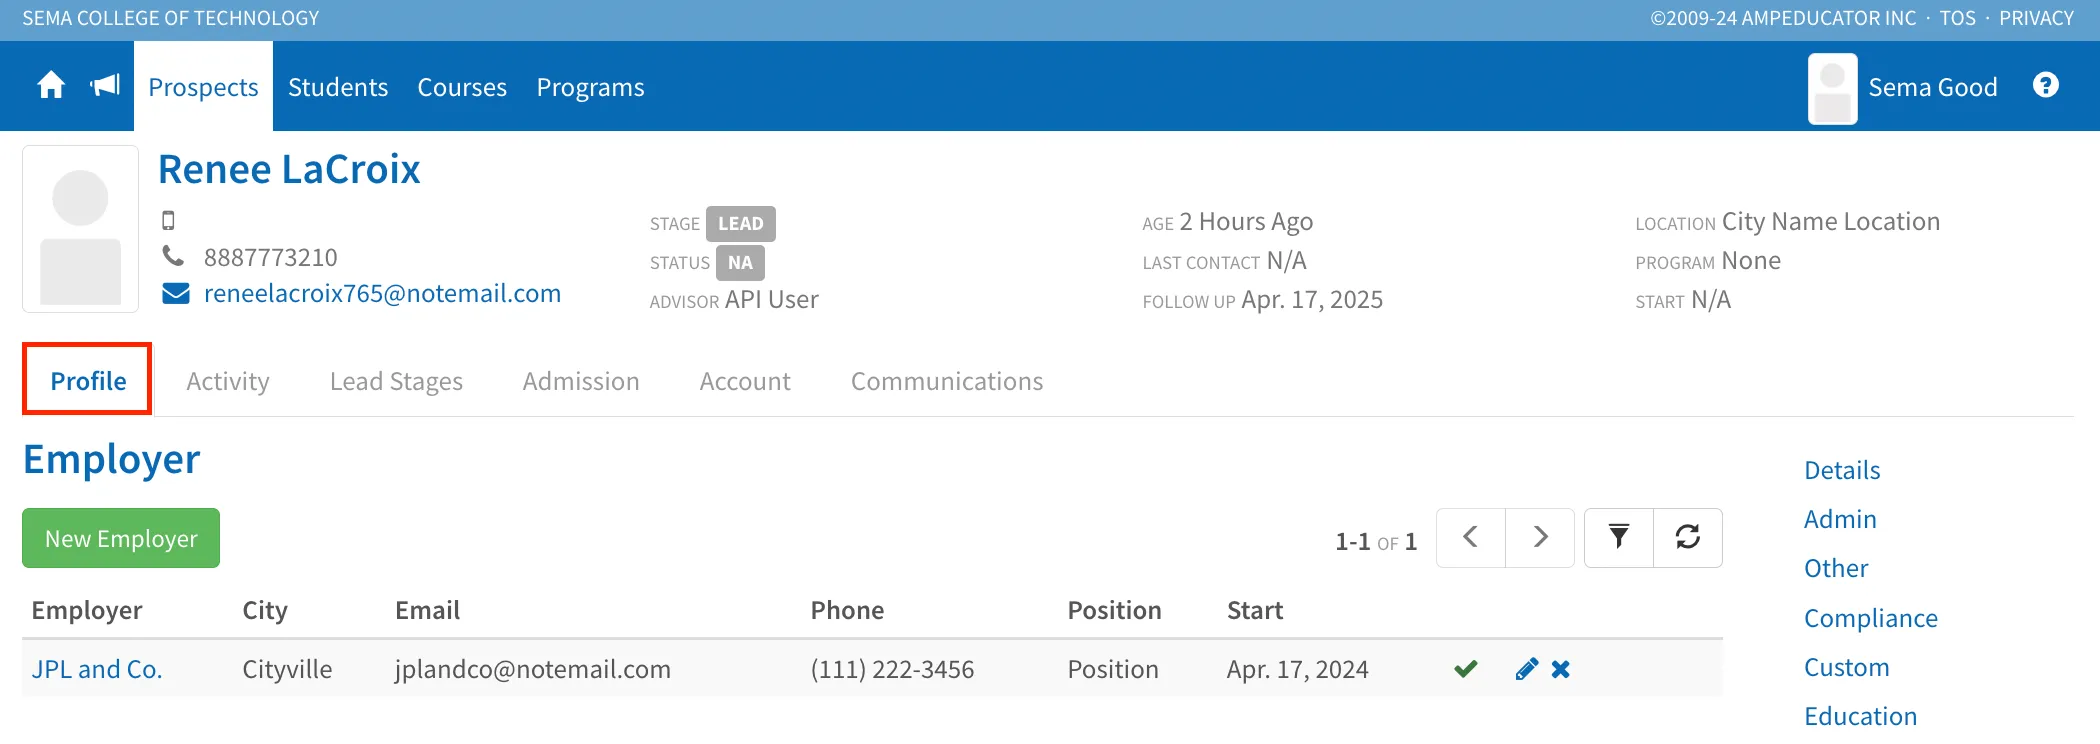
To add a new employer, click New Employer. A pop-up will appear where you can enter details such as the employer’s name, address, contact info, position, start date, salary, and whether it’s their current employer.
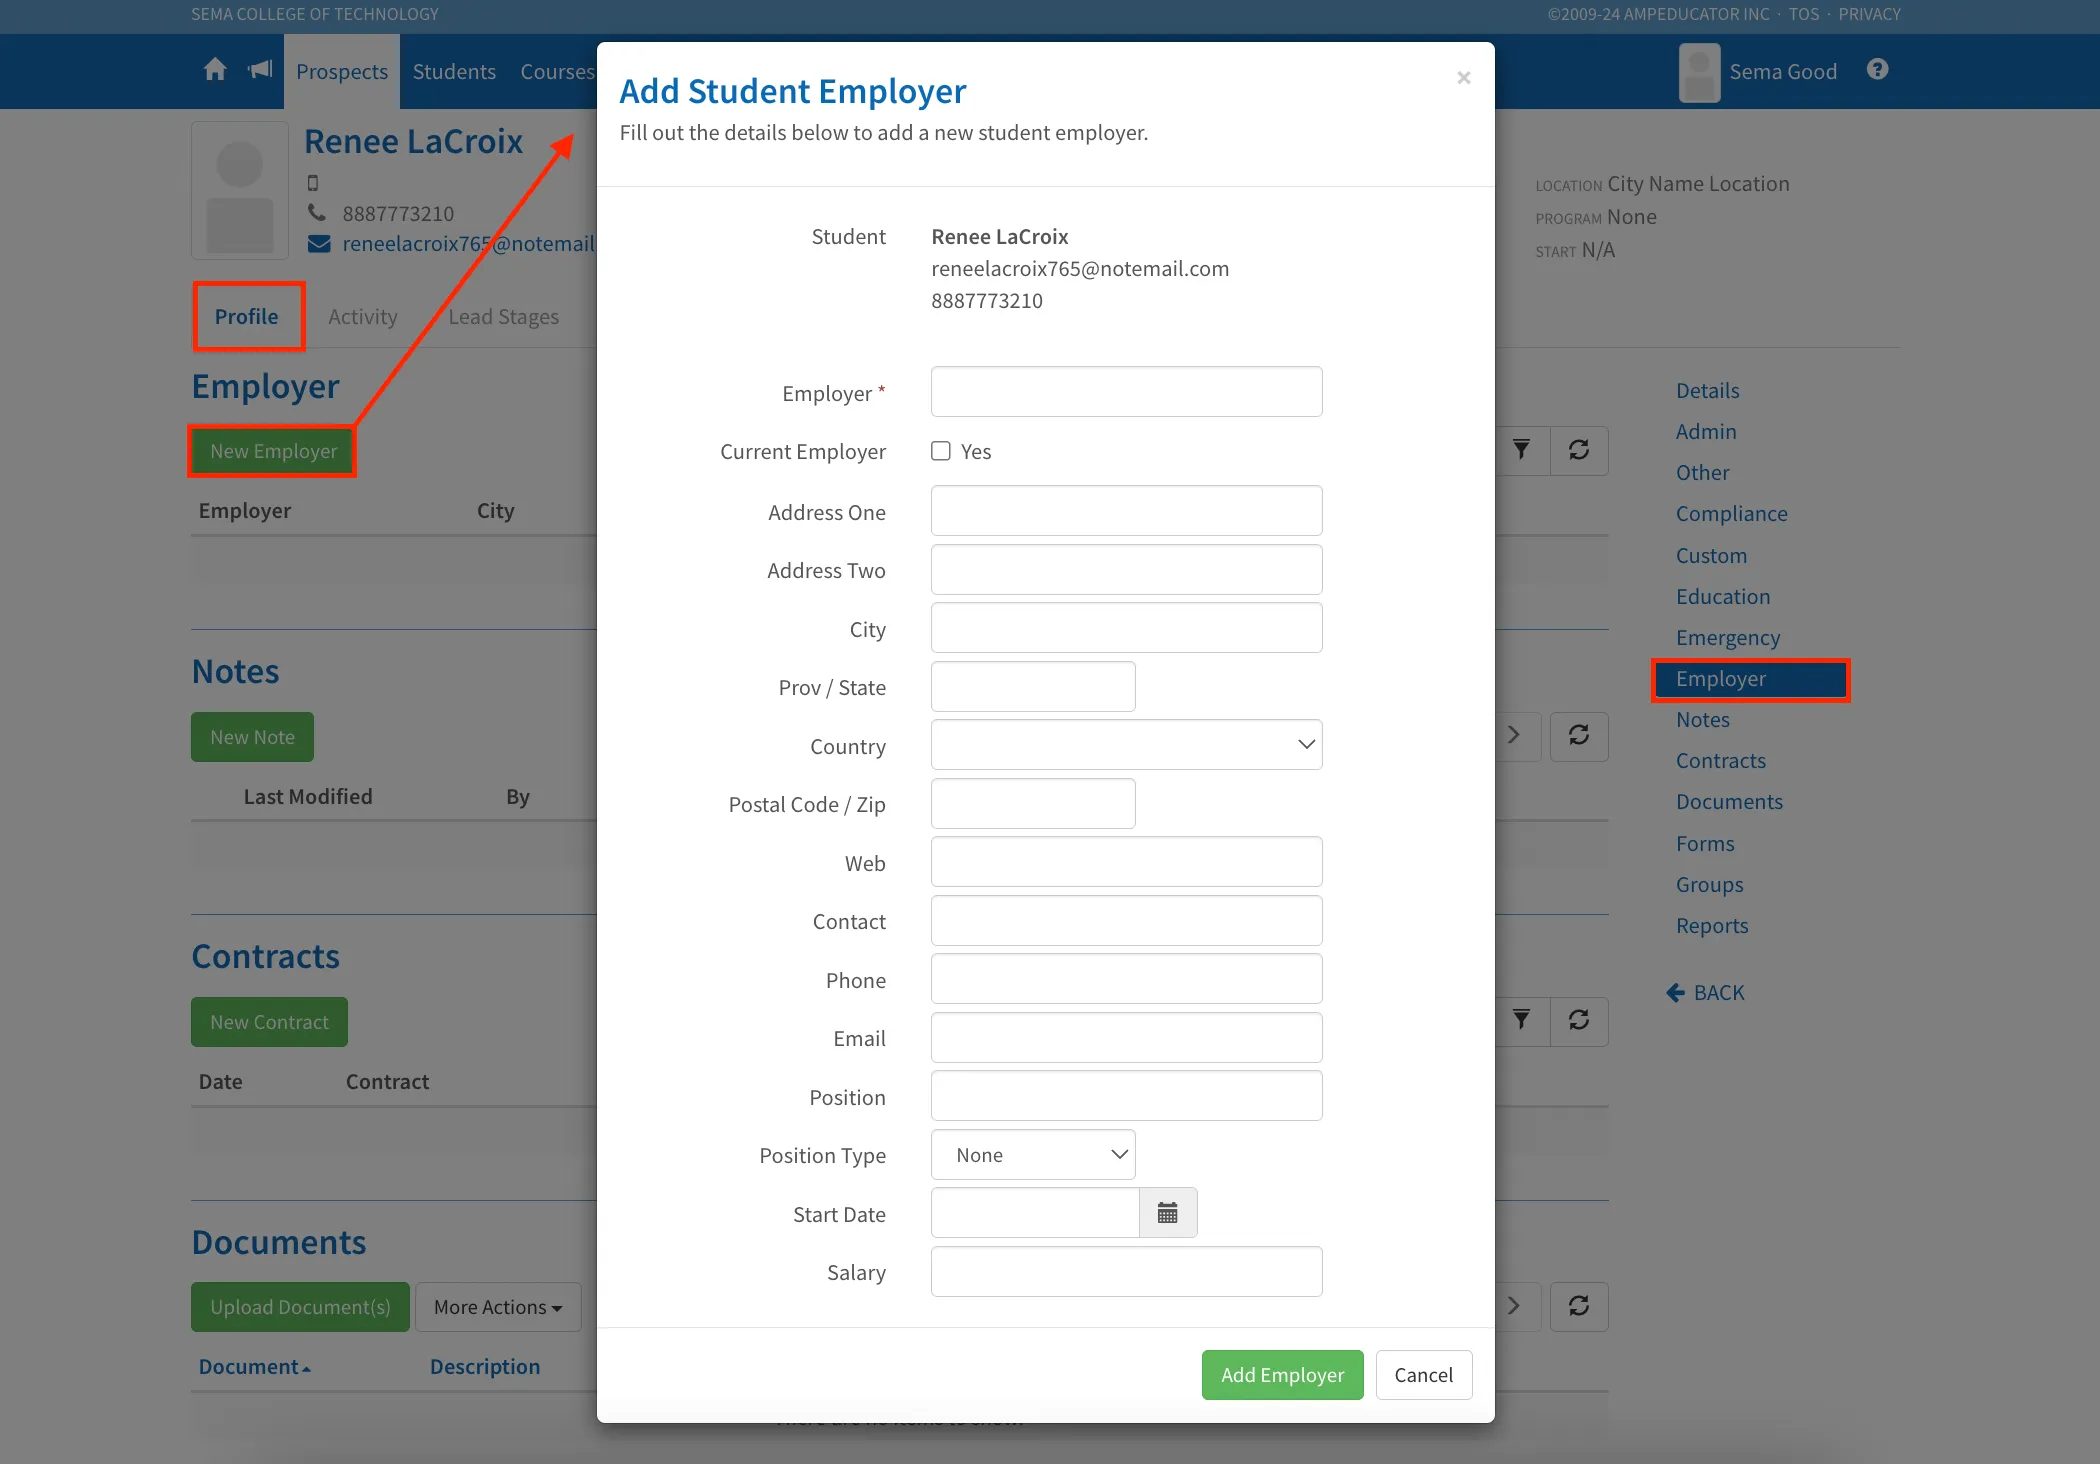
Click Add Employer to save the information.
Notes
The Notes section allows you to add internal notes to a Prospect’s profile.
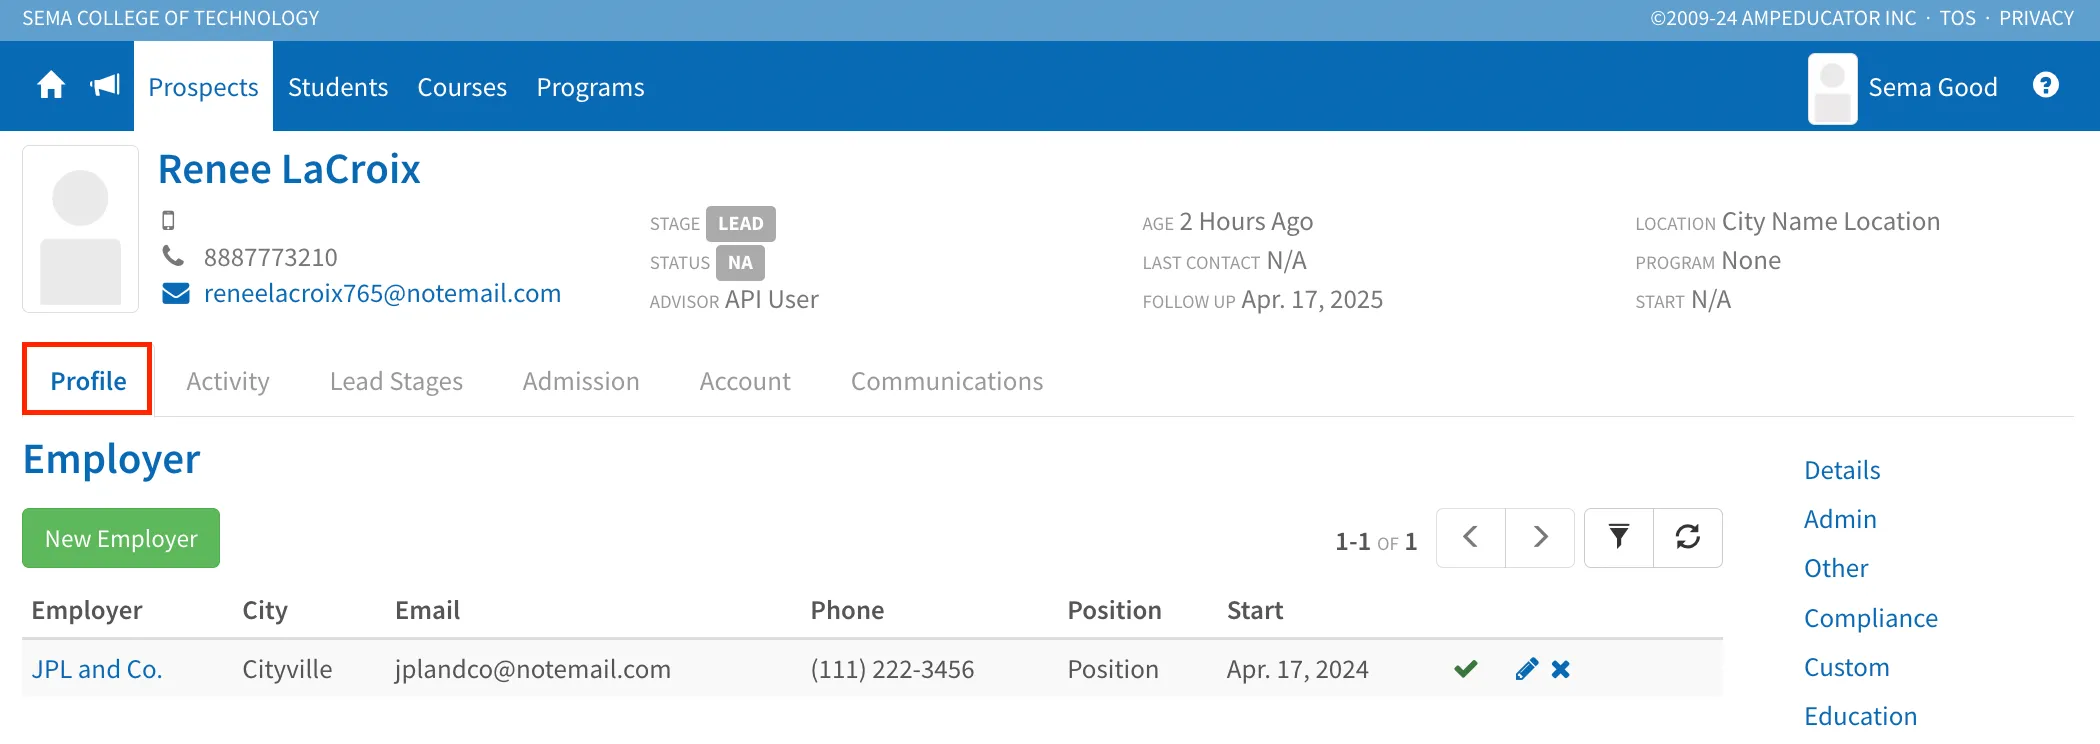
You can add a new note directly from this section by clicking New Note, or from the Activity Tab or the Activity Feed for quick access while reviewing interactions.
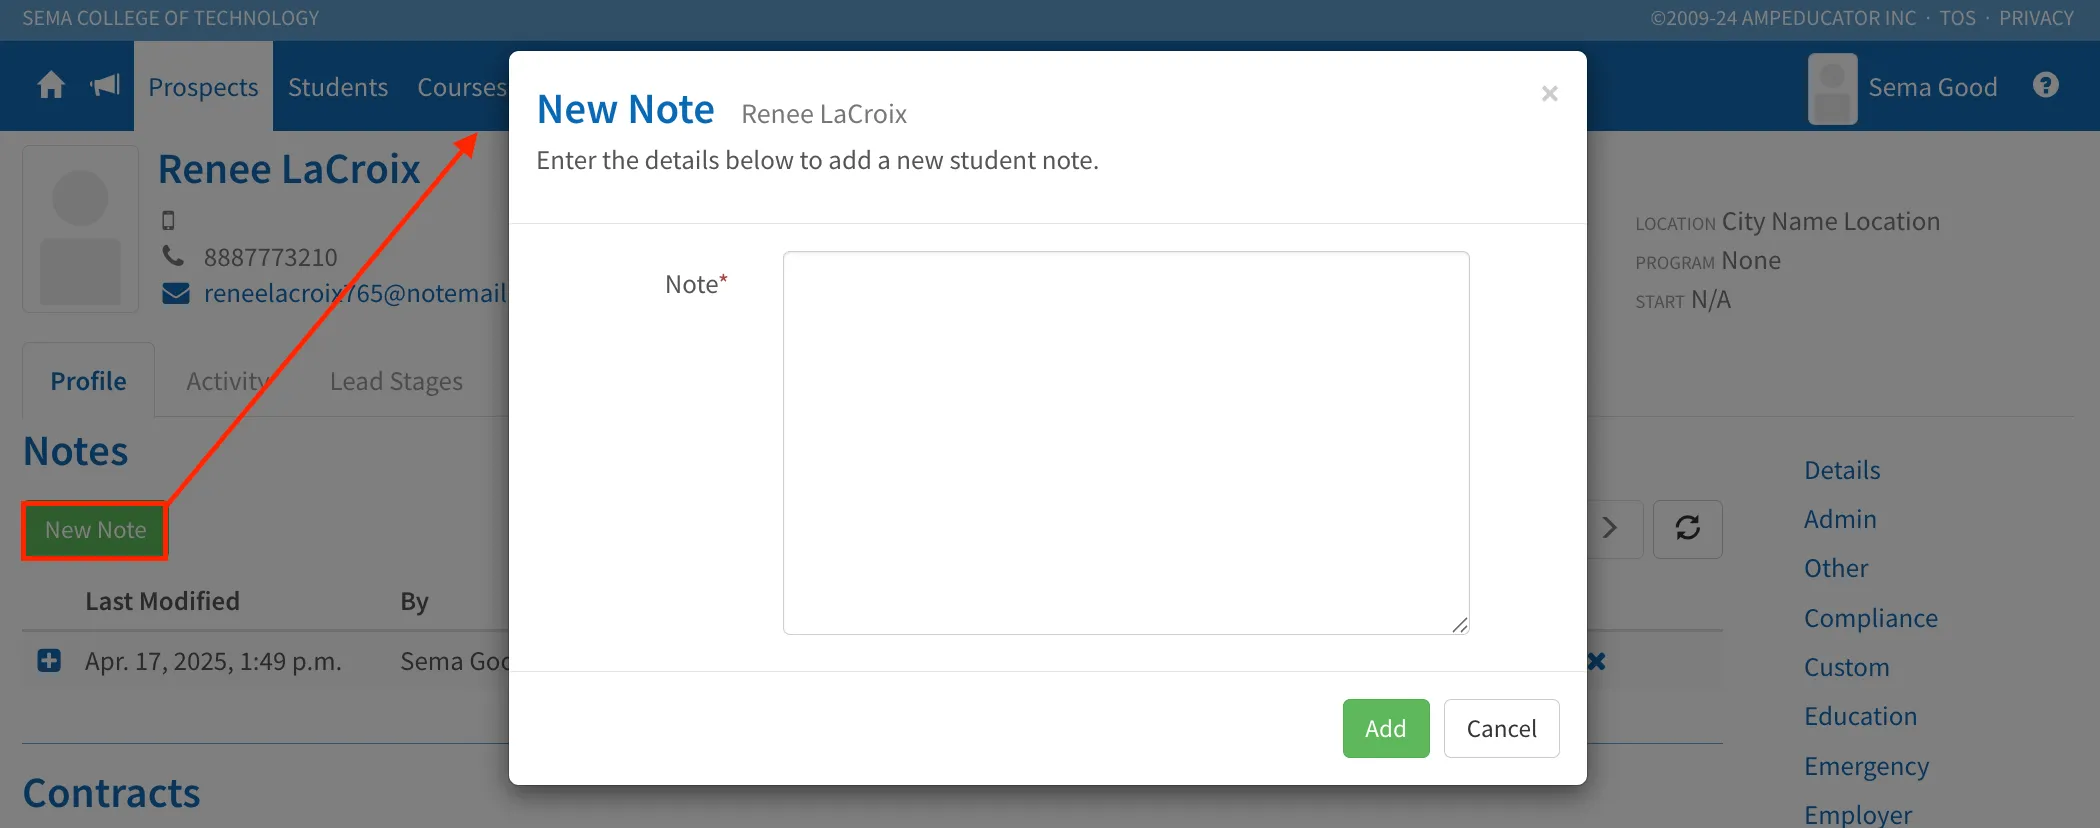
Each note entry shows who added it and when, and if any edits have been made, you’ll see revision history so you can track updates over time.
Contracts
The Contracts section allows you to generate and manage contracts for individual Prospects. This is especially helpful if your institution requires agreements to be signed before enrollment—such as offers of admission, payment plans, or program terms. Before contracts can be sent, they must first be created in Home / Contracts.
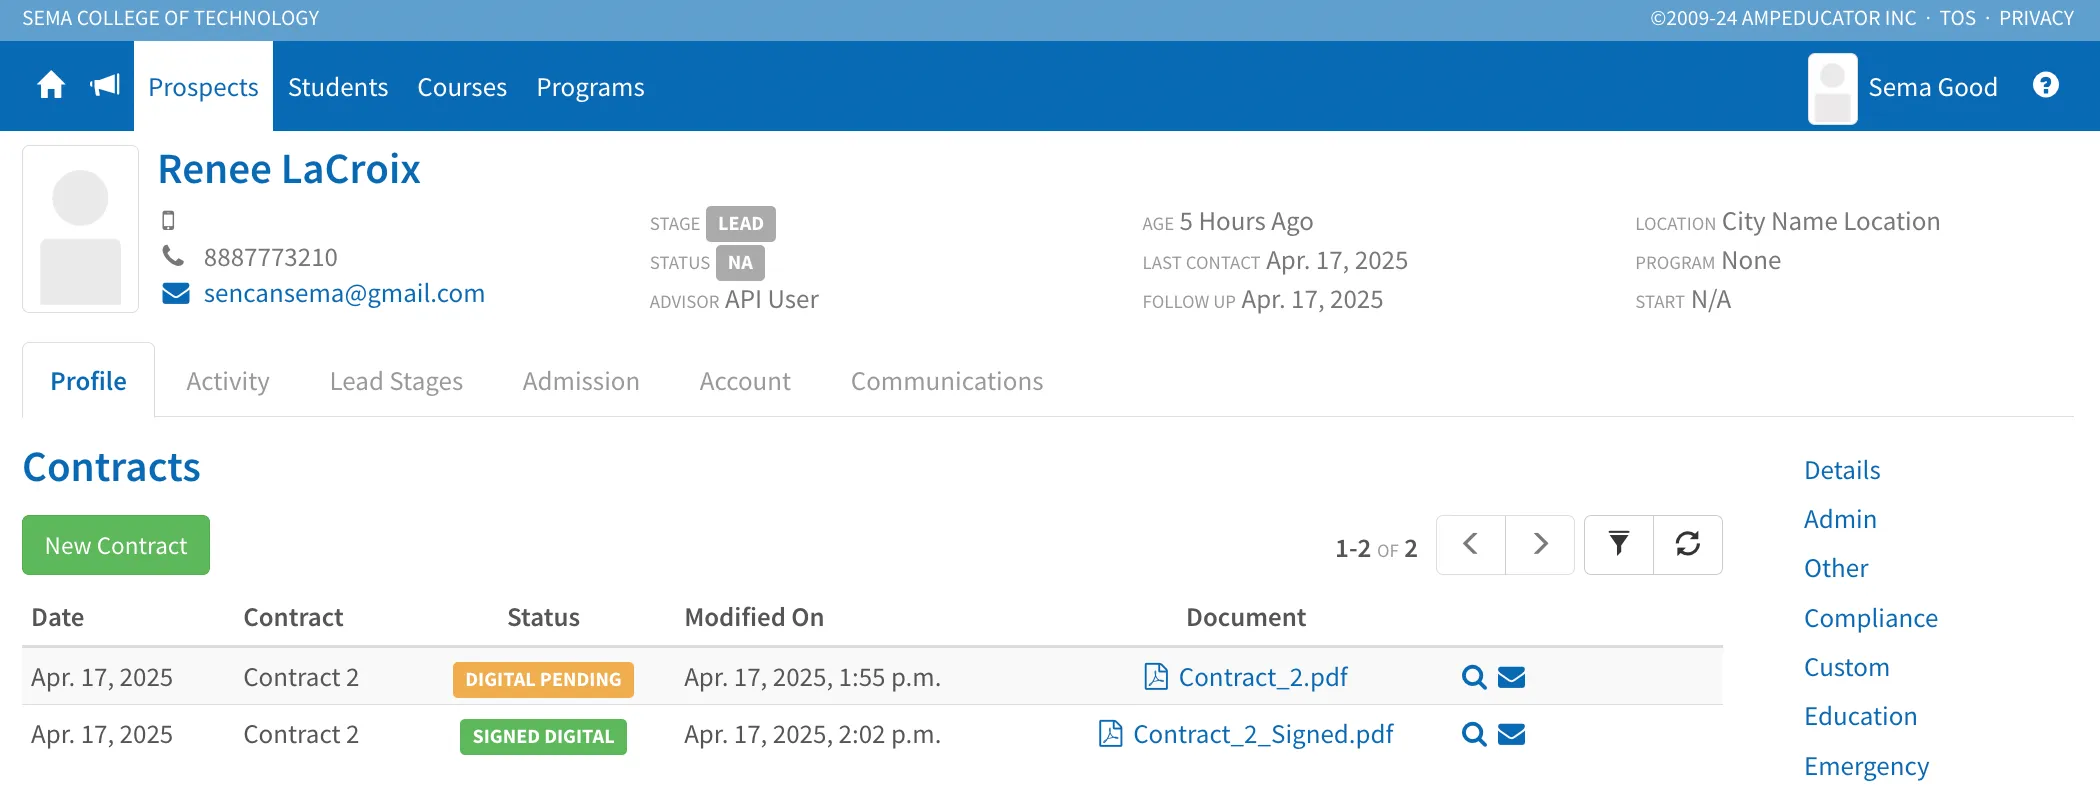
For full step-by-step instructions on building, sending, and managing contracts—including digital signatures—refer to the Students / Contracts section of this guide. The process is the same whether you’re working with a Prospect or a Student.
Documents
The Documents section is where all files uploaded to a Prospect’s profile are stored. From here, you can view, edit, delete, or manage access to each file. This can include things like ID scans, transcripts, proof of language proficiency, or any other supporting documents your institution requires.
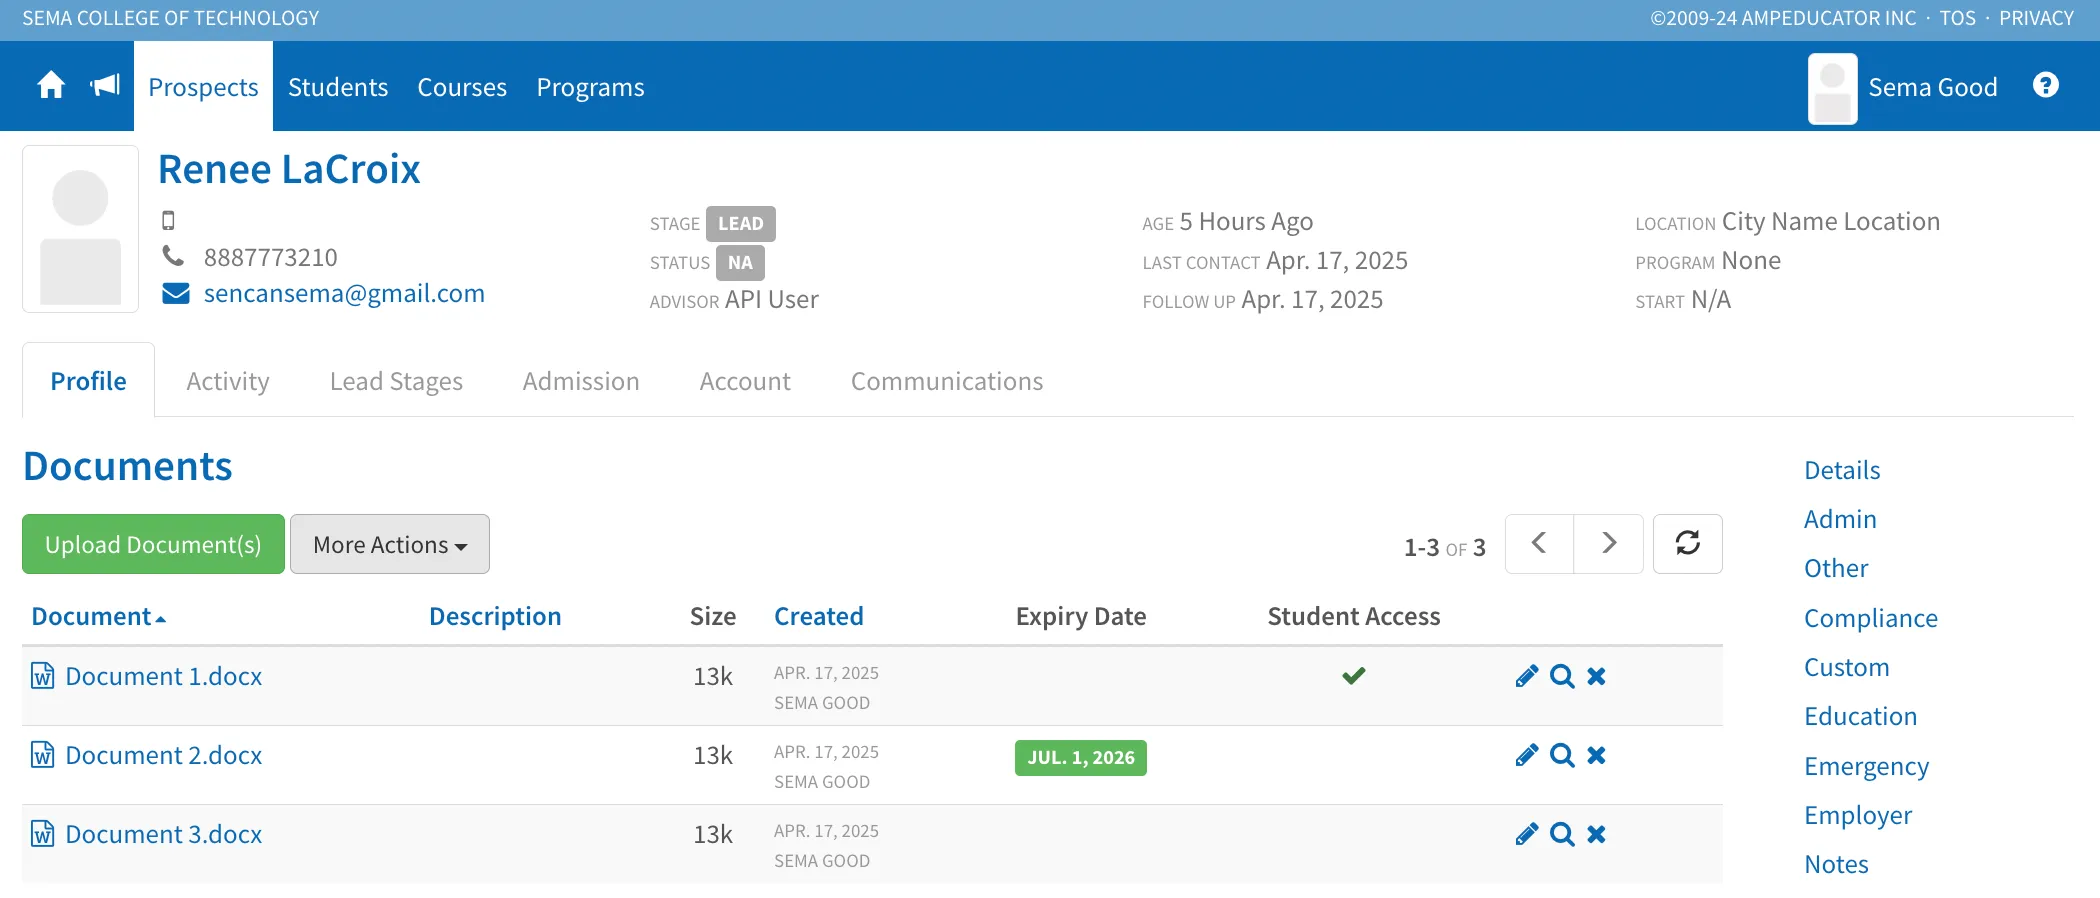
To upload a new file, click Upload Document(s). For full details on uploading single or multiple files, including how to set expiry dates or manage access, see the Students / Documents section of this guide. The process is the same for both Prospects and Students.
Forms
The Forms section displays any forms that have been sent to or completed by the Prospect. This is useful for collecting additional details, consent, or supporting information as part of your admissions process. Before forms can be sent, they must first be created and configured under Home / Forms.
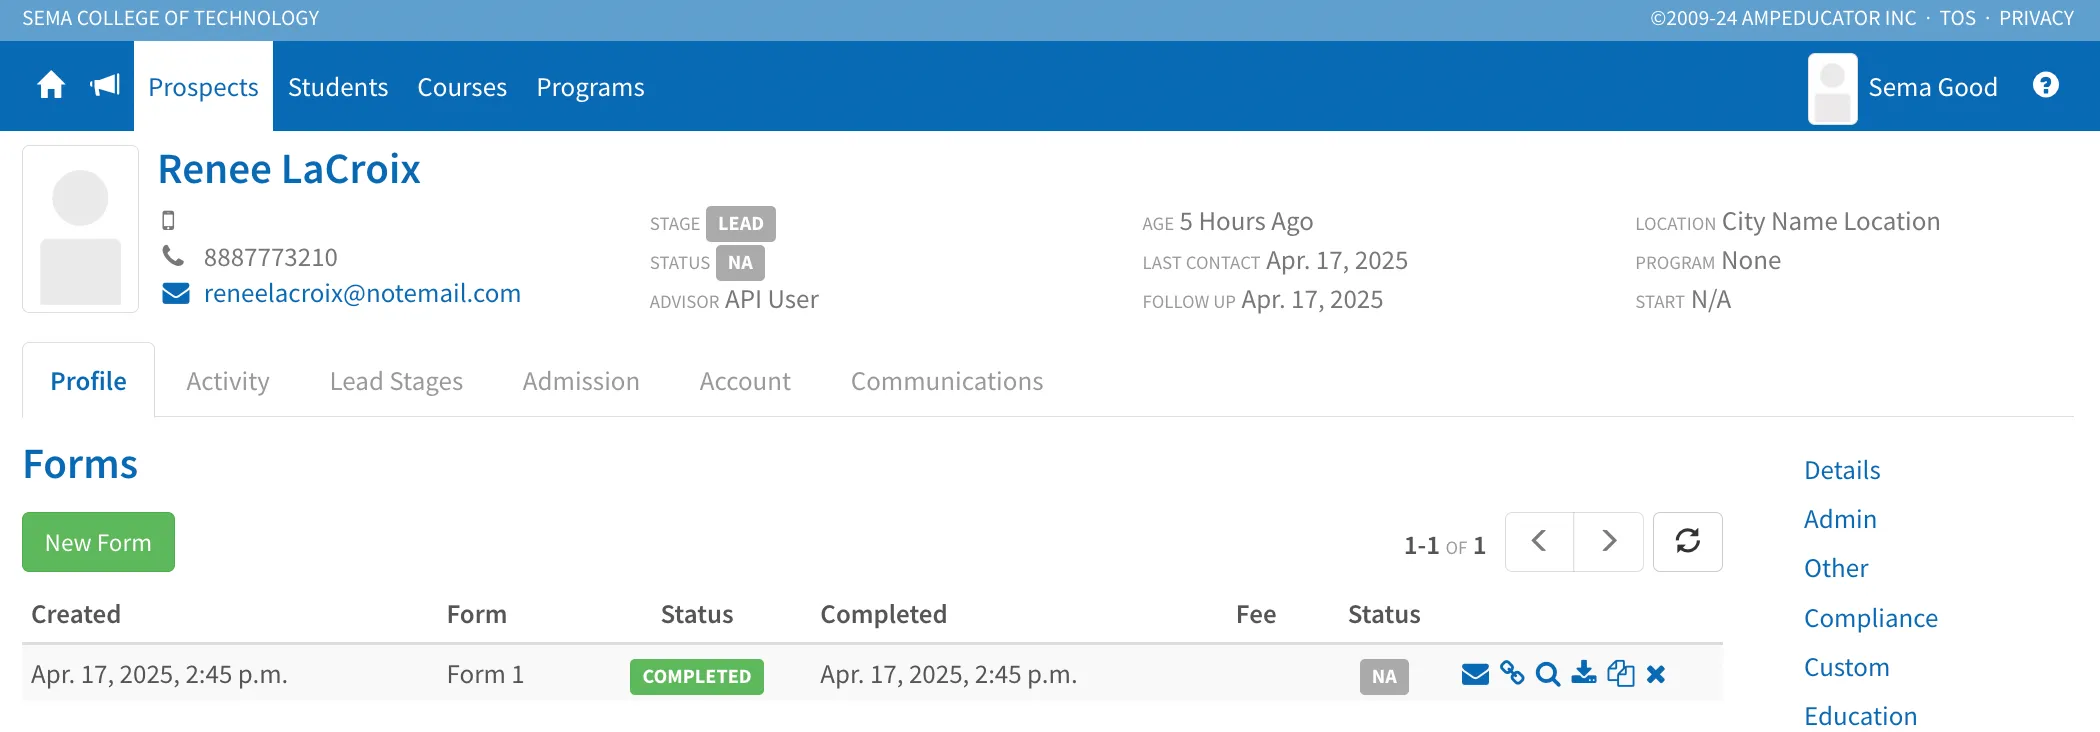
For full instructions on how to create, send, and manage forms—including tracking status, setting fees, and sending reminders—refer to the Students / Forms section of this guide. The process is identical for both Prospects and Students.
Groups
The Groups section displays which groups a Prospect belongs to. Groups are a powerful tool for sending bulk communications, managing event invitations, and organizing Prospects based on shared characteristics like intake, interest, or outreach campaigns. If you need to create a new group, go to Home / Groups.
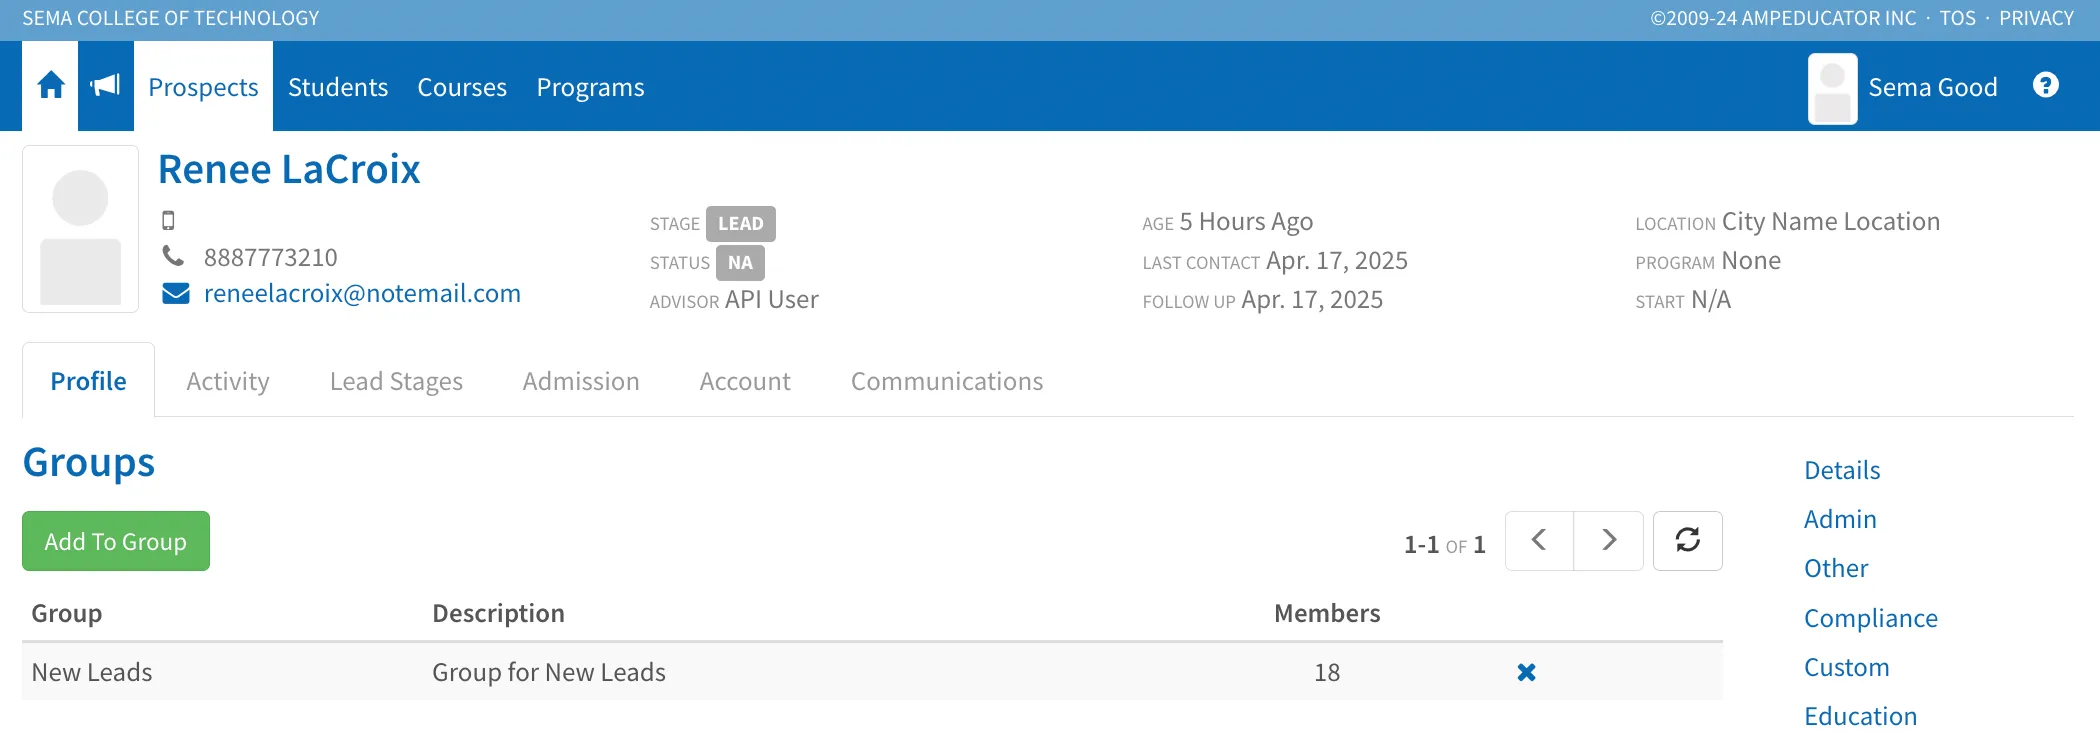
To add a Prospect to a group, click Add to Group. In the pop-up, you can select an existing group and choose whether to send an invite for any previously scheduled events tied to that group.
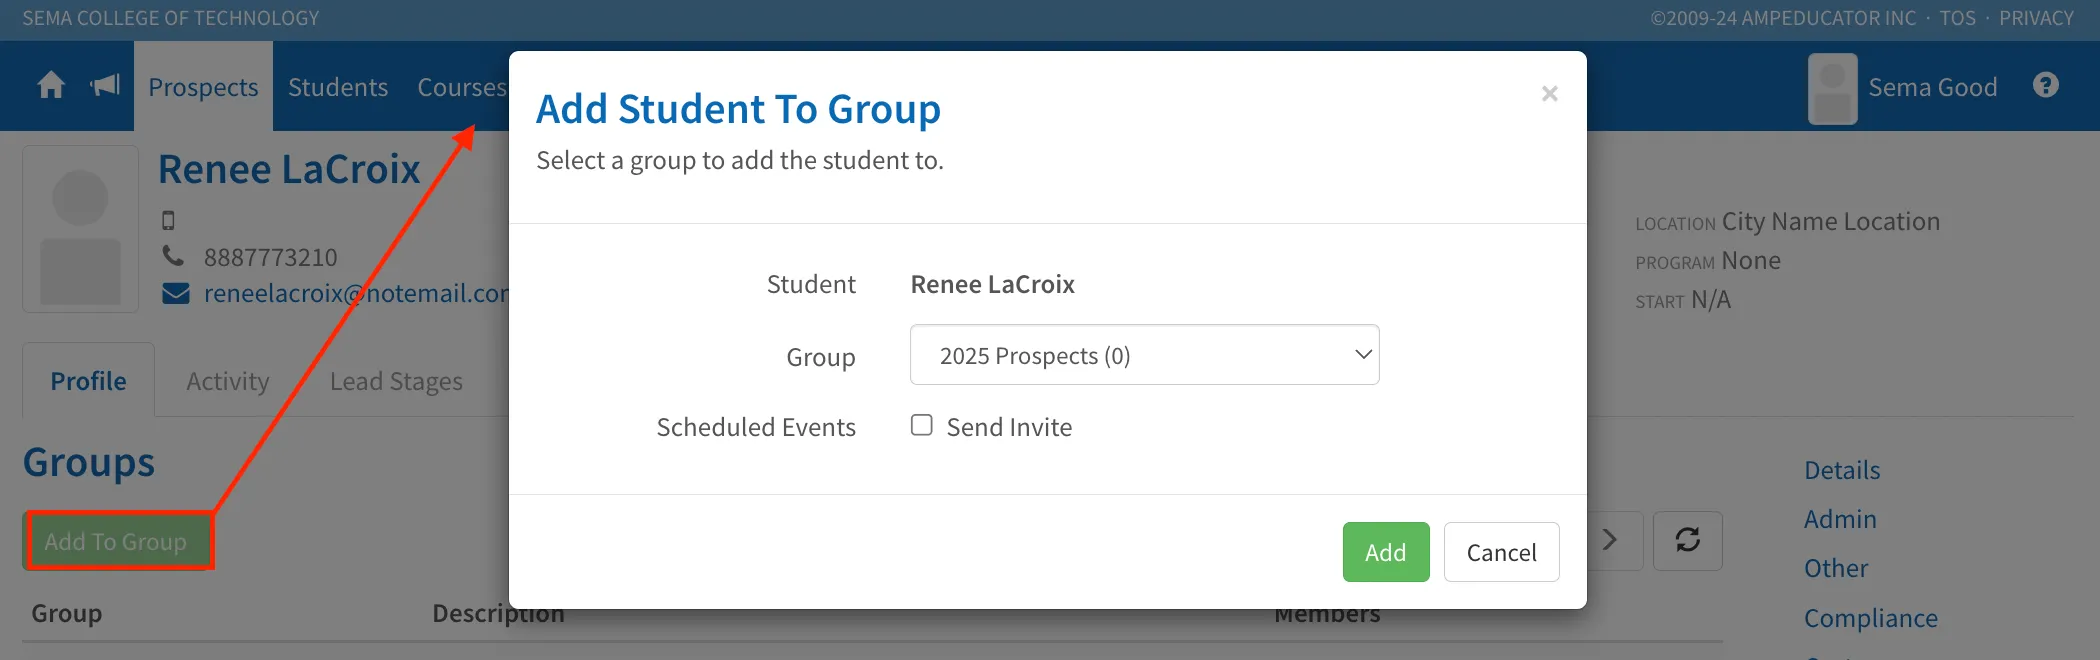
Once added, the Prospect will appear as a member in that group and can be removed at any time using the Remove From Group (x) icon.
Reports
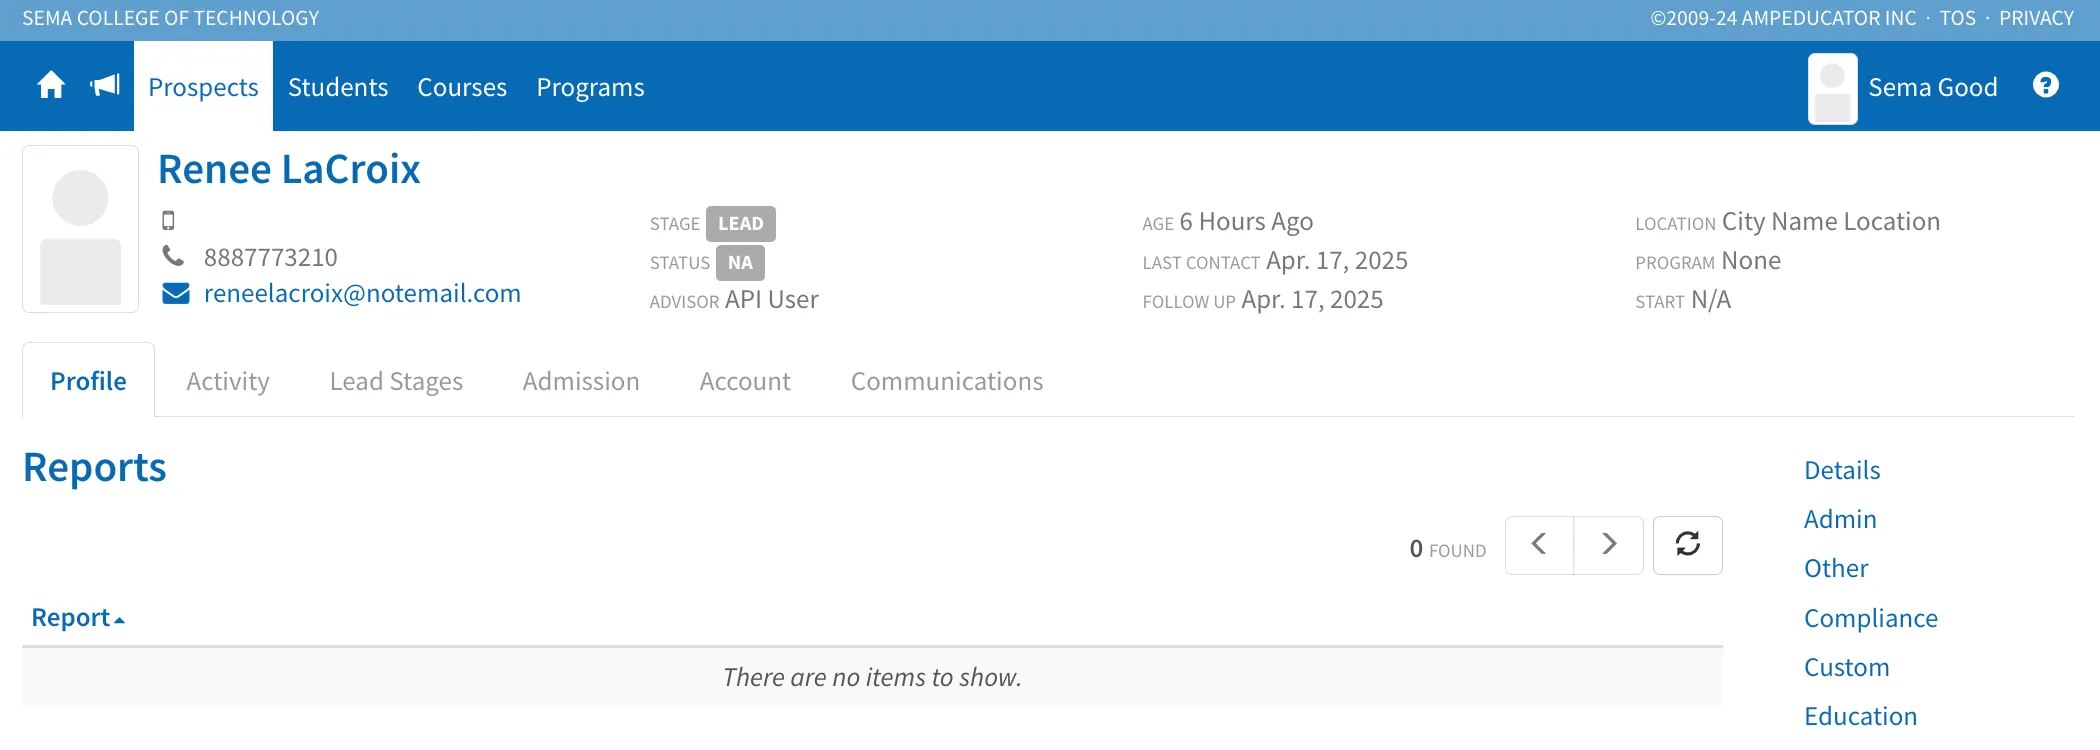
The Reports section is reserved for custom, student-specific reports that your institution may request or require. These are not standard reports available to all users—they’re designed for unique formats, layouts, or content that go beyond ampEducator’s built-in tools.
Some common examples include:
- Custom transcripts with specific formatting that can’t be achieved using the default transcript generator
- Exportable versions of a Prospect or Student profile in a specific layout
- Government forms or documentation required in a set format
To request a custom report, reach out to the ampEducator support team to discuss options at [email protected].