Facebook Instant Form Guide
This guide walks you through how to connect your Meta (Facebook) Instant Forms to ampEducator using the Facebook Instant Form Lead Provider type. Once set up, Prospects submitted through your Facebook or Instagram lead forms will automatically appear in your ampEducator Prospects list.
Step 1: Add a Facebook Instant Form Lead Provider
- Go to Prospects / Lead Providers / Add Lead Provider.
- Set the Provider Type to Facebook Instant Form.
- Enter a Provider Name that matches your Facebook form for easy reference (e.g., Fall Campaign Form).
- ampEducator will automatically generate a Unique ID for this provider. You can edit it if you’d like, but once saved, it cannot be changed.
- Click Add to continue.
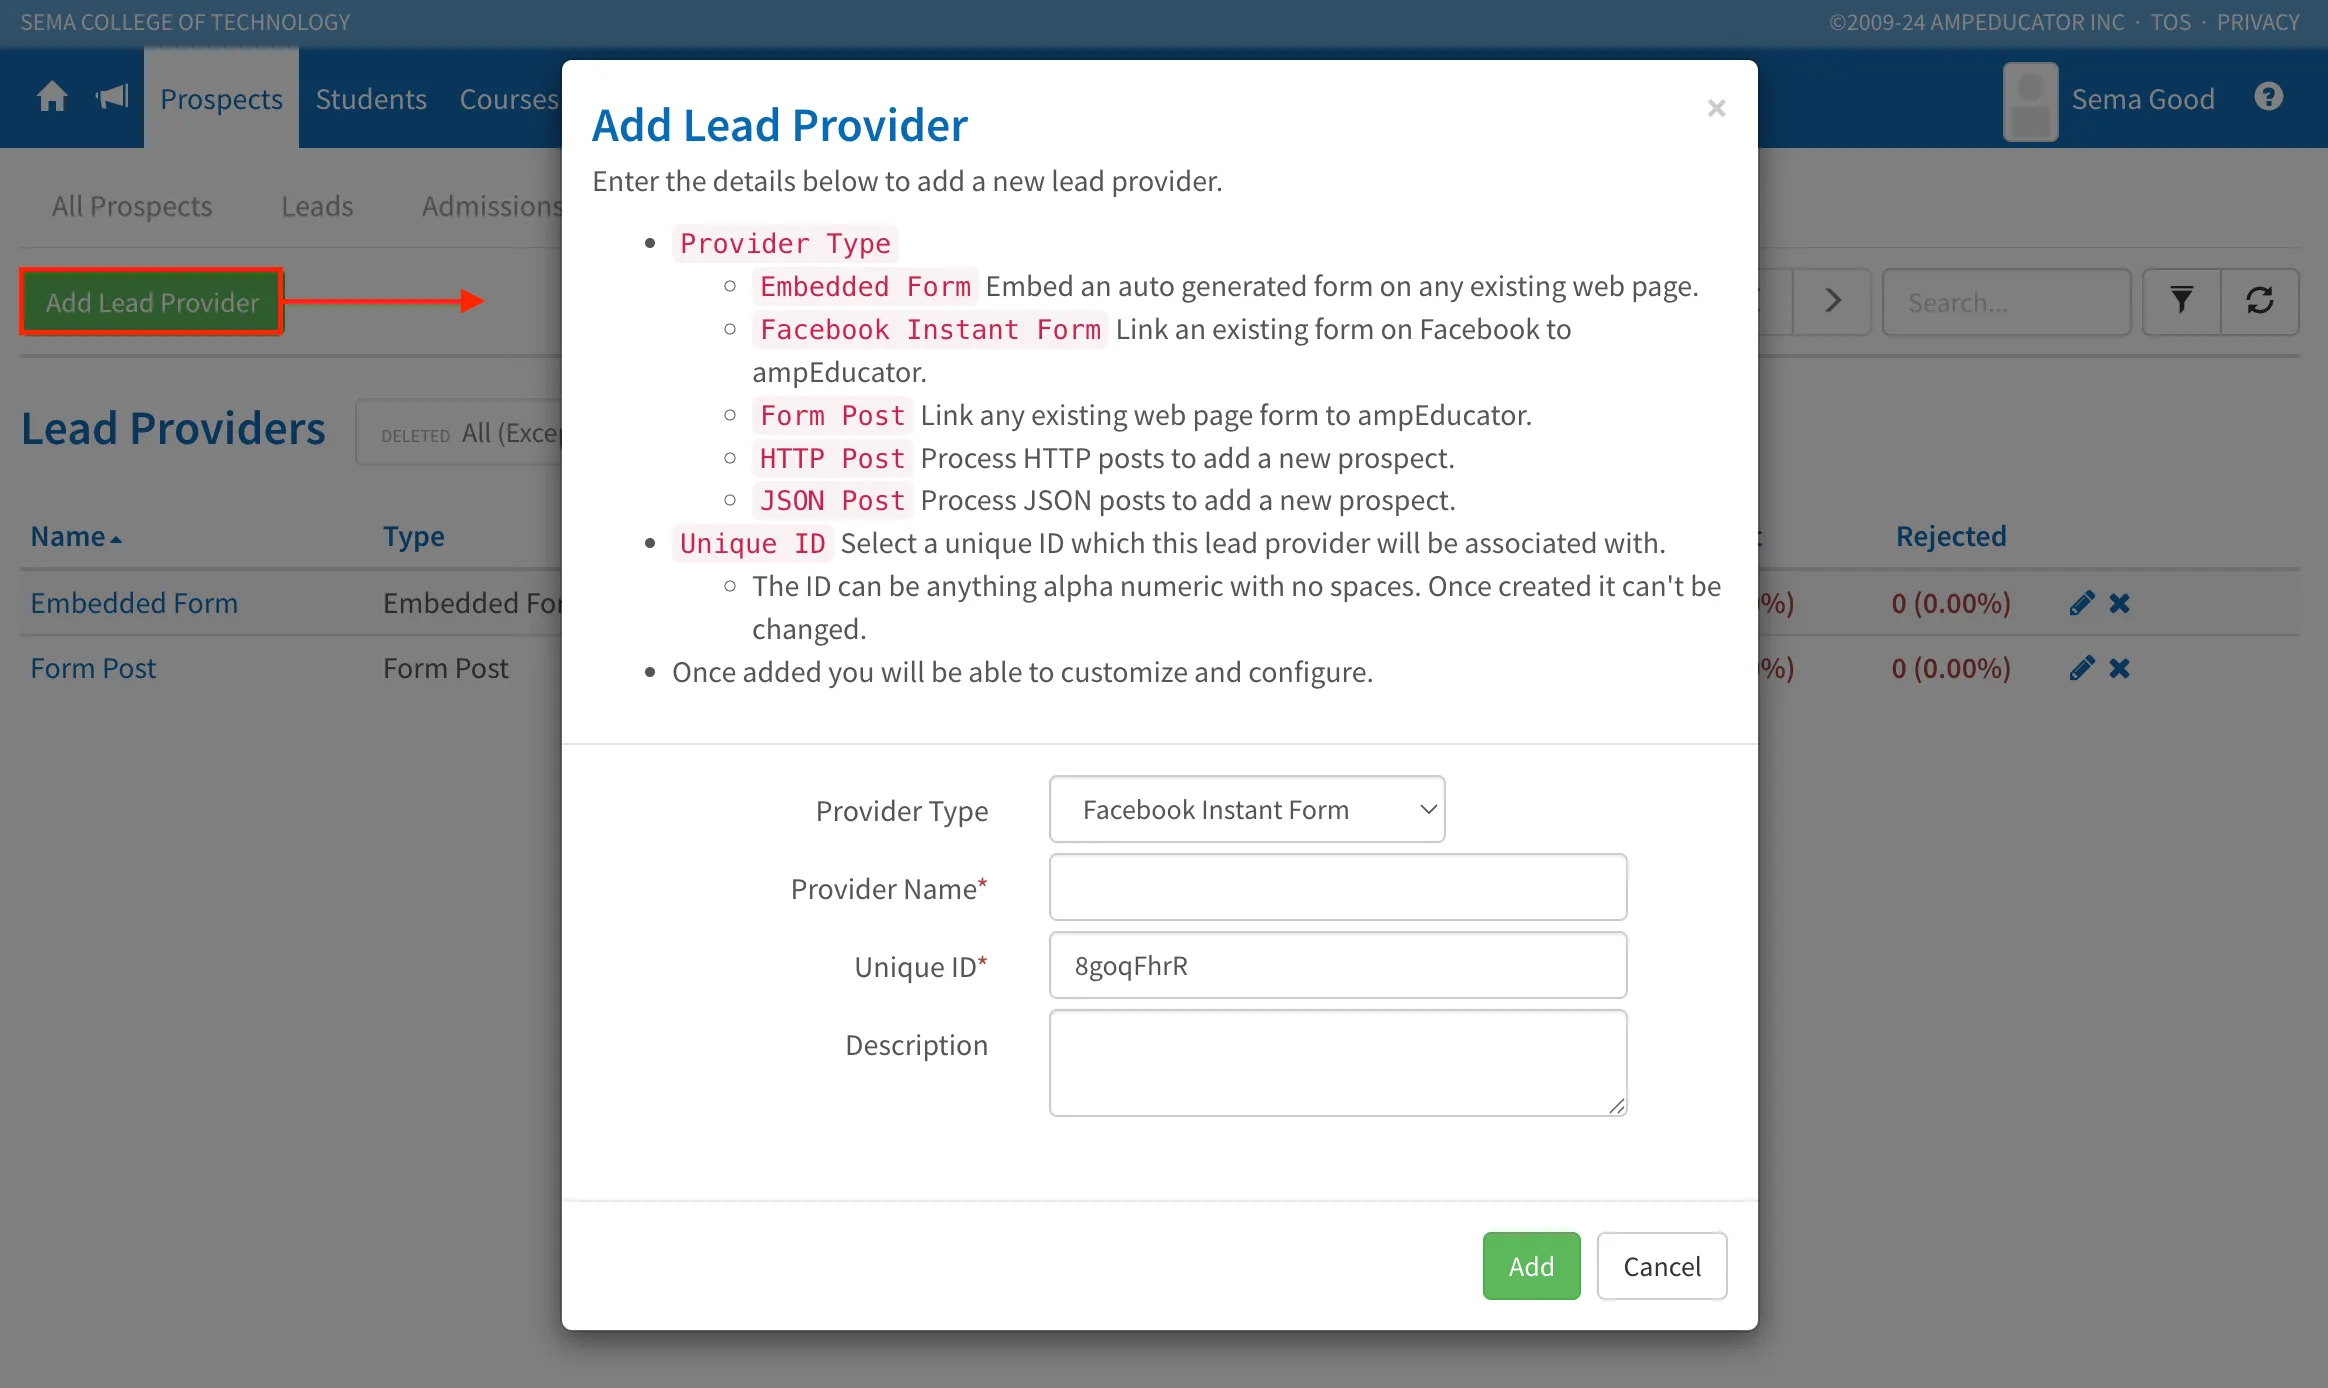
Note: Each Facebook Instant Form must be linked to a unique Lead Provider in ampEducator to ensure correct field mapping.
Step 2: Configure Facebook Integration
After adding the Lead Provider, you'll be taken to the profile page.
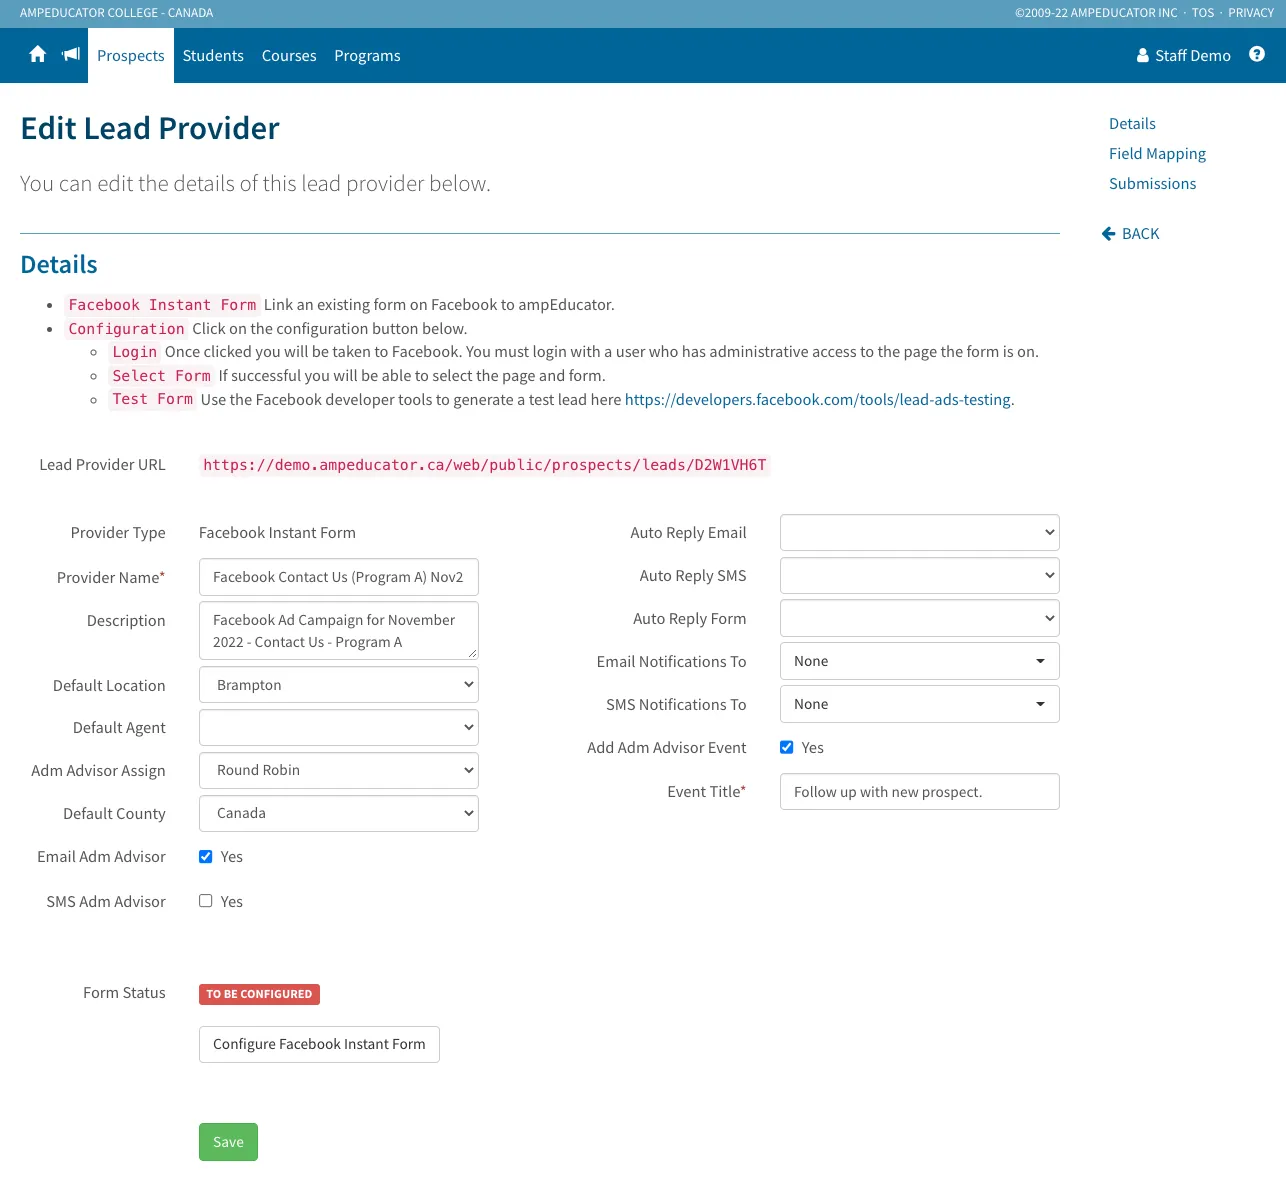
- Click Configure Facebook Instant Form.
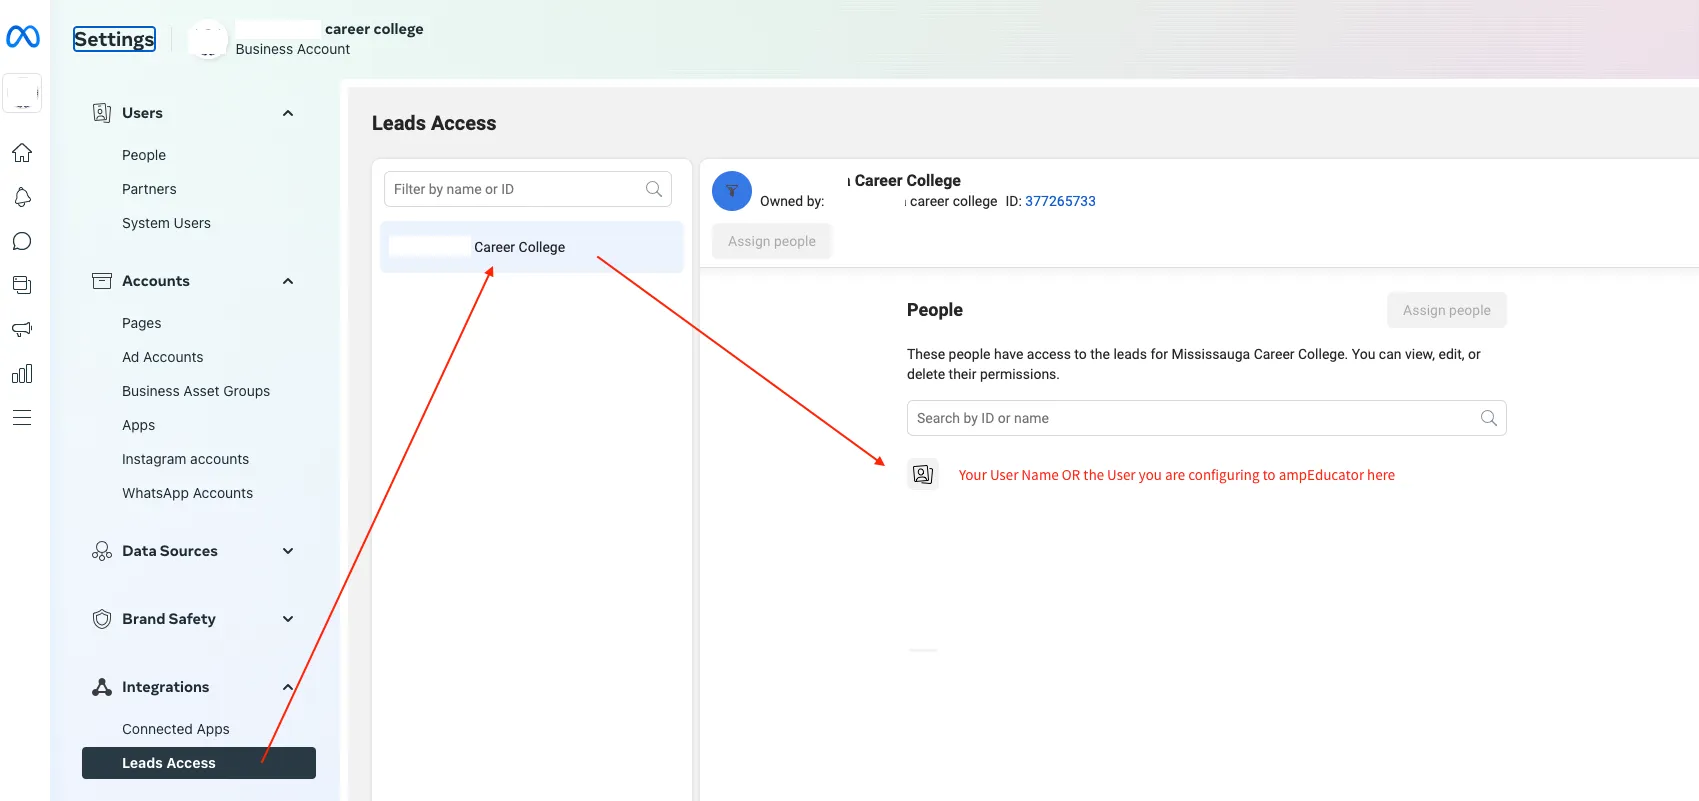
- Log in using the Facebook account that has:
- Admin access to the Facebook Business Account
- Admin access to the Facebook Page(s) connected to the form
Lead Access permissions under Business Settings > Integrations > Lead Access
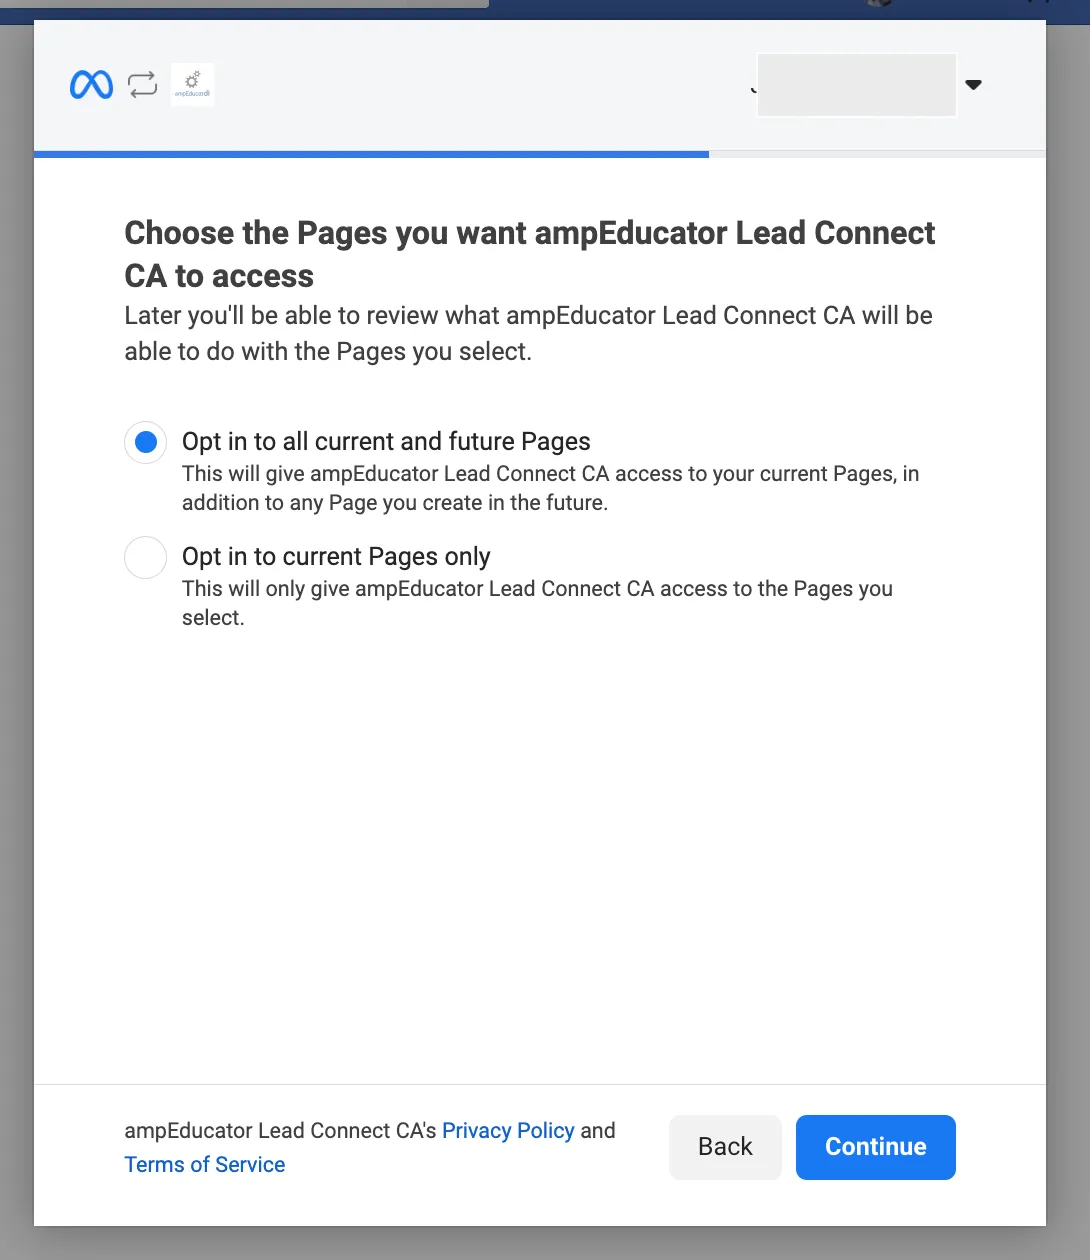
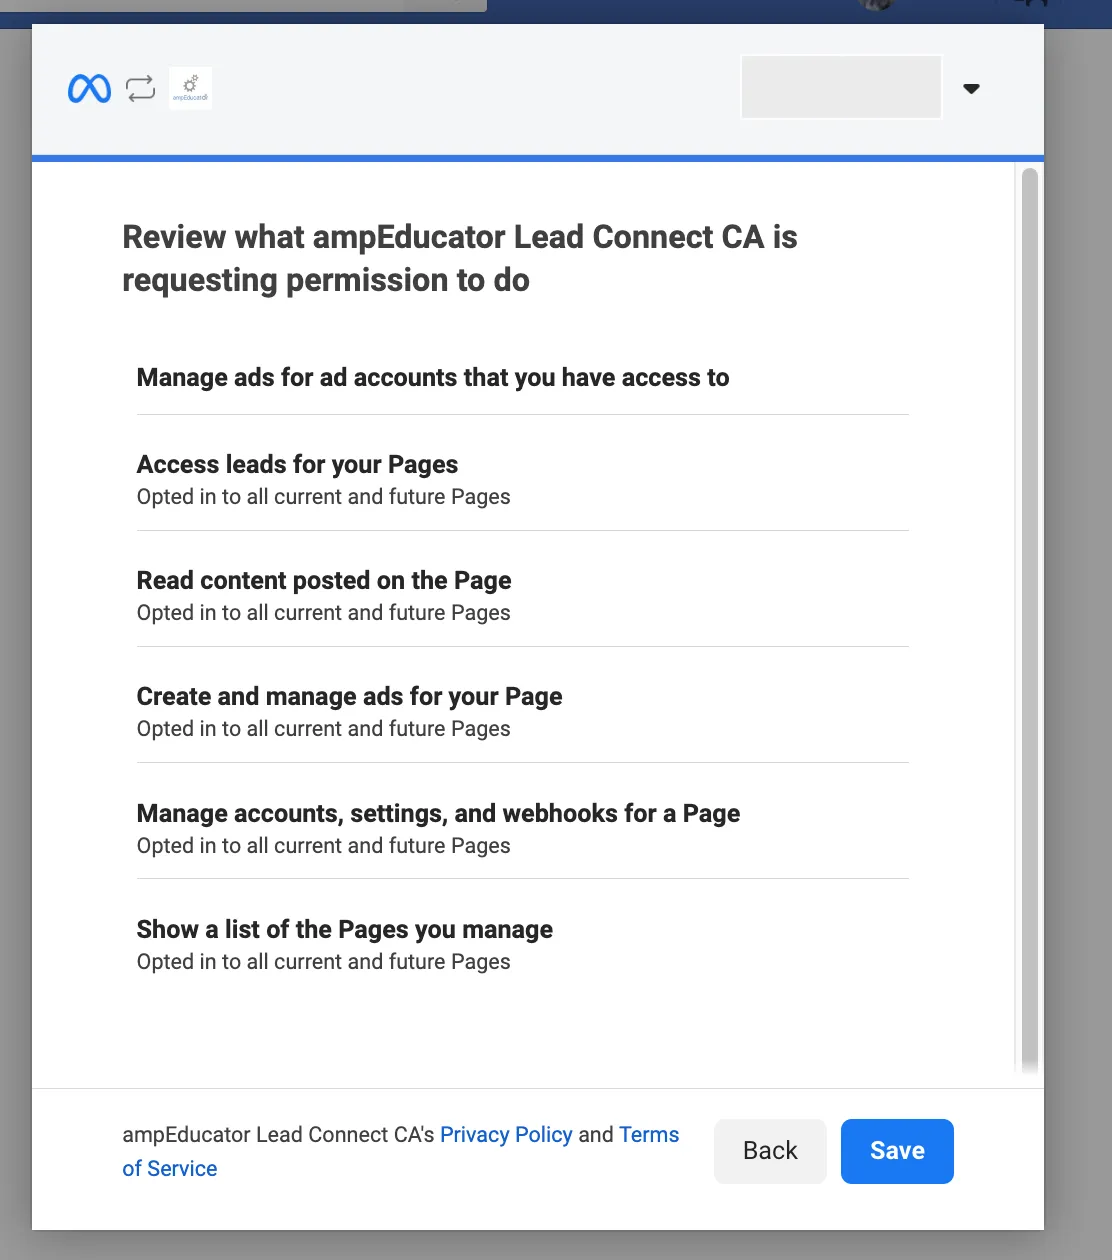
- When prompted:
- We recommend opting in to all current and future pages
- You can also select specific pages if preferred
- After permissions are granted, ampEducator will ask you to:
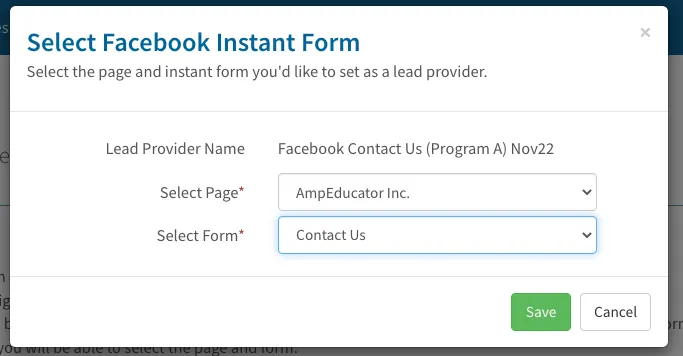
- Select the Page and the specific Form to connect
Click Save
Once permissions are granted, ampEducator will return you to the Lead Provider Details page. You’ll now be prompted to select the correct Facebook Page and Form you want to connect to this Lead Provider.
After saving, the Form Status will display as Configured.
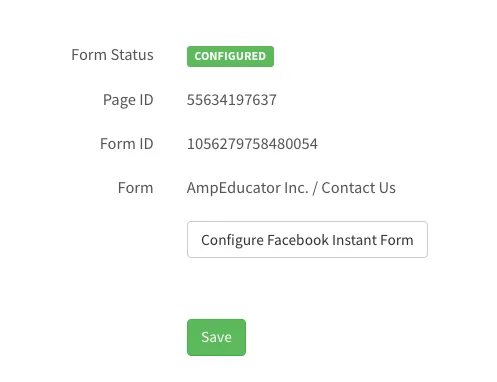
If you ever need to update or change the form, you can click the Configure Facebook Instant Form button again and repeat the setup.
Step 3: Add ampEducator Lead Connect in Facebook
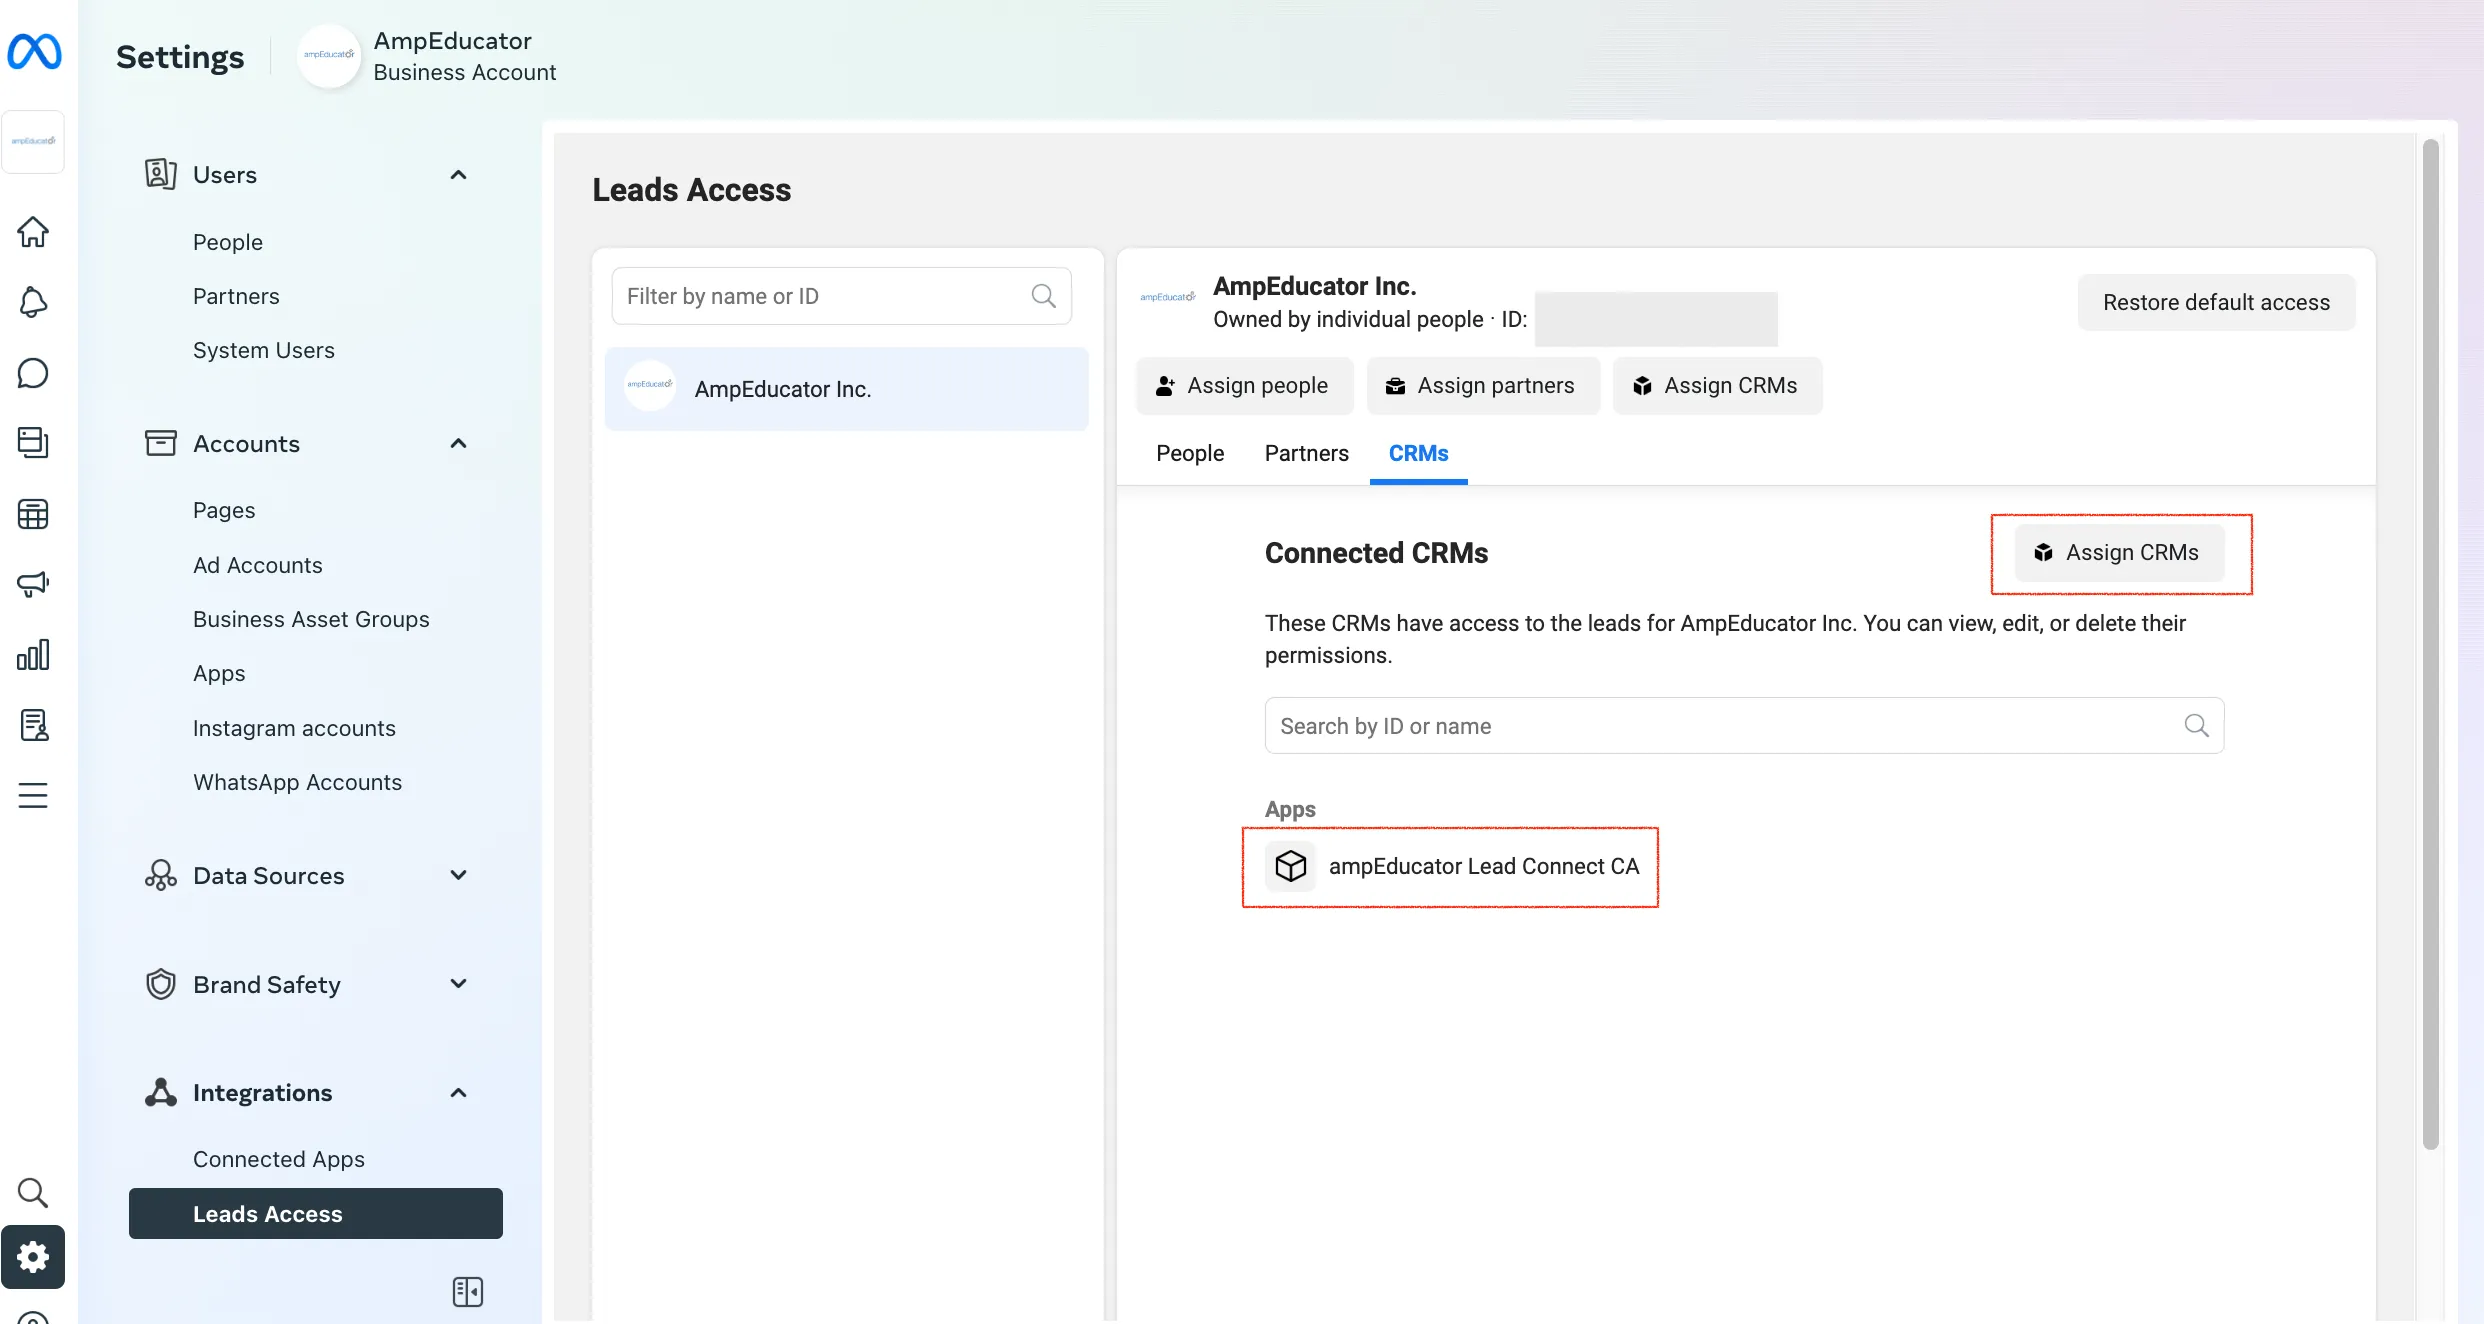
After the form is configured, go back to Business Settings > Leads Access > CRMs in Meta.
If ampEducator Lead Connect CA (for .ca domains) or ampEducator Lead Connect US (for .com domains) does not appear:
- Click Assign CRMs
- Search for and select the appropriate ampEducator app
- Click Add
Step 4: Configure Actions
After your form is connected, you can use the Actions tab in ampEducator to automate what happens when a new lead is received.
Some examples of Actions you can set up:
- Send a confirmation email or SMS to the prospect
- Tag the prospect automatically (e.g., "Fall Campaign," "Instagram Lead")
- Assign a specific Admissions Advisor
- Create a follow-up event for your Admissions team
To create an Action:
- Click on the Actions tab of the Lead Provider profile.
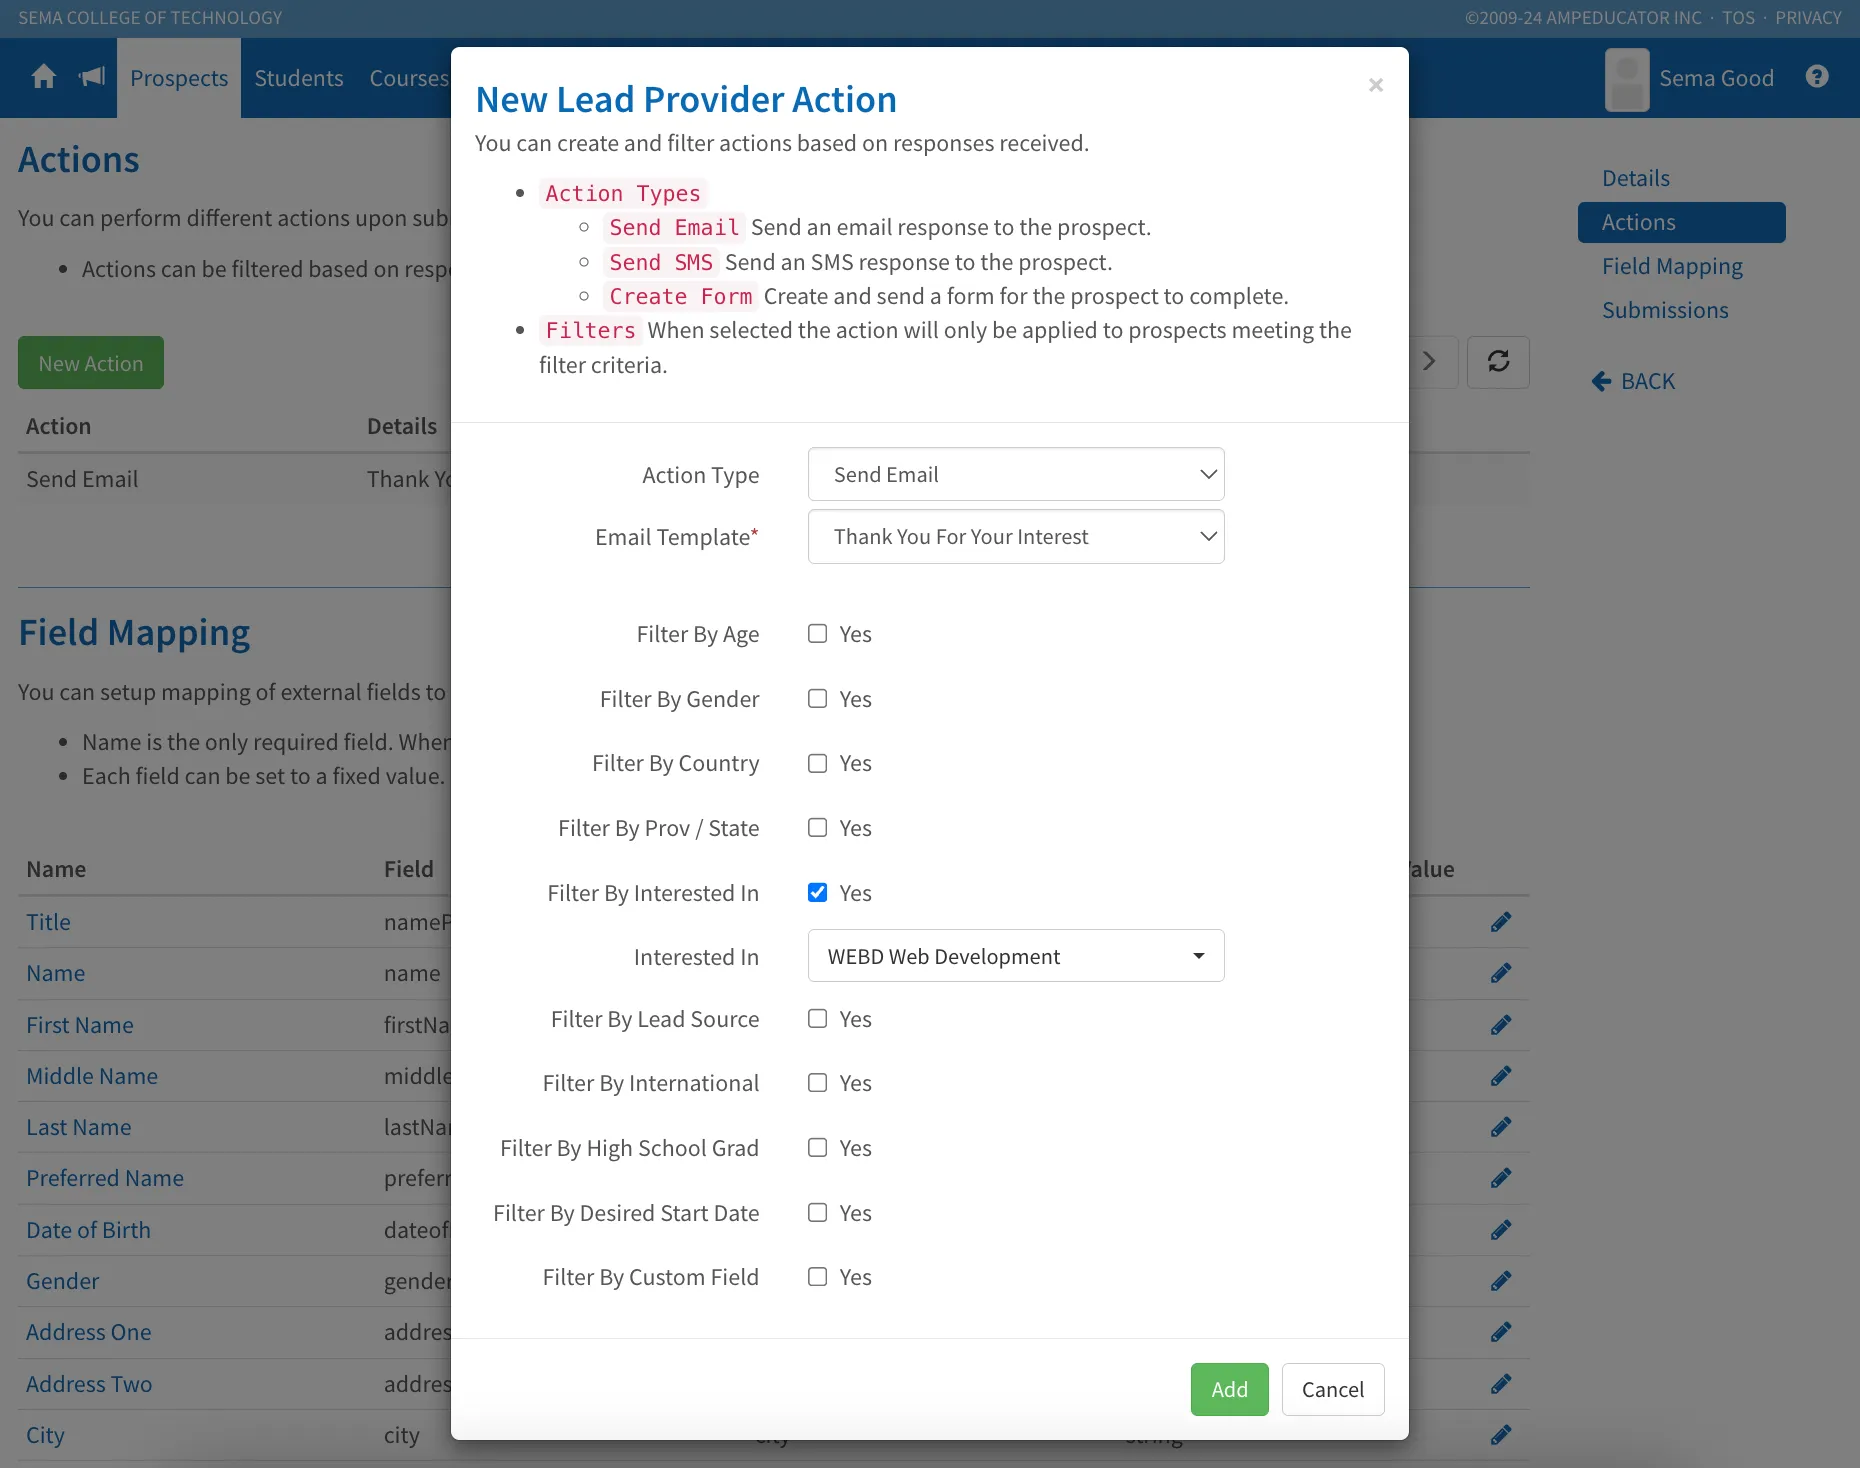
- Click New Action.
Choose the action type you want (Send Email, Send SMS, Create Form).
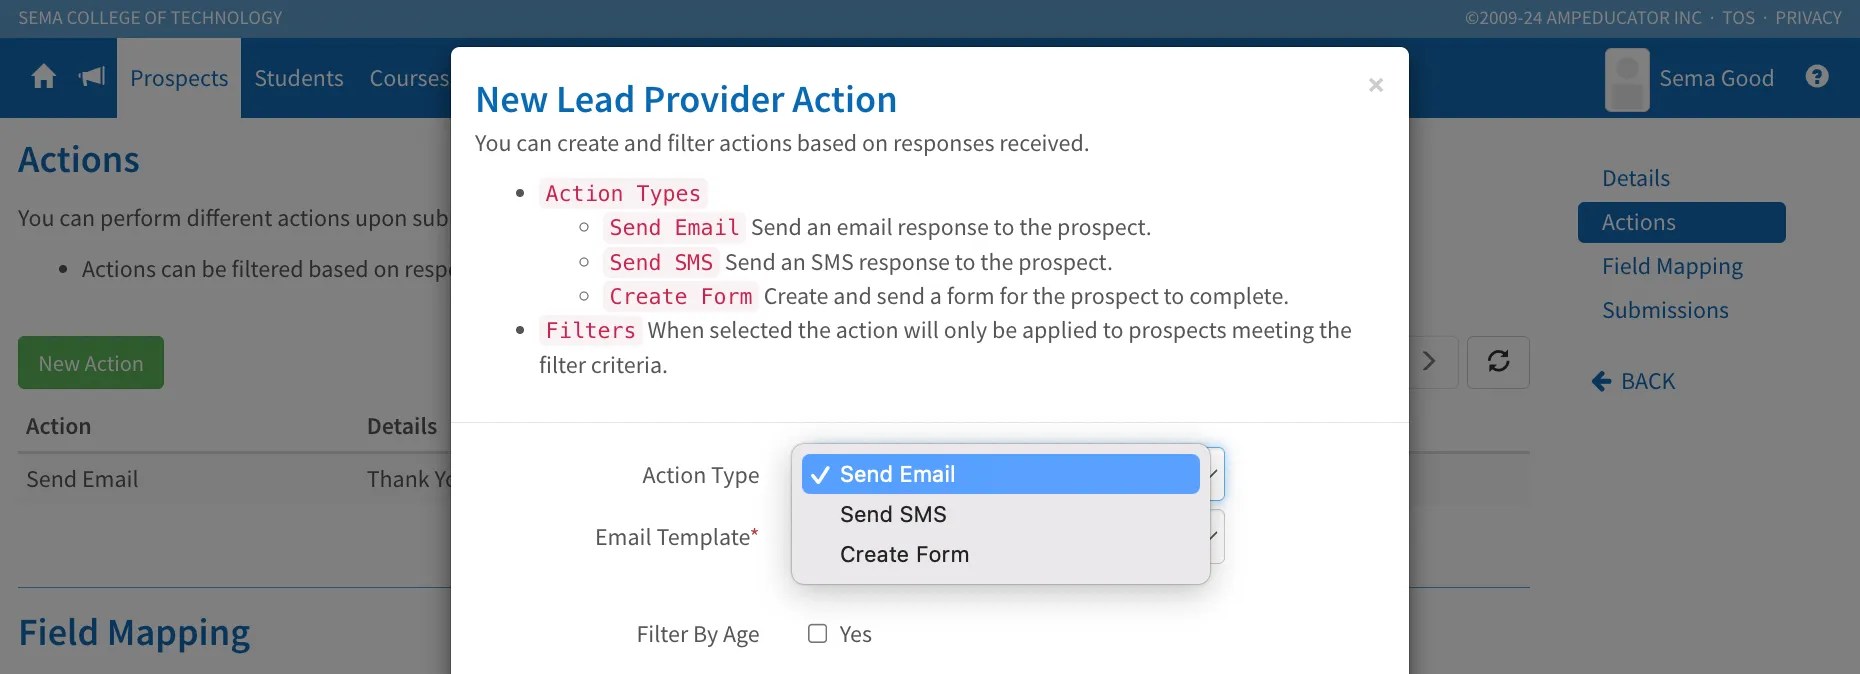
Optionally, apply filters to target specific leads based on their form responses.
Step 5: Configure Field Mapping
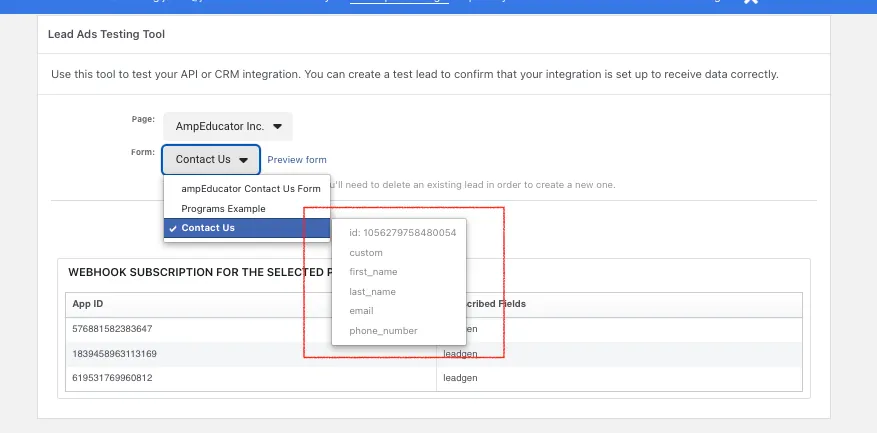
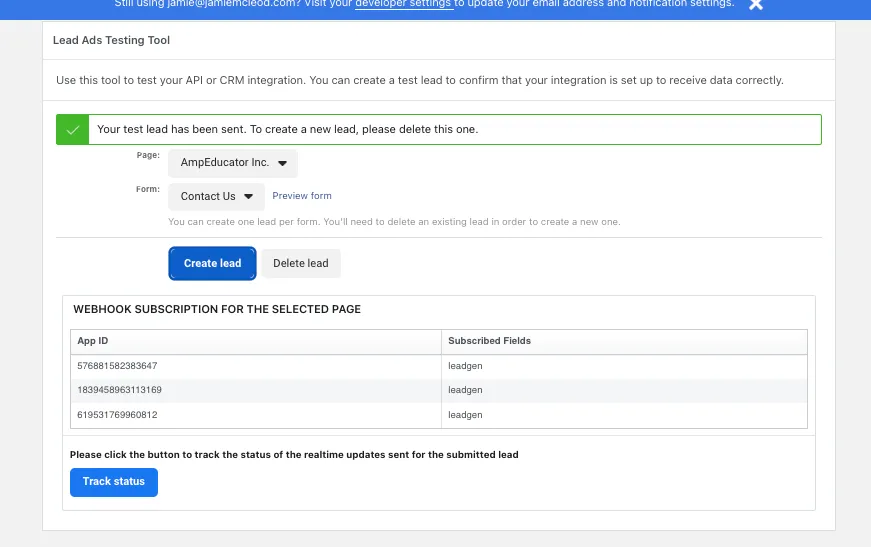
Use Facebook’s Lead Ads Testing Tool to identify your form field names:
- Select your Page and Form in the tool.
Hover over the form name to see the exact field names used (e.g., first_name, email, phone_number).
- In ampEducator, go to the Field Mapping tab of the Lead Provider profile.
Click the edit icon next to each field and map the exact field name from your form.
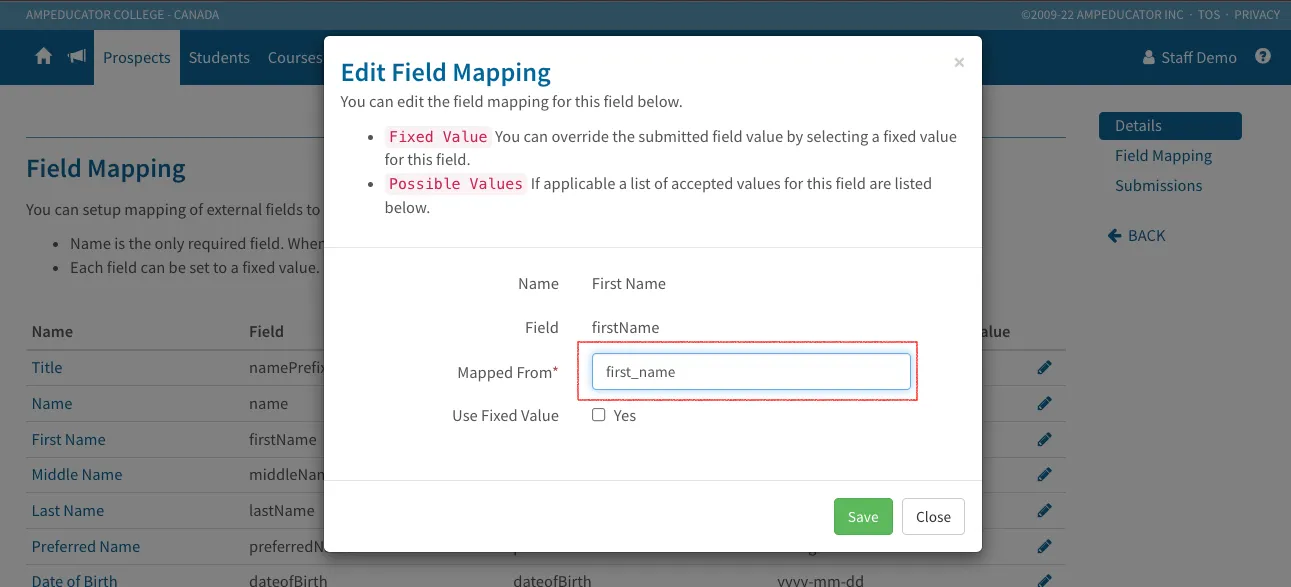
Repeat for all fields you plan to collect. Custom fields in your Facebook form can also be mapped to custom fields in ampEducator.
Step 6: Test Your Connection
Select your form and click Create Lead to submit a test.
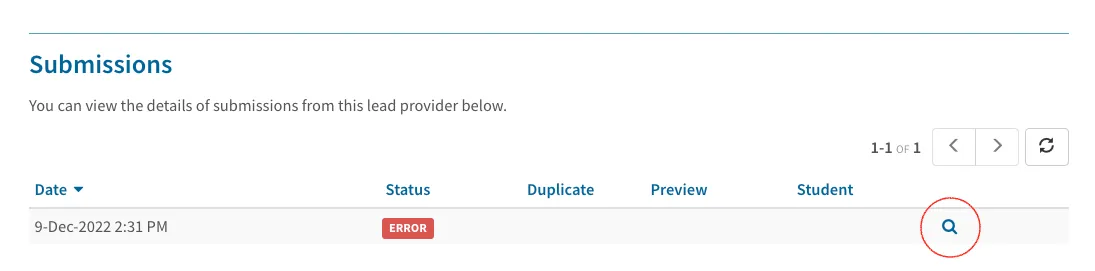
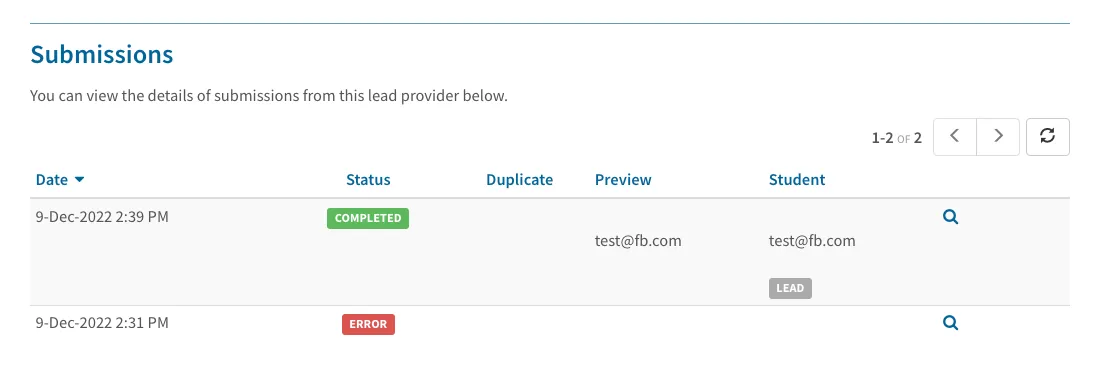
- In ampEducator, go to the Submissions tab in your Lead Provider profile.
- If it doesn’t appear right away, click Refresh
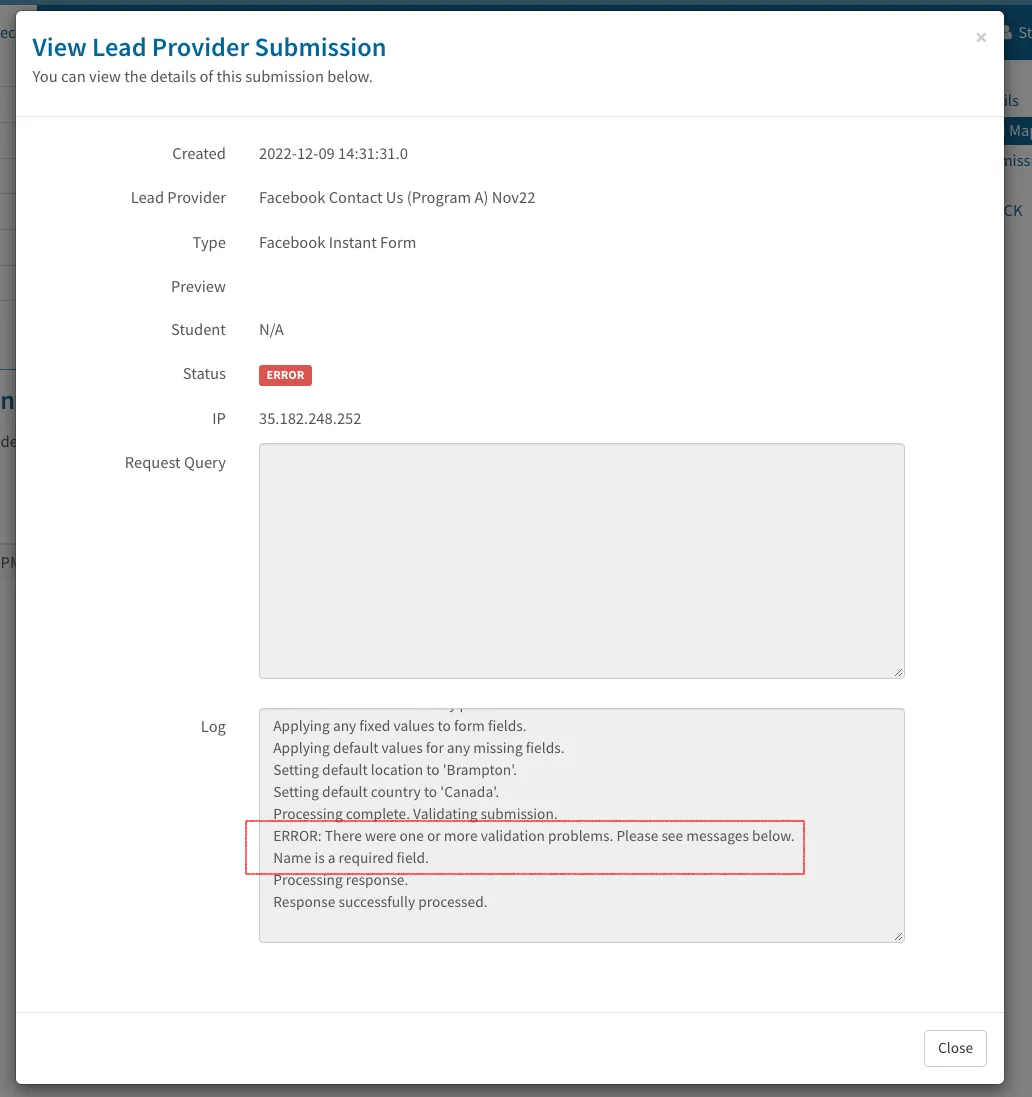
If the test shows Error, click the magnifying glass icon to review the issue.
Common issues include missing or mismatched field mappings.
Step 7: You're Connected!
Once everything is set up correctly:
- Leads from Facebook will appear automatically in your Prospects list.
- Any configured default settings (advisor, location, notifications) will be applied.
- You can continue to update field mapping, adjust settings, or track performance under the provider profile.
Need Help?
If you run into any issues during setup or need assistance with custom field mapping, please contact us at [email protected].