Embedded Form Guide
Embedded Lead Providers are used to collect new leads directly from your website. With this option, ampEducator generates a customizable form that can be embedded into any web page using a simple iframe code. When a prospective student fills out the form, their information is automatically sent to ampEducator and appears in your Leads list — no manual entry required.
This setup is ideal for schools that manage their own website and want to streamline the inquiry process for new prospects.
Step 1: Add a New Lead Provider
To begin, you’ll first need to add a new Lead Provider and select Embedded Form as the type.
- Go to Settings / Lead Providers.
- Click the green New Lead Provider button.
- In the popup:
- Provider Type: Select Embedded Form.
- Provider Name: Give your form a clear name (e.g. Website Contact Form or Fall 2025 Inquiries).
- Click Save.
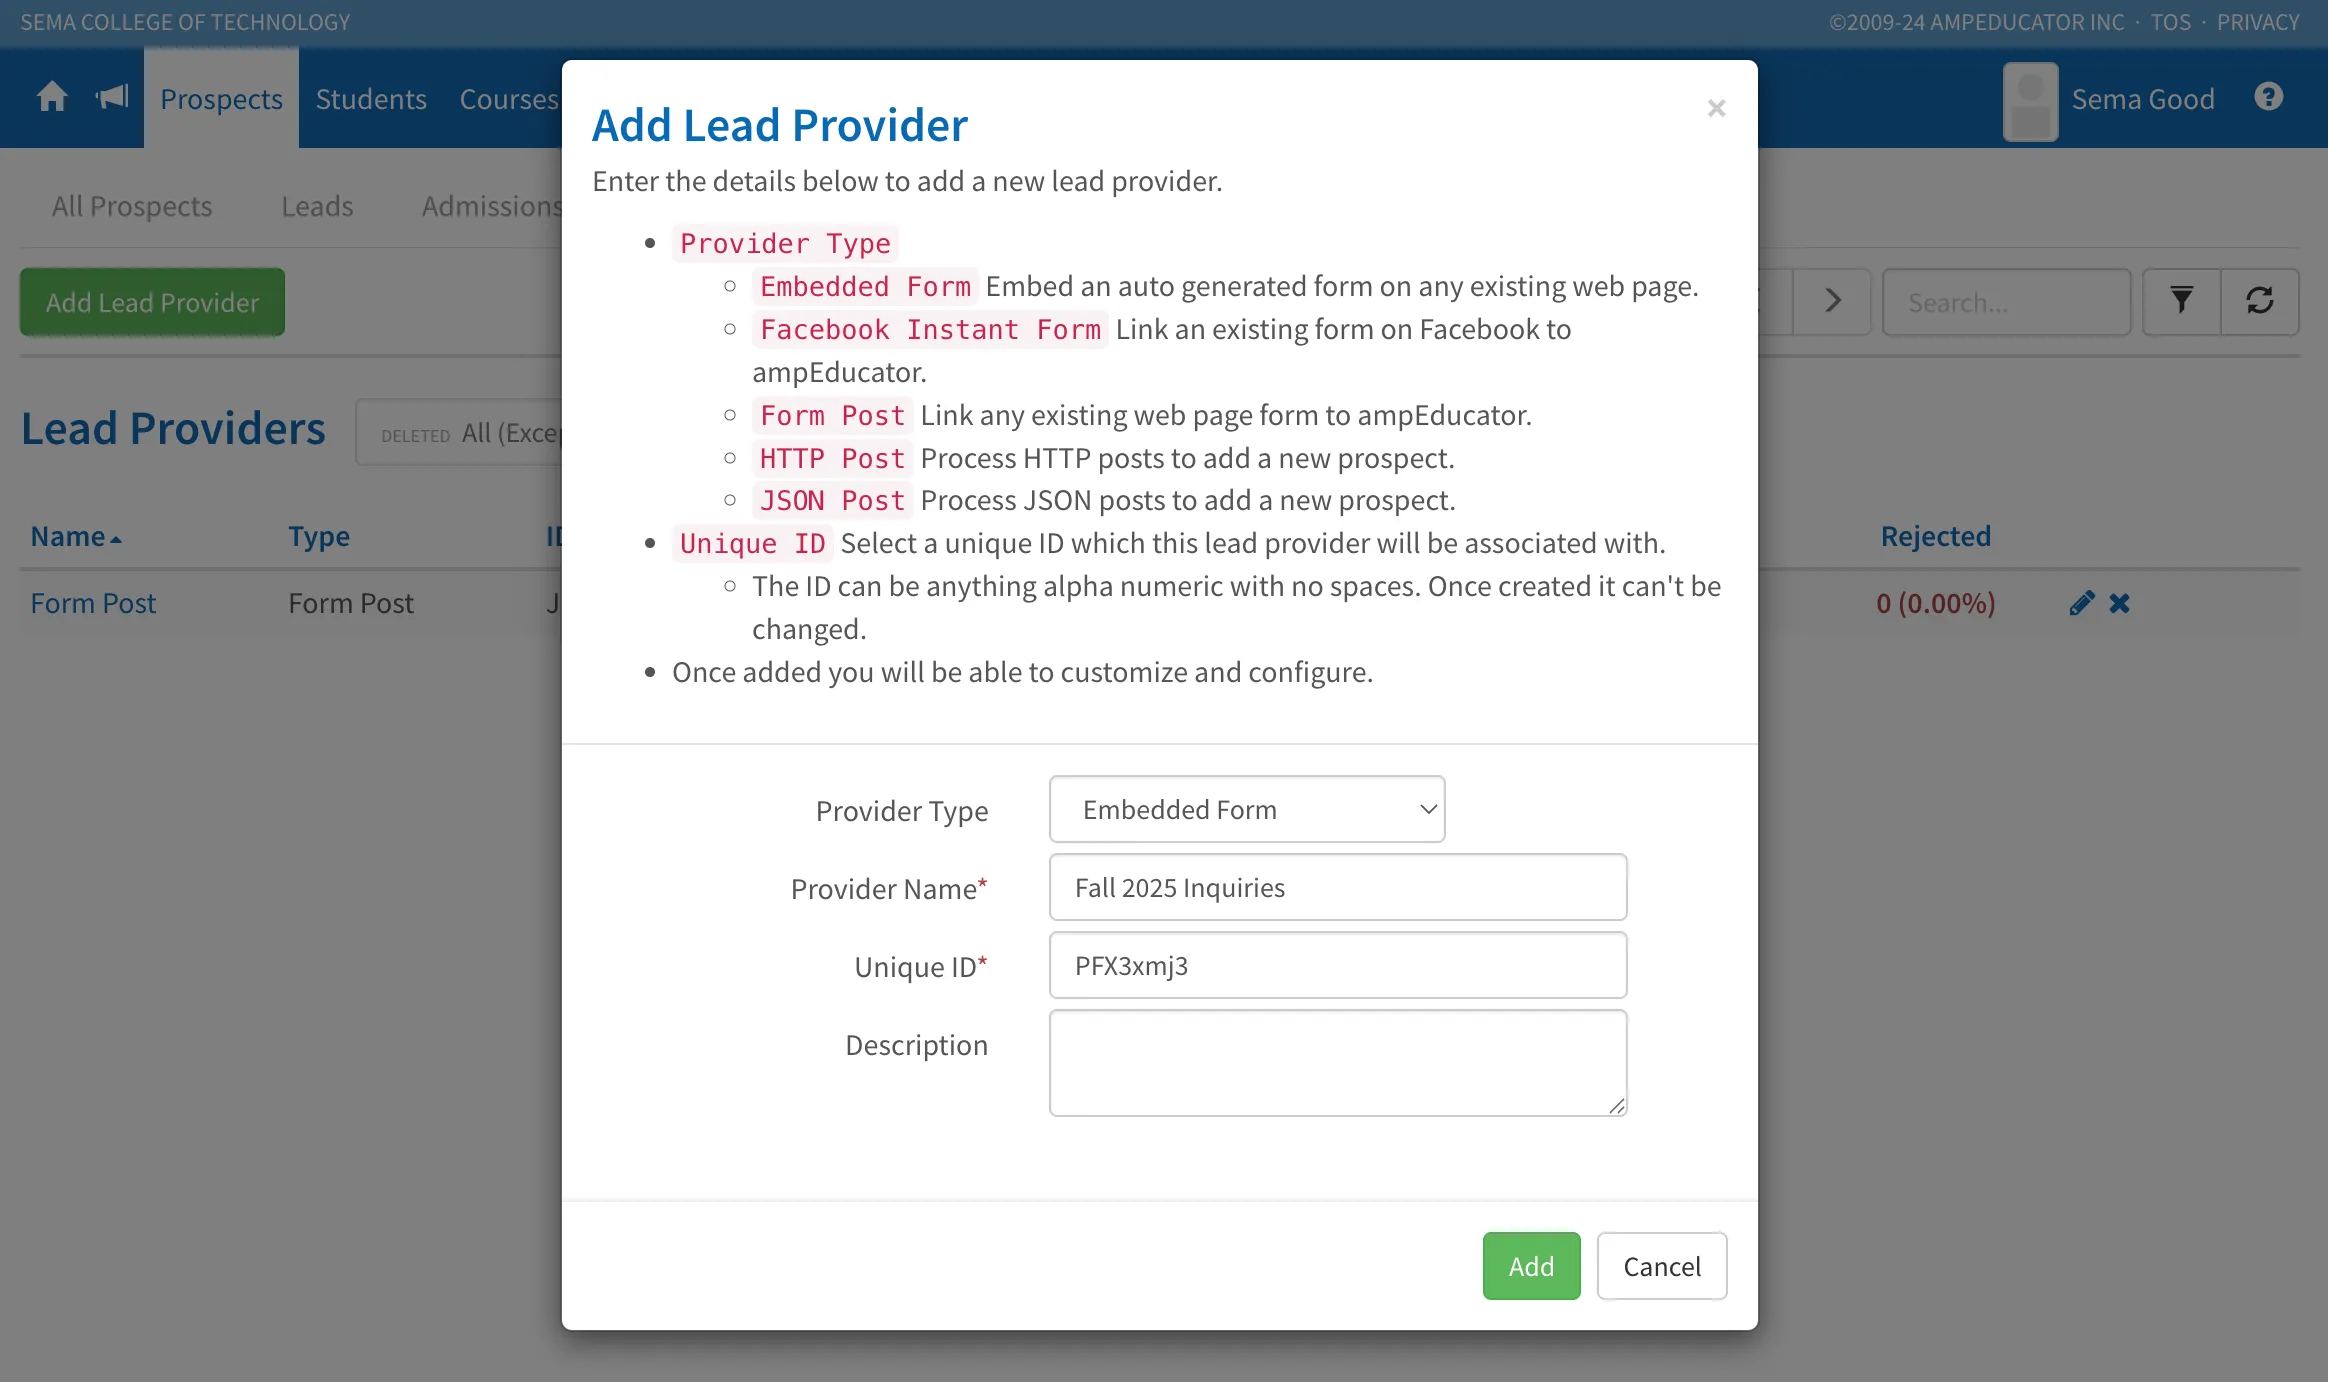
Once saved, ampEducator will automatically take you to the Details tab where you can set up the form’s layout, required fields, appearance, and default routing.
Step 2: Configure the Details
After saving, you’ll land on the Details screen for your Embedded Lead Provider. This is where you’ll customize how your form looks and functions, and set up how incoming leads are handled.
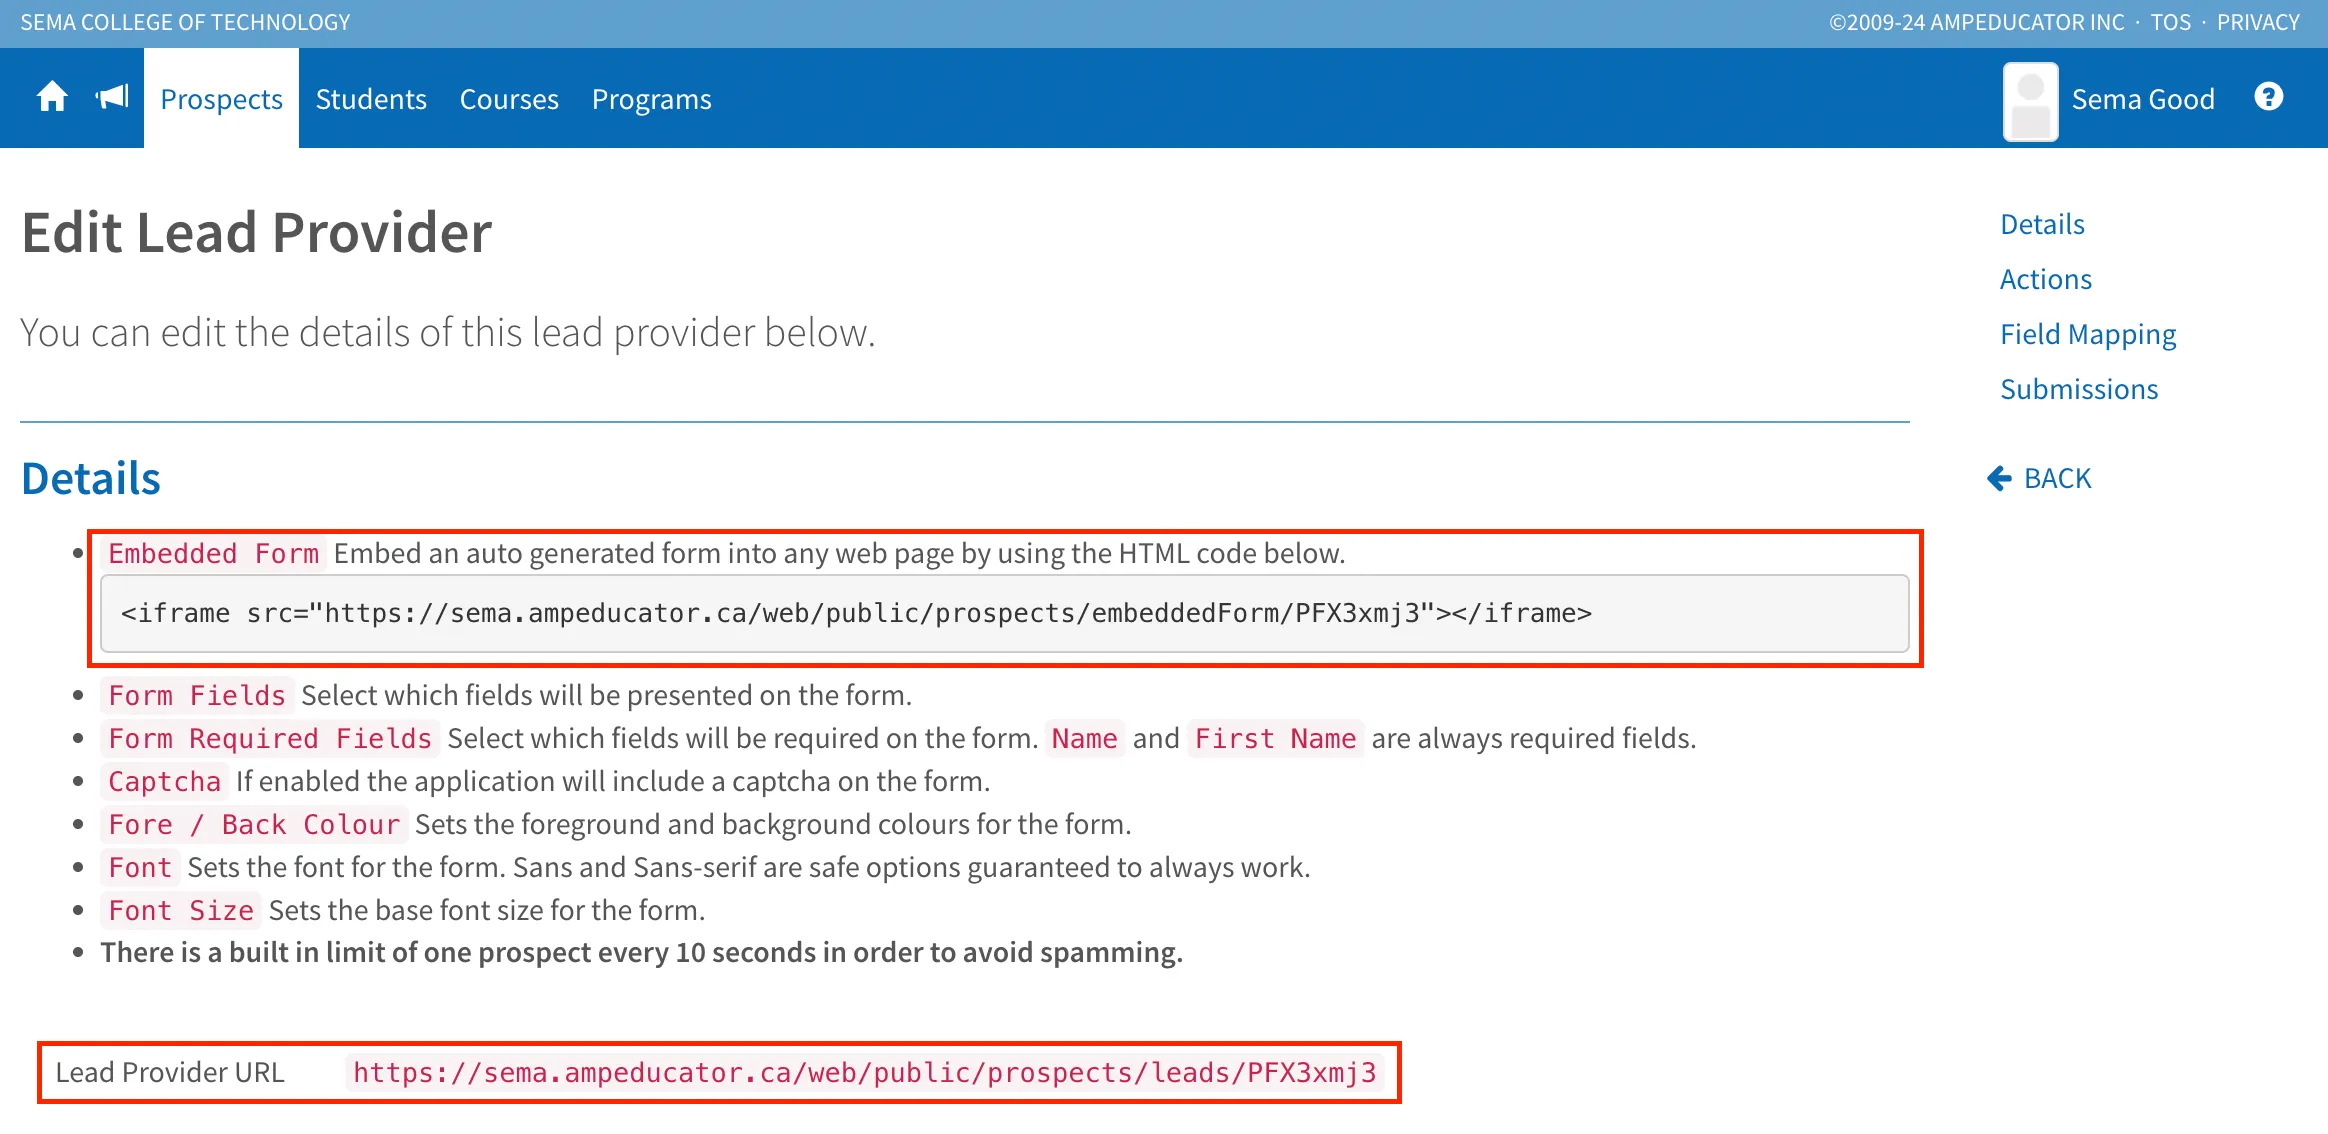
Embed Code and Form URL
At the top of the page, you’ll see:
- A pre-generated iframe embed code you can paste directly into your website HTML.
- The Lead Provider URL, which is the form’s direct submission endpoint. This can be used if you prefer to build a custom form instead of using the default one.
Form Routing & Notifications
These settings determine how incoming leads are routed and who gets notified.
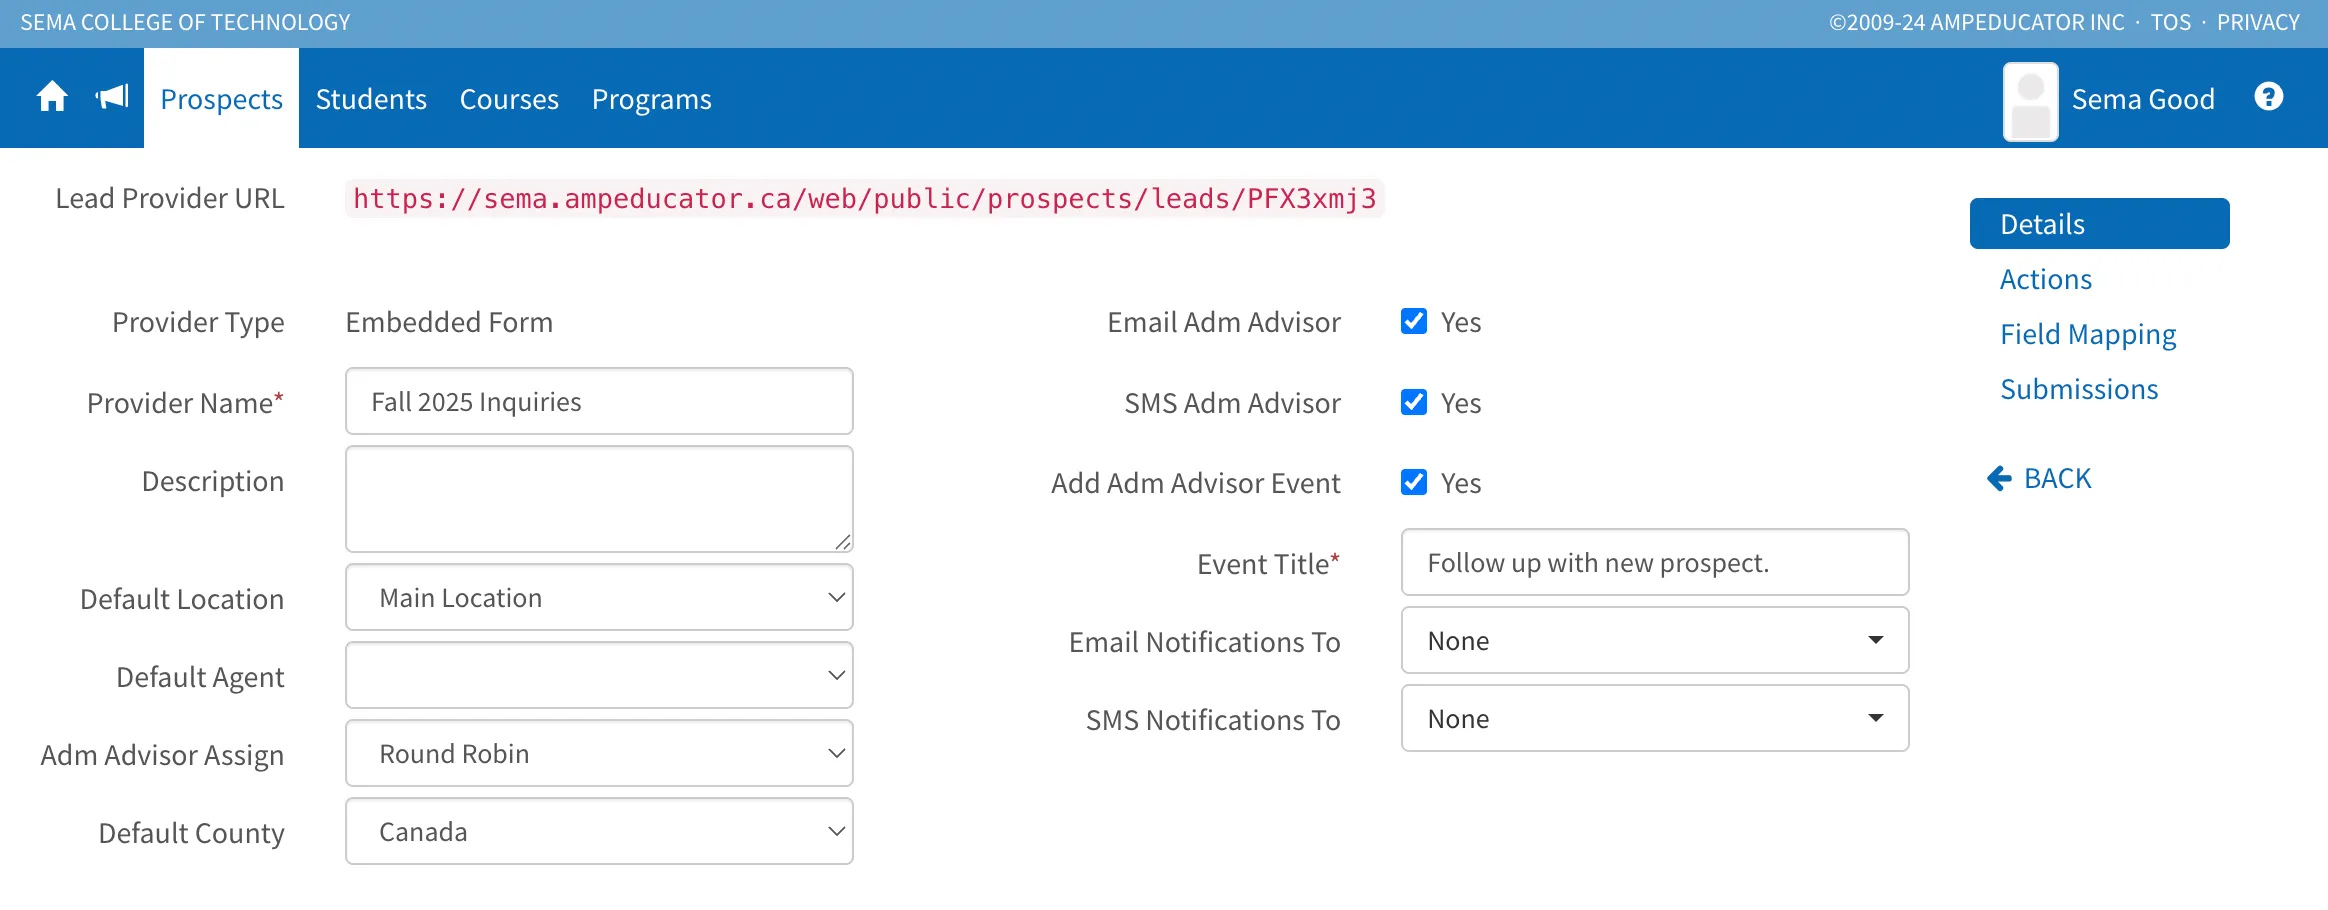
- Provider Type: Embedded Form (set automatically)
- Provider Name: e.g. Fall 2025 Inquiries
- Description: Optional description of this form
- Default Location: Assign a default location for all new leads
- Default Agent: (Optional) Pre-assign an agent for follow-up
- Adm Advisor Assign: Choose how Admissions Advisors are assigned (e.g. Round Robin)
- Default Country: Set a default country for incoming prospects
- Email Adm Advisor / SMS Adm Advisor: Enable notifications for the assigned advisor
- Add Adm Advisor Event: Automatically schedule a follow-up event
- Event Title: e.g. Follow up with new prospect
- Email Notifications To / SMS Notifications To: Select additional staff to be notified
Form Fields & Appearance
These options control what fields appear on the form, which are required, and how it looks visually.
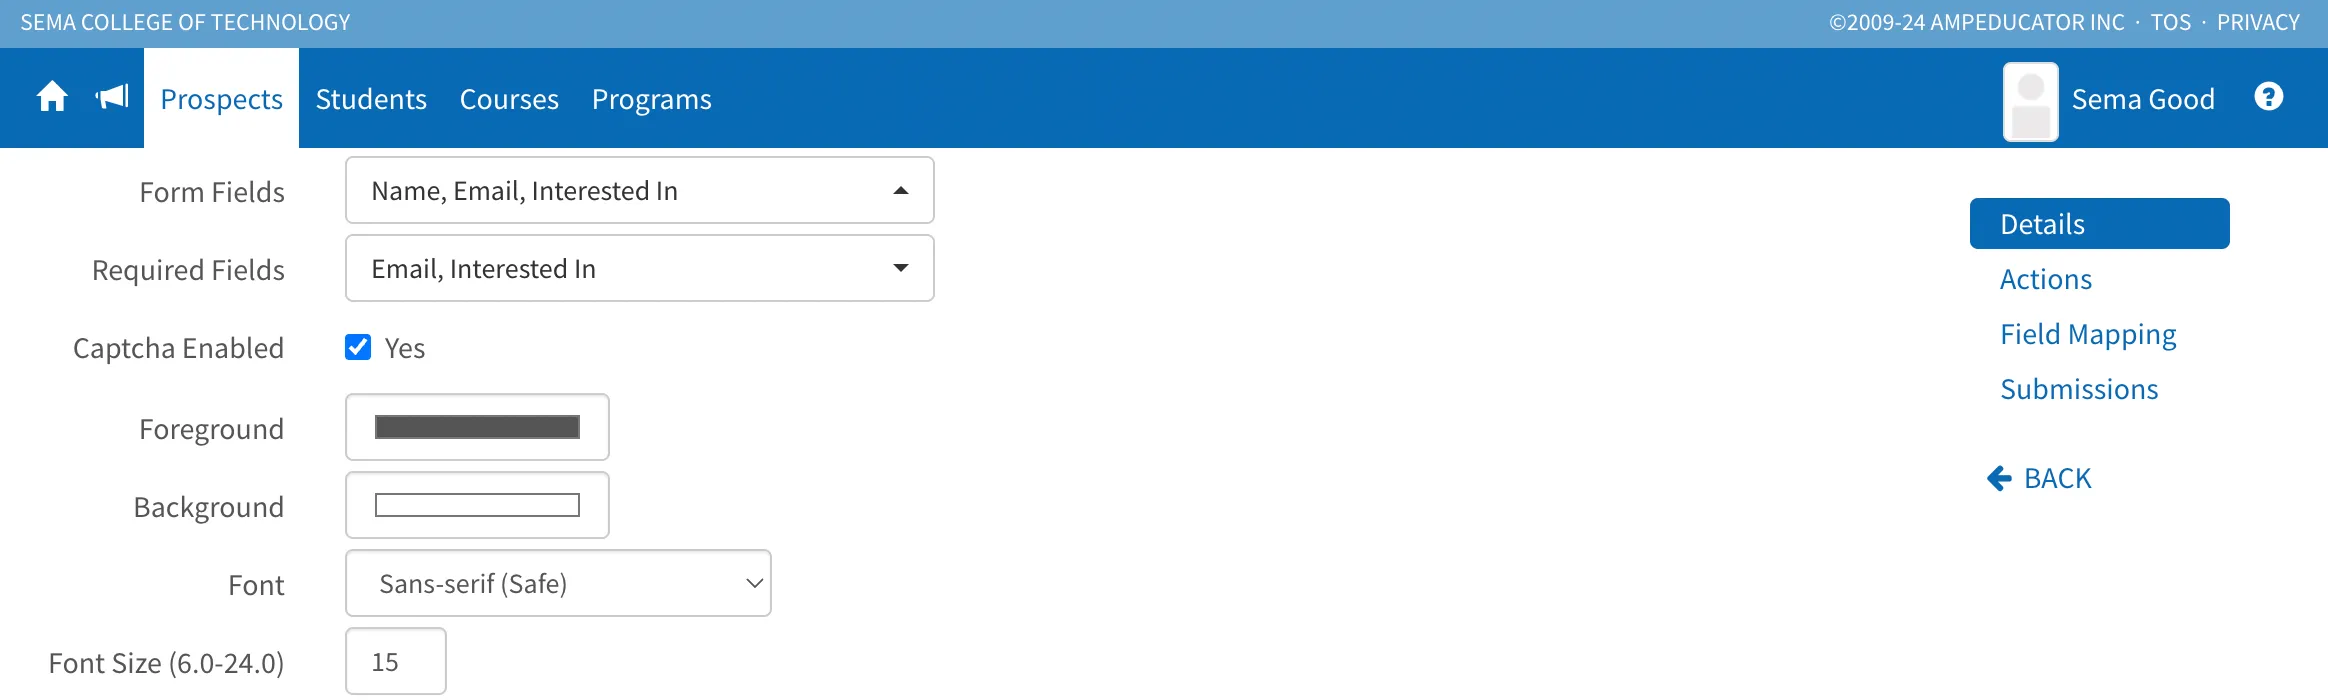
- Form Fields: Choose from a wide list of available fields including Name, Email, Phone, Address, Date of Birth, Country, Custom Fields, “Interested In”, and more.
- Required Fields: Mark any fields that must be completed before submission. Note: Name and First Name are always required by default.
- Captcha Enabled: Enable this option to help prevent spam form submissions.
- Appearance Settings: Customize the visual style of the embedded form:
- Foreground / Background: Set the color theme of the form
- Font: Choose a web-safe font (e.g. Sans-serif)
- Font Size: Set a size between 6.0 and 24.0 (e.g. 15)
Live Preview
As you adjust your settings, a preview of the embedded form appears at the bottom of the page so you can see exactly what it will look like before adding it to your website.
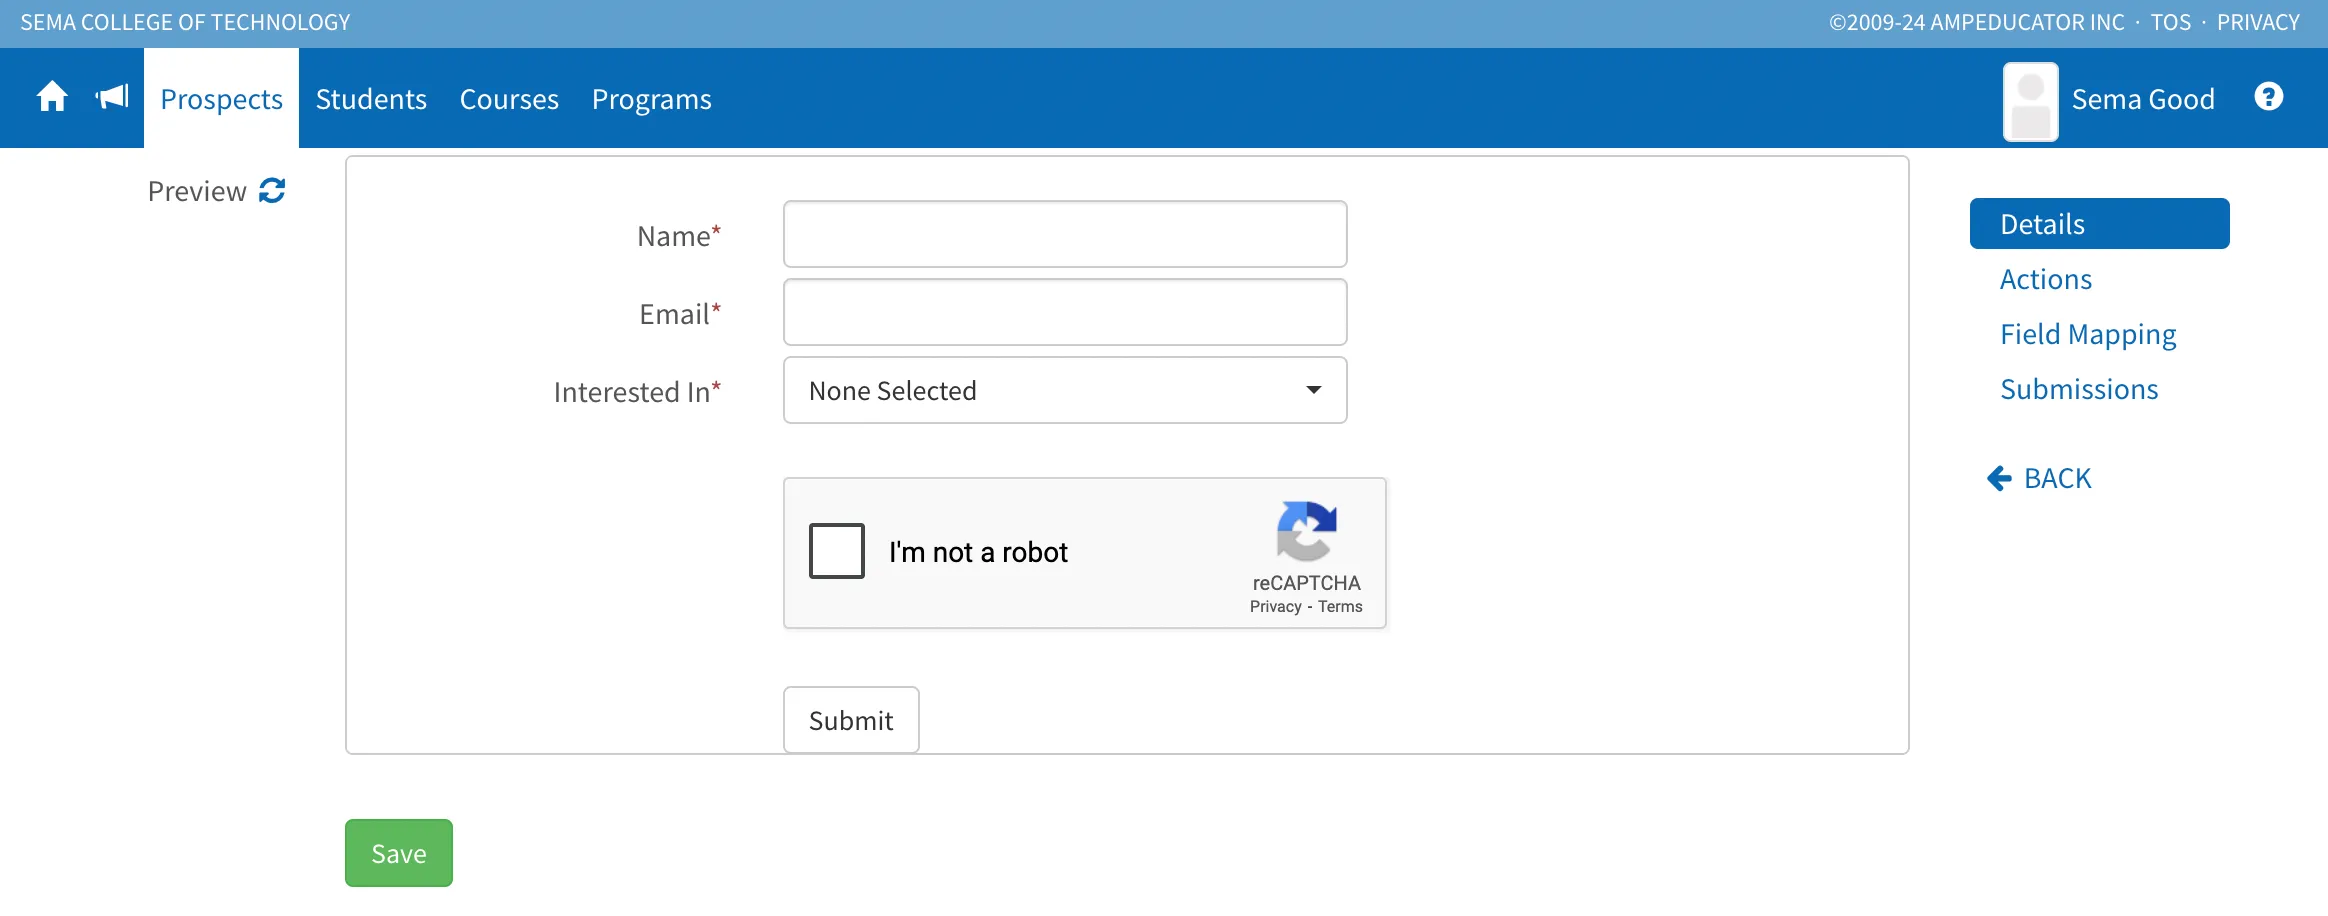
Click Save when you're done.
Next Steps
Once your lead provider is set up, continue with configuring Actions, Field Mapping & Submissions. These tabs work very similarly across all lead provider types and allow you to automate follow-ups, map incoming fields, and review submissions.