HTTP Post Guide
The HTTP Post Lead Provider type allows you to send lead data to ampEducator using an HTTP POST request from another system, platform, or web service. This is a flexible option if you're integrating with third-party systems like CRM platforms, marketing tools, or custom backend forms that can send HTTP requests. Once set up, incoming lead data will automatically create a new Prospect in ampEducator.
Step 1: Add a New HTTP Post Lead Provider
- Go to Prospects / Lead Providers.
- Click the green Add Lead Provider button.
Set the Provider Type to HTTP Post.
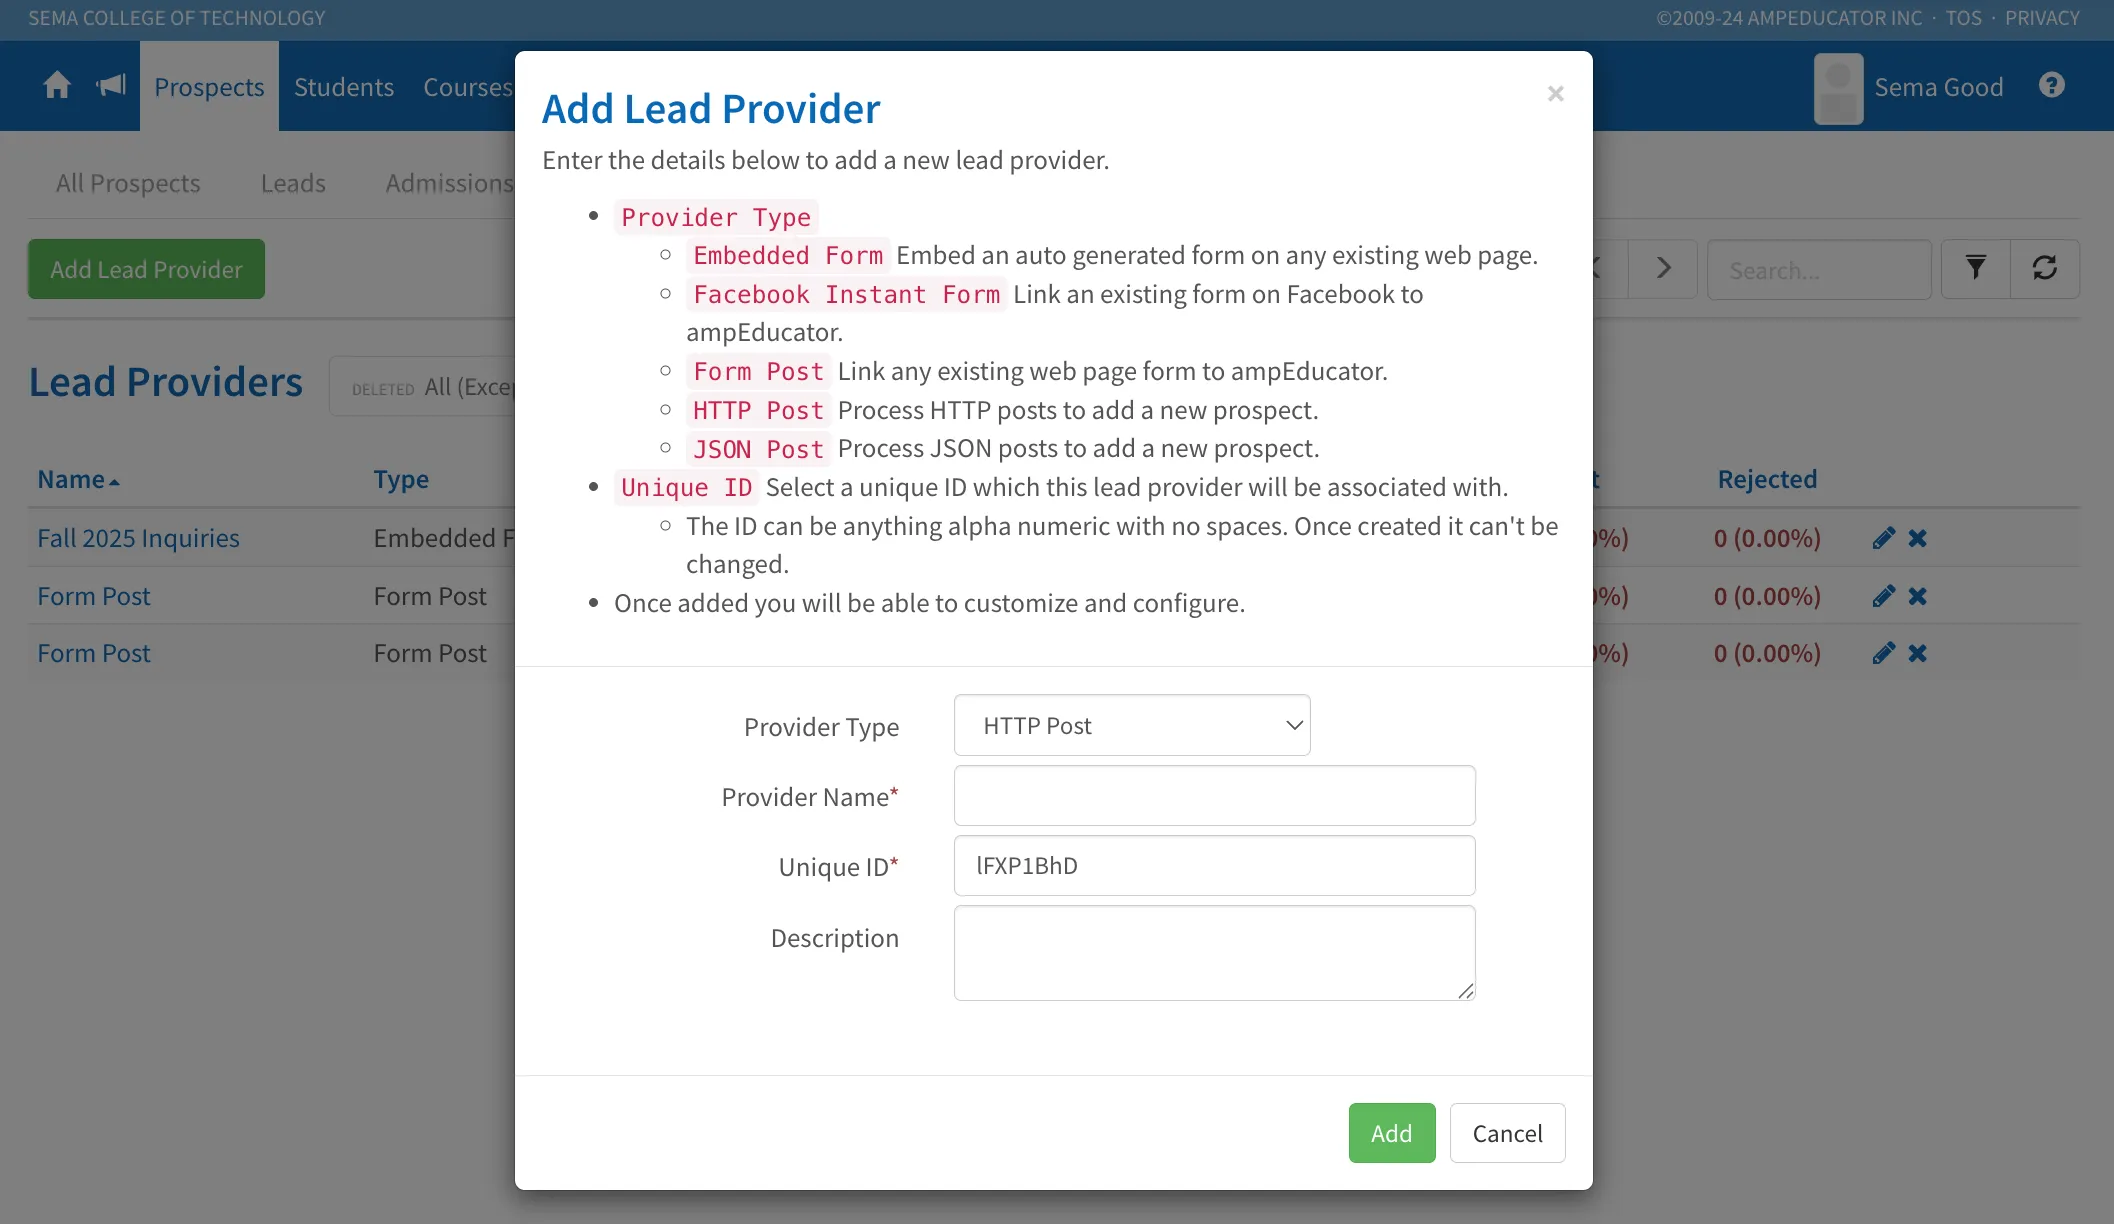
- Enter a Provider Name that helps you identify this source (e.g., Event Registration Form).
- A Unique ID will be automatically generated. You can edit it if you prefer, but once saved, it cannot be changed.
- (Optional) Add a Description.
- Click Add to continue.
After adding the Lead Provider, you’ll be taken to the profile page to configure the details.
Step 2: Configure the Details
After you add the HTTP Post Lead Provider, you’ll be taken directly to the Details page. Here, you’ll customize how incoming leads are handled and who gets notified.
Top Information and Lead Provider URL
At the top of the page, ampEducator provides important notes:
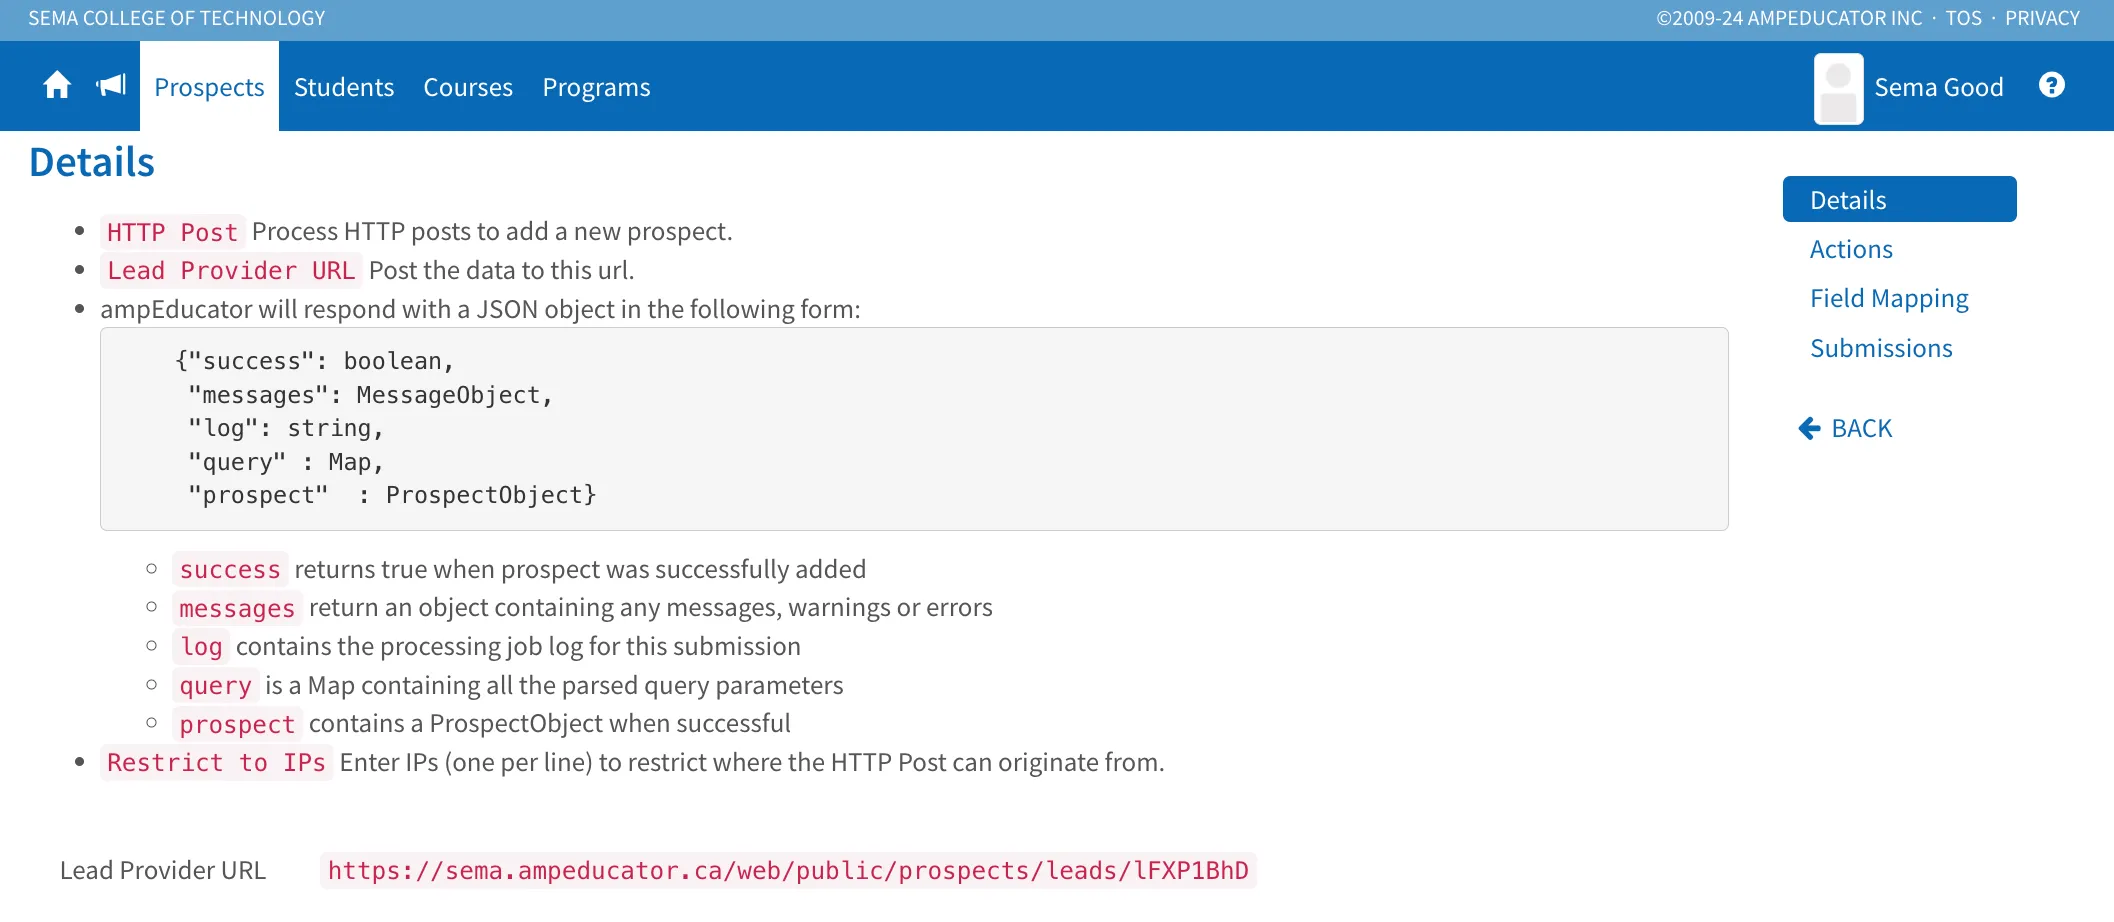
- HTTP Post processes incoming HTTP POST requests to create new Prospects.
- The Lead Provider URL shown must be used as the action URL for the POST request.
- ampEducator will respond to each POST with a JSON object showing:
- success: true or false depending on the result
- messages: any warnings or errors
- log: the processing log for the submission
- query: all submitted form parameters
- prospect: the newly created ProspectObject if successful
- You also have the option to Restrict to IPs. If entered, only requests from the specified IP addresses will be accepted.
Lead Assignment and Notifications
Below the Lead Provider URL, you’ll configure the basics:
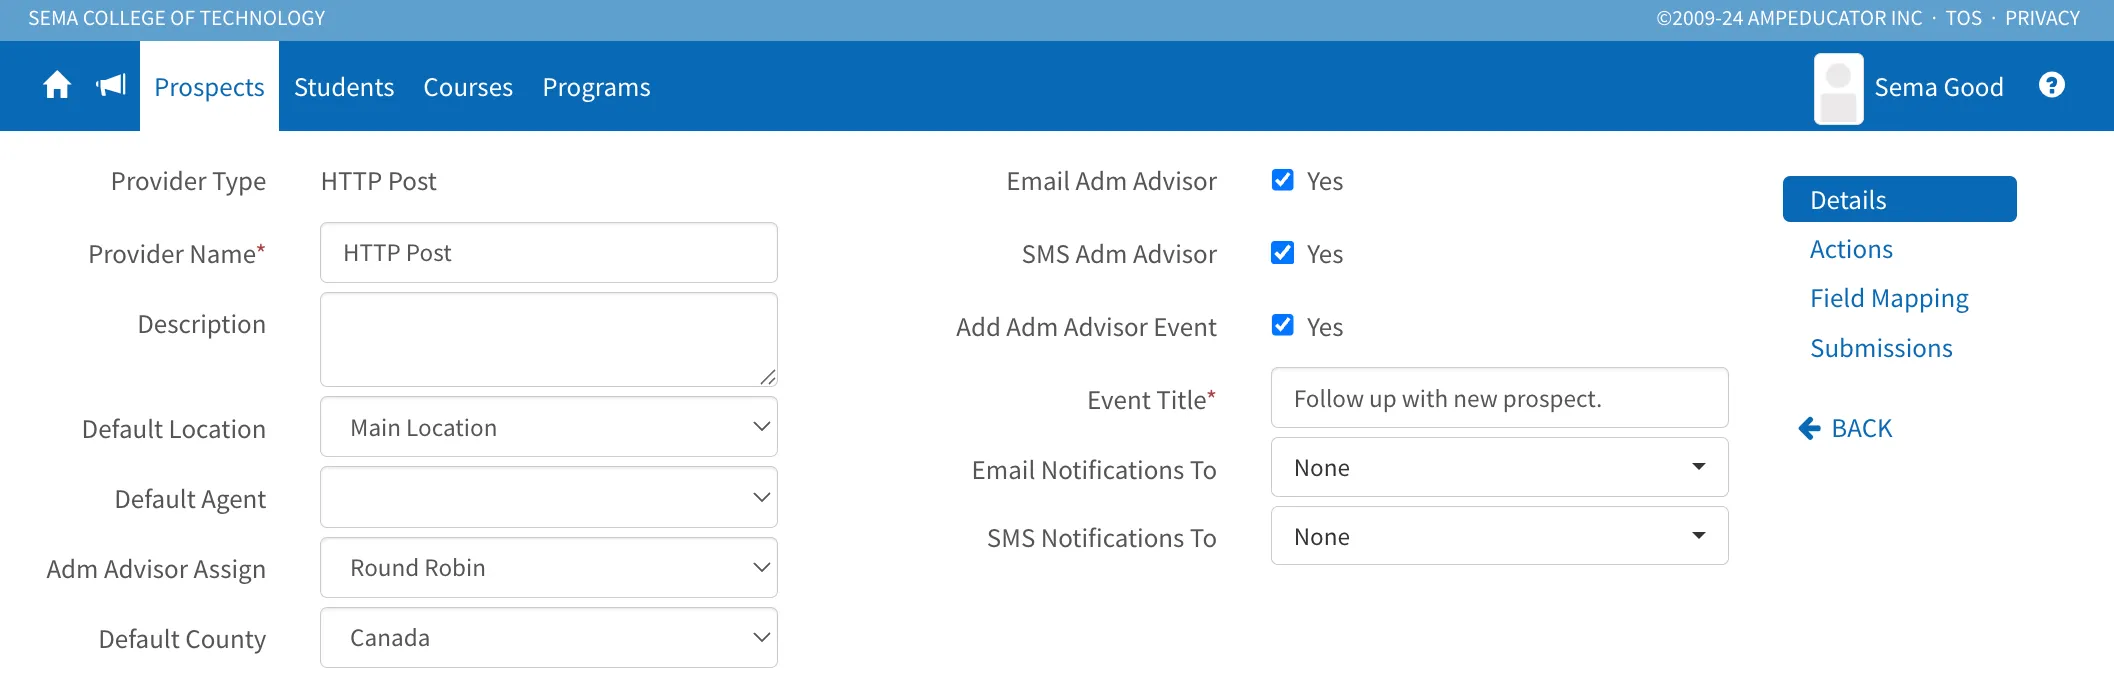
- Provider Type: Set to HTTP Post automatically.
- Provider Name and Description: Update as needed to describe the source.
- Default Location: Assign a location for incoming leads.
- Default Agent: (Optional) Pre-assign an agent.
- Adm Advisor Assign: Choose Round Robin or another method.
- Default Country: Set the default country (e.g., Canada).
Notifications:
- Email Adm Advisor / SMS Adm Advisor: Notify the assigned advisor automatically.
- Add Adm Advisor Event: Create a scheduled follow-up task for each lead.
- Event Title: Set a title for the automatic event (e.g., Follow up with new prospect).
- Email Notifications To / SMS Notifications To: Add other staff to receive alerts if needed.
Restrict to IPs (Optional)
If you want to improve security, you can enter specific IP addresses in the Restrict to IPs field. Only submissions from those IPs will be accepted. You can add multiple IPs by listing them one per line.
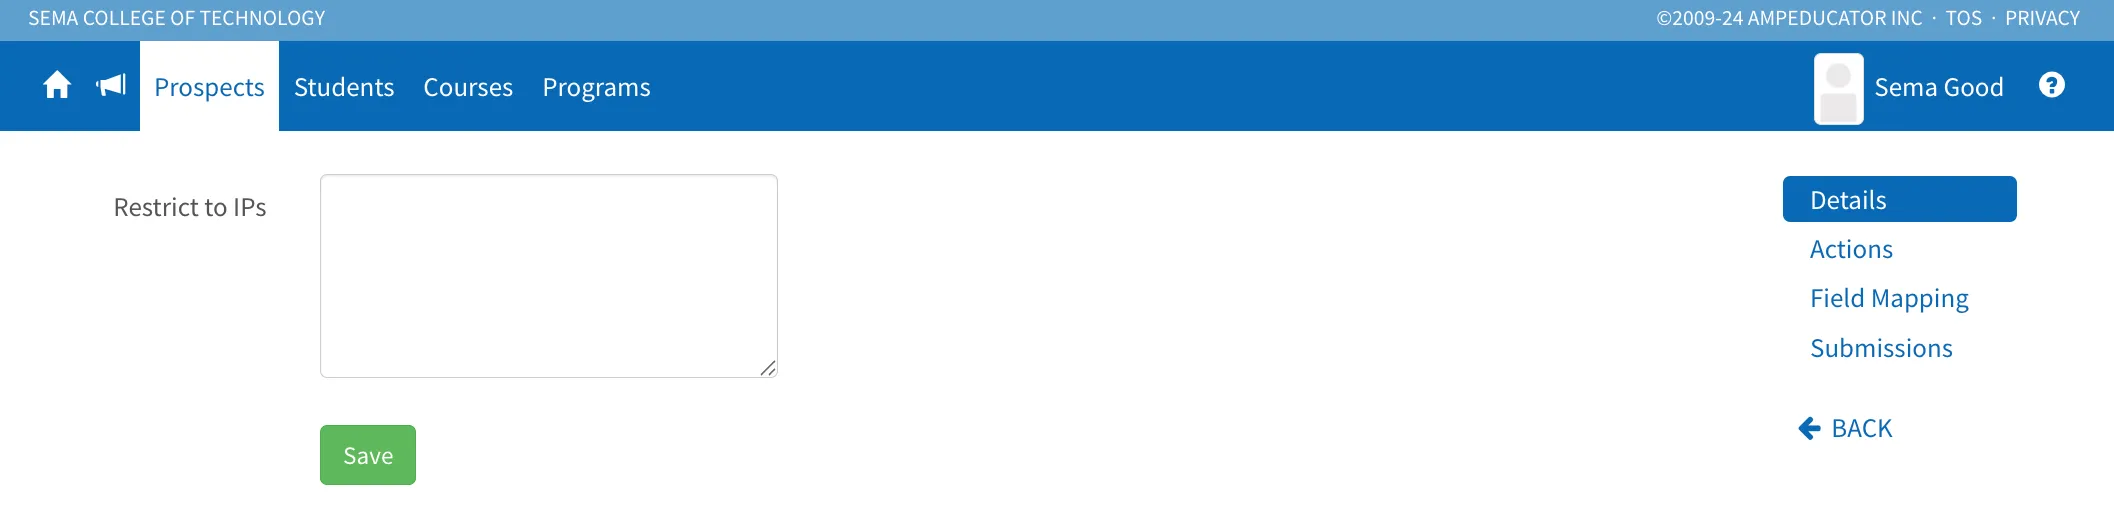
When you’ve finished entering your settings, click Save at the bottom of the page.
Next Steps
Once your lead provider is set up, continue with configuring Actions, Field Mapping & Submissions. These tabs work very similarly across all lead provider types and allow you to automate follow-ups, map incoming fields, and review submissions.