Adding New Staff
Before you can grant access to ampEducator, each staff or instructor must be added to the system with the appropriate credentials and access. Start by clicking the green Add New Staff button.
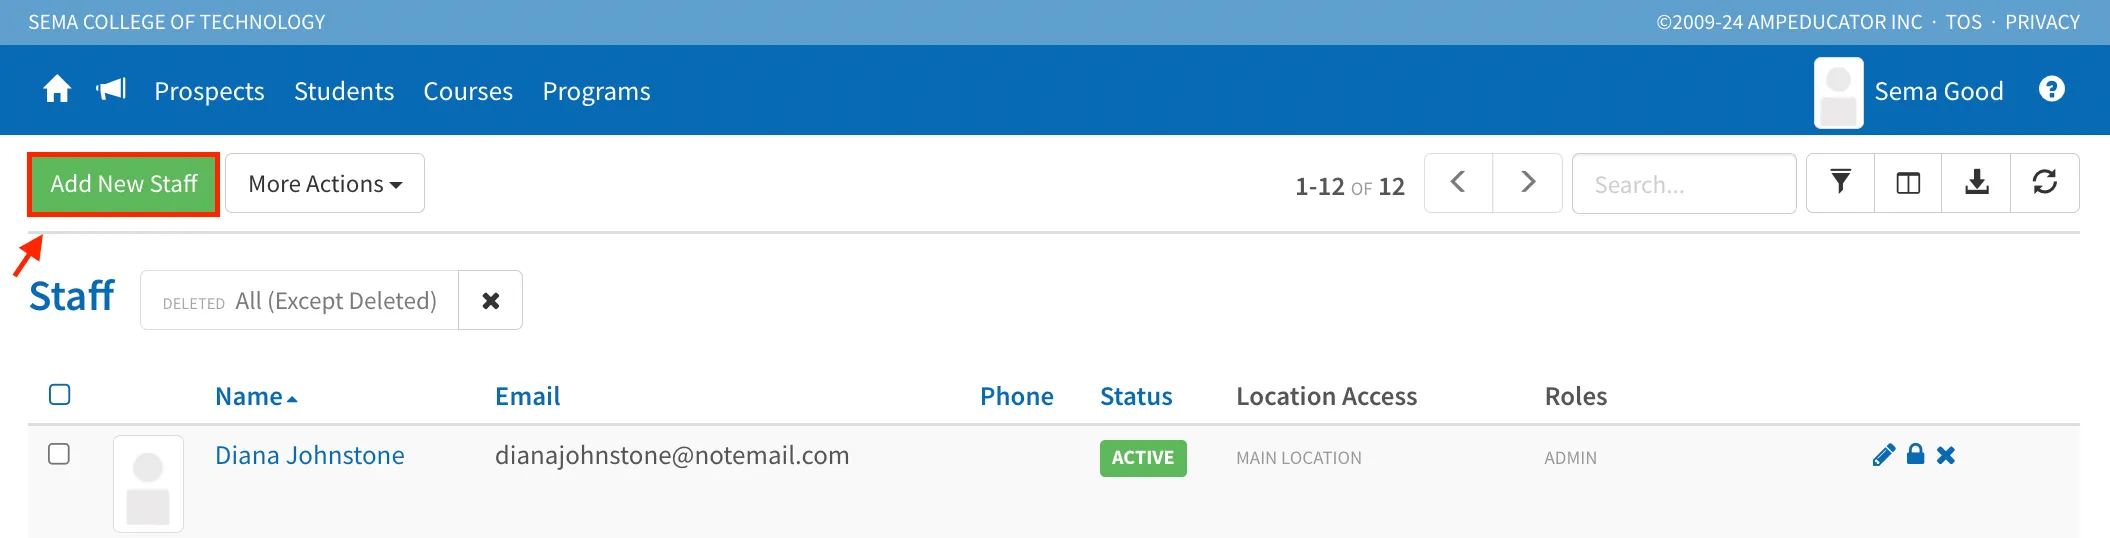
A pop-up window will appear. Fill in the required details:
- Name – Enter the full name of the staff member.
- Location – Choose the primary location where this person will be working.
- Location Access – Select one or more locations they should be able to access.
- Status – Choose Active to allow login access, or Inactive to keep the account disabled.
- Position – (Optional) Use this to note the person’s job title or role within the institution.
- Email – (Optional) Enter the user’s email for notifications and contact.
- Username – Create a unique login name for the user.
- Password and Confirm Password – Set a secure password for their account.
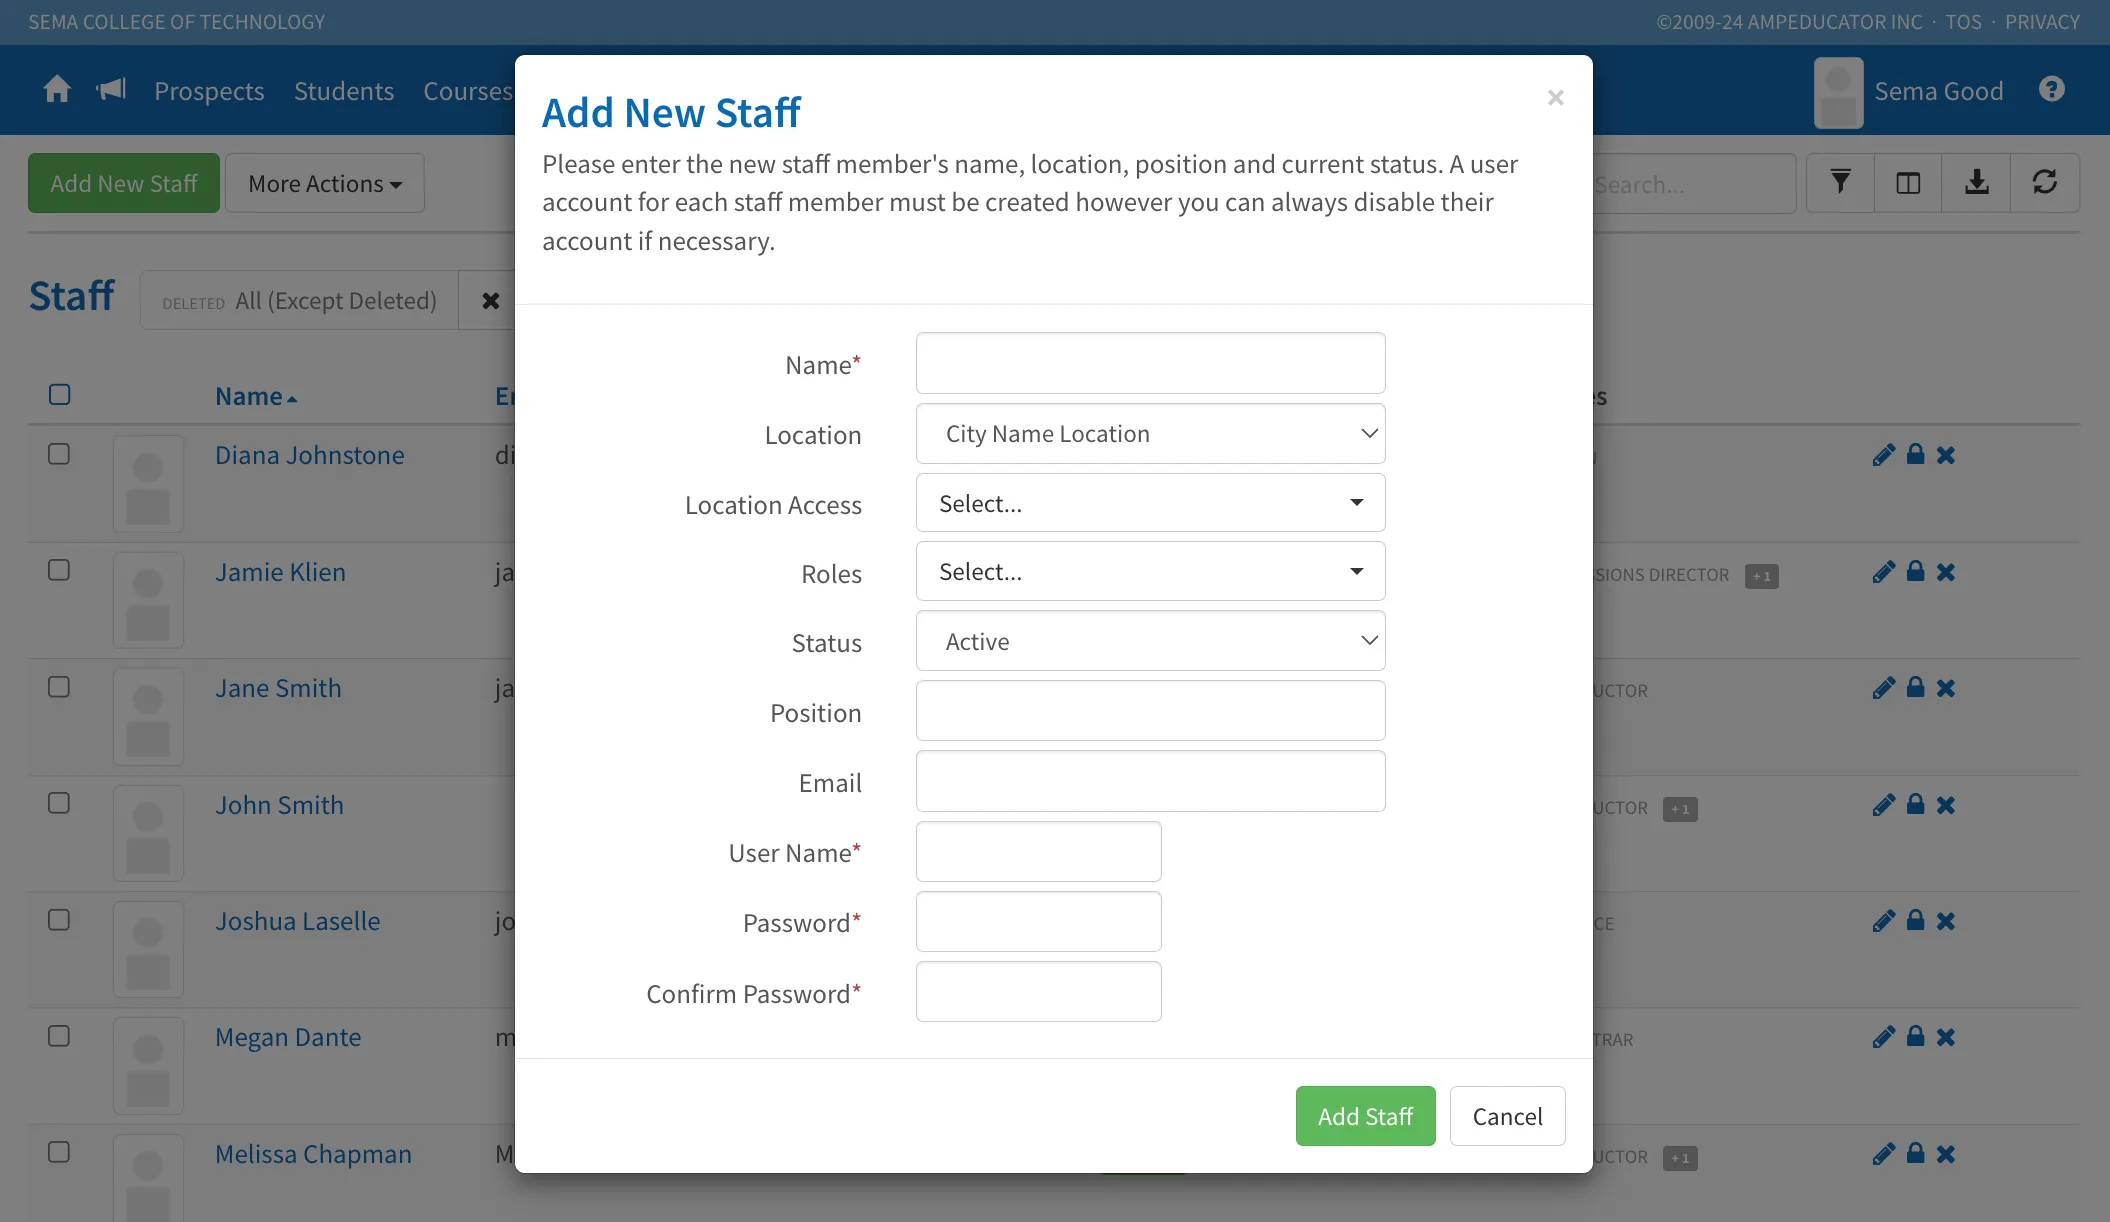
Once all fields are complete, click Add Staff to finish.
Once you've added a new staff member, they’ll appear in the main list. At this point, only the basic details you entered are saved.
To add more information—like phone number, address, schedule preferences, or internal notes—click on their name or the edit icon beside it. This opens the full staff profile, where you can continue building out their record and managing settings as needed.
Video Walkthrough: Adding Staff Manually
Importing Multiple Staff via CSV
If you need to add multiple staff or instructors at once, you can import them in bulk using a CSV file. This is the fastest way to add users and works best when you already have the data prepared. To learn more, see Home / Imports. You’ll be guided through the field requirements and can test your file before completing the import.
If you run into any trouble, feel free to contact support at [email protected] and include your file—we’re happy to help.