Commissions
The Commissions tab provides a complete record of all commission-related transactions. This includes commissions linked to student enrollments, invoices, agency agreements, and payments. From this area, you can track outstanding commissions, review payments made to agents, apply refunds, and manually create new commission records when needed.
Commissions Section
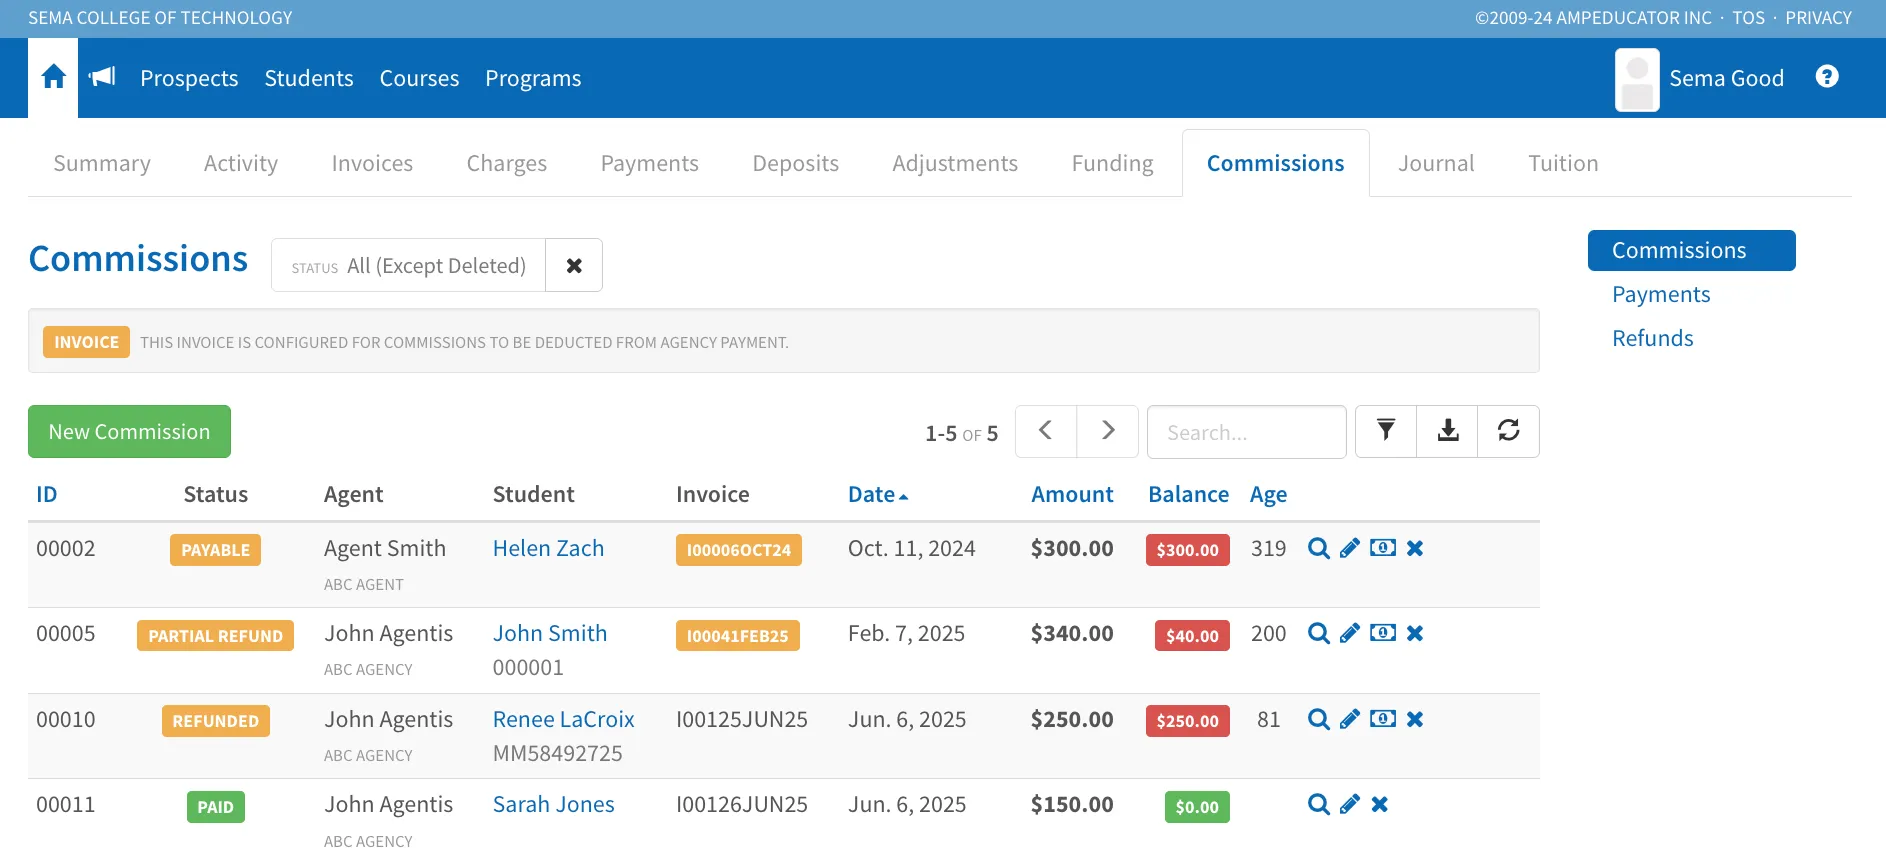
The Commissions section displays a detailed list of all commissionable invoices tied to agents and agencies. Each record includes the ID, status, agent name, student, invoice, date, amount, balance, and age of the commission.
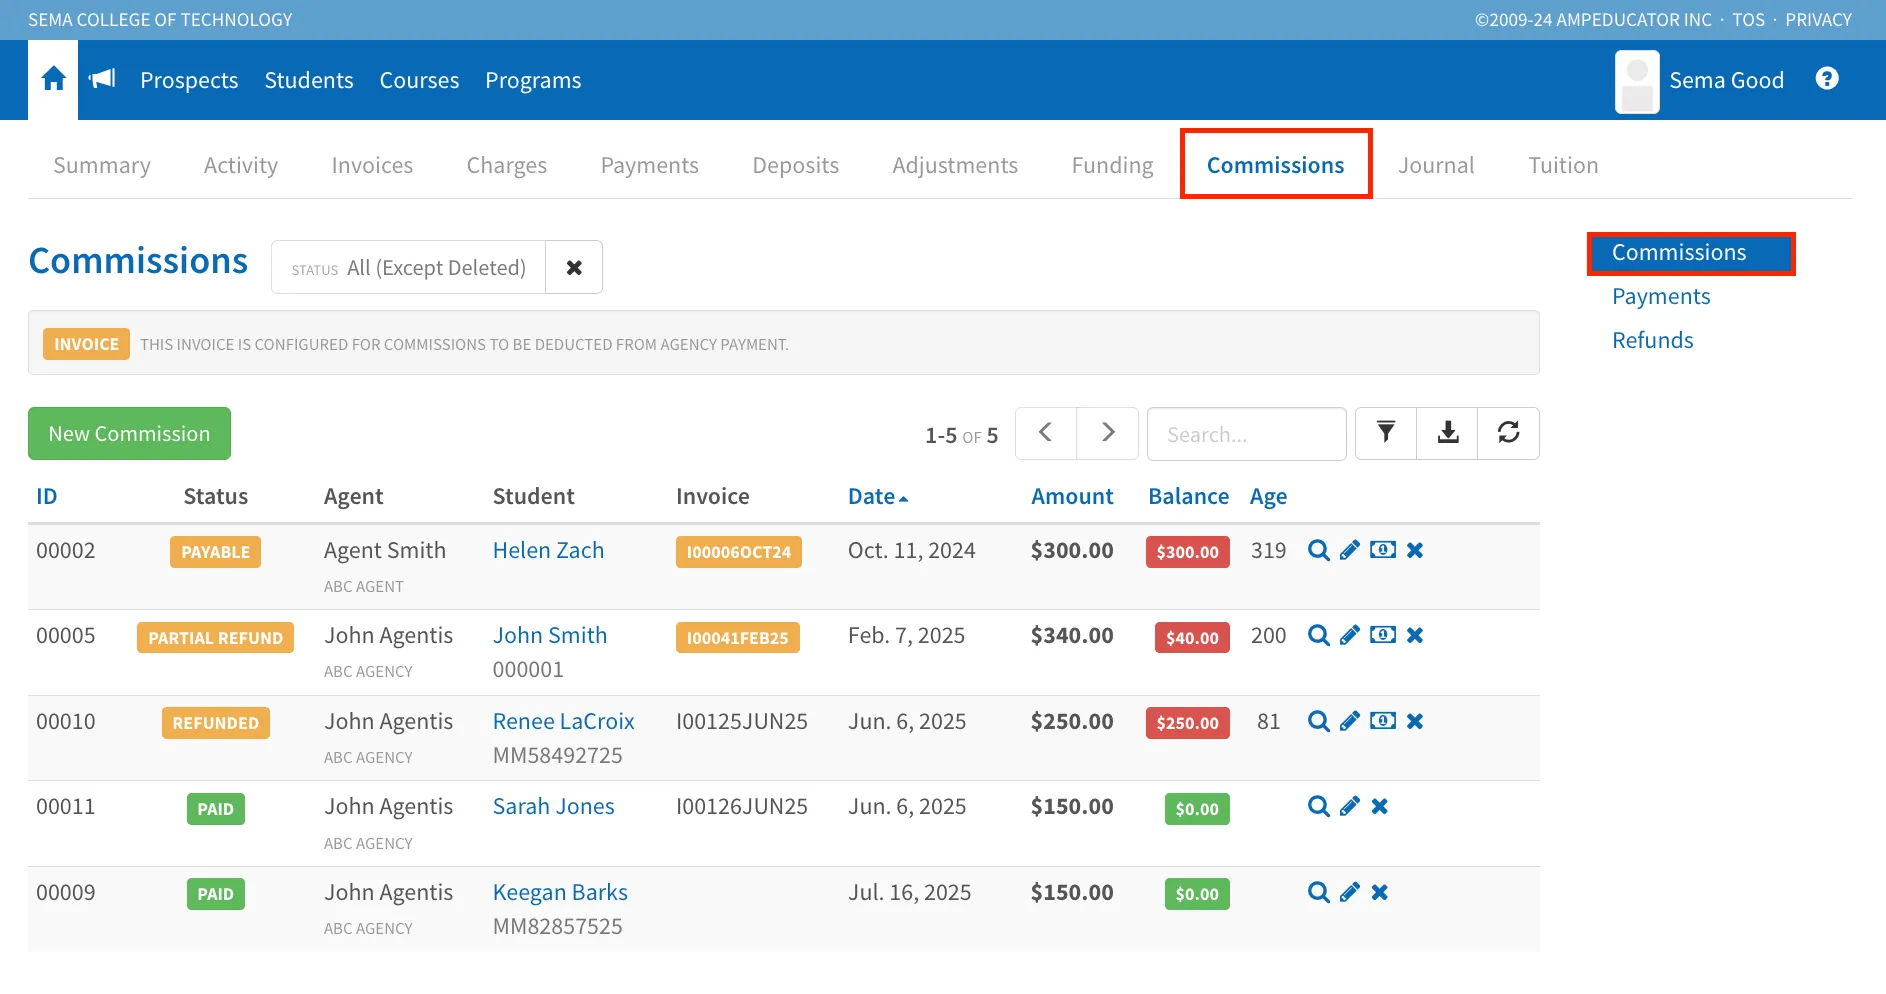
Invoices highlighted with an orange “Invoice” label indicate that the invoice is configured for commissions to be deducted directly from the agency payment. This ensures that commissions are automatically calculated and applied when processing payments.
Manually Creating a New Commission
Most commissions are automatically created during the invoicing process, especially when an agent or agency has been associated with the student. To learn more about how to associate an agent with a commission and add a commission directly to an invoice, see the Students / Student Accounts tab / Invoices section of this guide.
In some cases, you may want to manually create a commission. This can be useful for:
- Commissions not tied to a tuition invoice, such as referral bonuses
- Retroactive entries for enrollments that were missed
- Manual adjustments or corrections
- Internal training or testing
Clicking the New Commission button opens a form where you can enter the necessary details for the commission. Each field plays a role in how the commission is recorded and calculated.
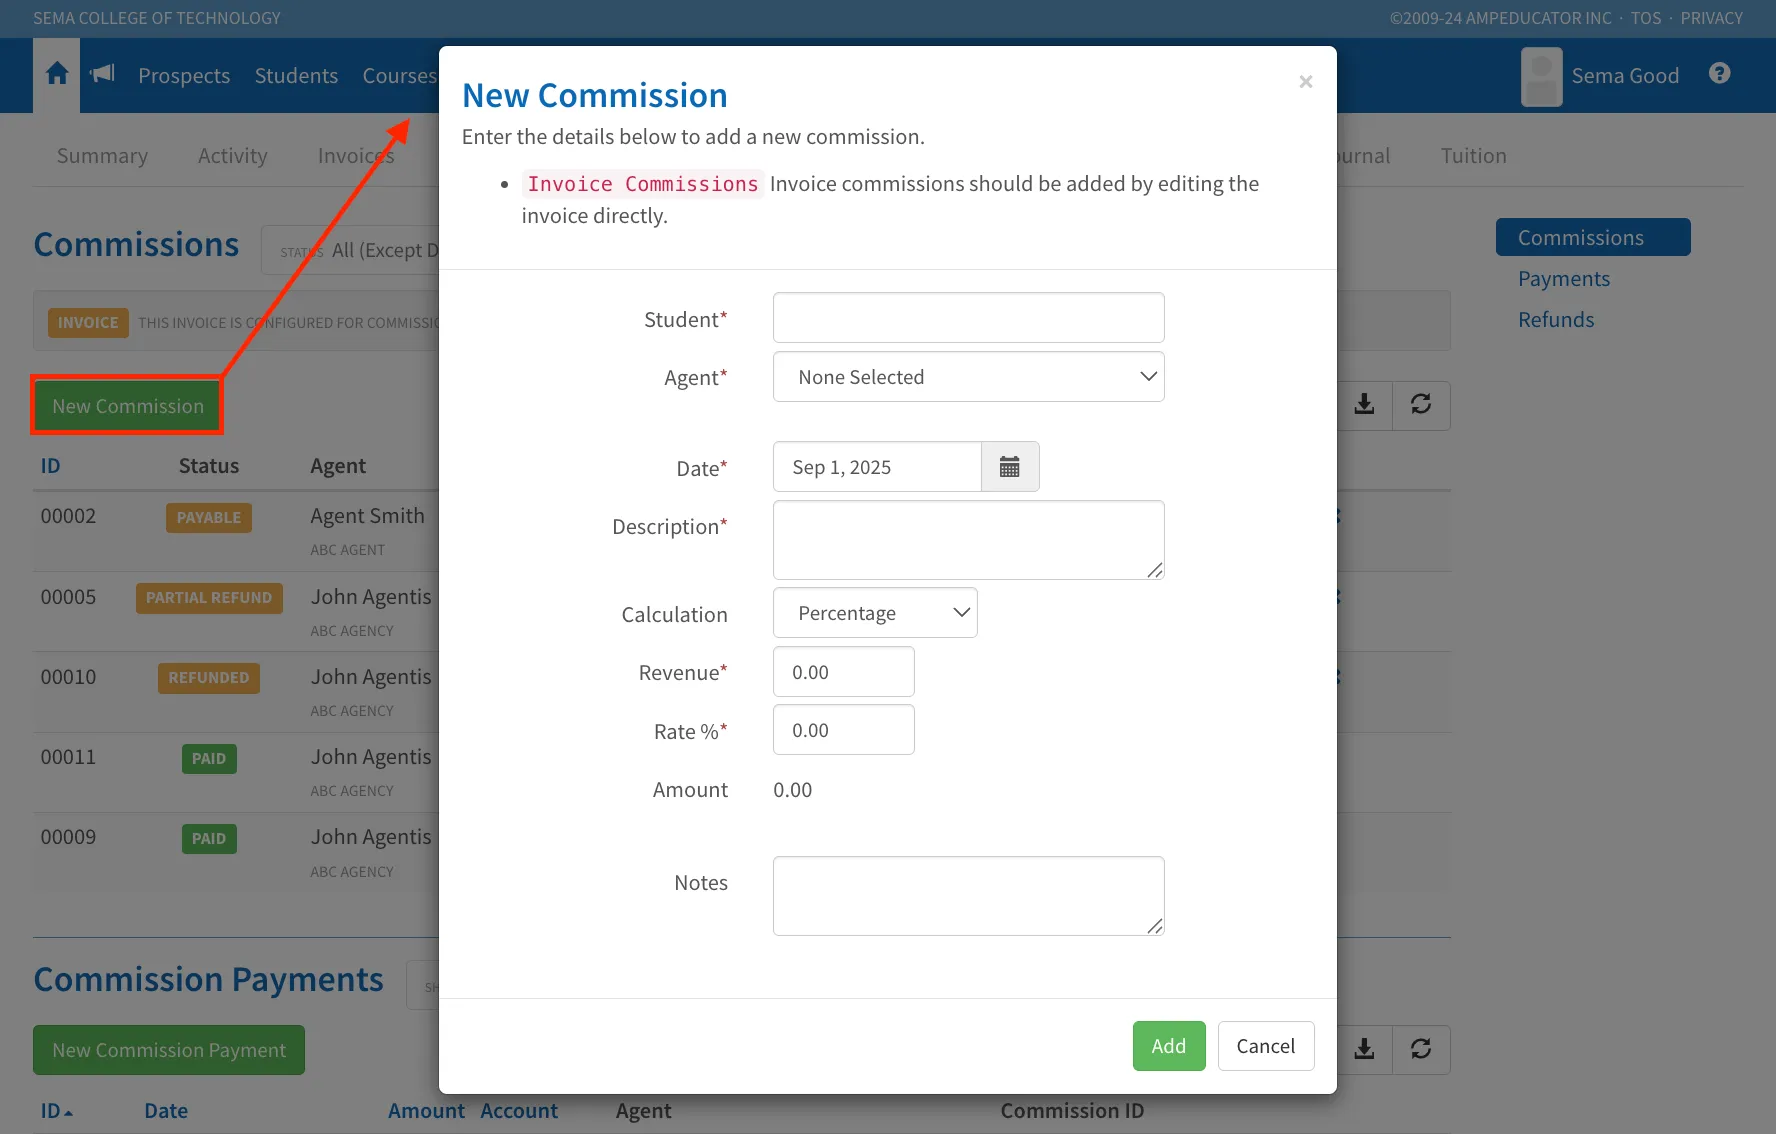
Here’s a breakdown of what to enter:
- Student – Start typing the student's name to search and select the correct record.
- Agent – Select the agent or agency who should receive the commission.
- Date – Choose the date the commission should be recorded.
- Description – Enter a short label or explanation for the commission (e.g. “Referral Bonus” or “Manual Entry”).
- Calculation – Choose whether the commission is based on Percentage or Fixed:
- If you select Percentage, enter both the Revenue and the Rate %, and the Amount will calculate automatically.
- If you select Fixed, simply enter the Amount directly.
- Notes – Optional field to include any internal notes or comments.
Once everything is filled out, click Add to save the commission.
Reminder: A red notice at the top of the form indicates that invoice-based commissions should be added directly from the invoice, not here. Use this form only for manual commissions not tied to an invoice.
Quick Action Icons (Commissions Section)
Each commission listed in the Commissions section includes a set of quick action icons on the right side of the row. These icons allow you to manage commissions directly without navigating away from the list.
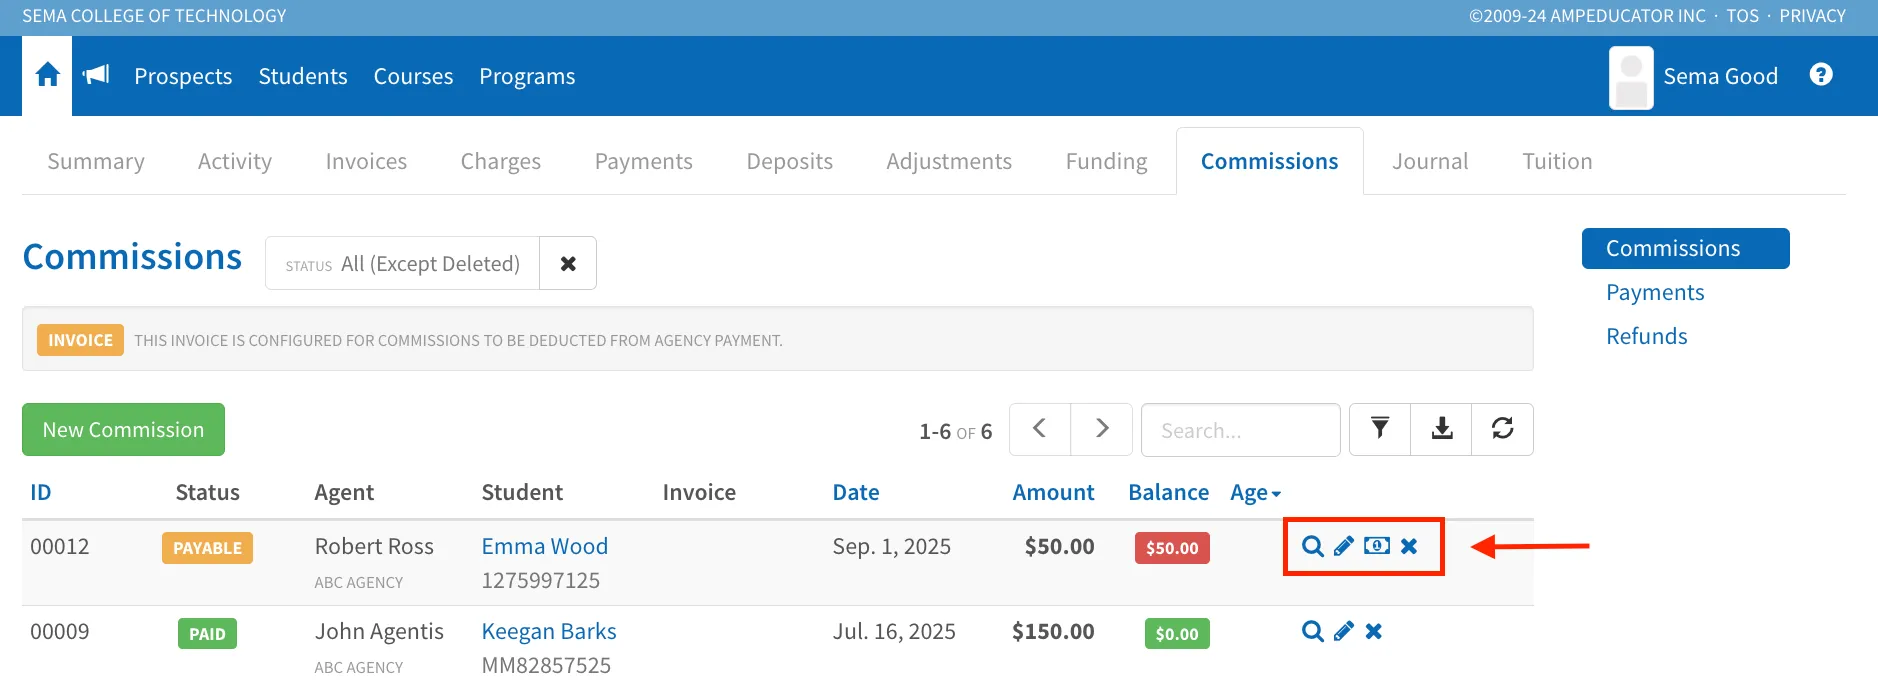
View Commission
Clicking the View Commission icon opens a window that displays all relevant details about the commission. This includes the Student, Agent, and Invoice it’s linked to, as well as the commission’s date, description, calculation method, amount, and current status.
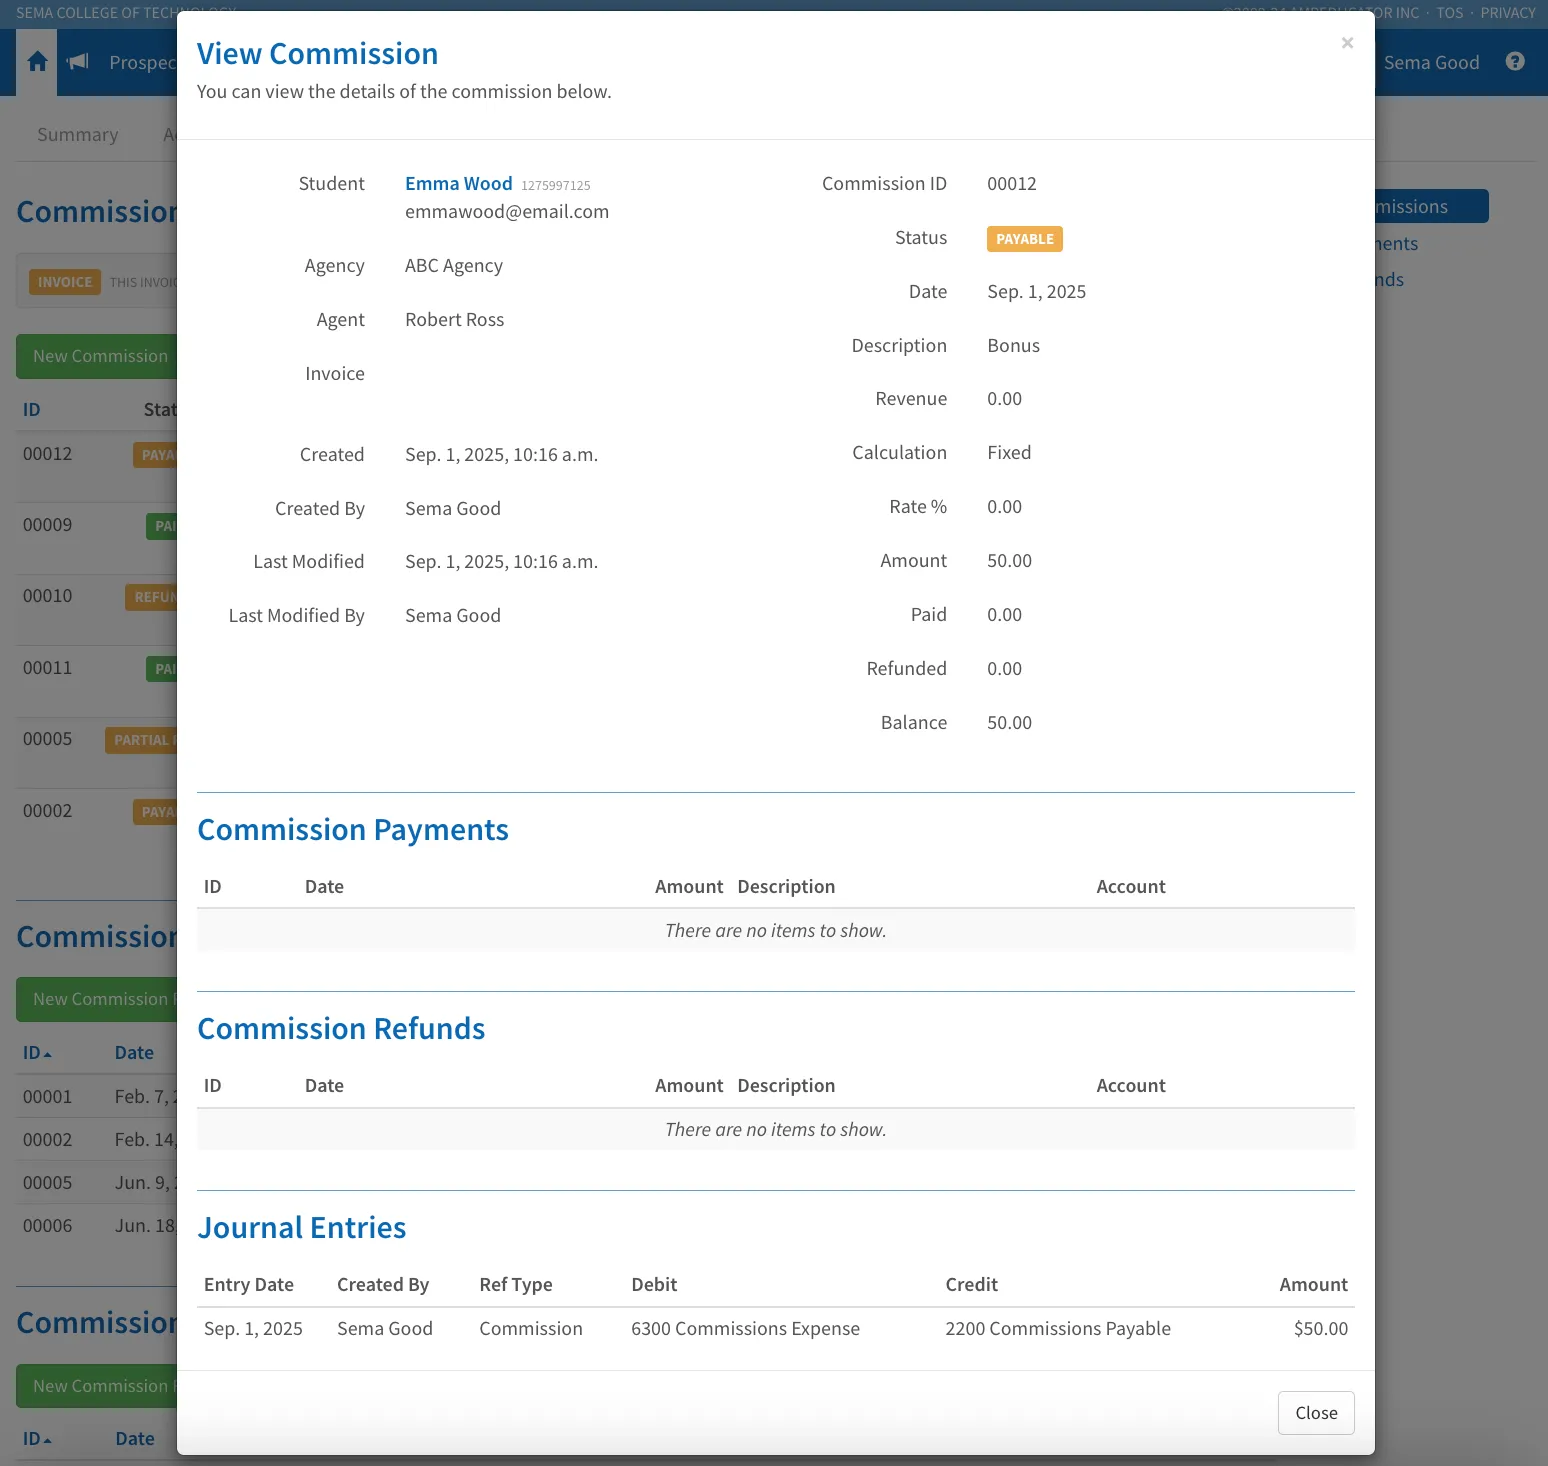
You’ll also see an audit trail showing who created or last modified the commission and when, along with a breakdown of any Commission Payments, Commission Refunds, and Journal Entries (if applicable).
Edit Commission
The Edit Commission button allows you to update the details of an existing commission. This opens a modal where you can view and modify commission information.
The fields you see may vary depending on whether the commission is linked to an invoice. For invoice-based commissions, certain fields like Revenue and Rate % may be automatically populated or locked to maintain accuracy.
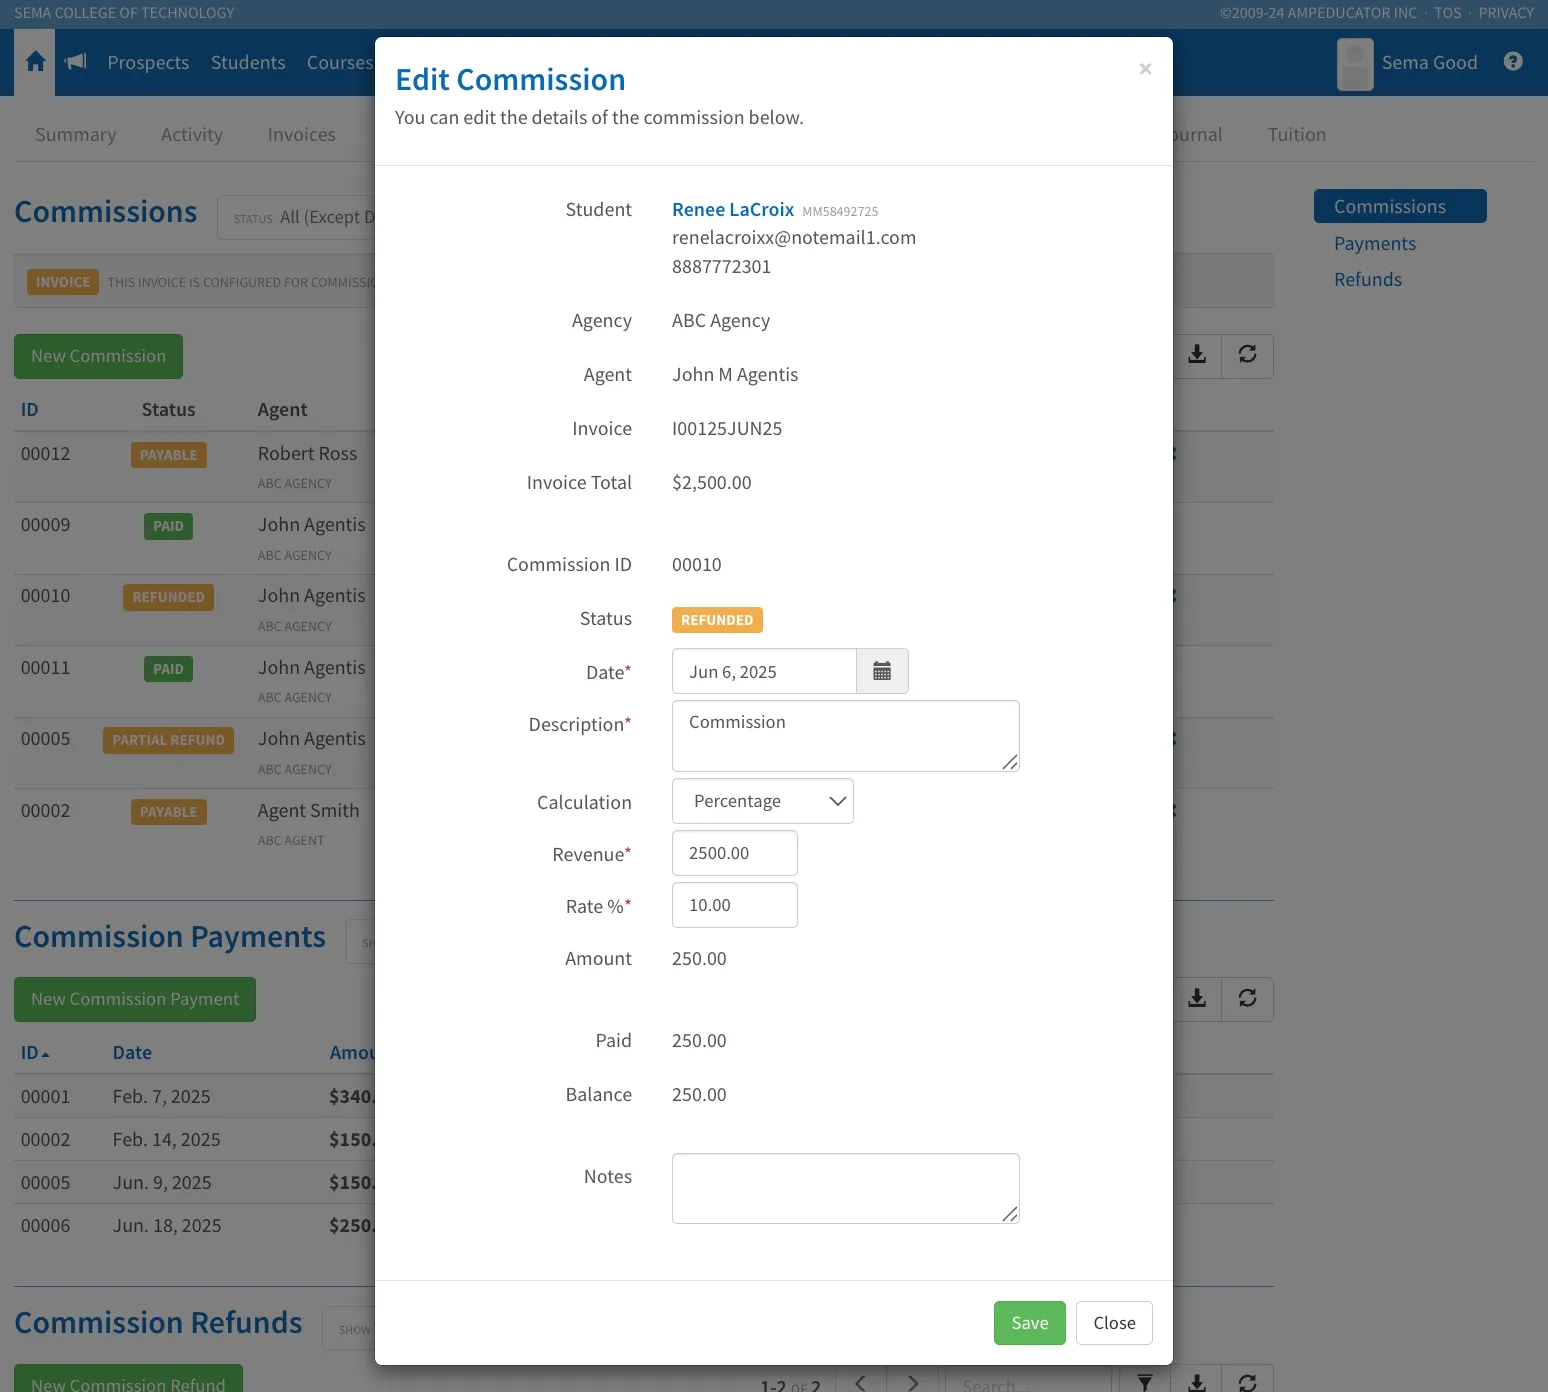
You can typically update:
- Date – Change the commission date if needed
- Description – Update the label or purpose of the commission
- Calculation – Switch between Percentage or Fixed as needed
- Revenue / Rate % / Amount – Edit these fields unless locked by an associated invoice
- Notes – Add or revise internal notes for tracking purposes
Once you’ve made your changes, click Save to update the commission or Close to exit without saving.
New Commission Payment
Clicking New Commission Payment opens a modal where you can record a payment toward a commission.
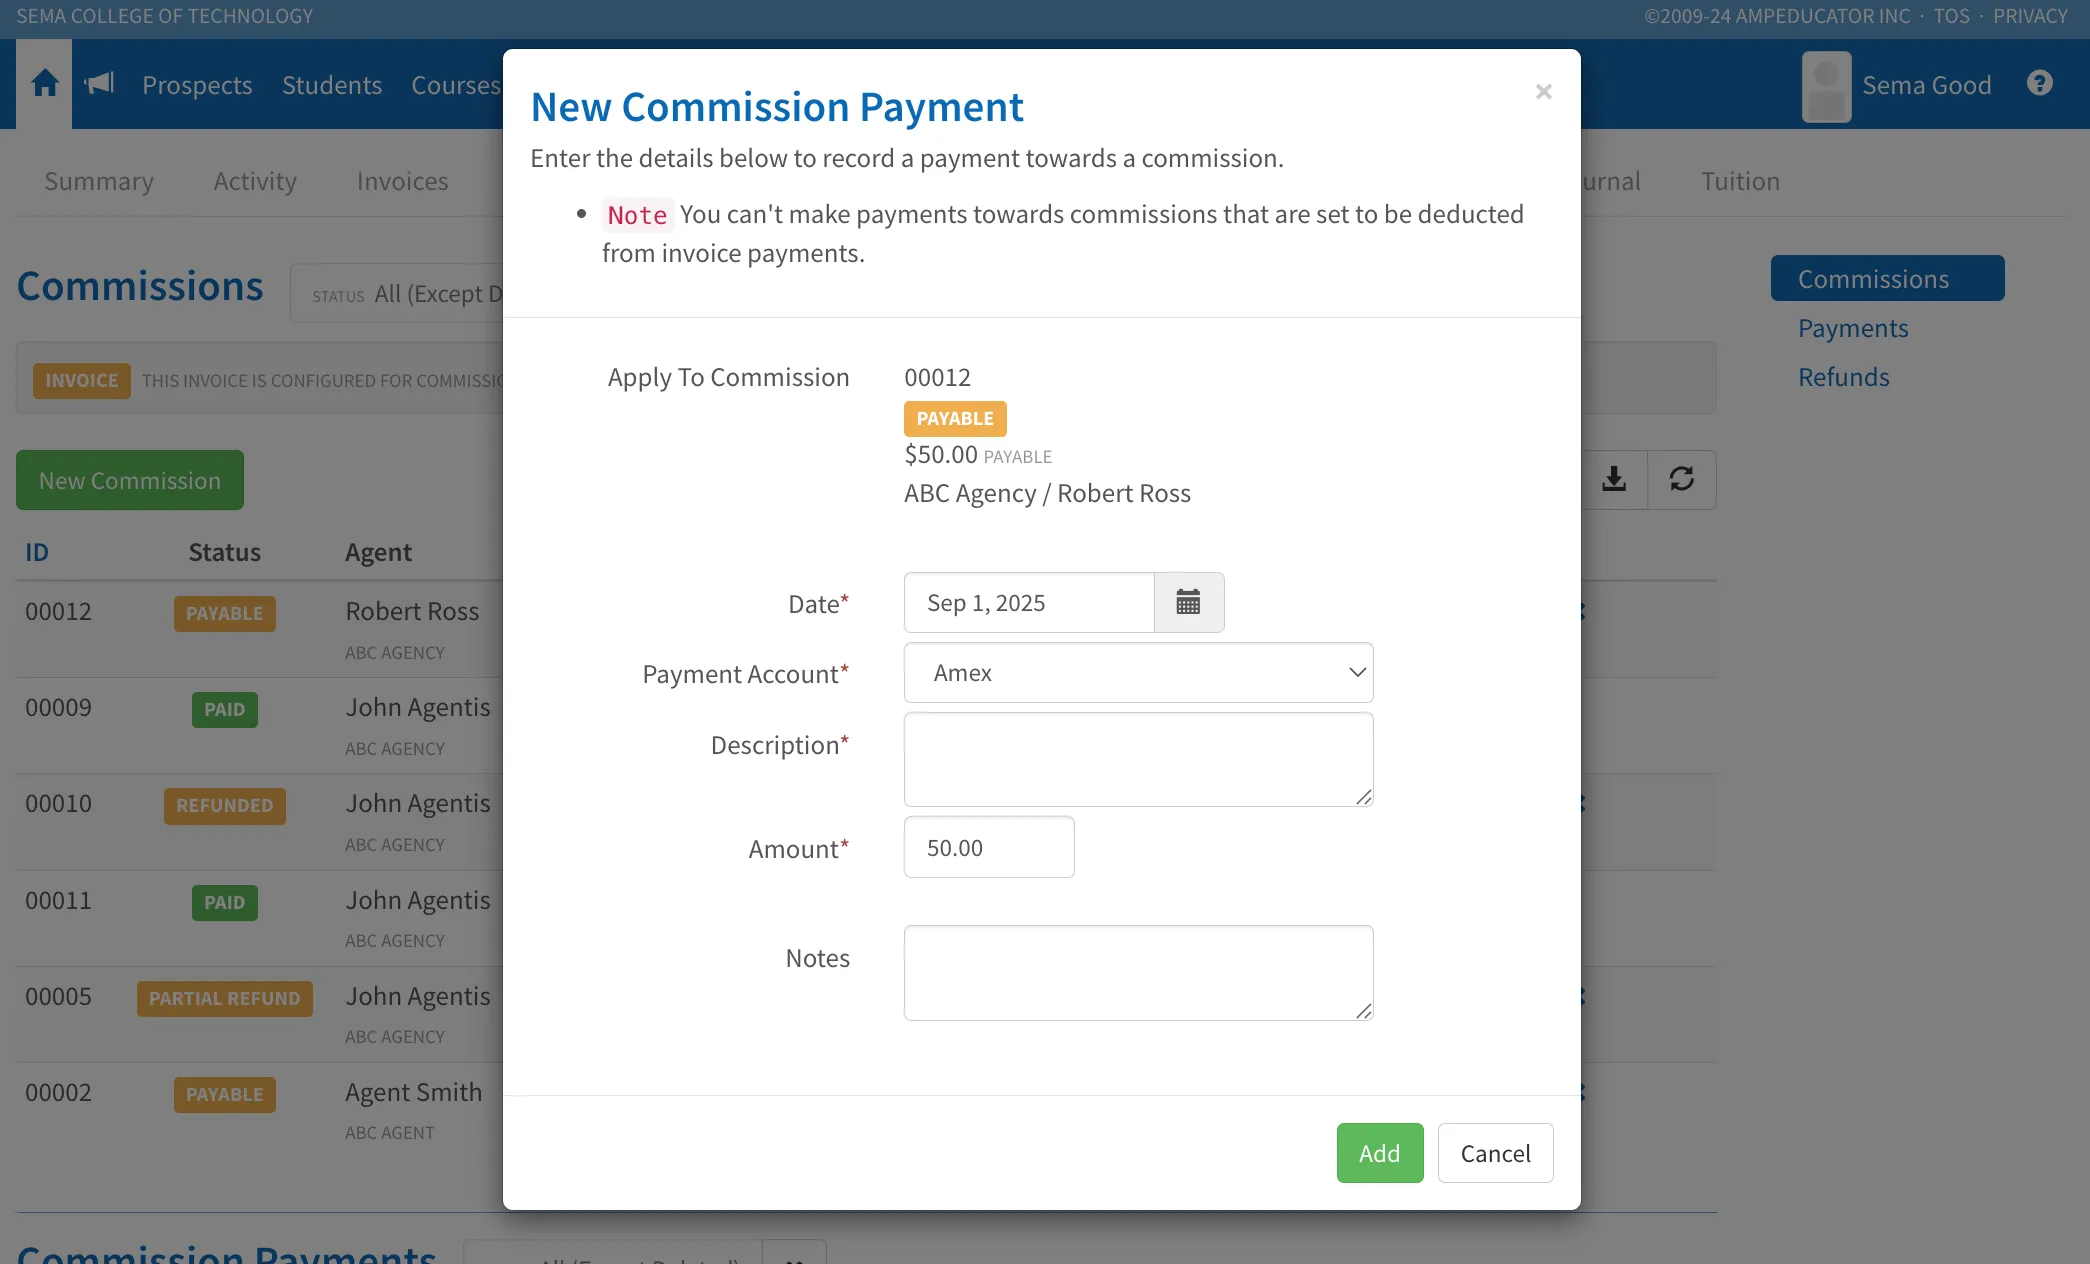
At the top, you'll see which commission the payment is being applied to. If the commission is configured to be automatically deducted from an invoice payment, a message will appear letting you know that manual payments are not allowed.
To complete the form, enter the following:
- Date – The date the commission payment was made
- Payment Account – Choose the payment method (e.g. Cheque, Bank Transfer)
- Description – Add a note or label for the payment
- Amount – Enter the amount being paid toward the commission (this field defaults to the full balance)
- Notes – Optional field for any internal comments or details
Click Add to save the payment, or Cancel to close the modal without saving.
Delete Commission
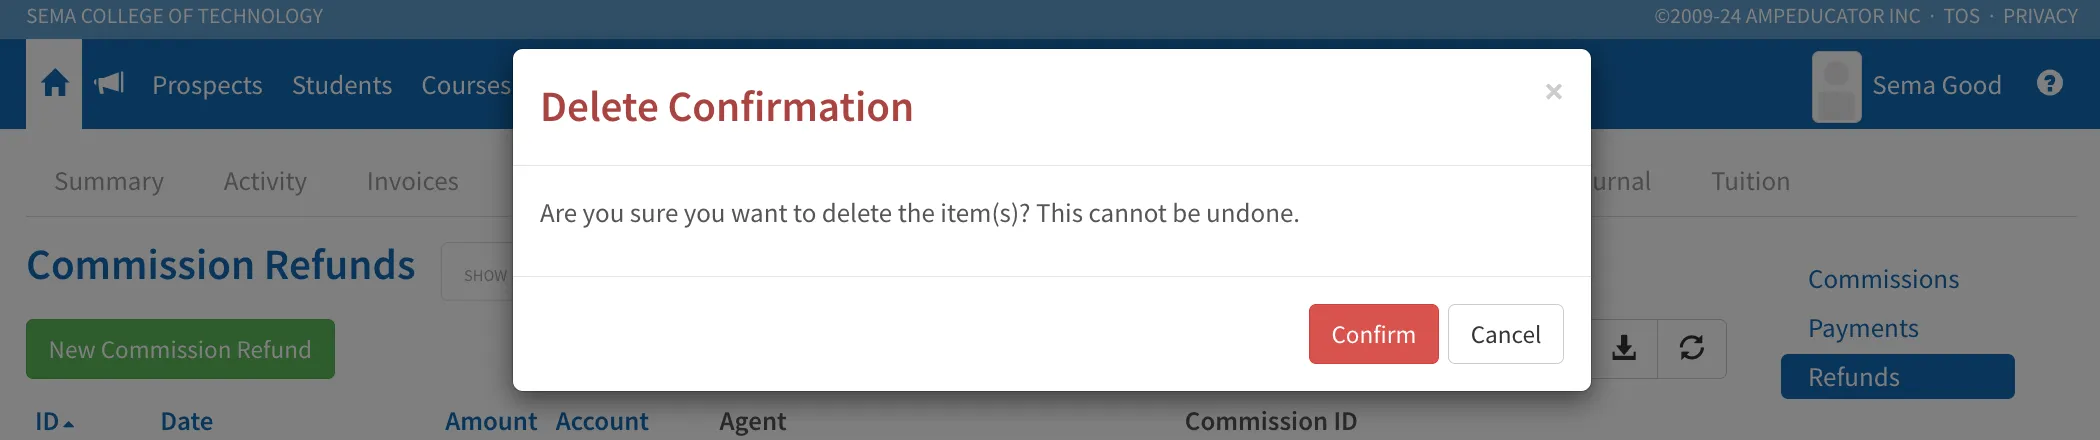
Clicking the Delete Commission button will prompt a Delete Confirmation modal. You’ll be asked to confirm whether you want to delete the selected commission(s).
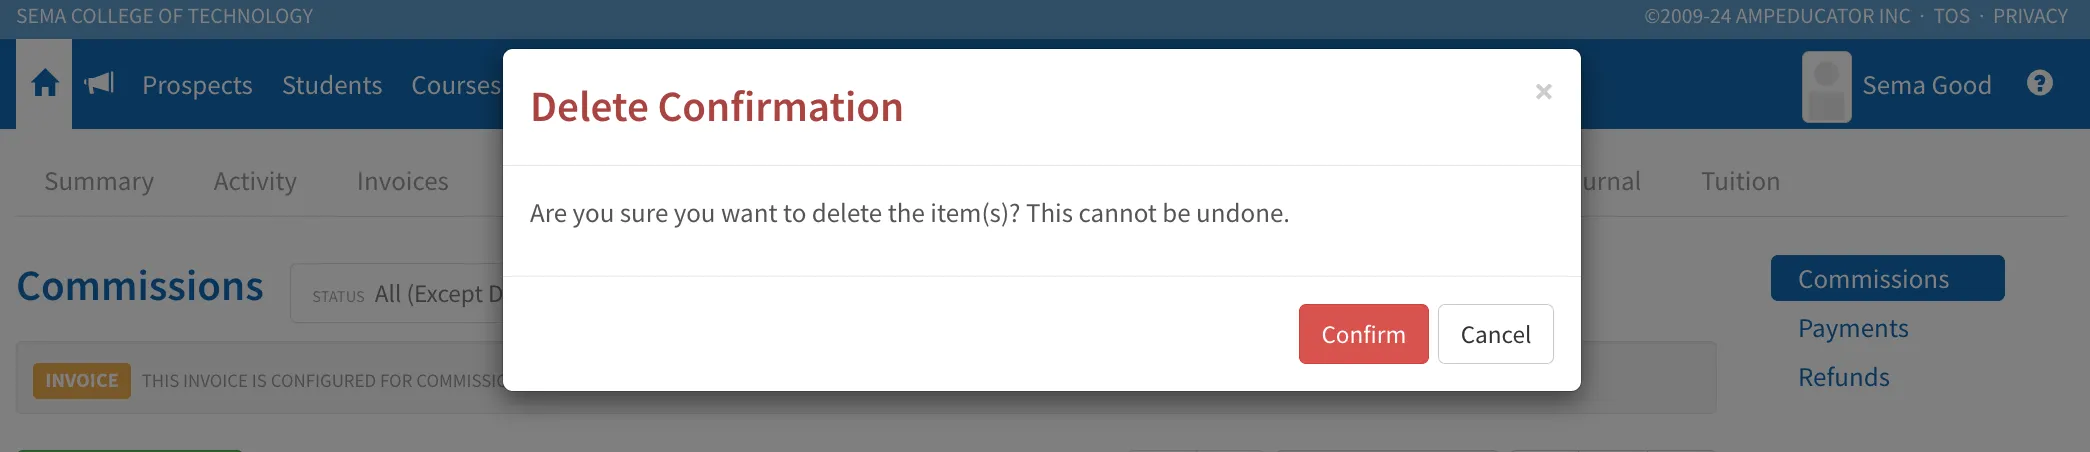
This action cannot be undone, so make sure to review the commission details carefully before clicking Confirm. If you're unsure, click Cancel to close the modal without deleting anything.
Comission Payments Section
The Commission Payments tab allows you to track and manage all payments made to agencies and agents. You’ll see a list of payments that includes the Payment ID, Date, Amount, Account, Agent, and associated Commission ID. This allows for accurate tracking of commission payouts over time.
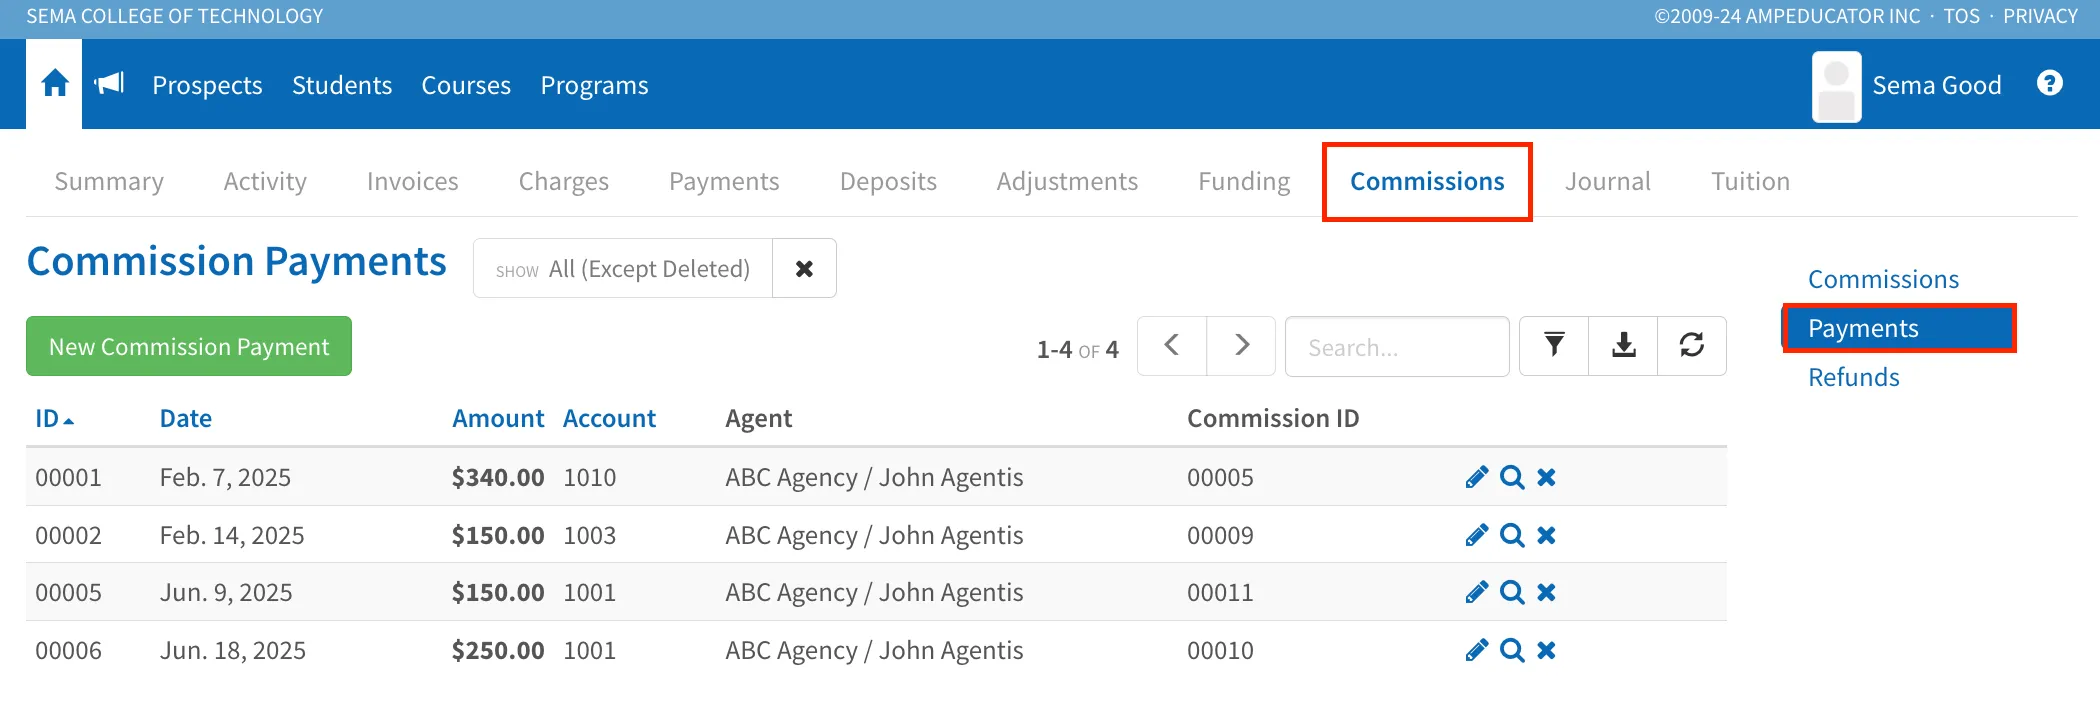
New Commission Payment
Clicking the New Commission Payment button opens a form where you can record a payment toward a specific commission.
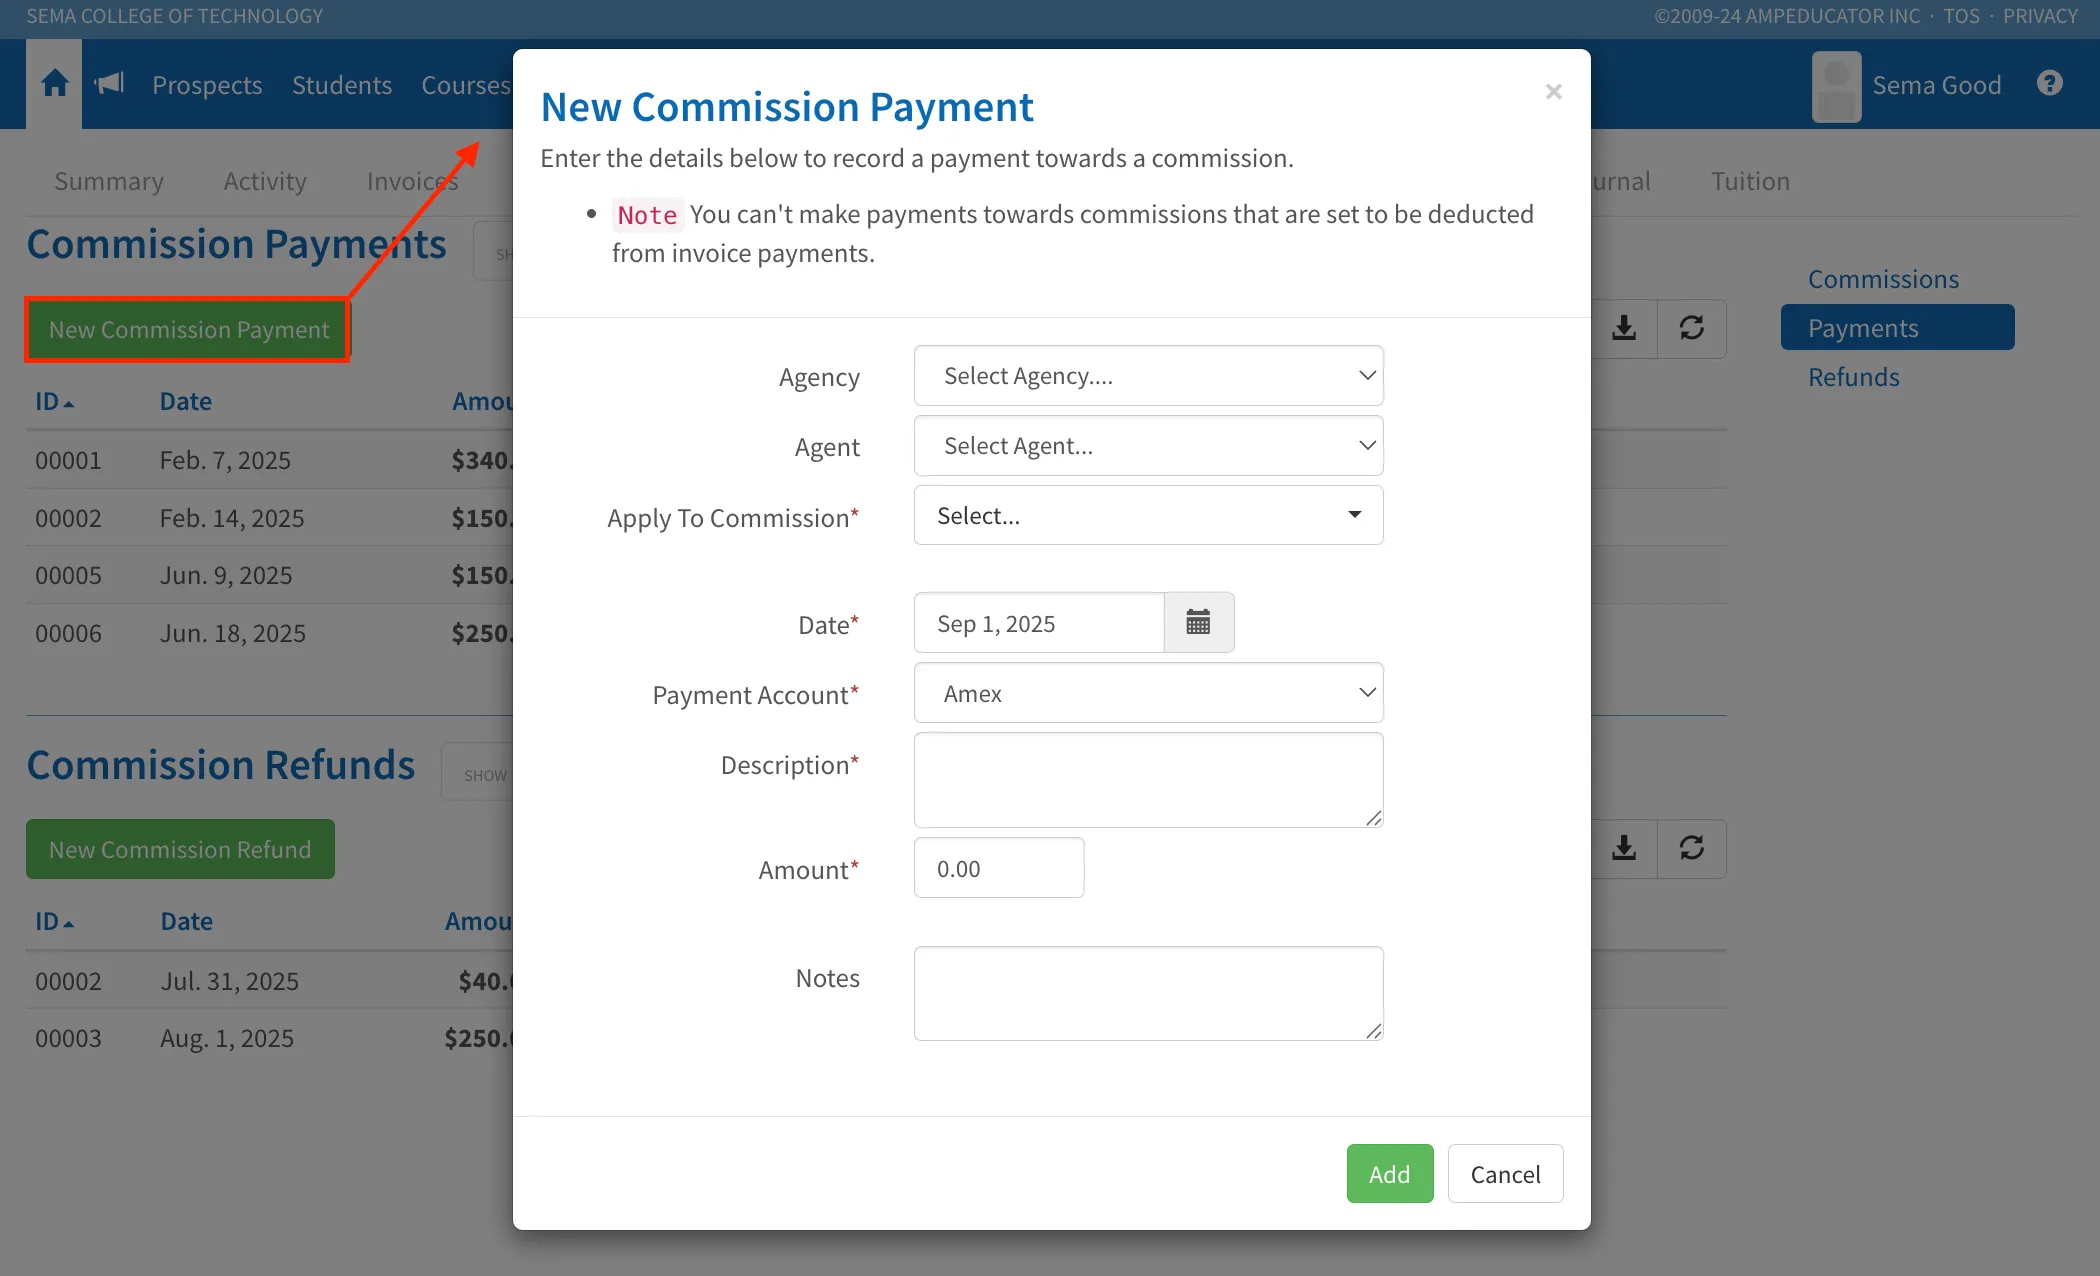
Start by selecting the Agency and Agent, then choose the commission you want to apply the payment to. Next, choose the Date, select the Payment Account, and enter a short Description. Then, fill in the Amount and any optional Notes.
When you're done, click Add to save the payment, or Cancel to discard your changes.
Note: Payments cannot be made toward commissions that are set to be automatically deducted from invoice payments.
Quick Action Icons (Payments Section)
Each entry in the Payments section includes a set of quick action icons on the right side of the row. These icons allow you to manage commissions directly without navigating away from the list.
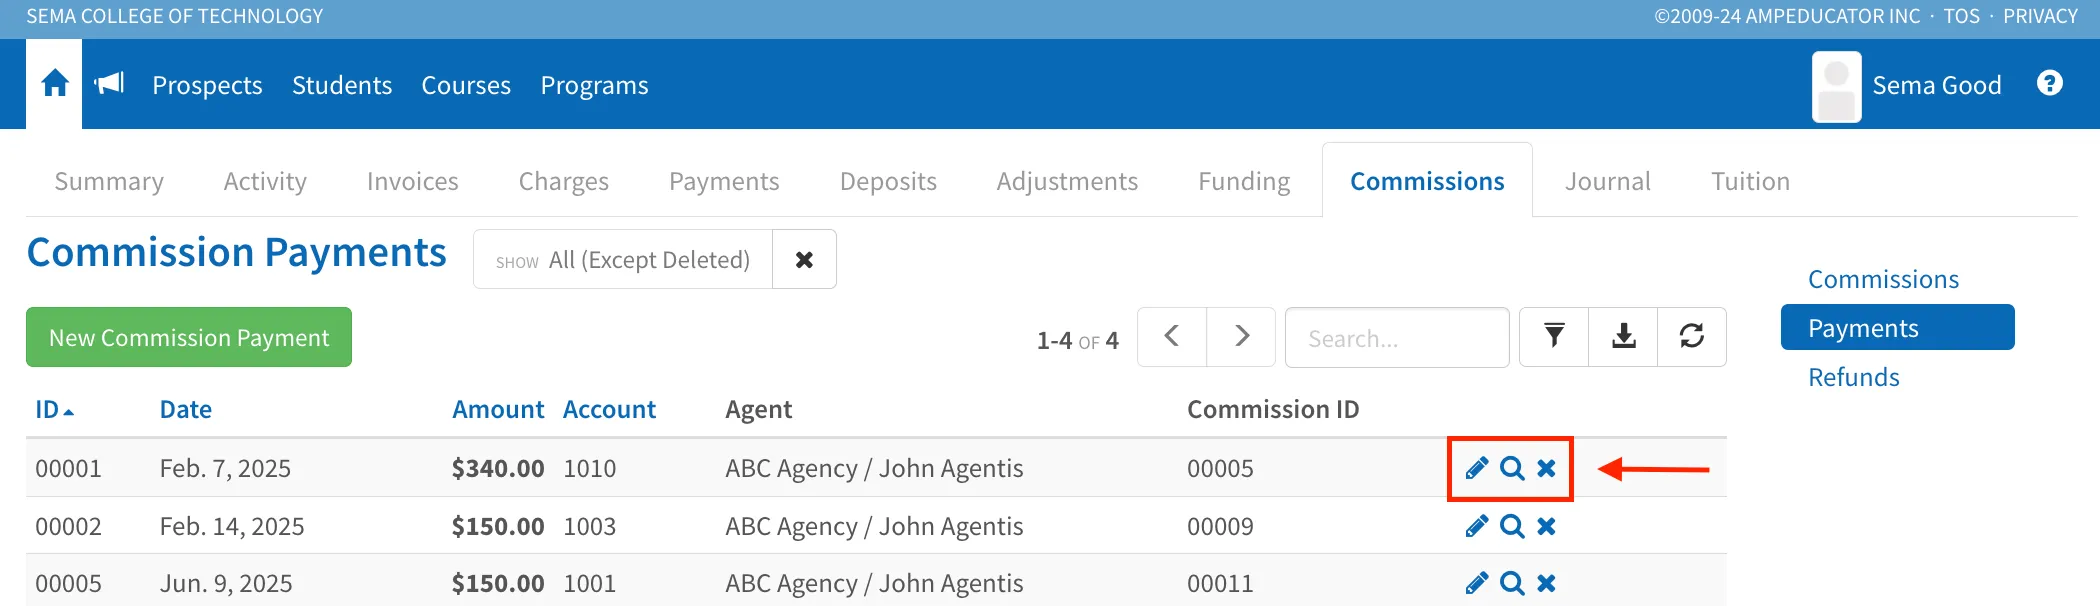
Edit Commission Payment
Clicking the Edit Commission Payment icon opens a modal where you can update the payment details, including the date, payment account, description, amount, and any notes.
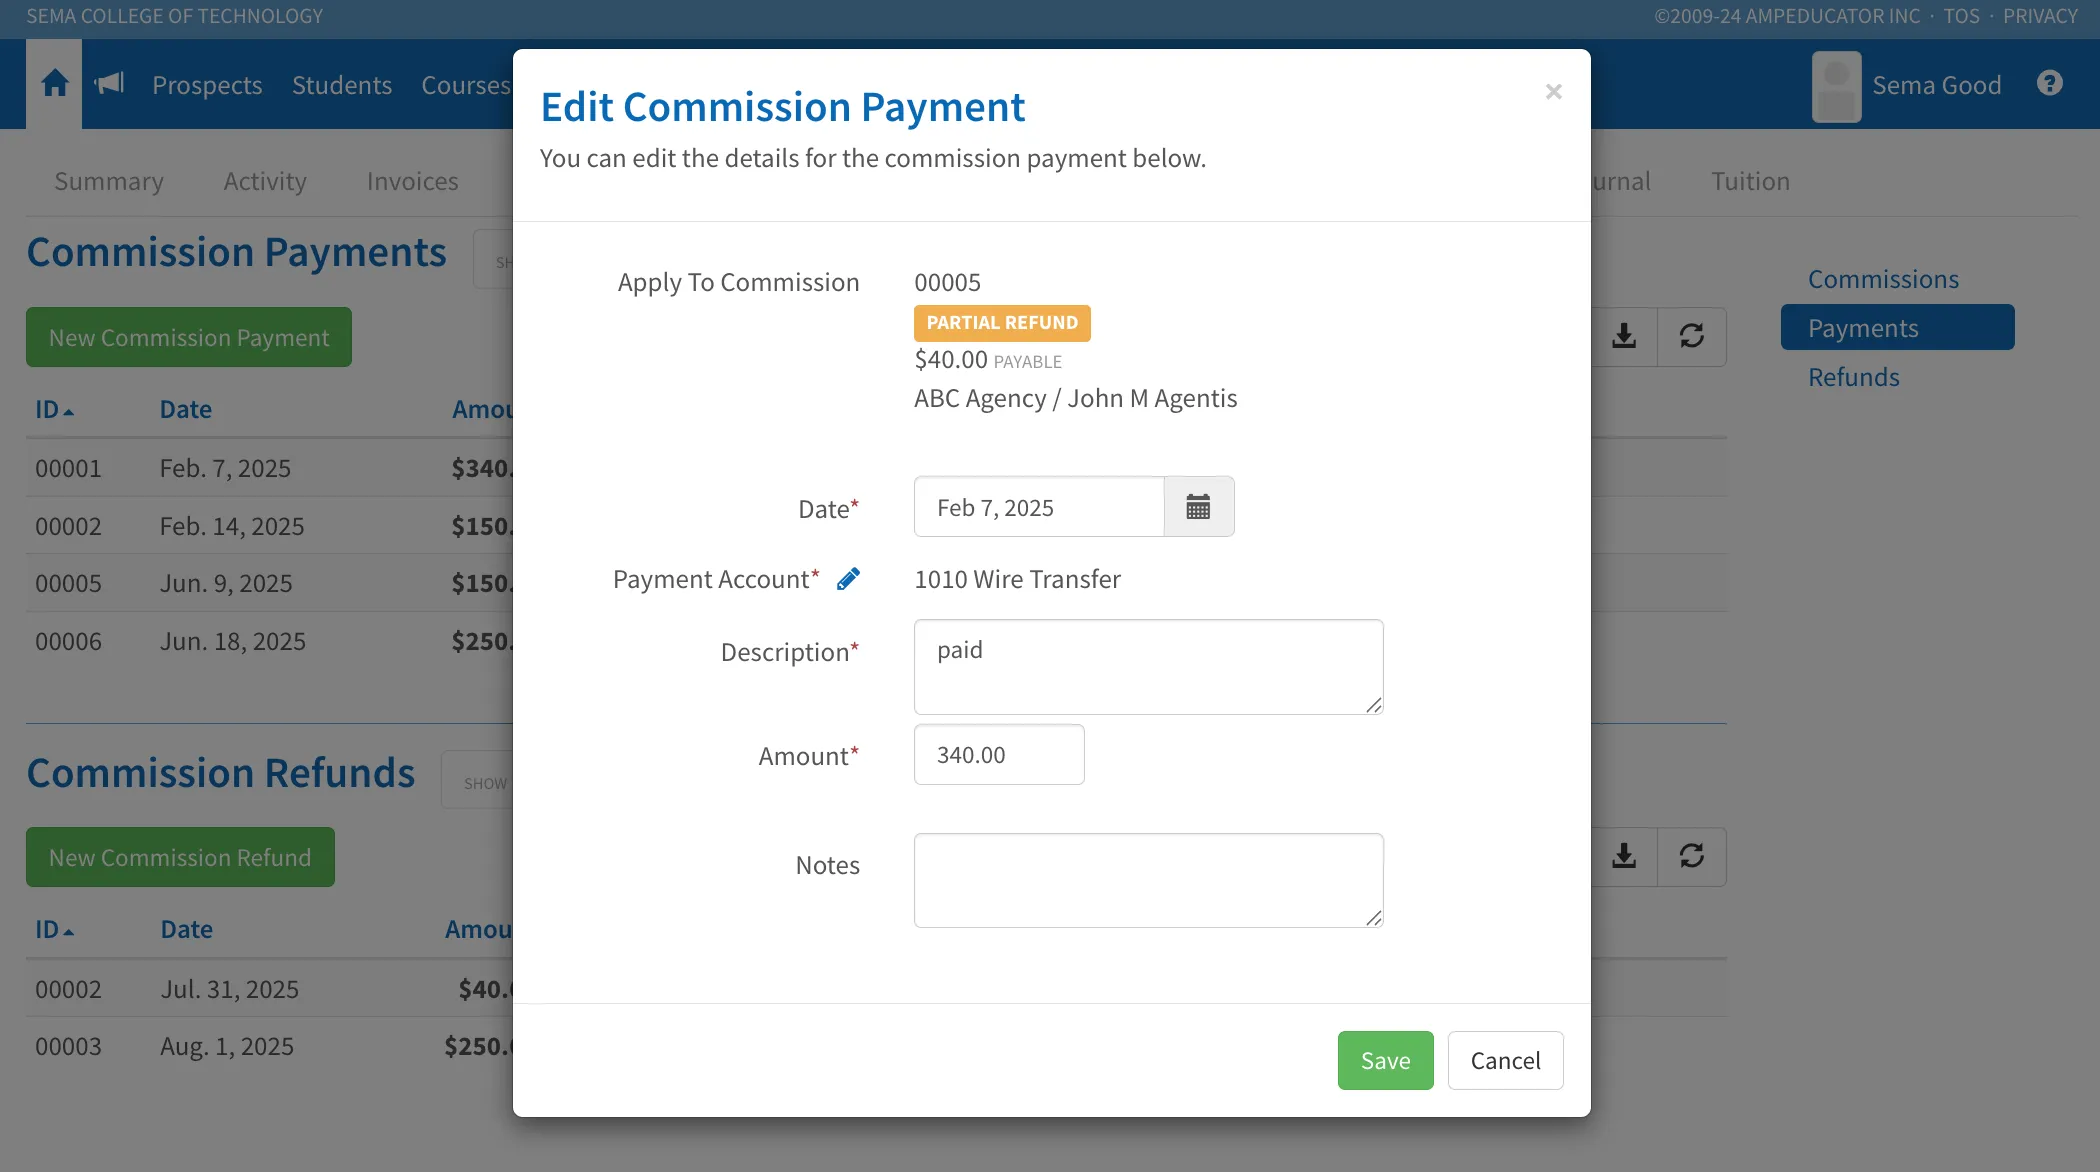
You cannot change which commission the payment is applied to from this screen.
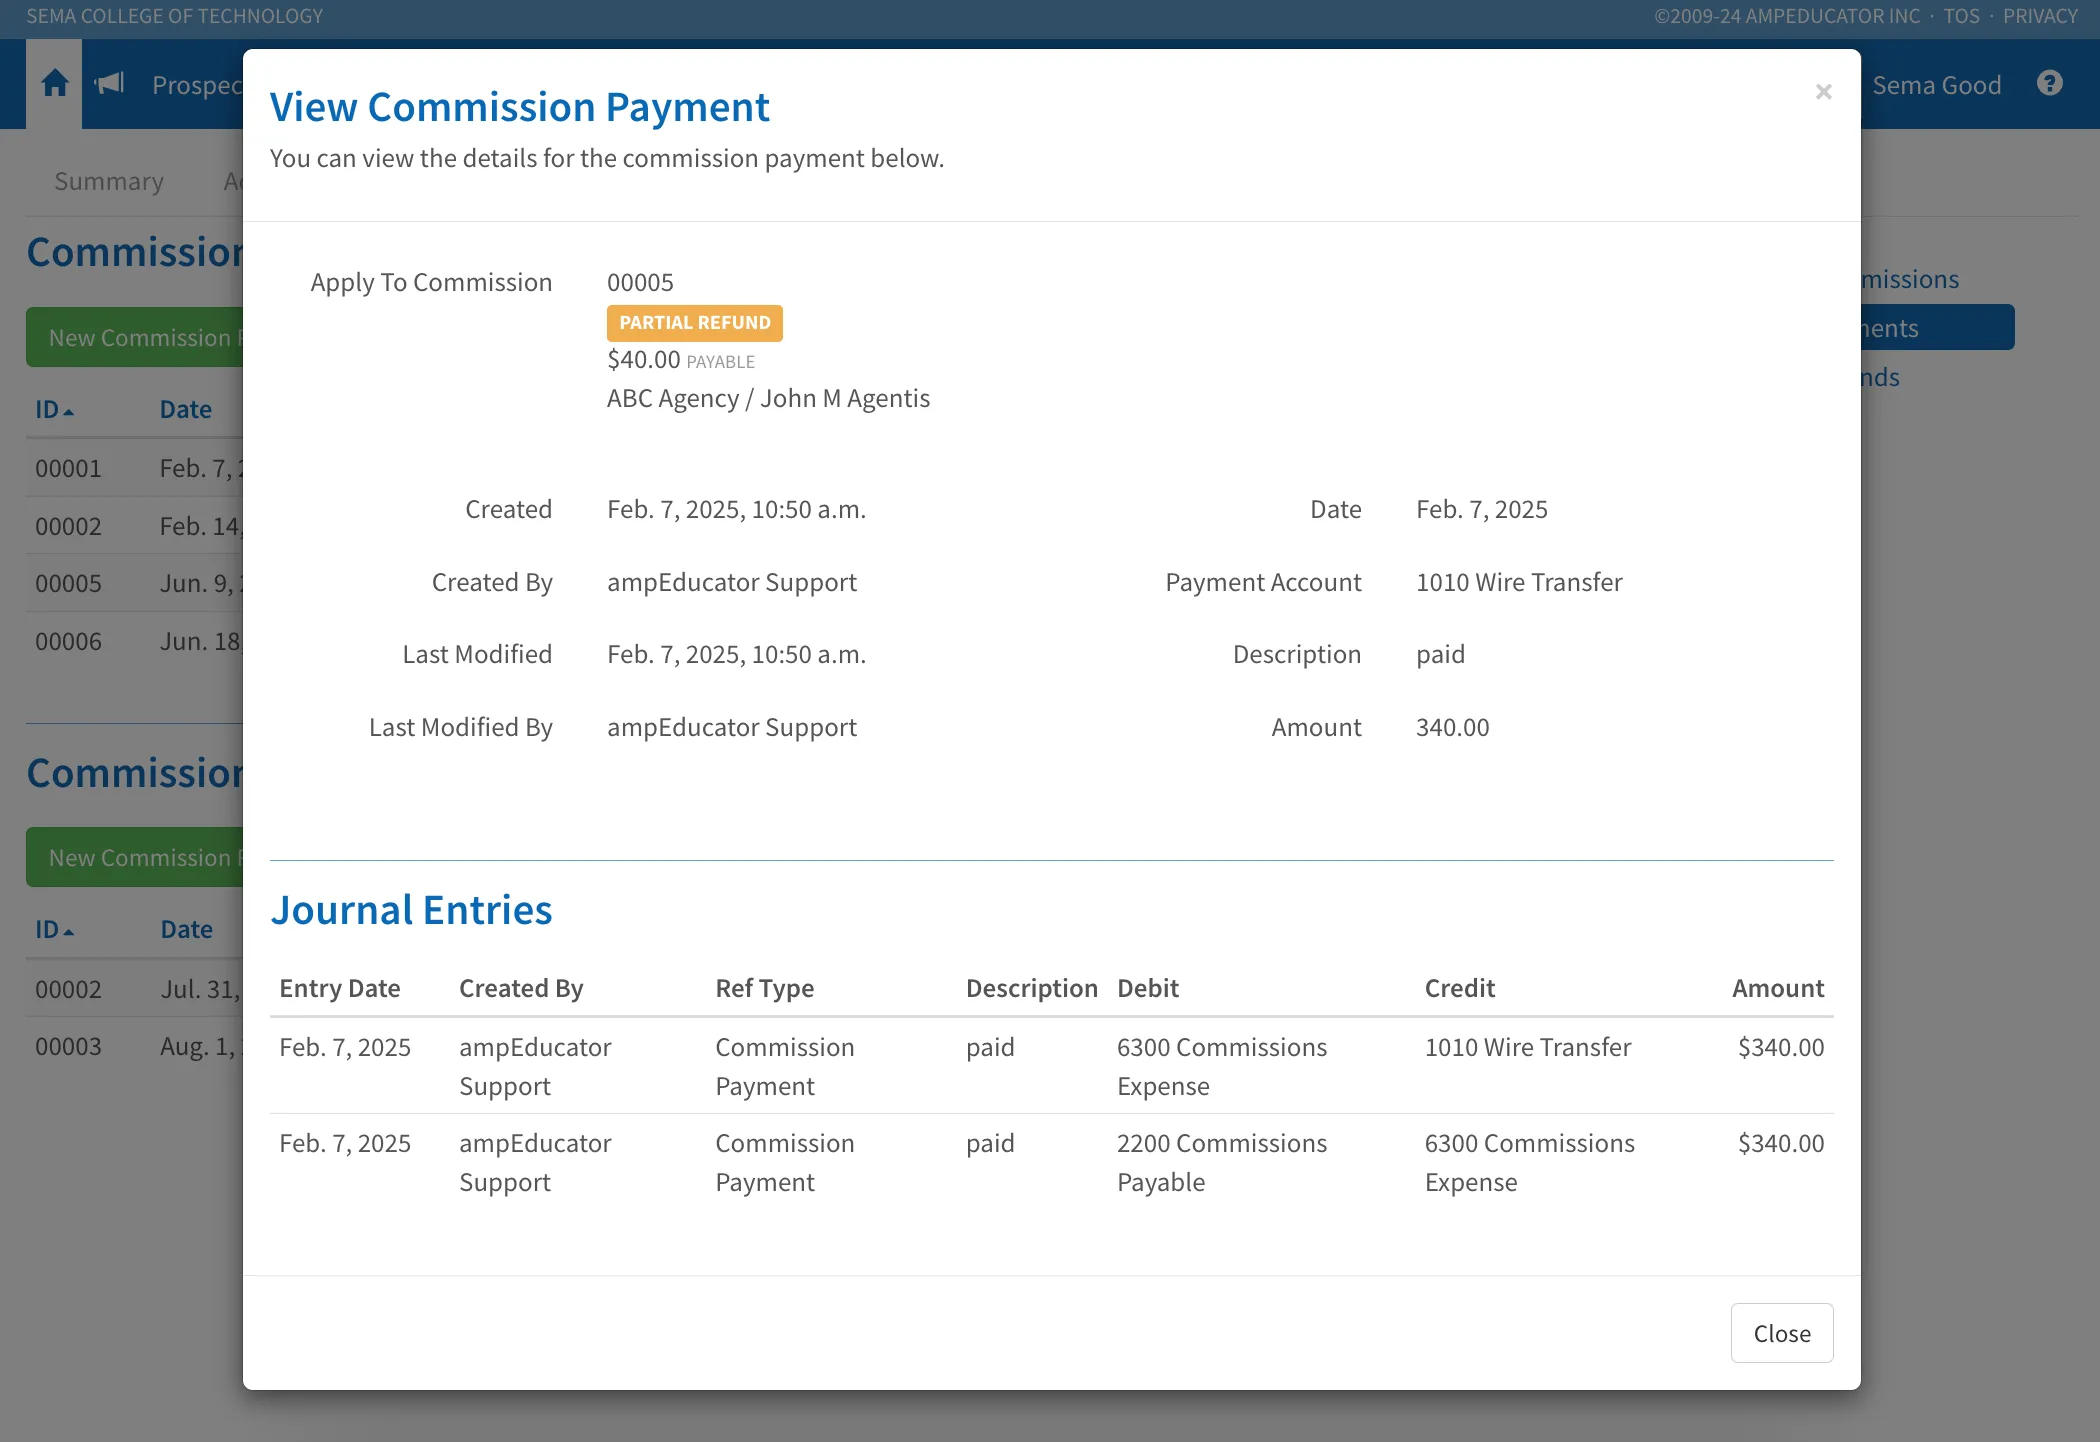
View Commission Payment
Clicking the View Commission Payment icon opens a read-only modal showing full payment details, including a breakdown of any associated journal entries.
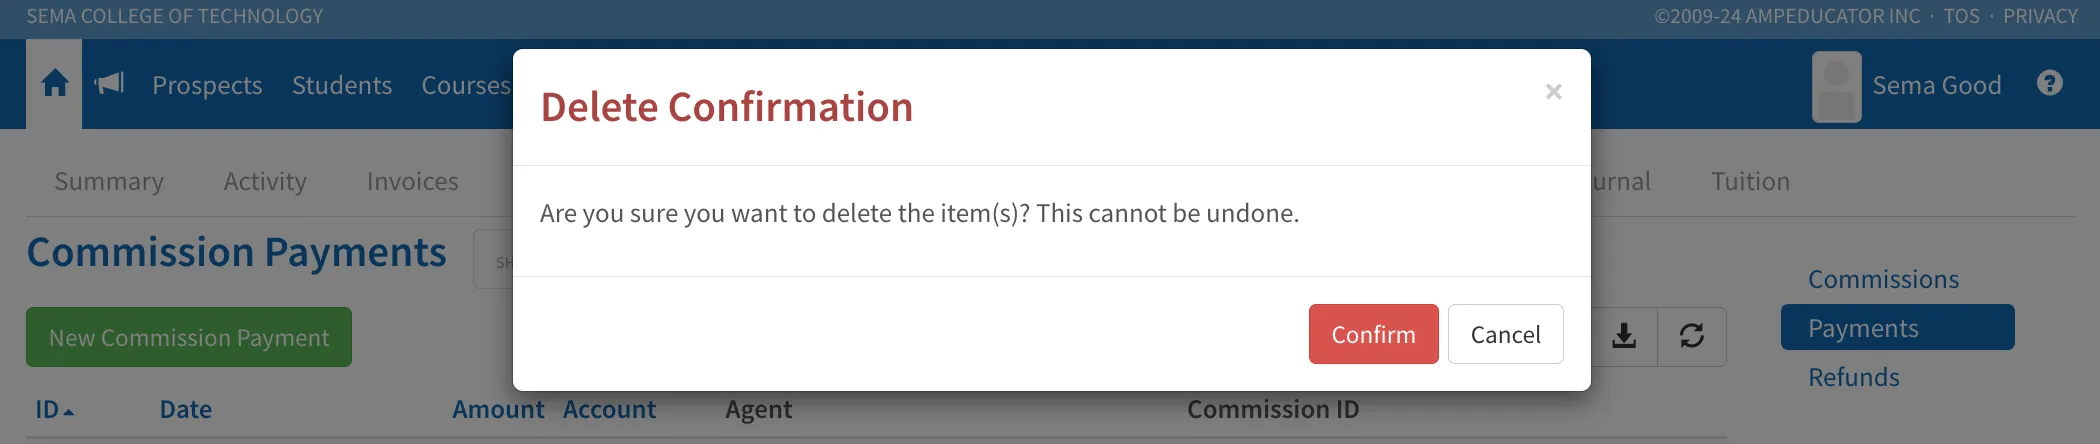
Delete Commission Payment
Clicking the Delete Commission Payment icon prompts a confirmation window. If confirmed, the payment will be permanently removed. This action cannot be undone.
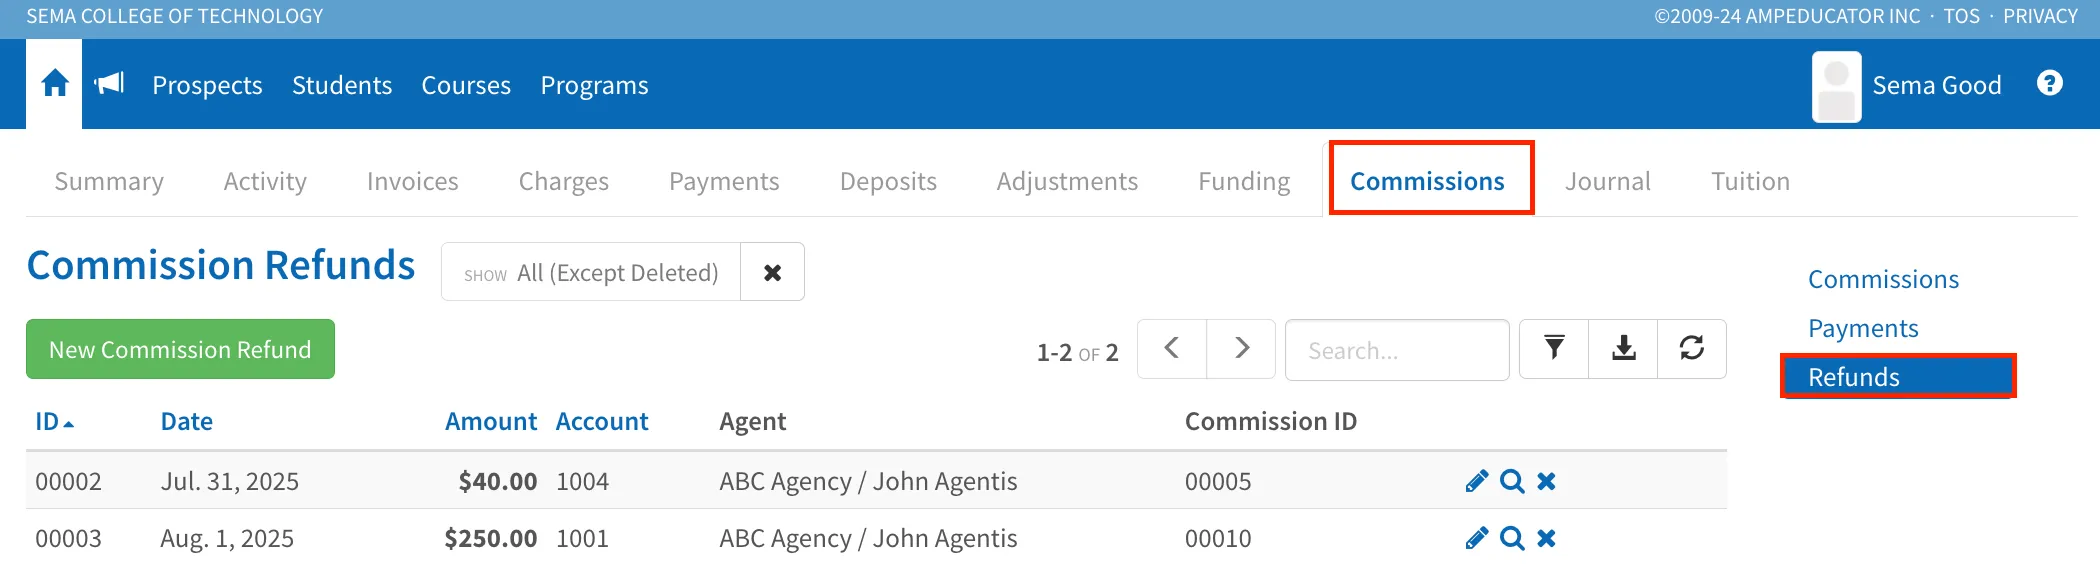
Commission Refunds Section
The Commission Refunds area lists all commission refunds issued to agencies or agents. Each refund is recorded with a unique ID, date, amount, account, agent details, and the related commission ID.
New Commission Refund
To issue a refund, click the green New Commission Refund button. This opens a modal where you can enter all the required details:
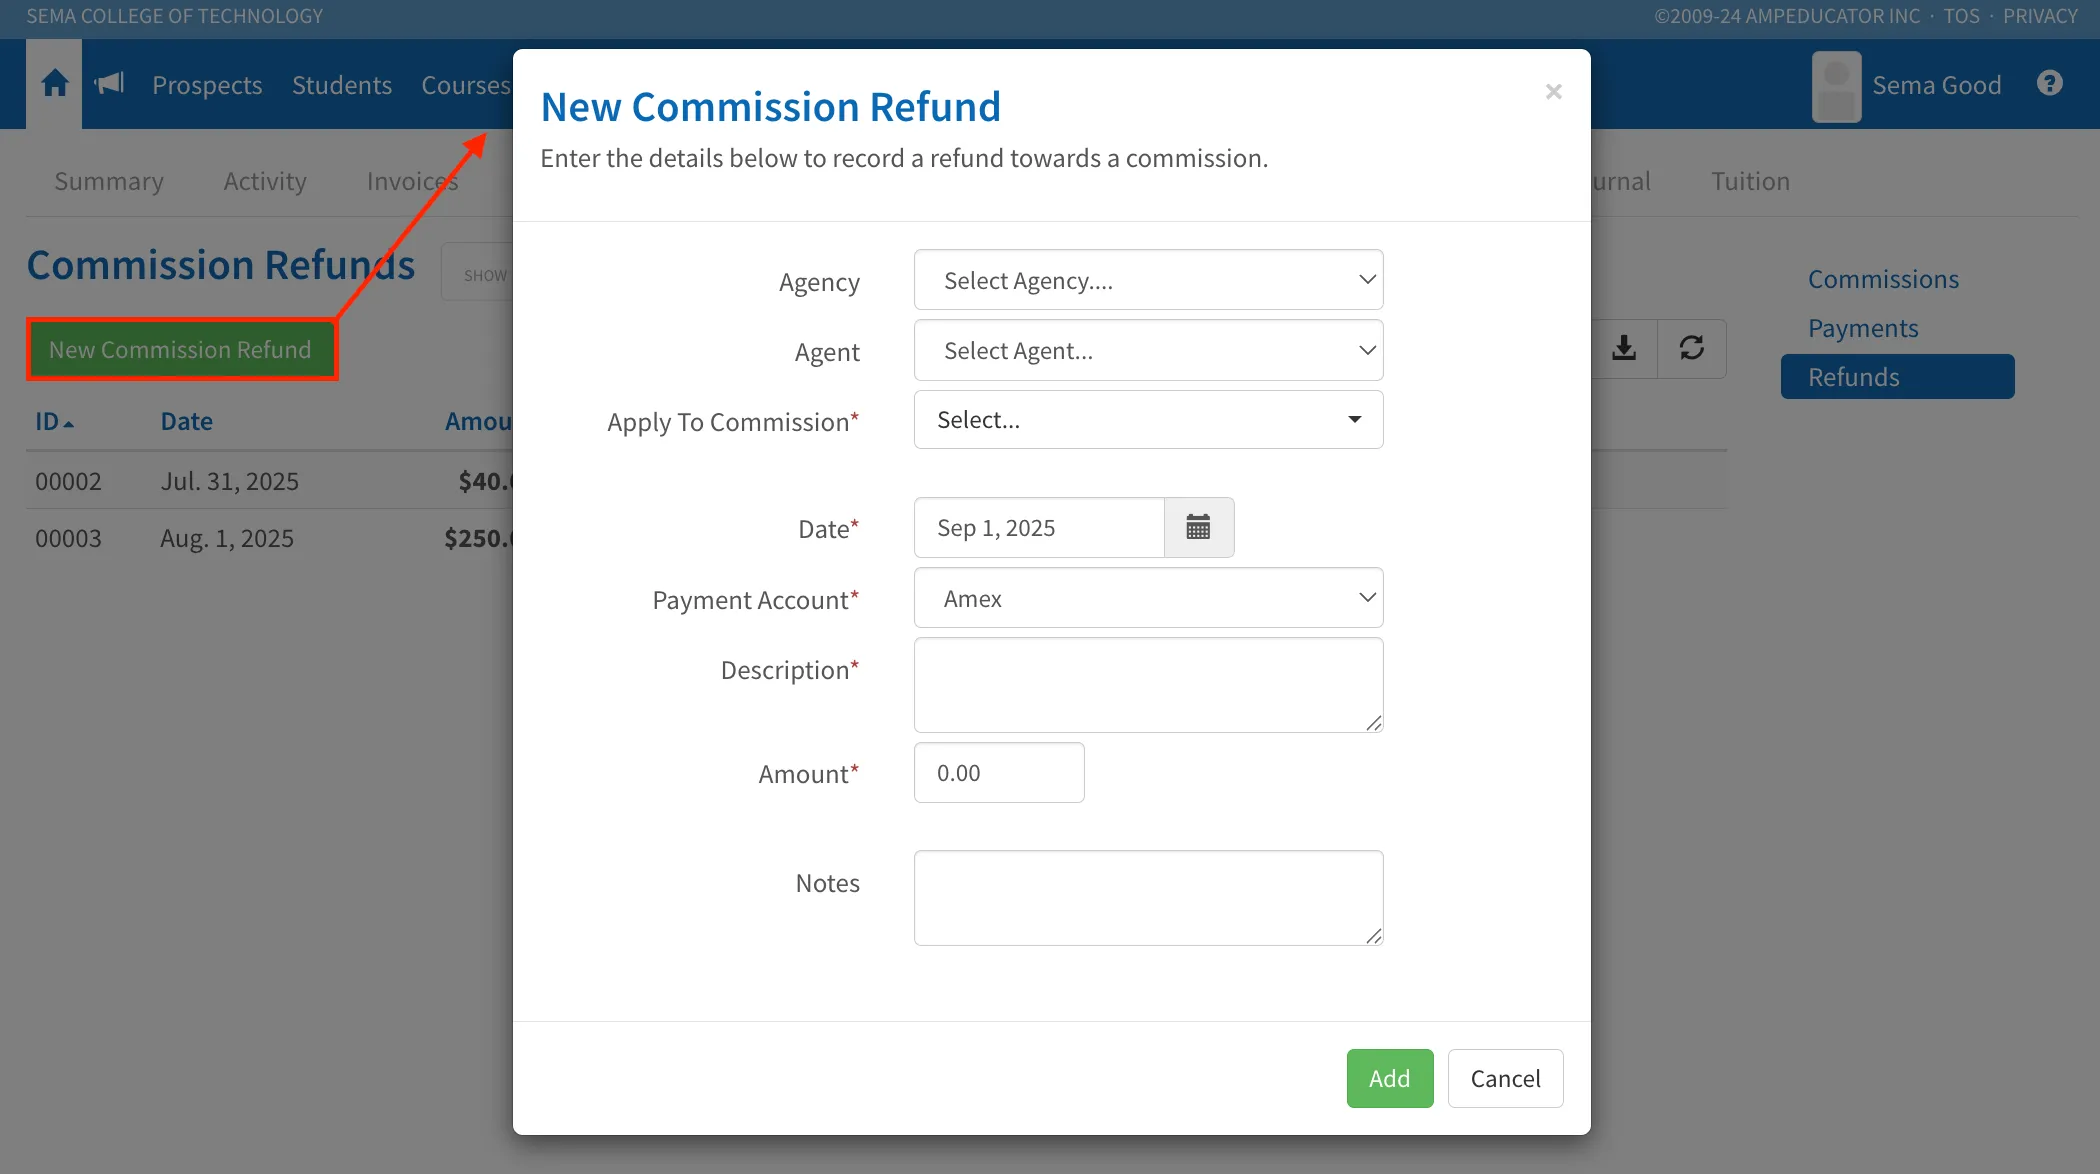
- Agency / Agent: Choose the agency and agent the refund is being issued to.
- Apply To Commission: Select the original commission that the refund should be applied to.
- Date: Set the refund date.
- Payment Account: Select the account from which the refund will be issued.
- Description: Enter a brief explanation for the refund.
- Amount: Enter the refund amount.
- Notes: (Optional) Add any additional notes for internal reference.
Click Add to save and process the refund.
Quick Action Icons (Refunds Section)
Once Commission Refunds have been created, they will appear in a list within the Refunds tab. To the right of each refund entry, you’ll see a set of quick action icons. These allow you to quickly edit, view, or delete a refund without opening the full commission.
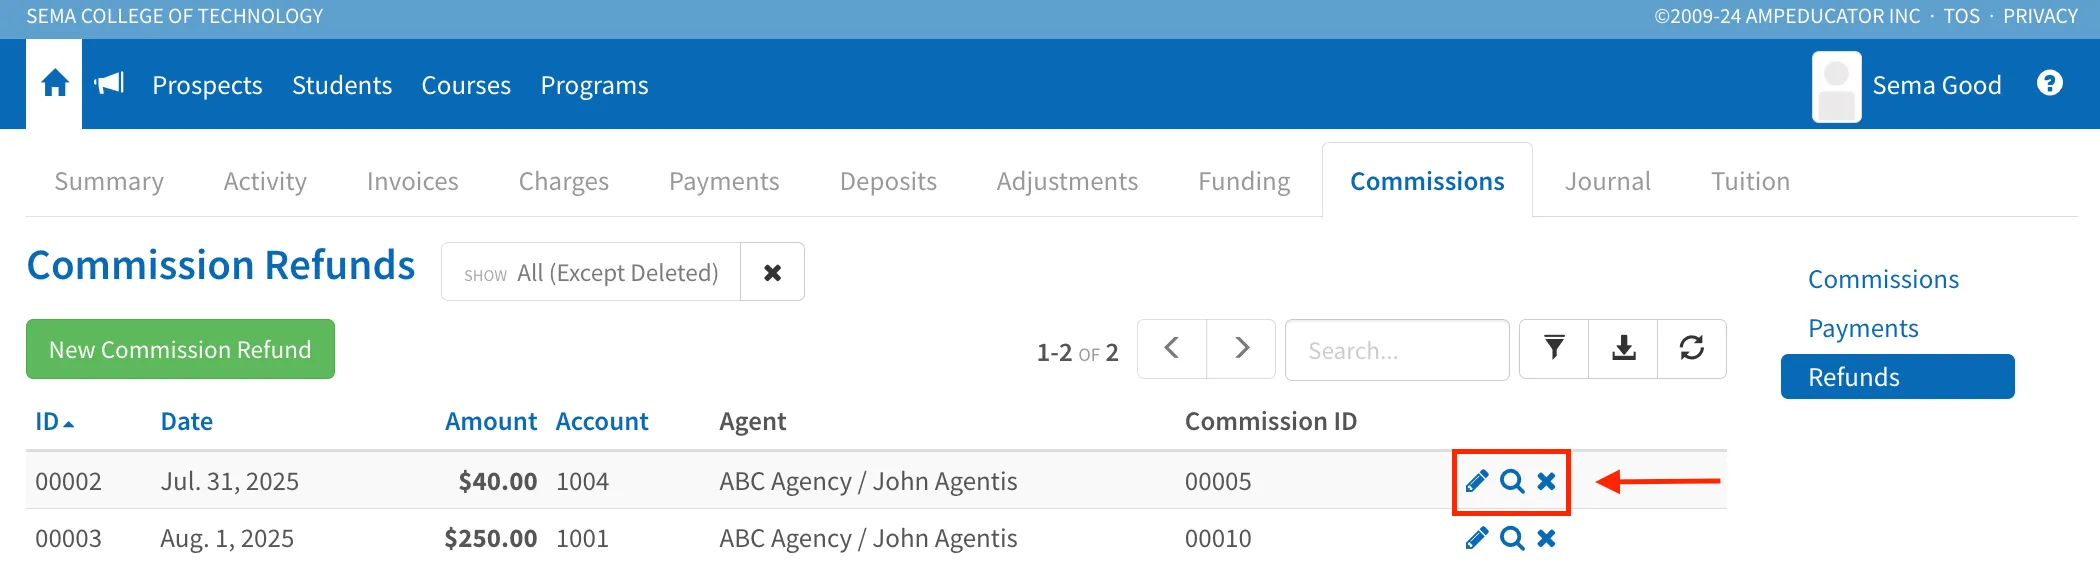
Edit Commission Refund
Clicking the Edit Commission Refund icon opens a modal where you can update the details of the refund.
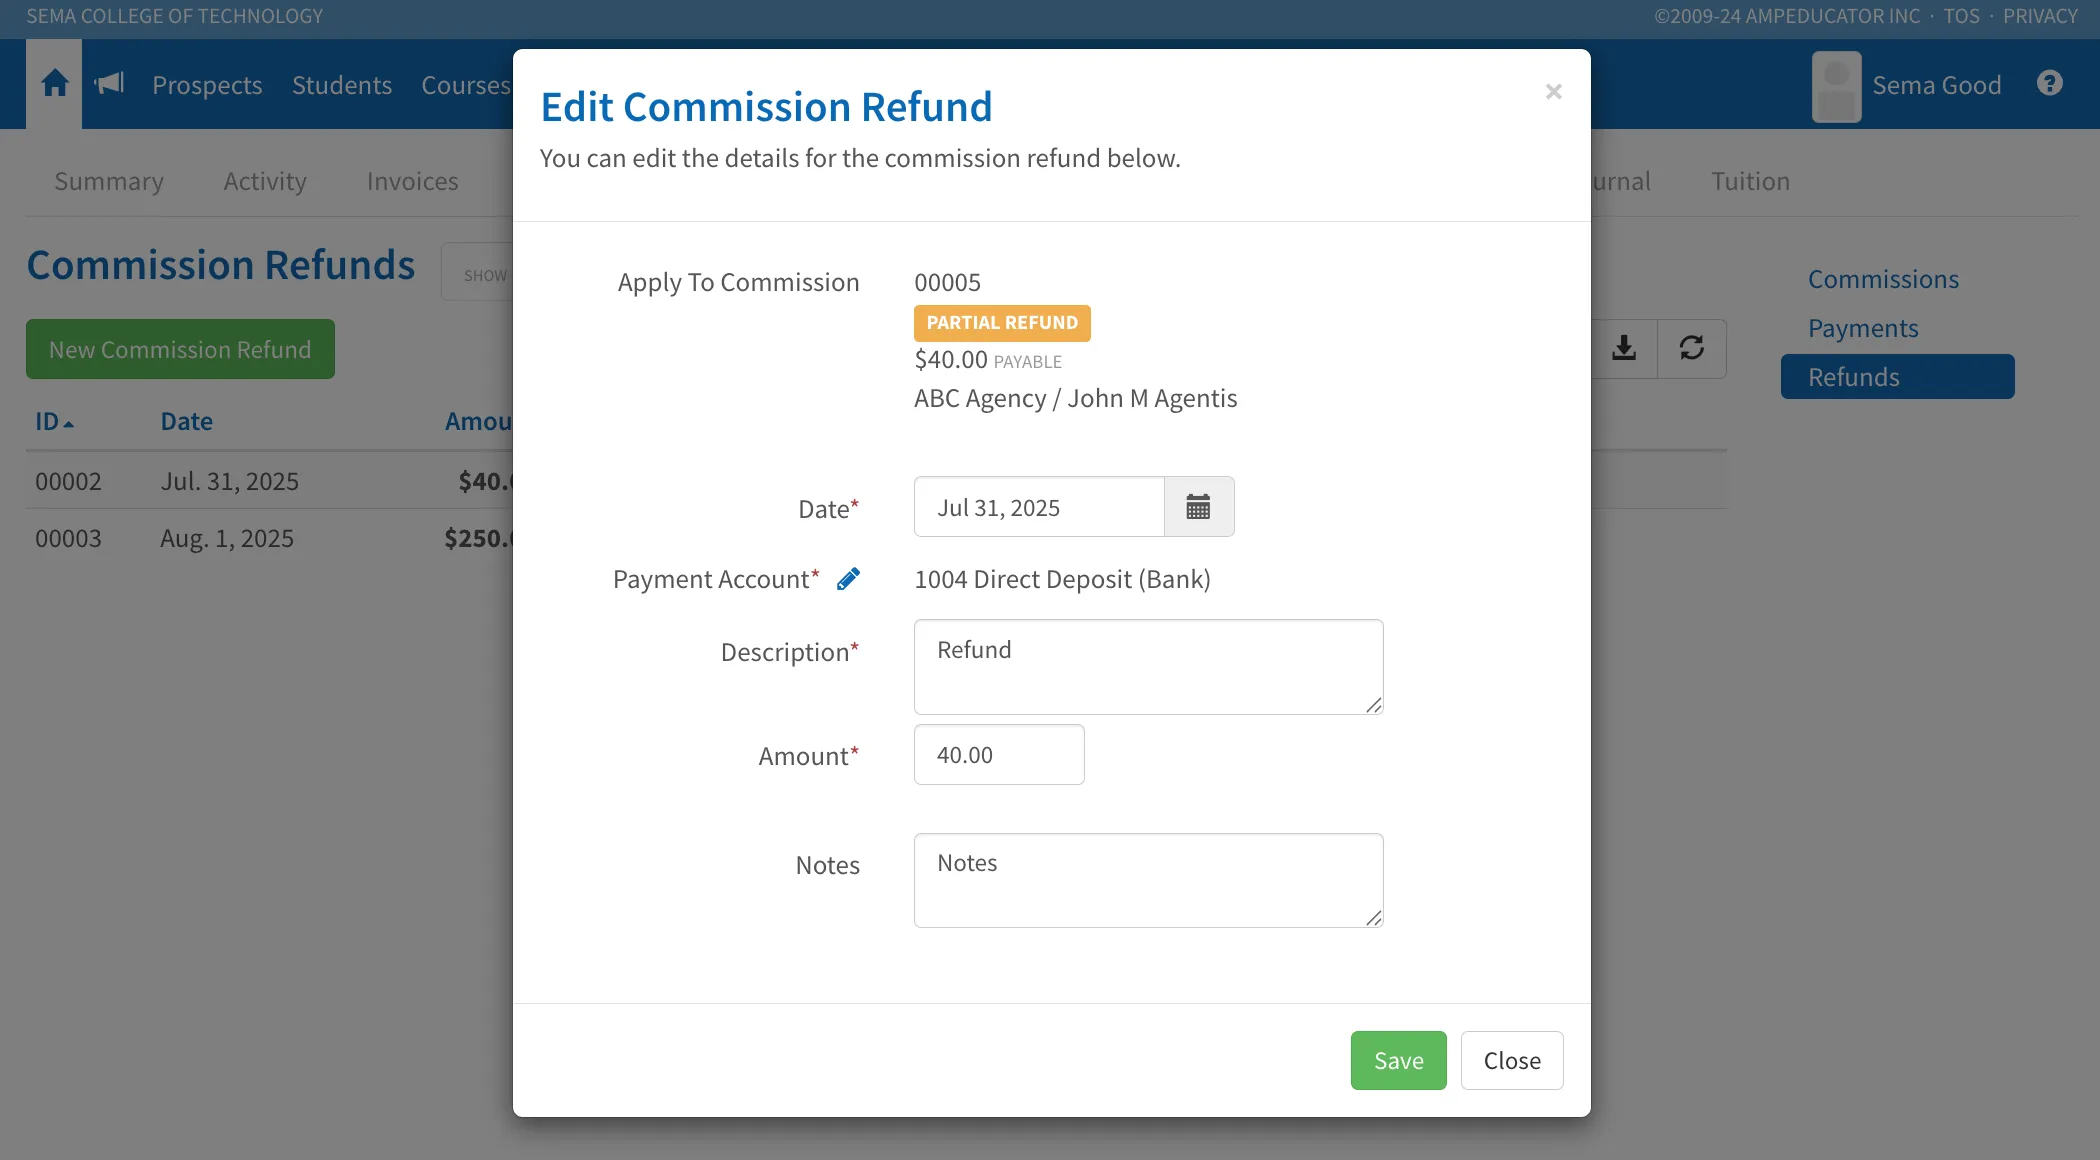
You can change the date, select a different payment account, update the amount, or revise the description and notes. When you're done, click Save to apply your changes.
View Commission Refund
The View Commission Refund icon opens a read-only version of the refund details. This includes the associated commission, payment account, amount, description, and any notes. You’ll also see when the refund was created and last modified, by whom, and a breakdown of the related journal entries showing debits and credits.
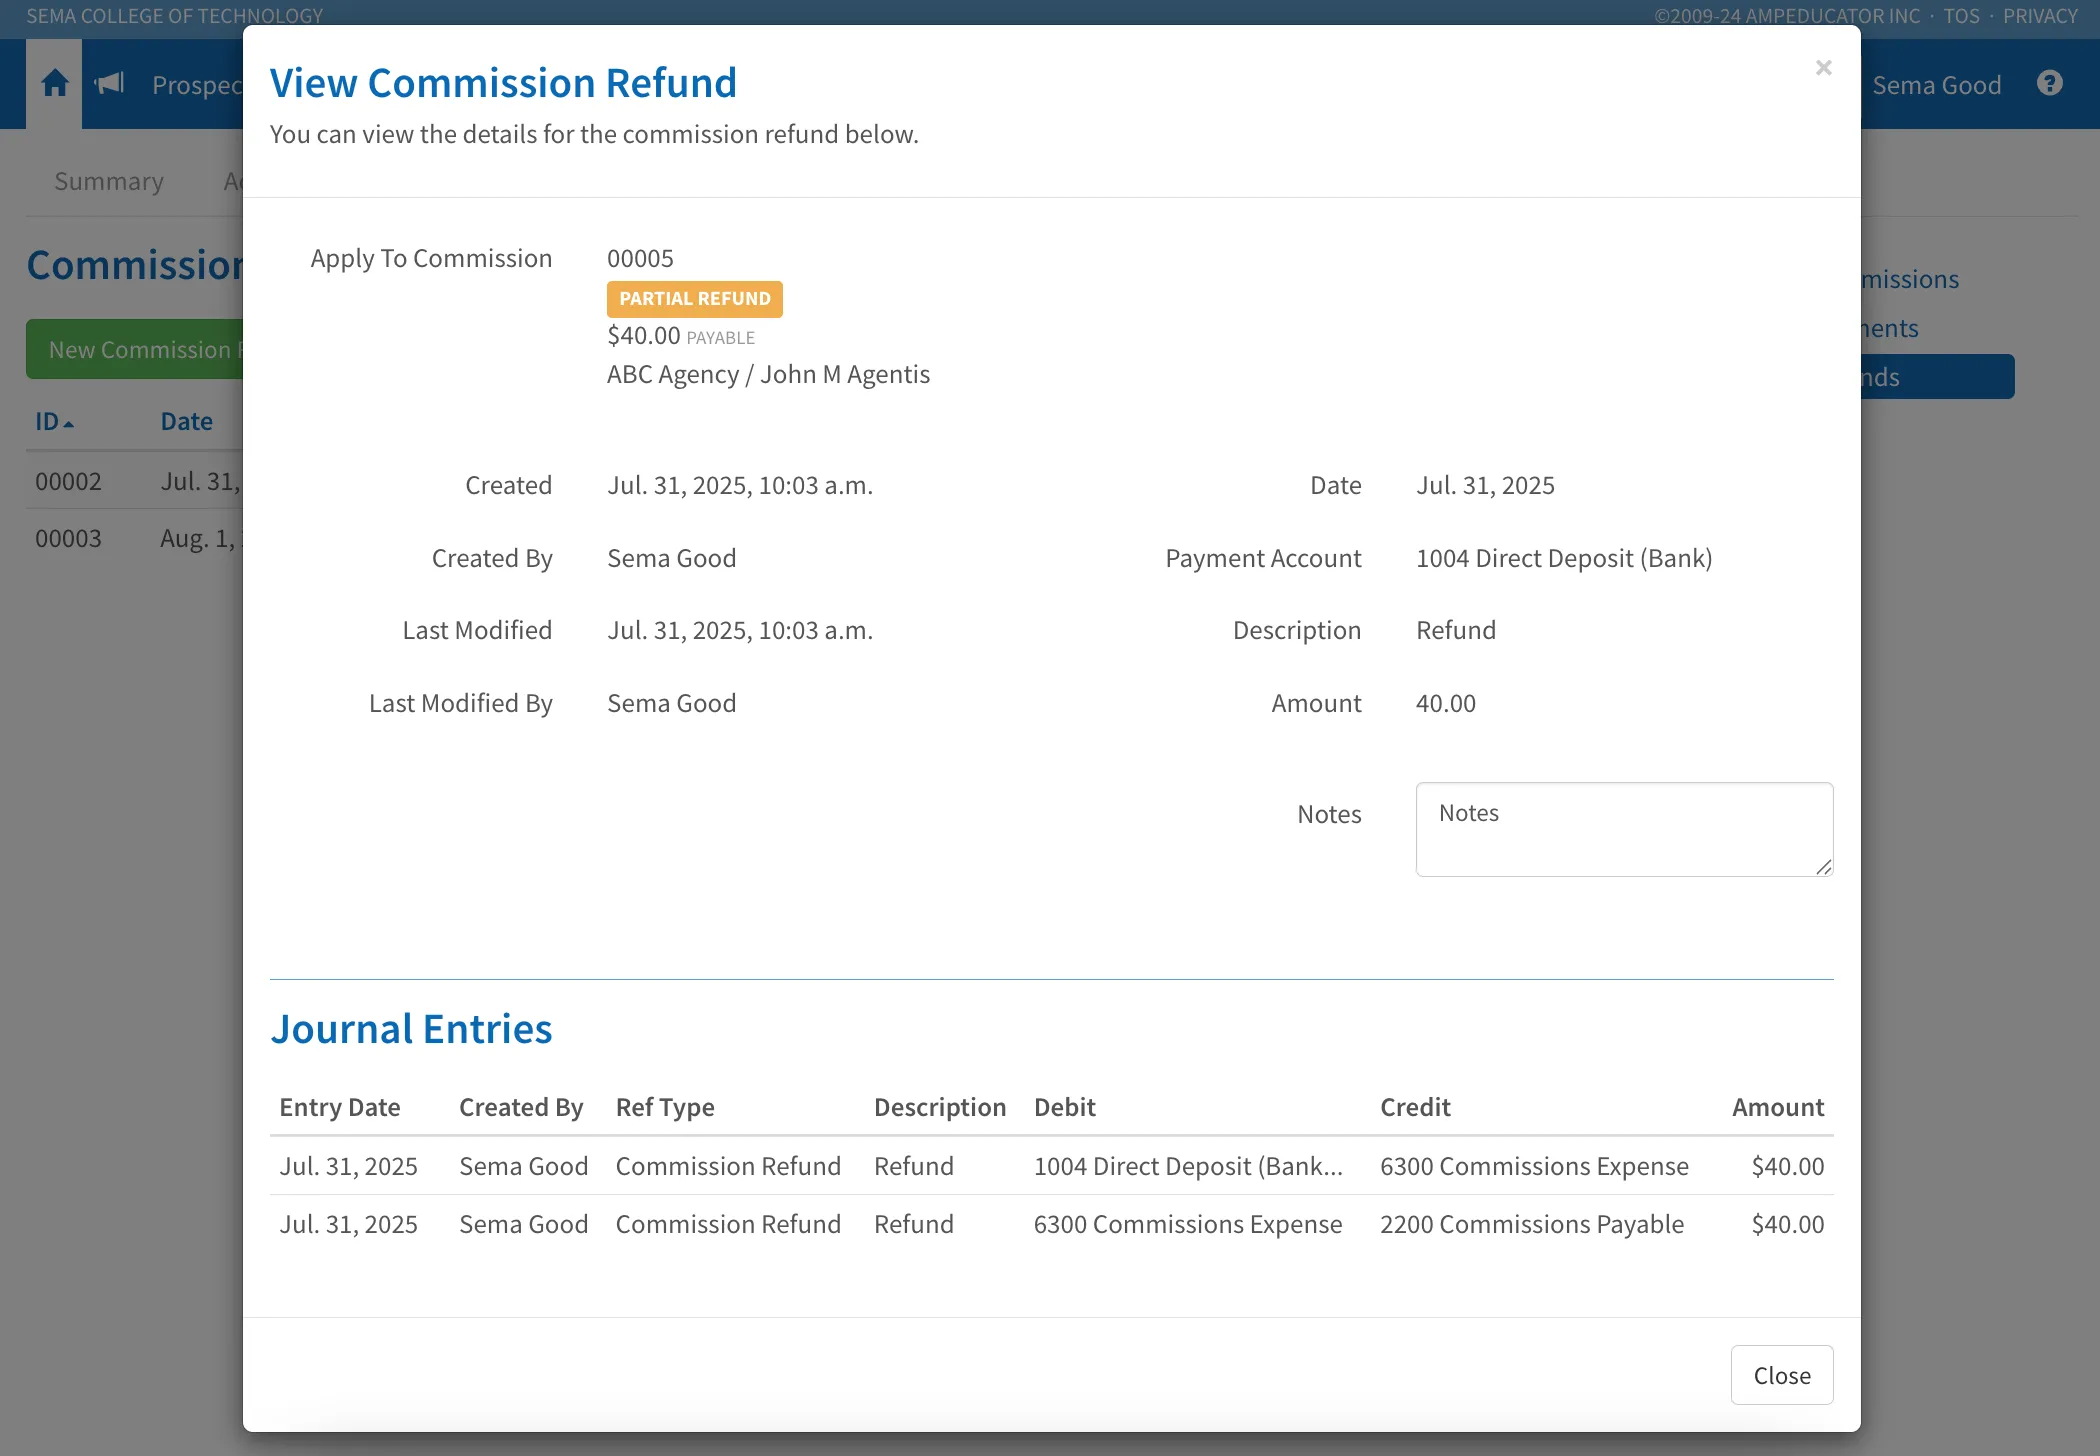
Delete Commission Refund
Clicking the Delete Commission Refund icon will prompt you to confirm the removal. Once deleted, the refund and its journal entries are permanently removed from the system. This action cannot be undone, so only delete if you're sure the refund is no longer needed.
Video Walkthrough: Commission Refunds
Search, Filter, and Export Options
Every tab (Commissions, Payments, and Refunds) includes a search and filter bar to help narrow results based on available fields like Agent, Date, Status, or Commission ID.
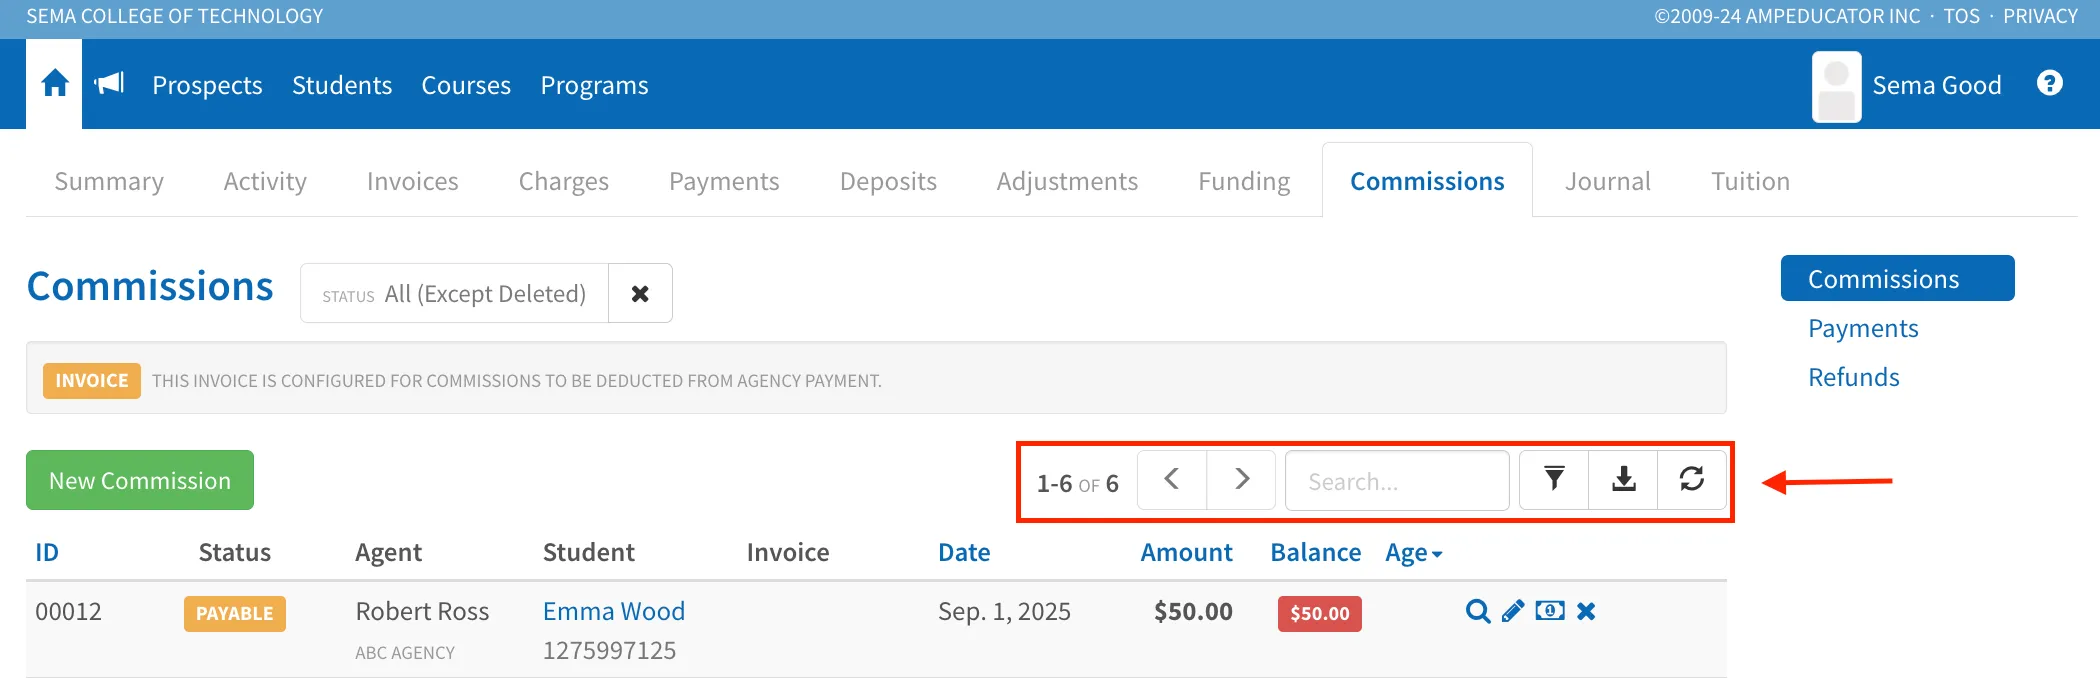
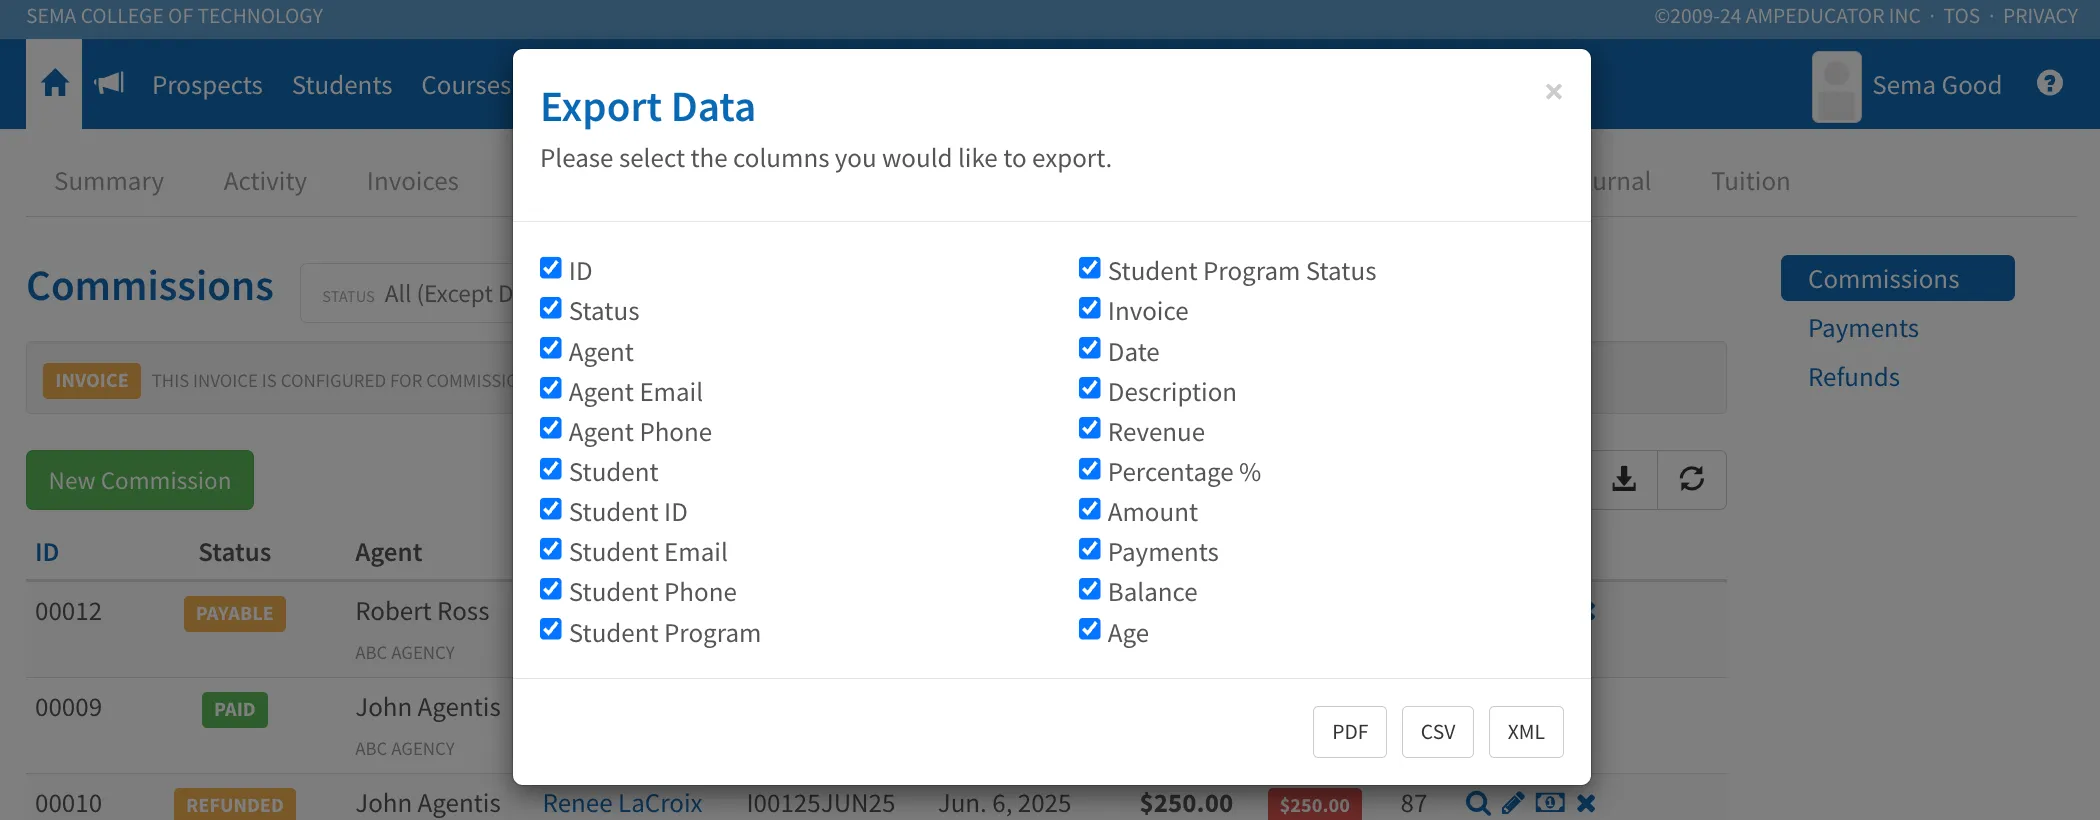
You can also export data from each list using the Export Data icon. When exporting, you can select which columns to include and download the file as a PDF, CSV, or XML.