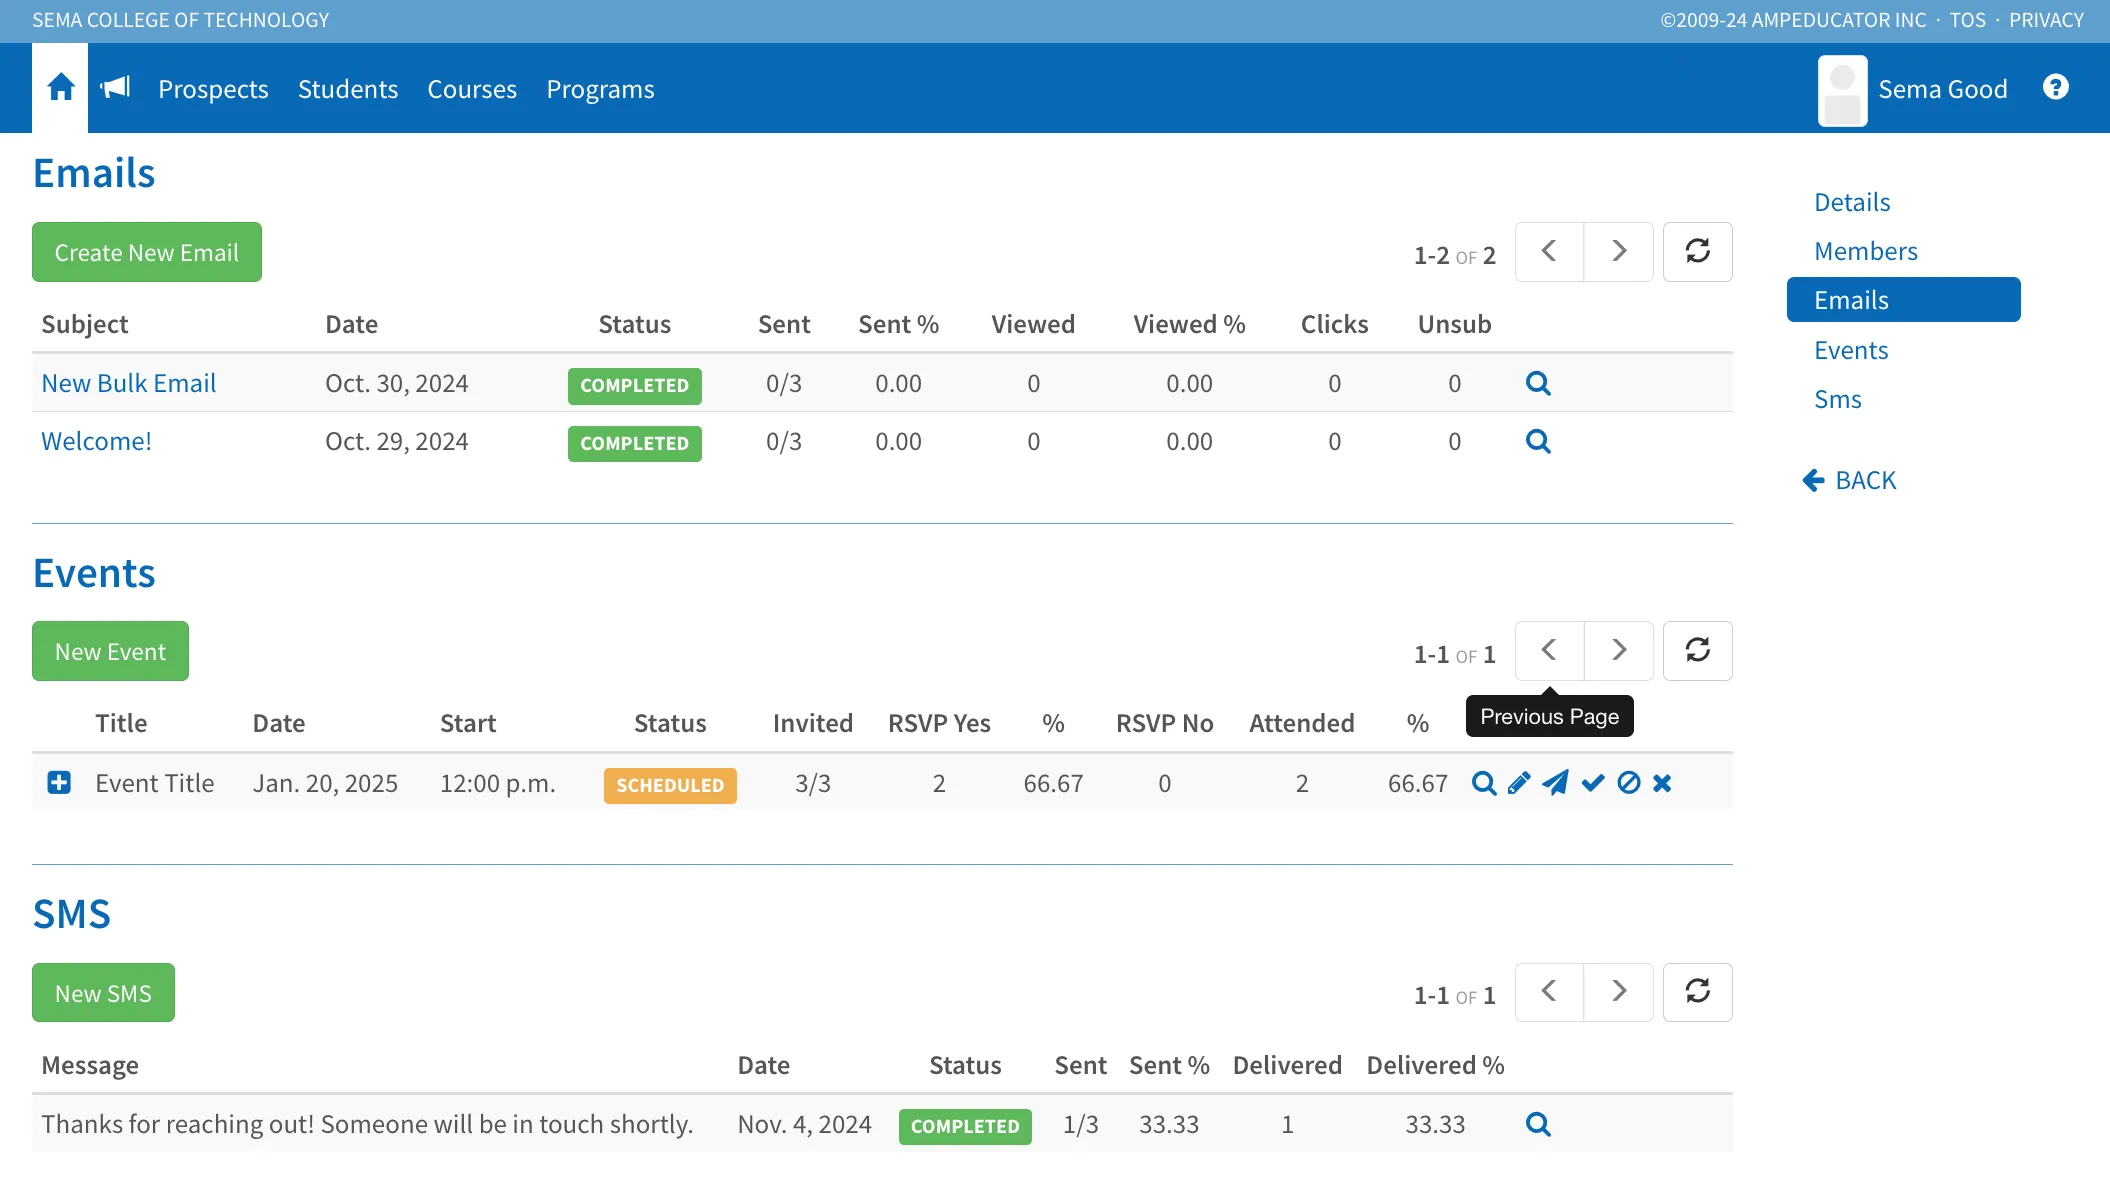
Communications Tab
The Communications tab provides a complete history of all interactions sent to or from the Student, including emails, events, letters, and SMS messages. It helps keep everything organized in one place so you can quickly reference past communications, check delivery status, or send new messages—without leaving the Student profile.
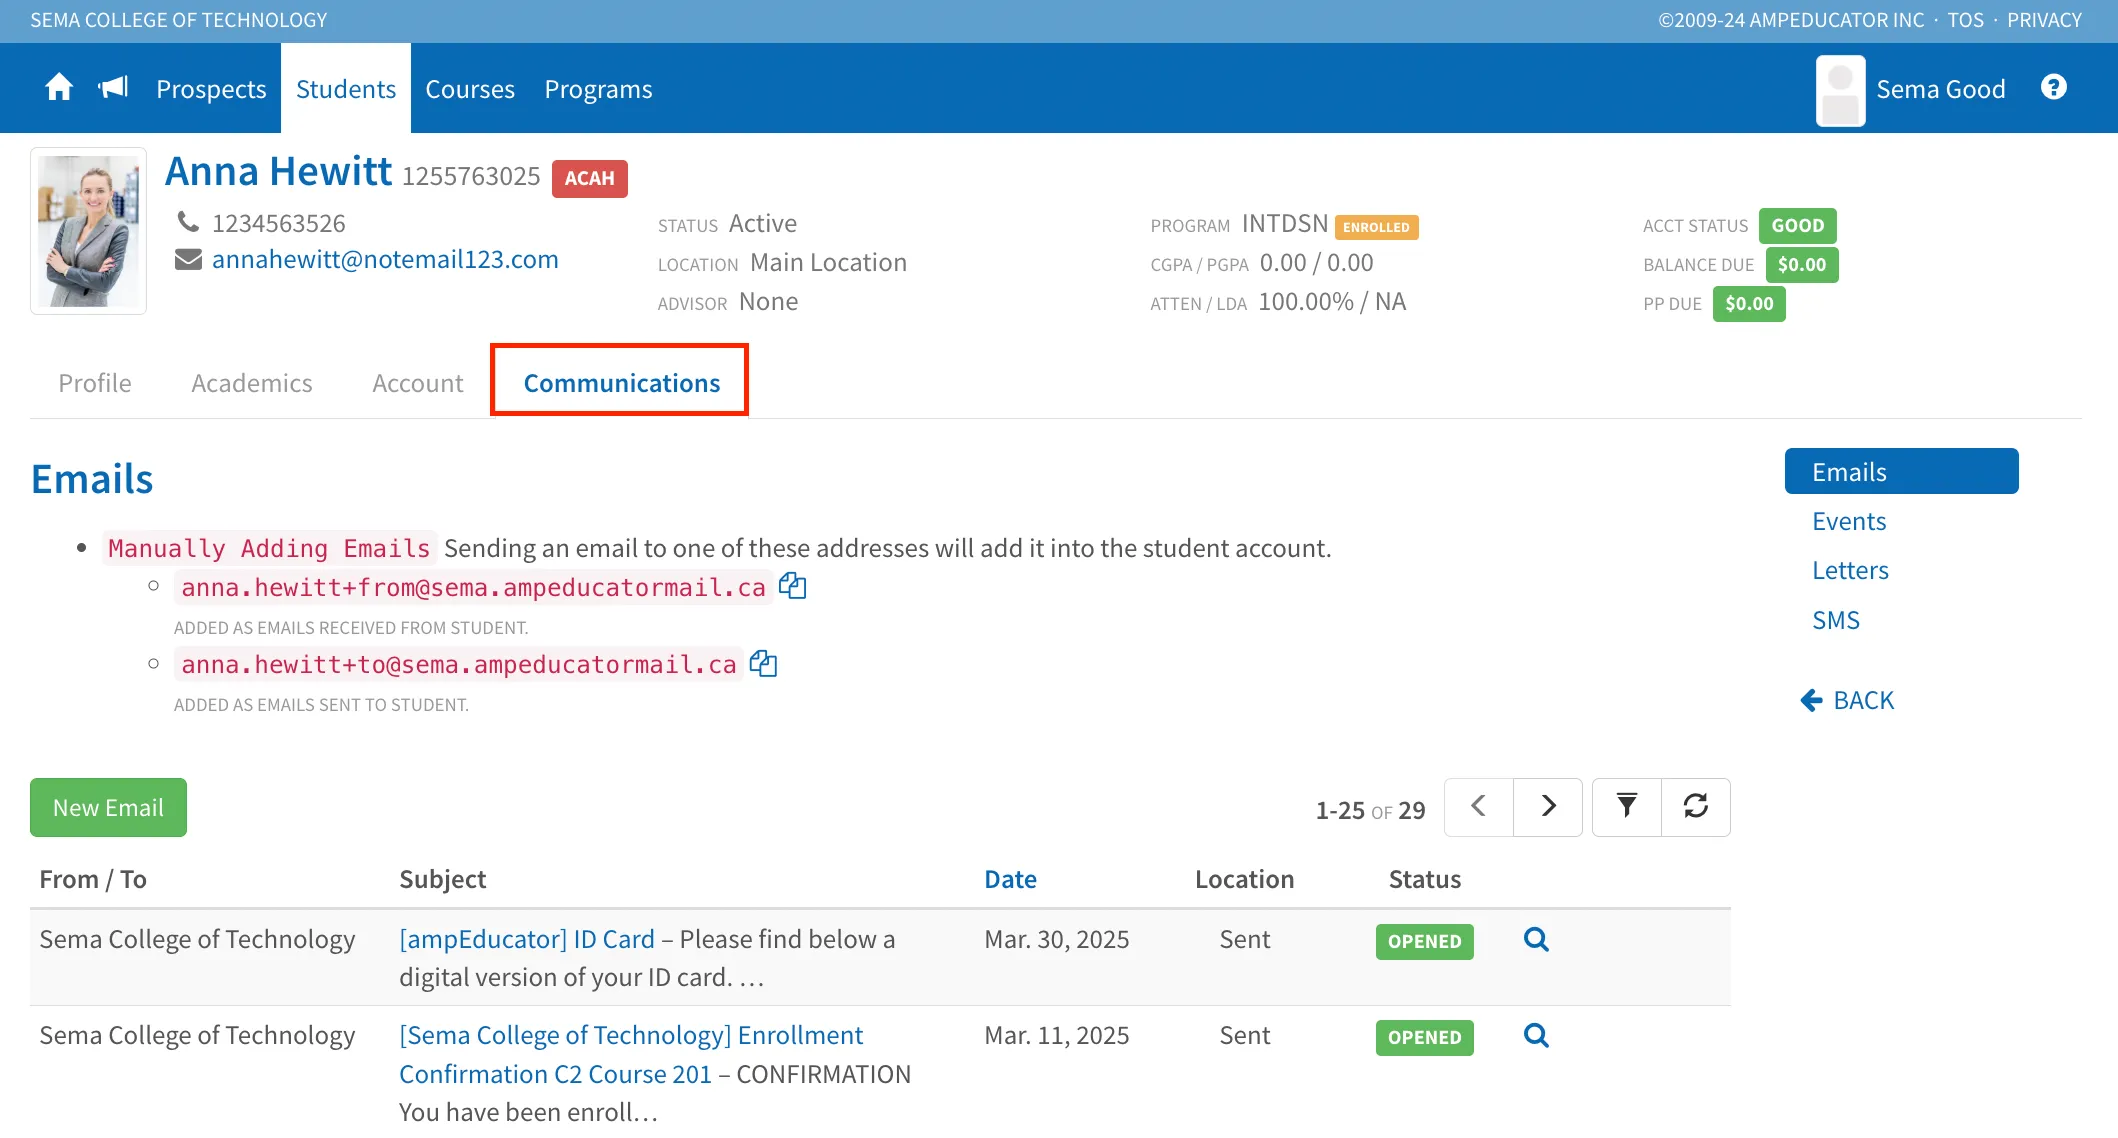
Each section is separated by communication type, with tools to search, filter, and view message details. You can also use the green buttons beside each section to send a new message or schedule a new event.
Managing Communication Consent
If you plan to use the communication tools in ampEducator, it's essential to collect consent from your students. You can manage this in the Student Profile / Admin section. If a student is not opted in, ampEducator will not send any emails or SMS messages to them.
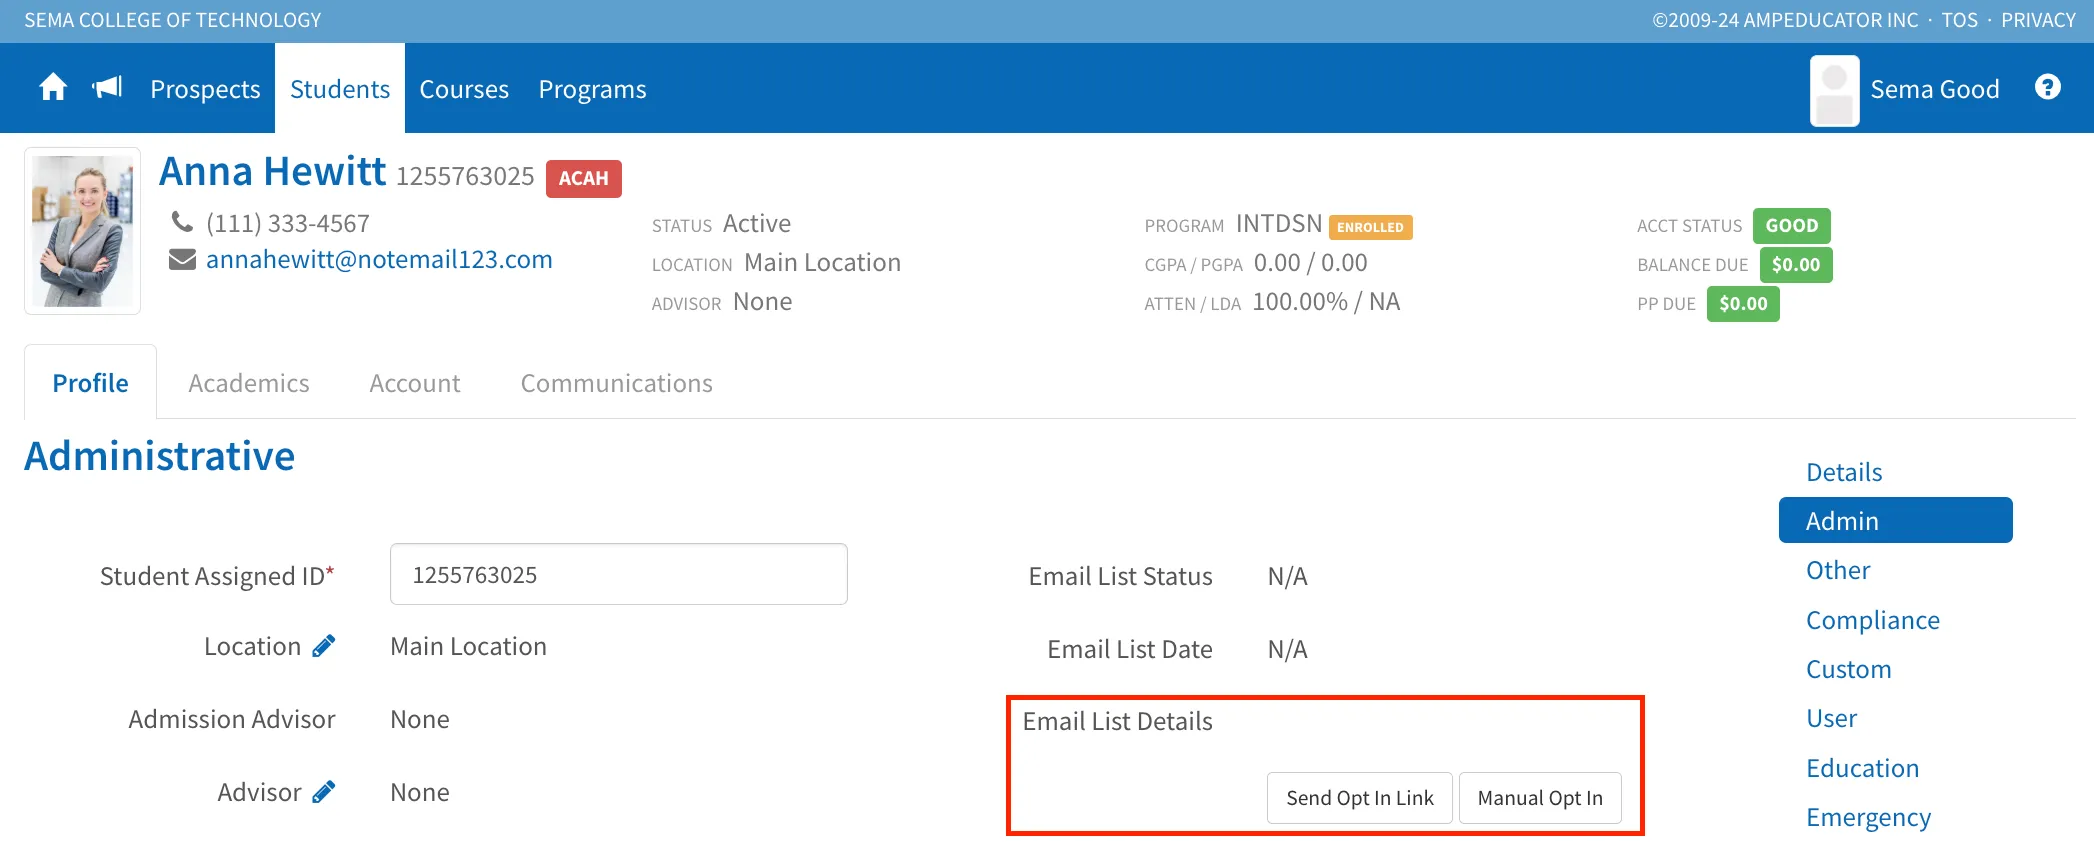
Note: A best practice is to collect Opt-In consent automatically when a student is added to ampEducator via a web form. You can do this by including a checkbox field named "Opt In" set to "True" on your web form. If you’d like more information on implementing this feature, please reach out to us at [email protected] or start a ticket.
Emails
This section displays a list of all emails sent to or from the Student. You’ll see the sender and recipient addresses, subject lines, dates, and delivery statuses (e.g., Delivered or Bounced). This is also where you can send a new email using the New Email button.
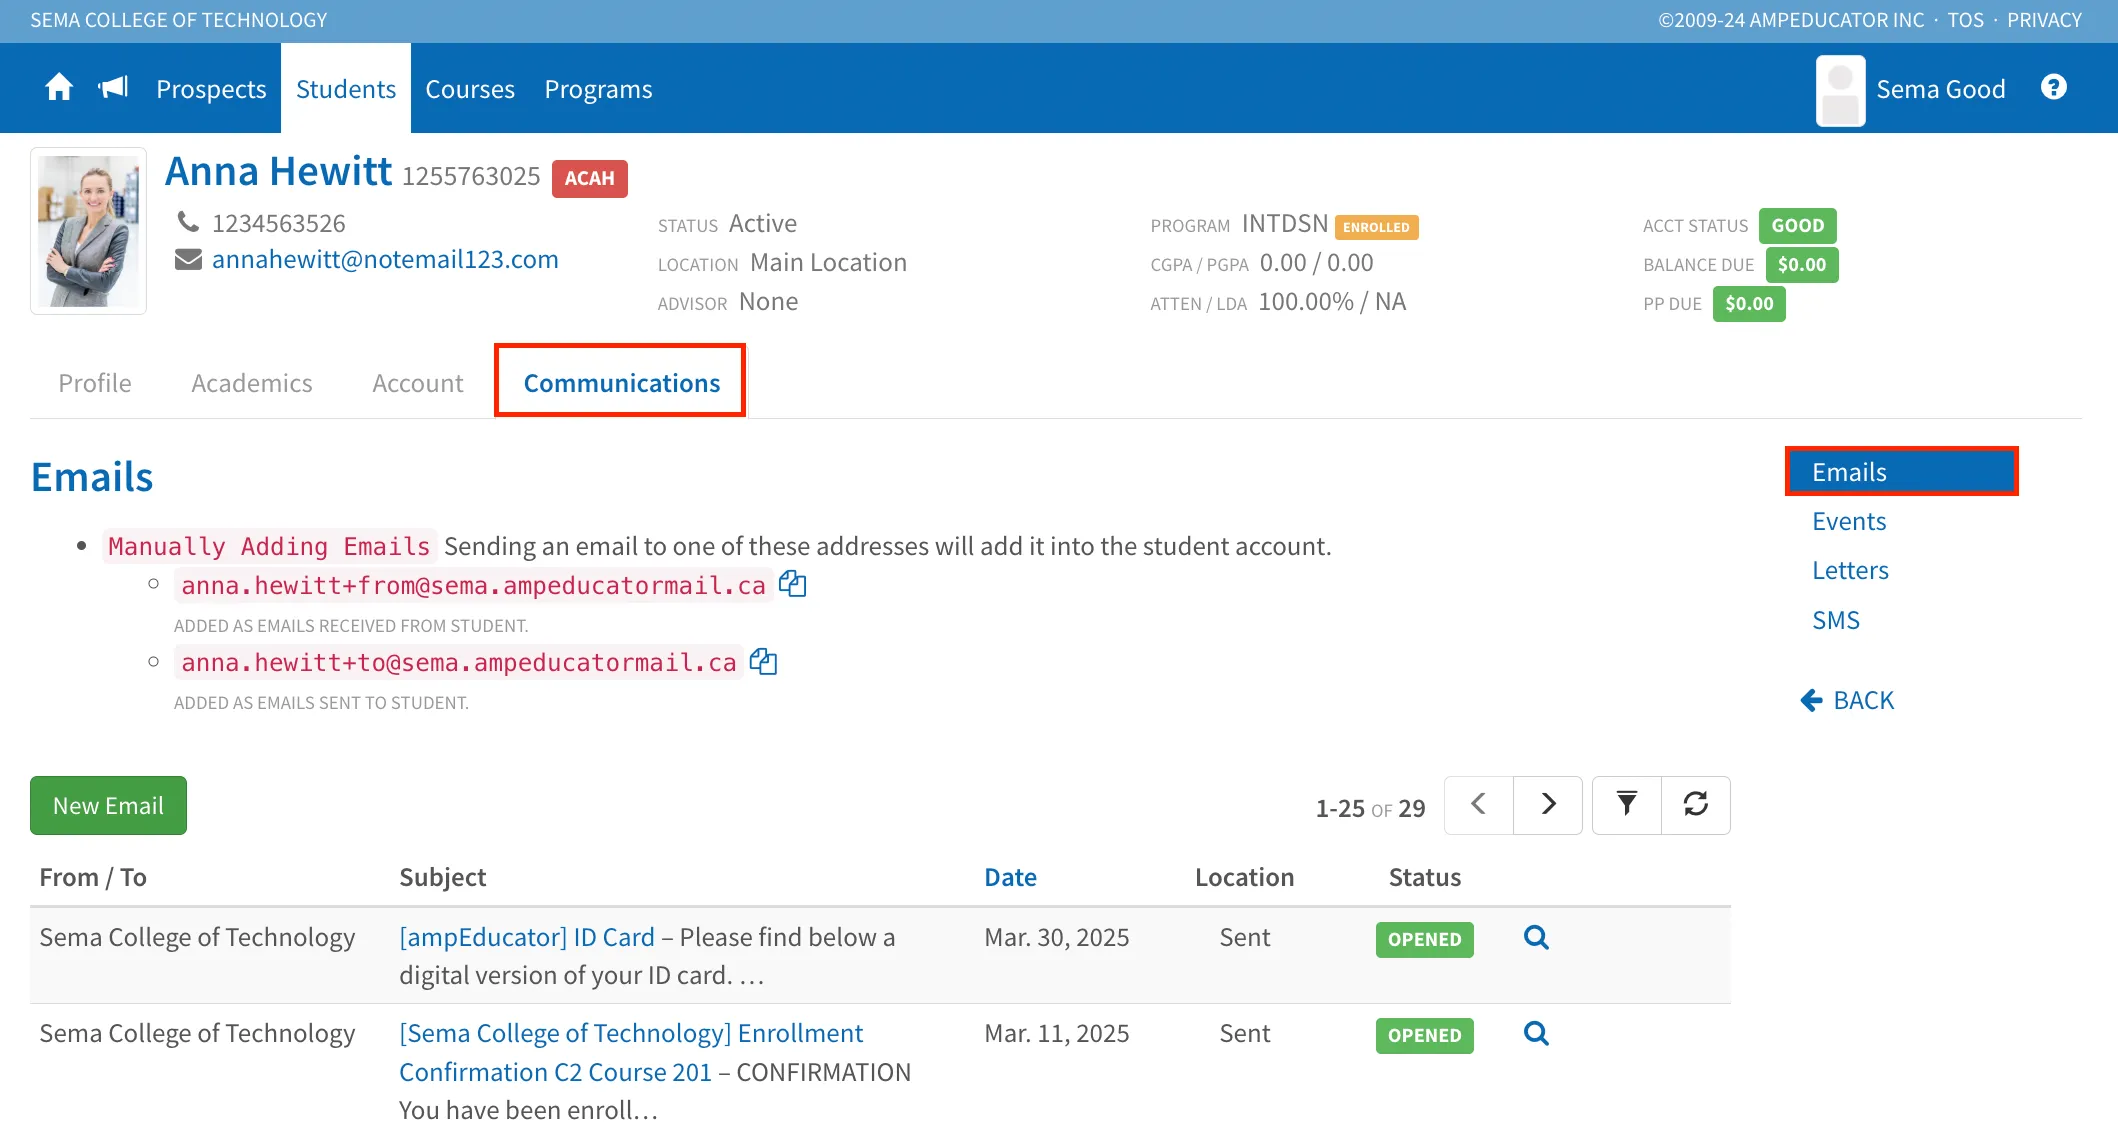
Sending a New Email
Click New Email to open the email composer. The Student’s name, email address, and contact number will automatically populate the top of the modal.
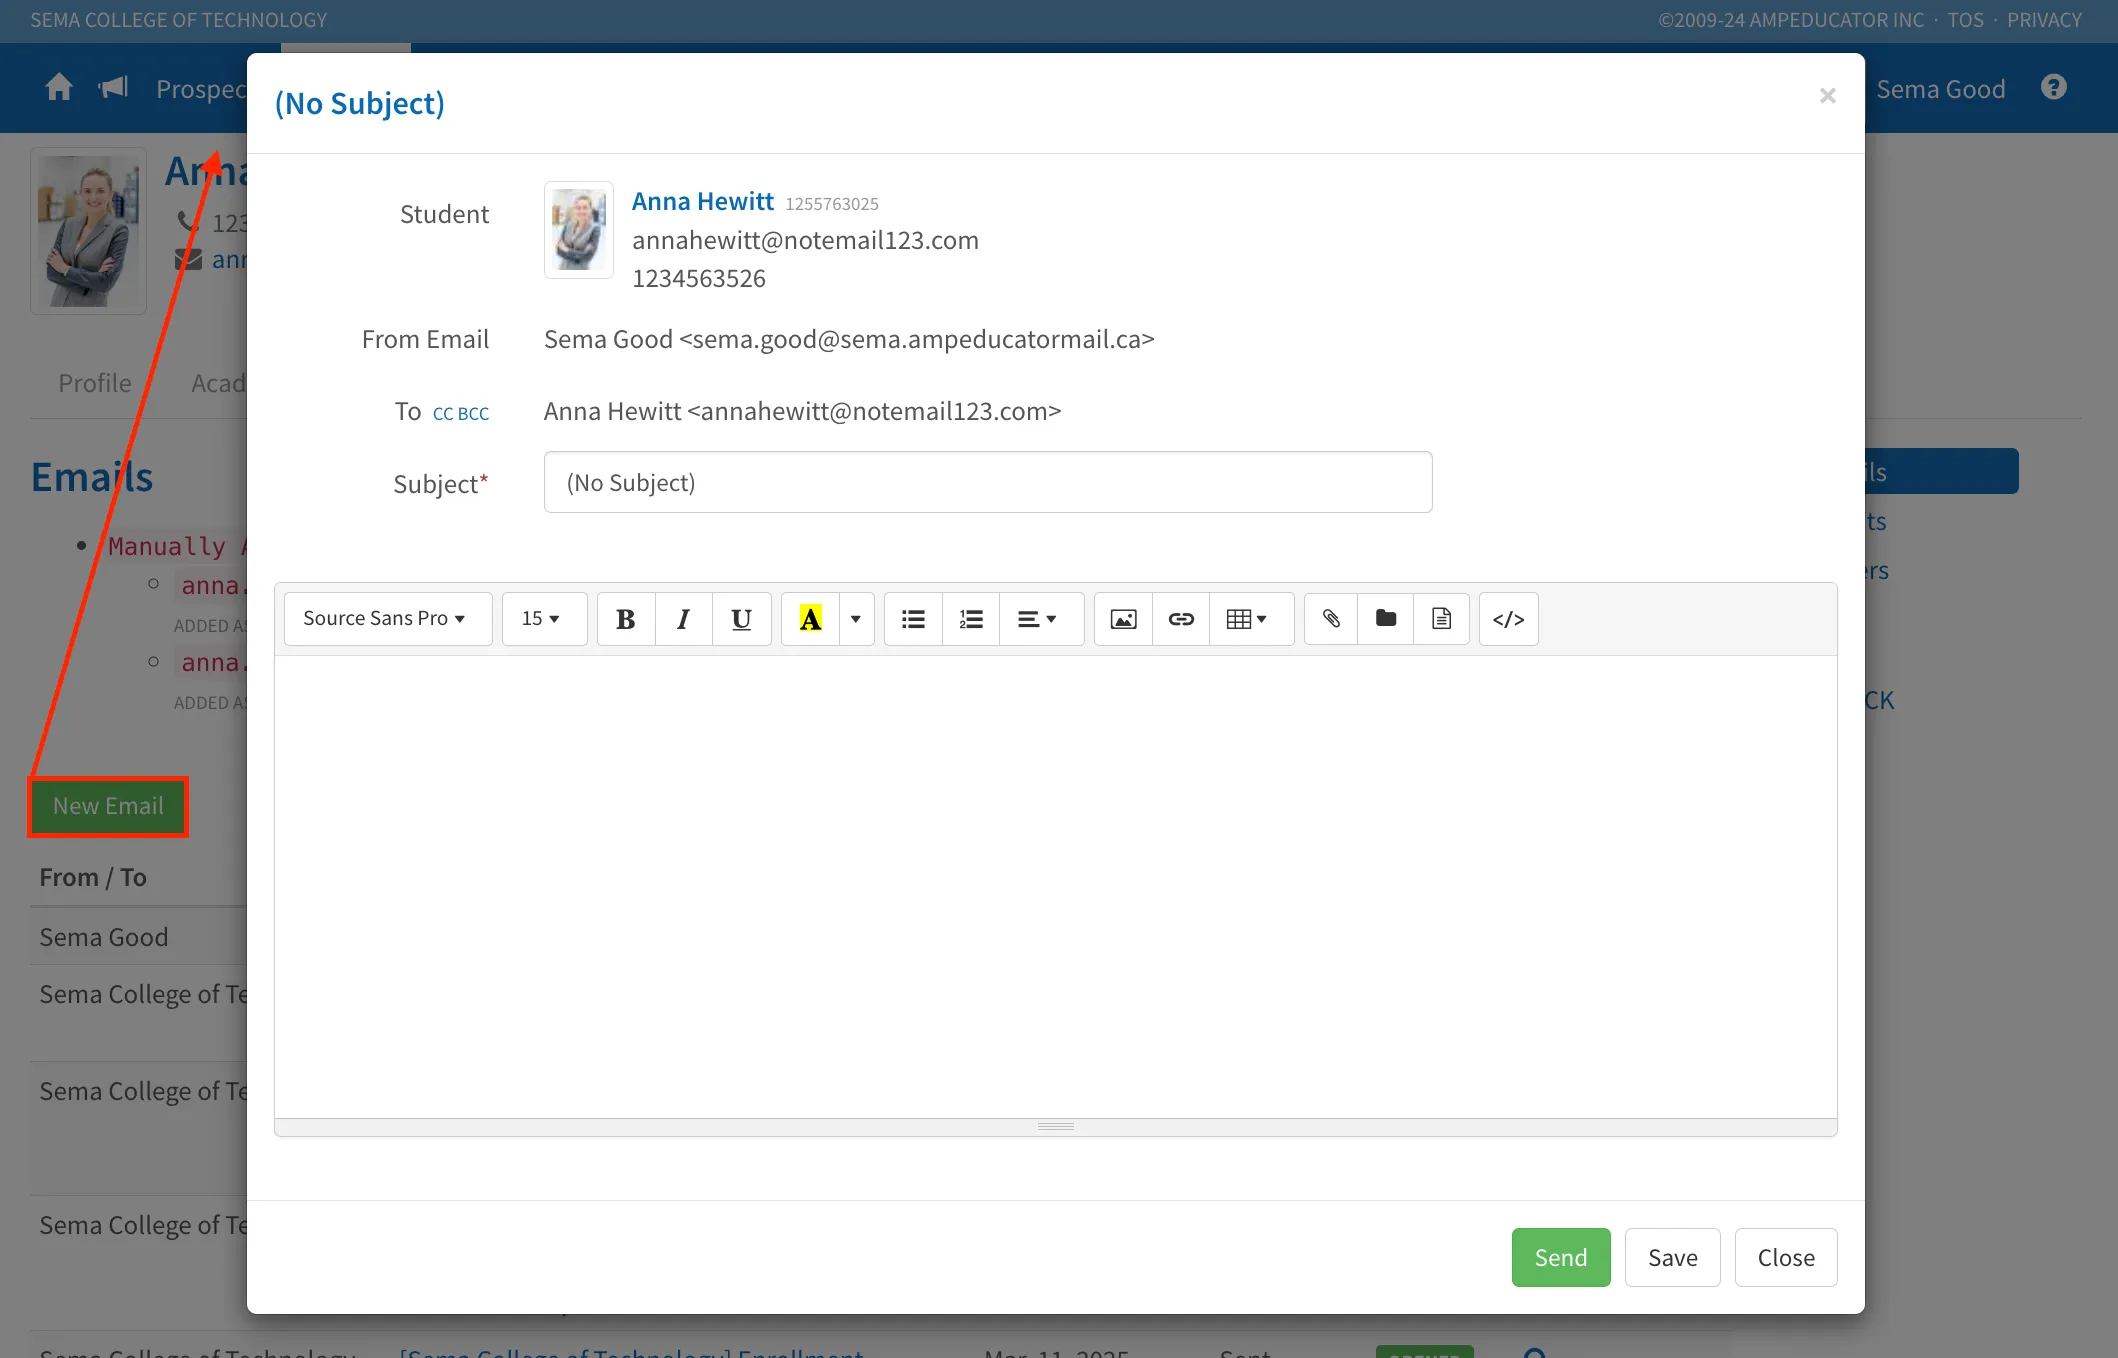
You can use the rich text editor to format your message, add links or attachments, and insert tables or images as needed. The toolbar also includes options for using merge fields to personalize the message (such as inserting the Student’s name or program). If email templates have been set up, you can load them in to save time and maintain consistency.
Once your message is ready, press Send to deliver it, or Save to keep it as a draft. The email will then appear in the list under the Emails section of the Communications tab.
Viewing Sent Emails and Logs
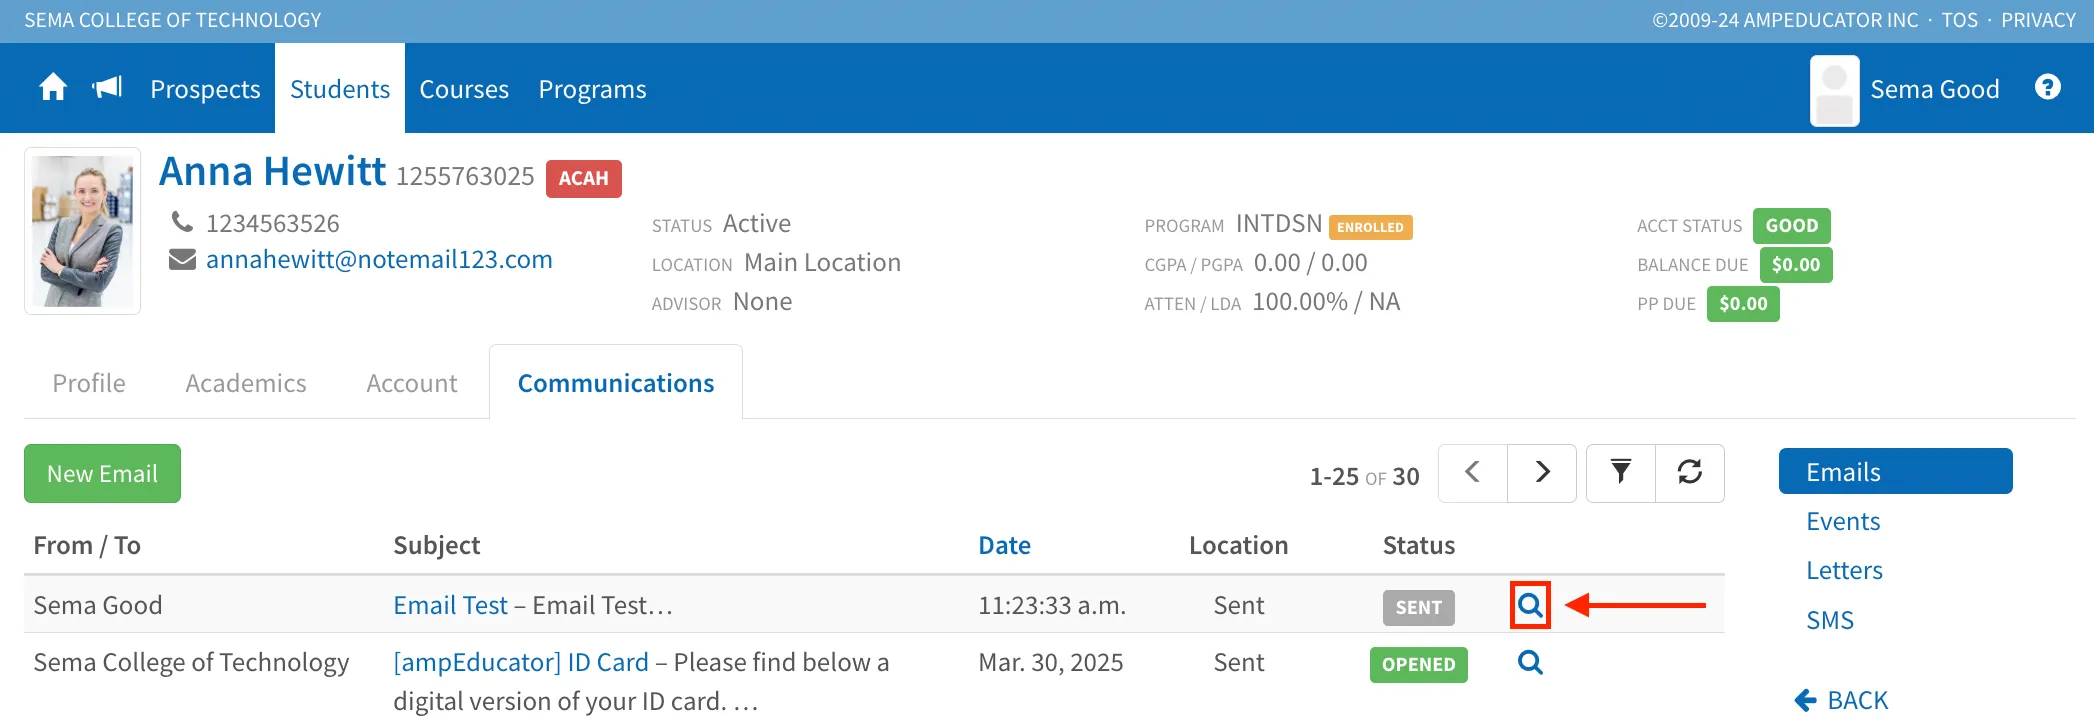
To view a previously sent email, click the View Email icon beside the email entry.
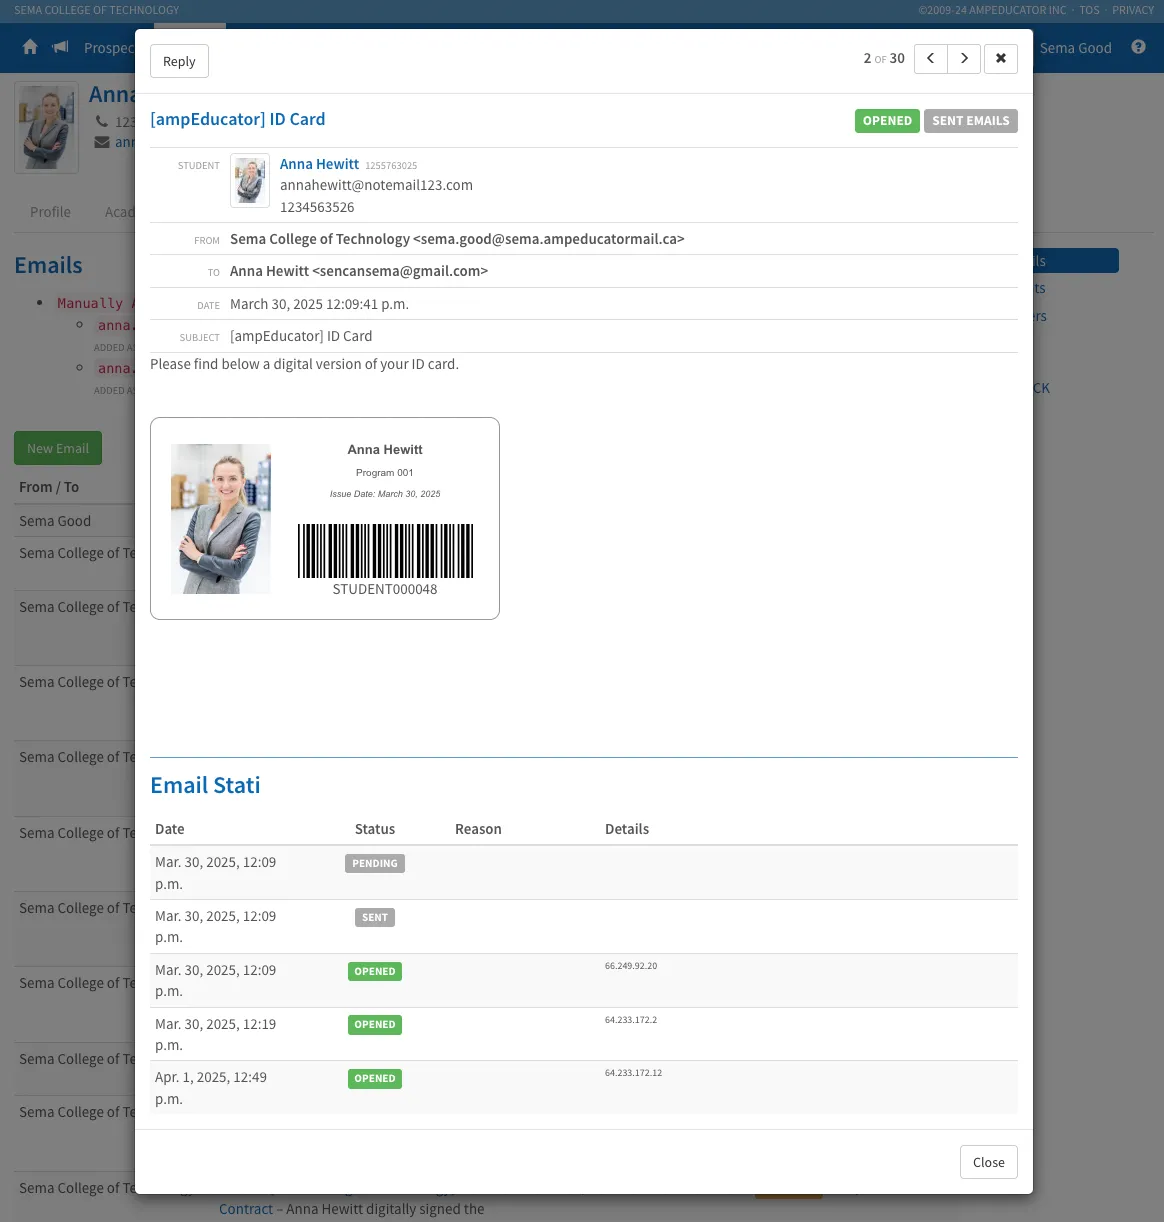
This opens the full message so you can review what was sent, including any attachments or formatting. Beneath the message, you’ll also see an Email Stati Log, which tracks the delivery status (e.g., Pending, Sent, Opened), timestamp, and technical details such as IP addresses. This can help confirm whether the Student received or opened the email.
Events
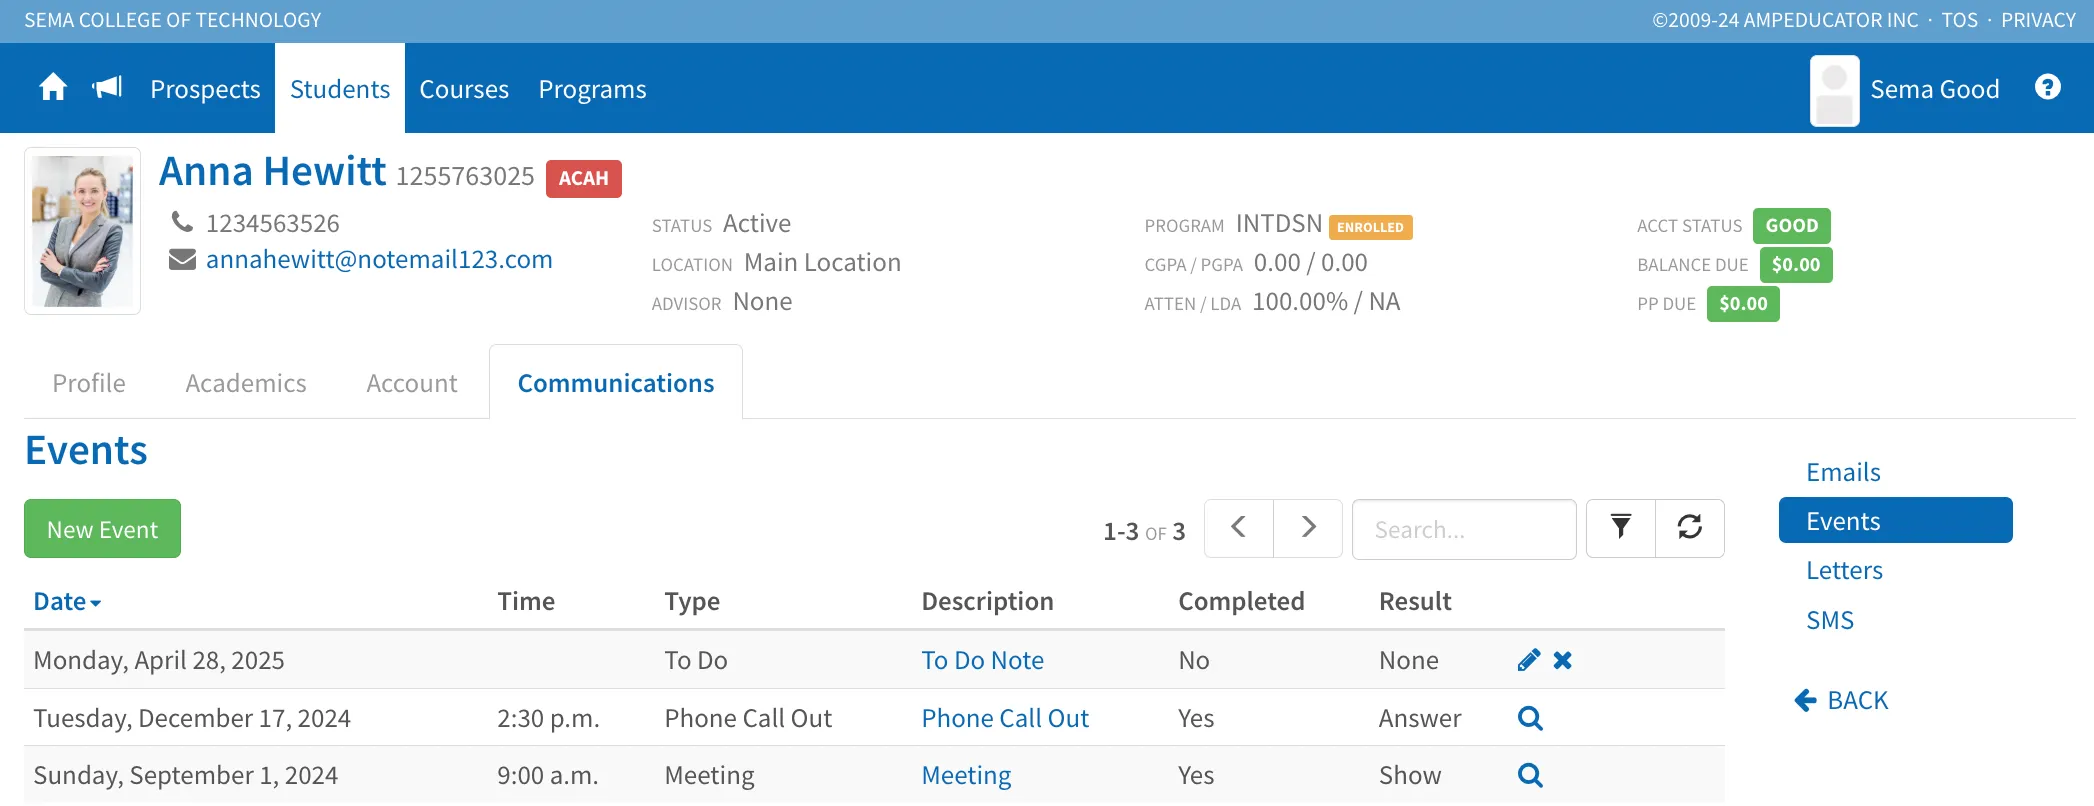
Here you’ll find a list of all scheduled events related to the Student, such as meetings, phone calls, or to-dos. Each entry shows the event date and time, type, description, completion status, and result.
Scheduling a New Event
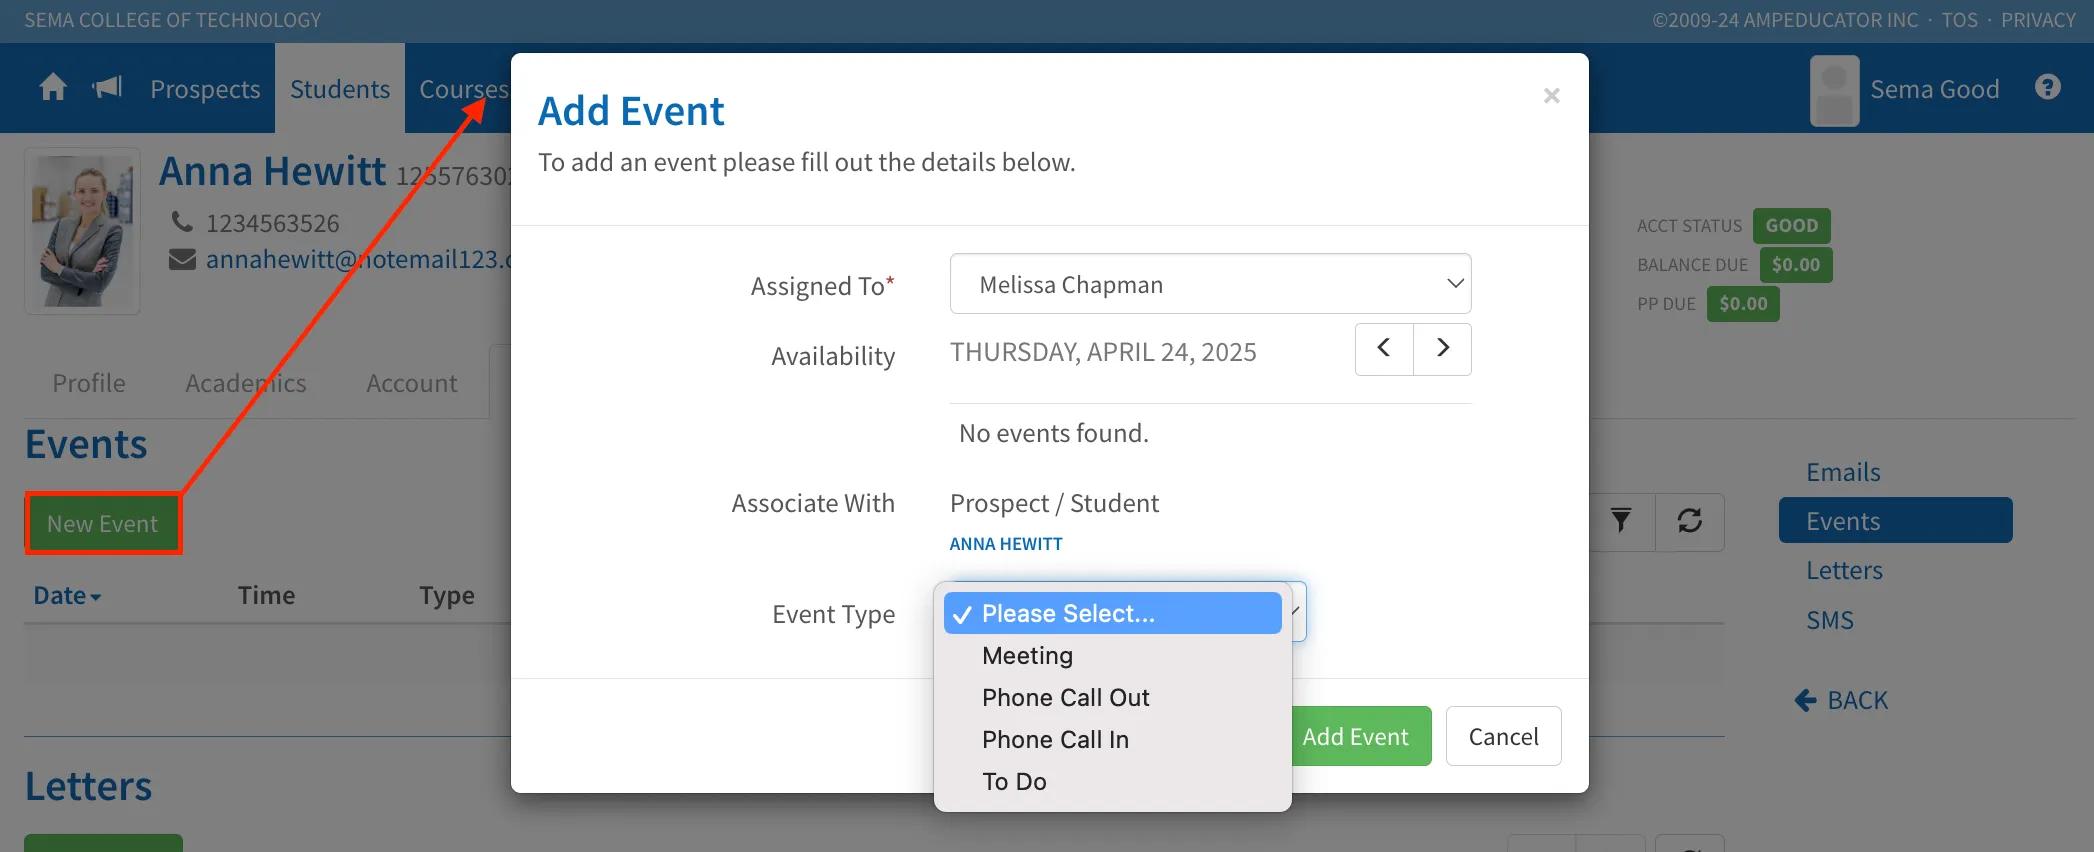
Click New Event to open the scheduling modal. You can set the event type, date, time, assign it to a user, and add a description. The event will automatically appear in this list and in the assigned user’s calendar.
Letters
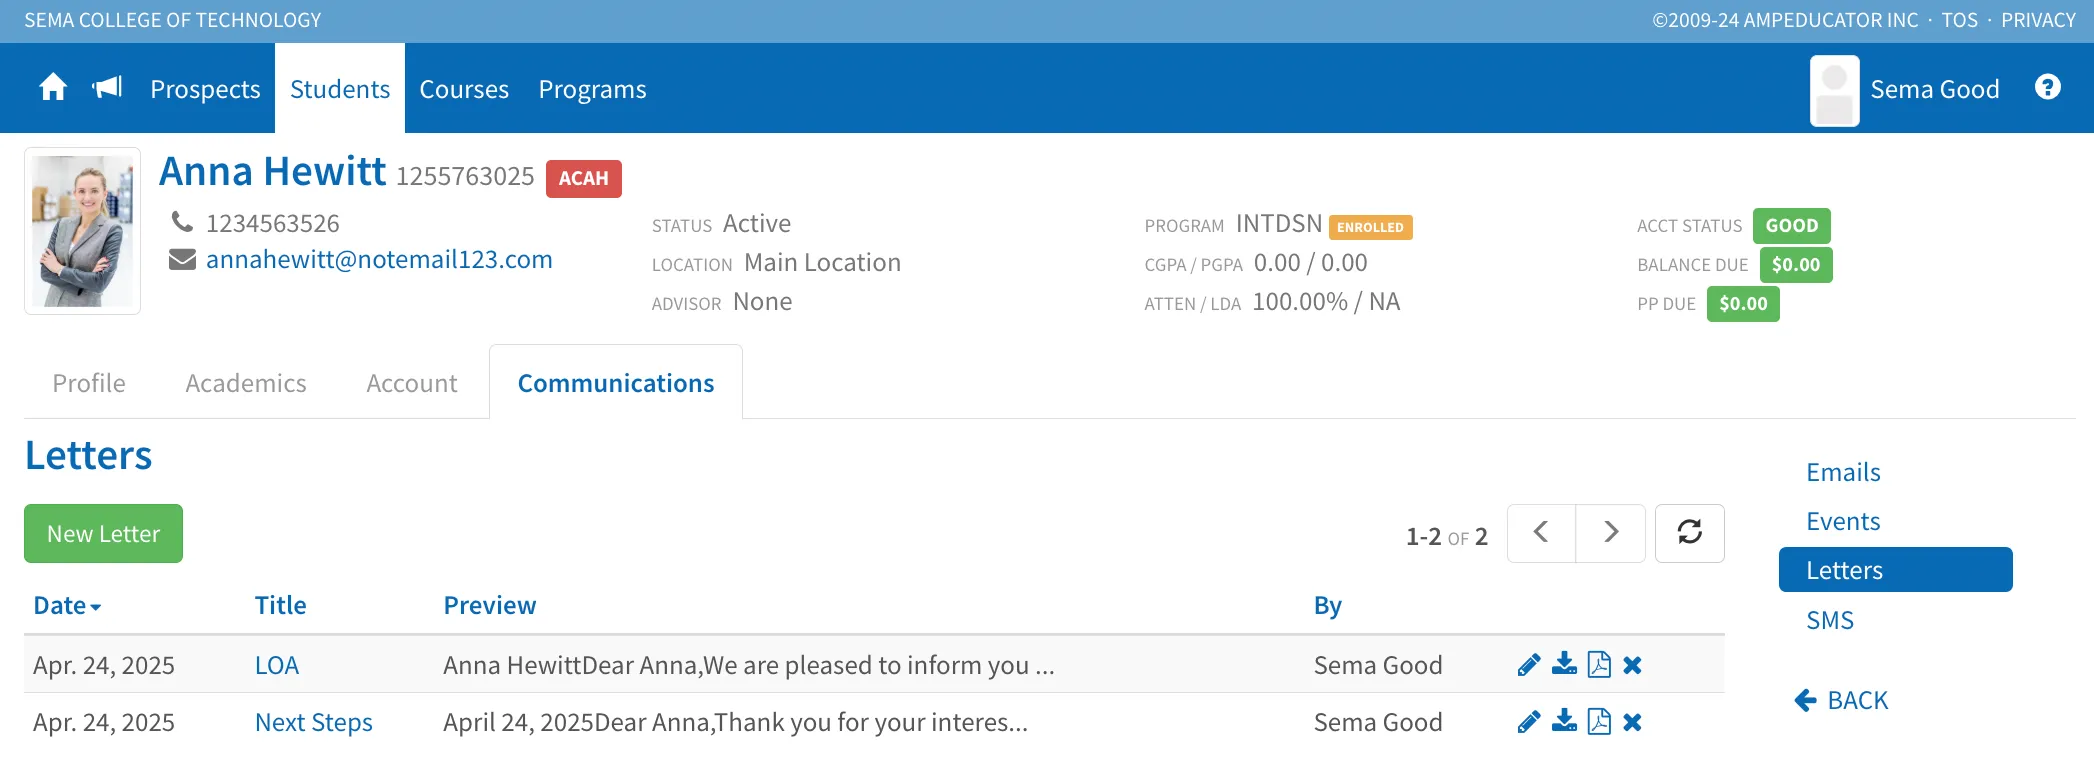
Letters are ideal for formal, repeat communications—like acceptance notices or reminders. Using Templates with merge fields allows you to quickly generate personalized letters by pulling in Student or Prospect details automatically. Once created, you can choose Save as Document to store the letter on their profile and make it viewable in the portal if needed.
Adding and Managing New Letters
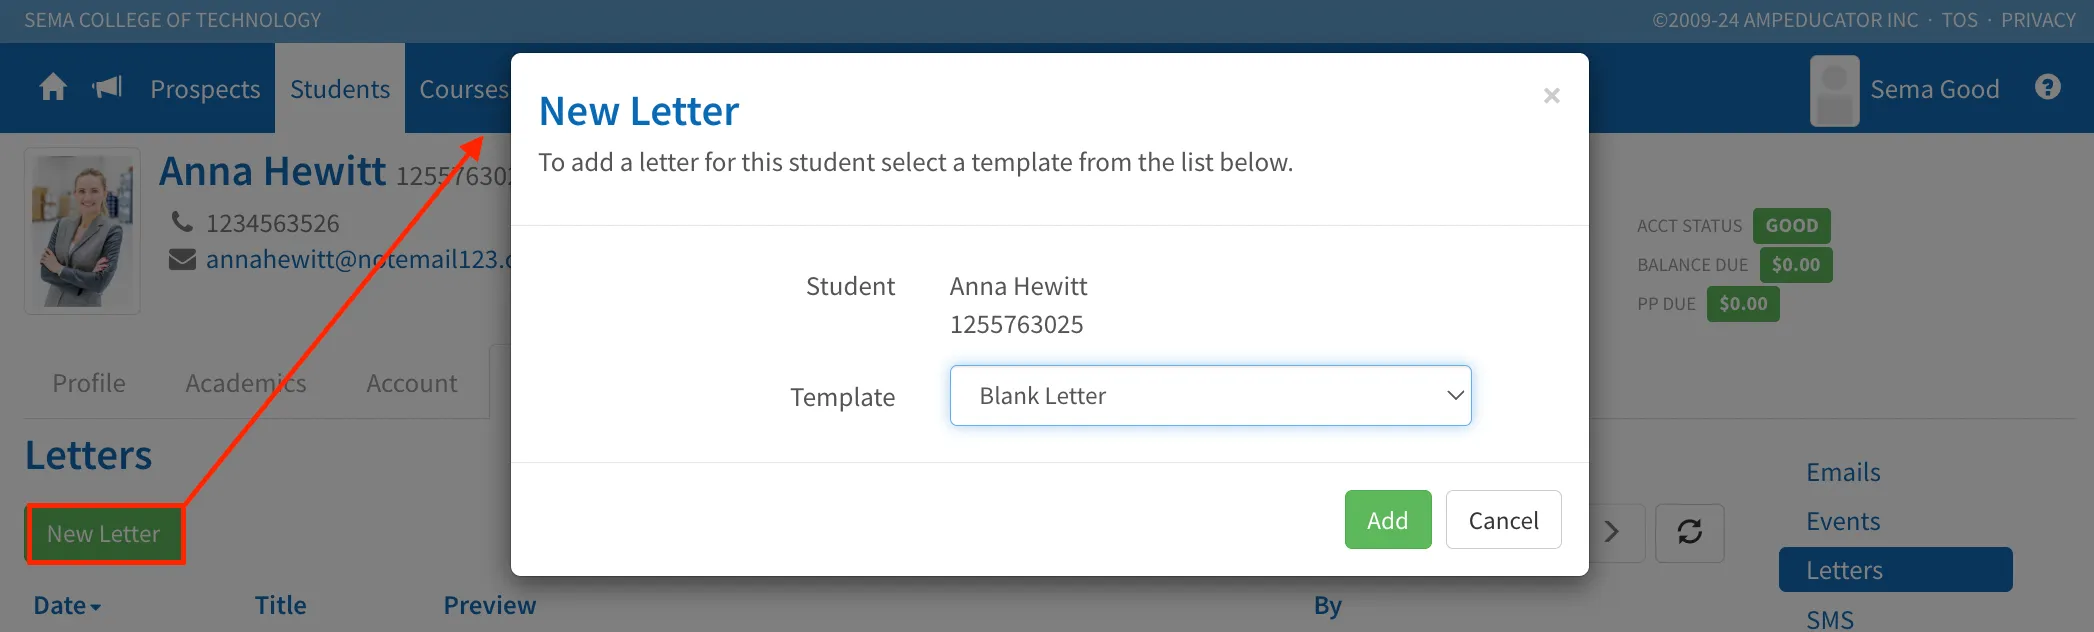
To create a new letter for a Student or Prospect, click New Letter in the Letters section. You’ll then be prompted to choose from a list of existing Templates or start with a blank letter.
Once you select a template or start a blank letter, the Edit Letter window will open.
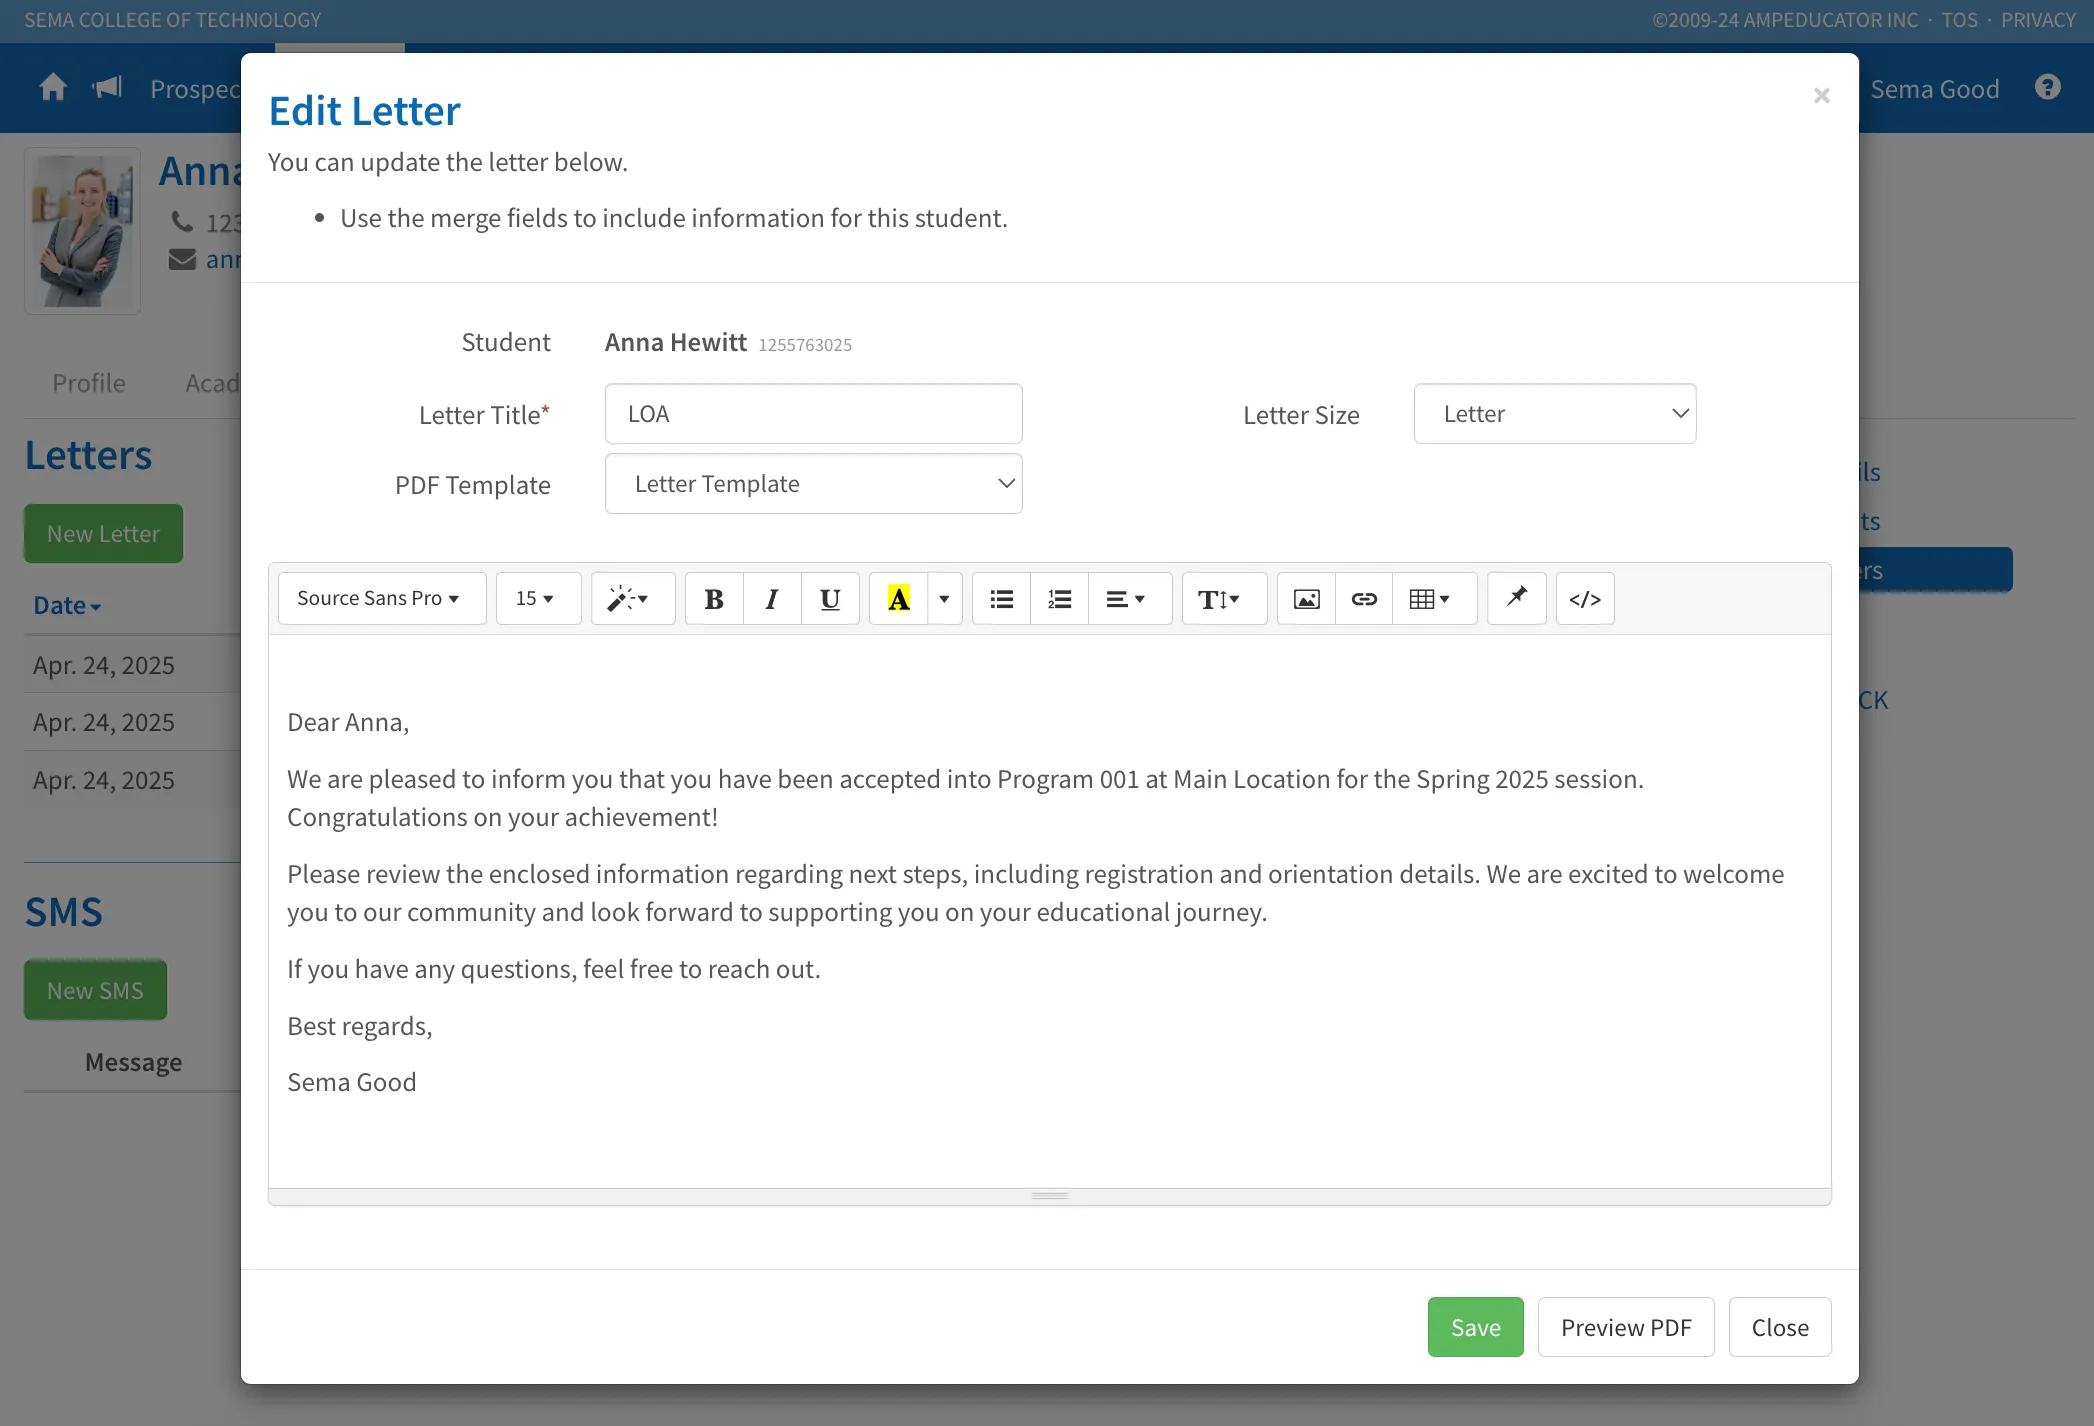
Here you can:
- Use the rich text editor to customize the content, format text, insert images, tables, and more.
- Set the Letter Title for your records.
- Select the Letter Size (e.g., Letter, A4).
- If you chose a template with merge fields, relevant student information will automatically fill in. You can also insert merge fields manually when creating a blank letter.
Click Preview PDF to view how the letter will appear when downloaded or printed—great for double-checking formatting before saving.
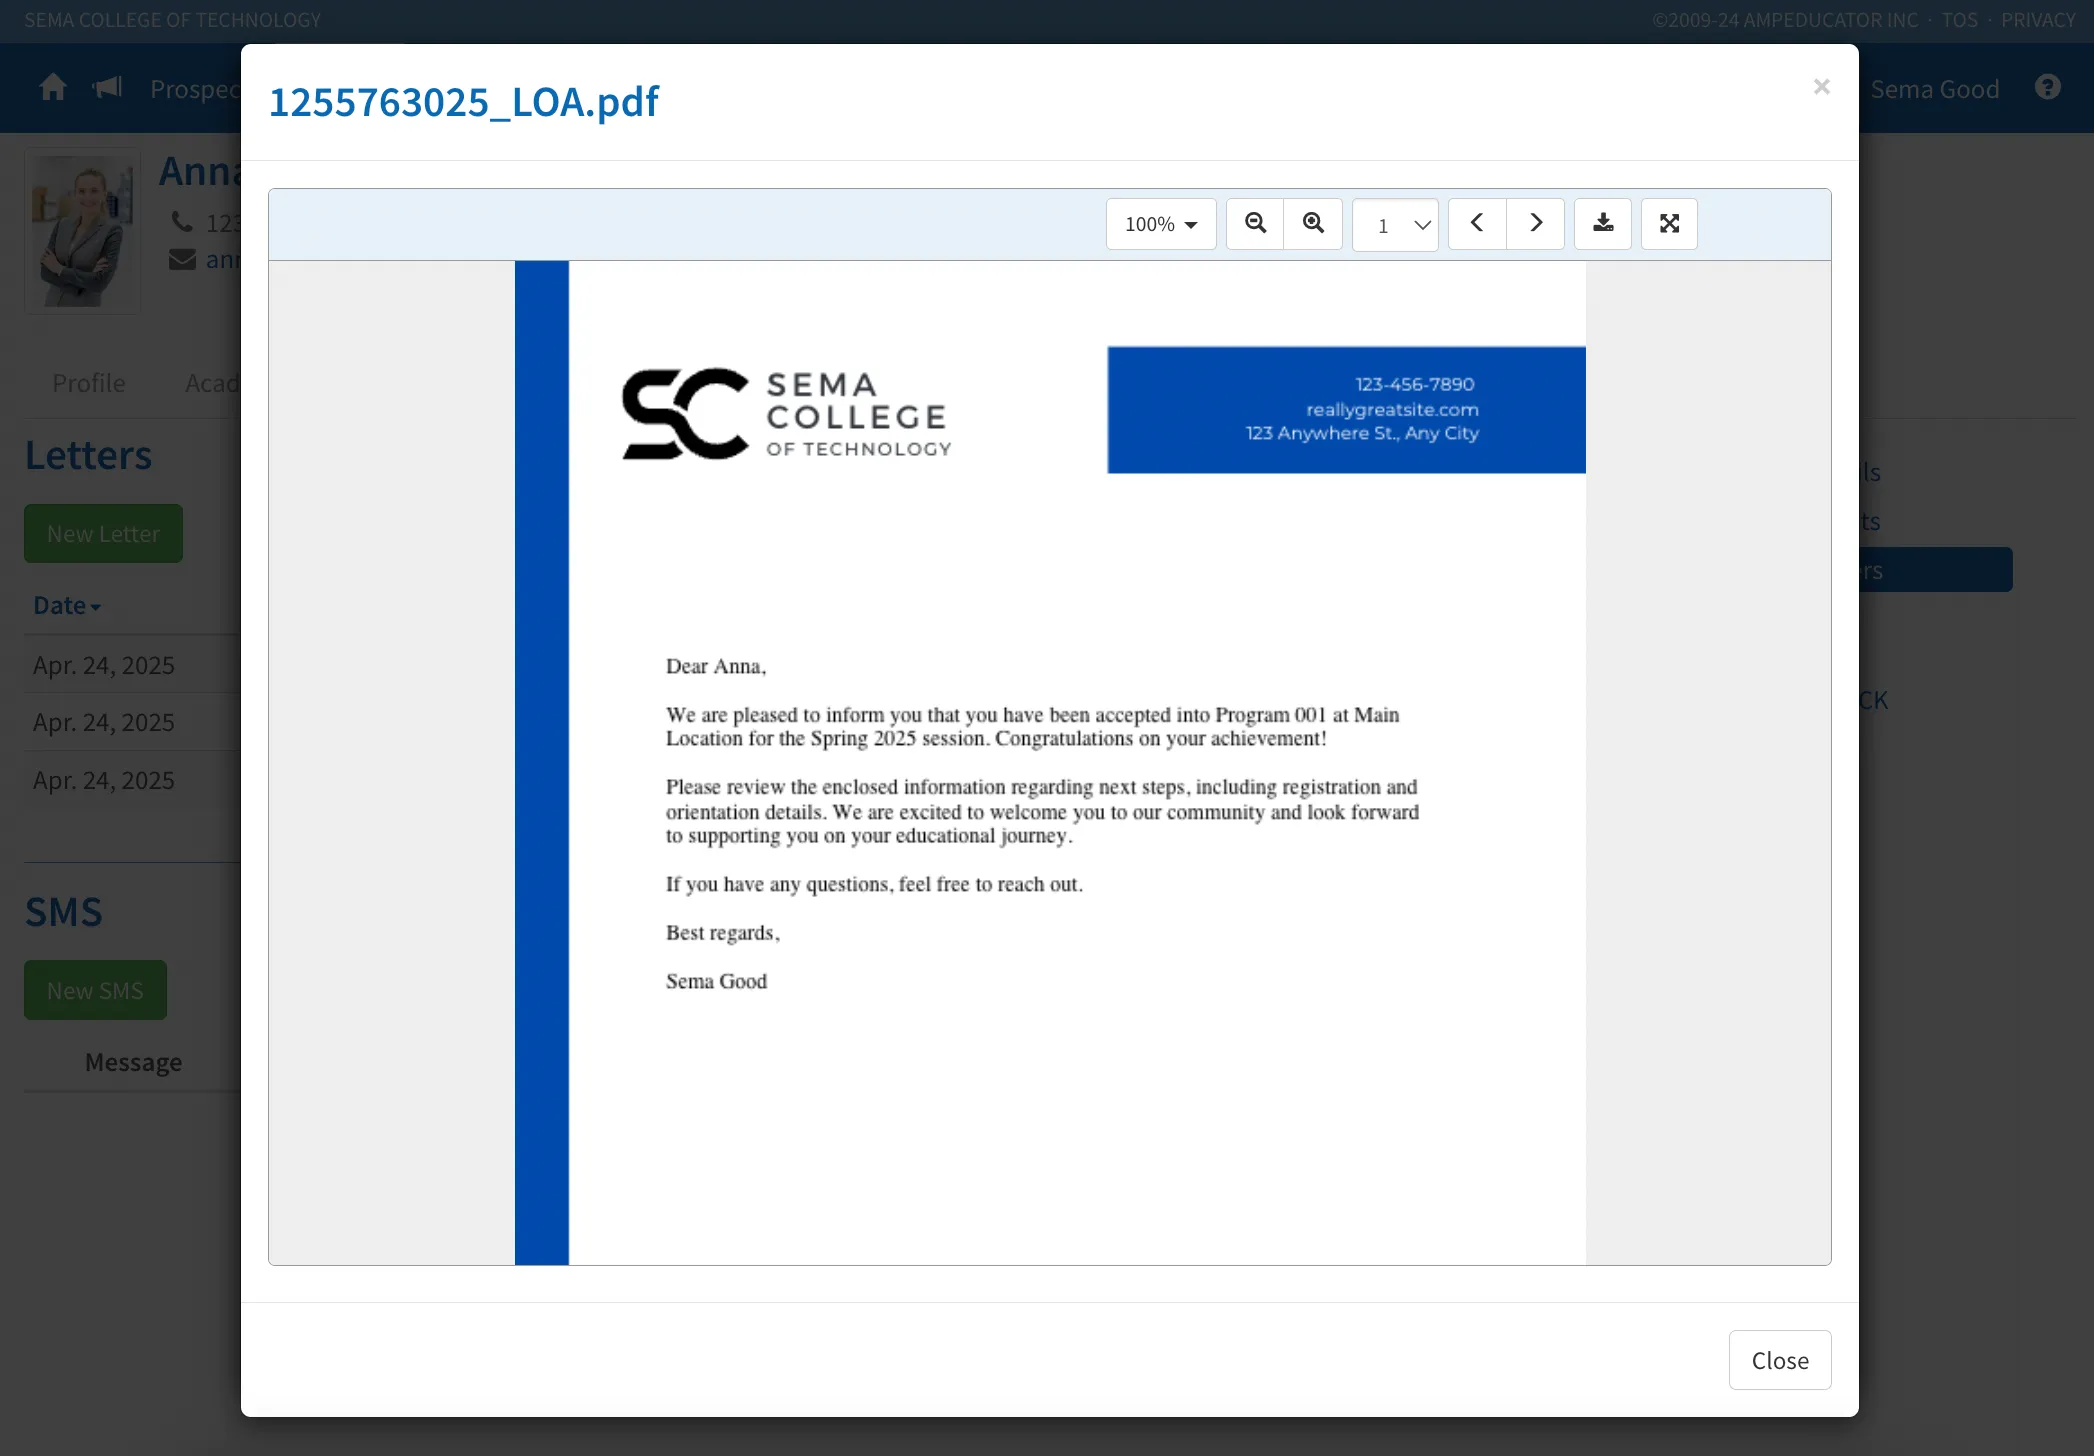
Once you press Save, the letter will appear in the list under the Letters section of the Communications tab.
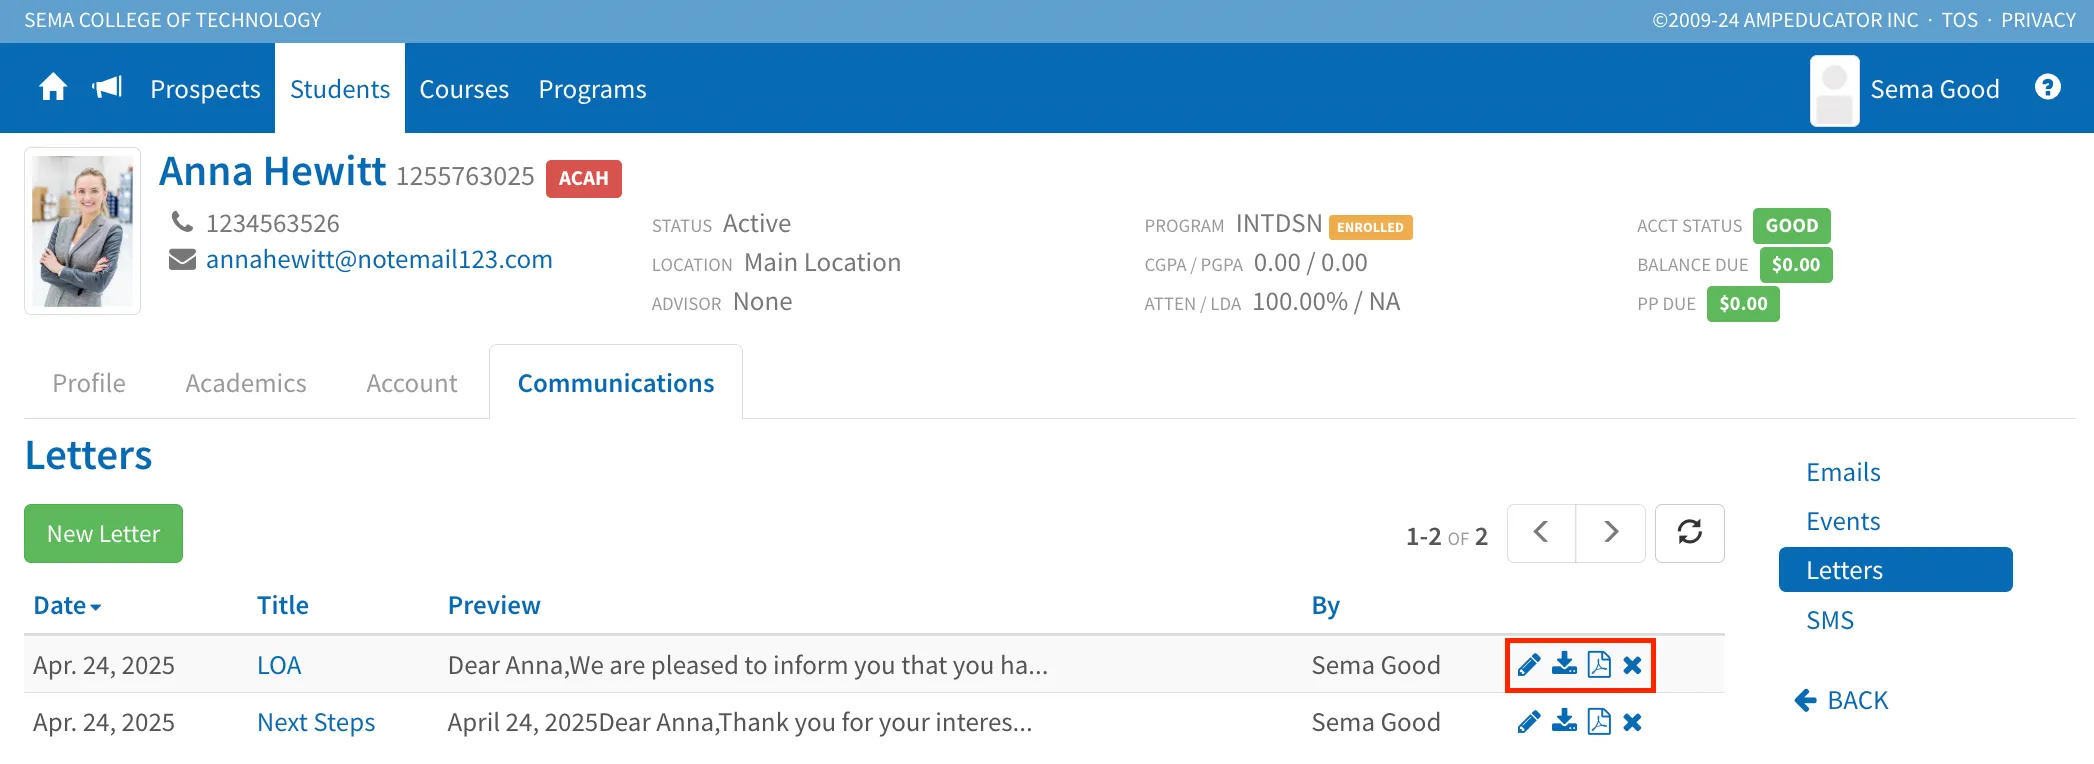
You’ll see a set of quick action icons to the right of each letter:
- Edit Letter Icon – Make changes to the letter.
- Save as PDF Icon – Download a PDF version of the letter.
- Save as Document Icon – Save the letter to the student’s profile under the Documents section.
- Delete Icon – Remove the letter if it’s no longer needed.
These options help keep important communications organized and easily accessible.
SMS
SMS is a quick and effective way to communicate important reminders or updates. Like emails and letters, SMS messages can also use templates and merge fields to personalize communication while saving time. This section displays all SMS messages sent to the Student. You’ll see a list that includes the message preview, recipient number, delivery status, timestamp, and a quick action icon to view the full message.
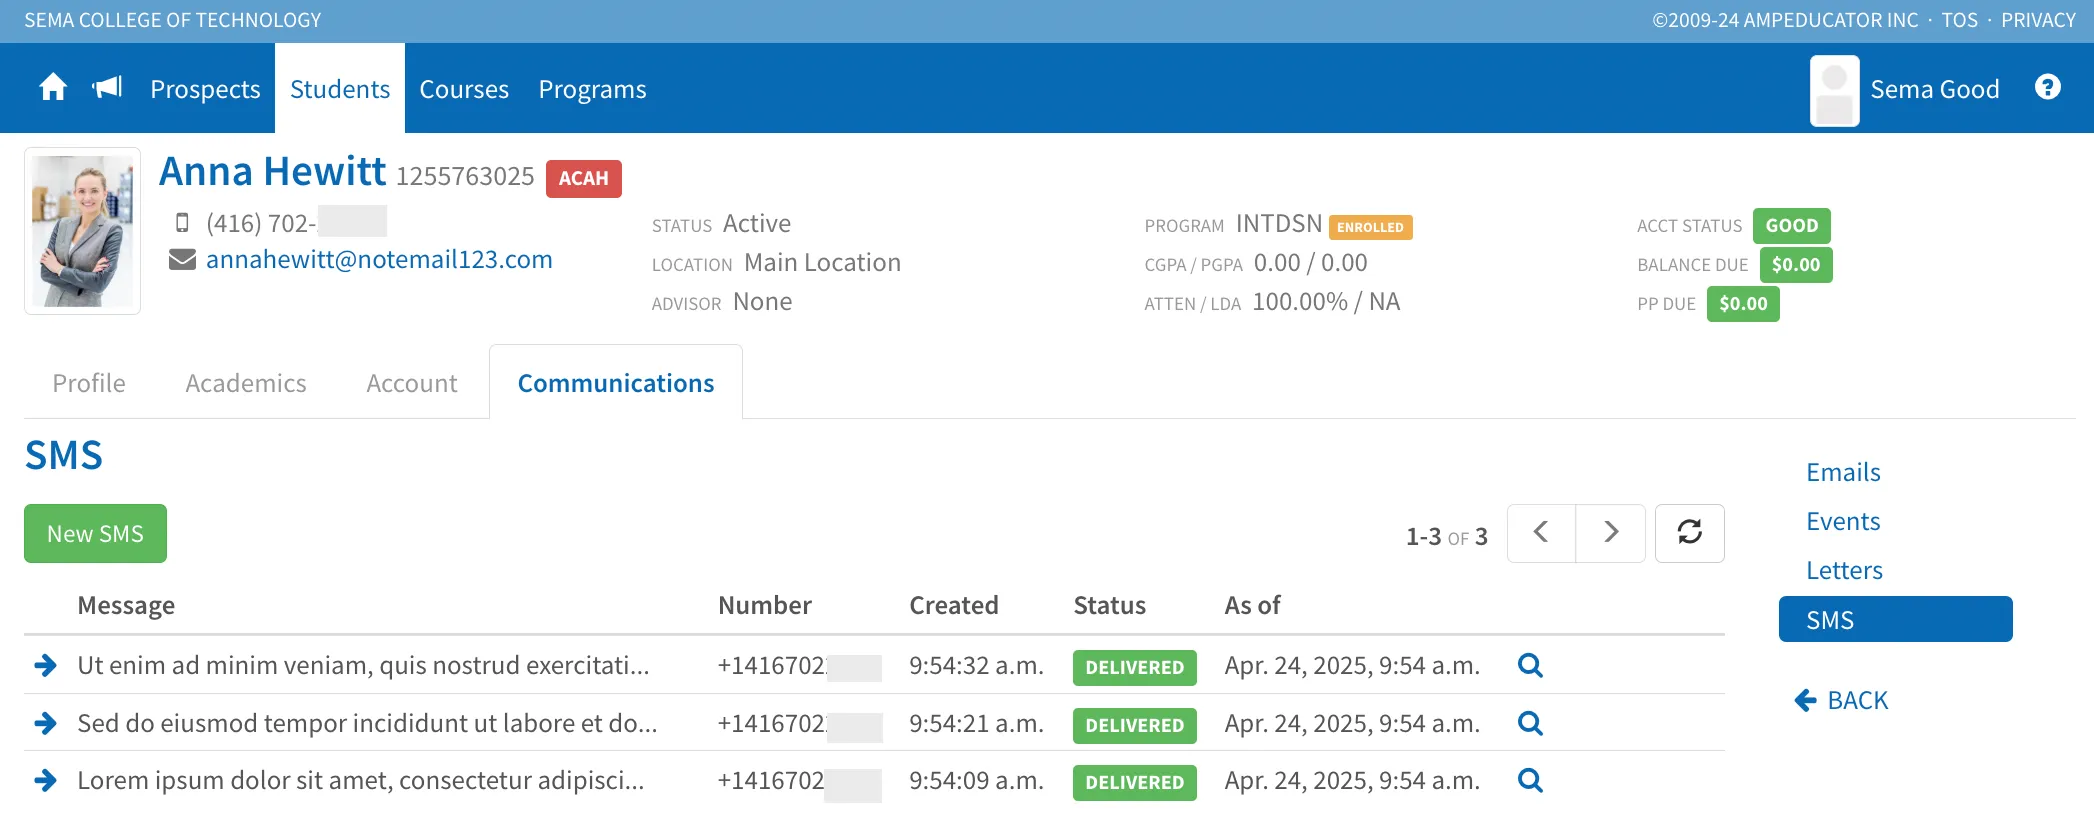
Sending a New SMS
To send a new SMS, click the New SMS button. This will open a modal where you can type your message.
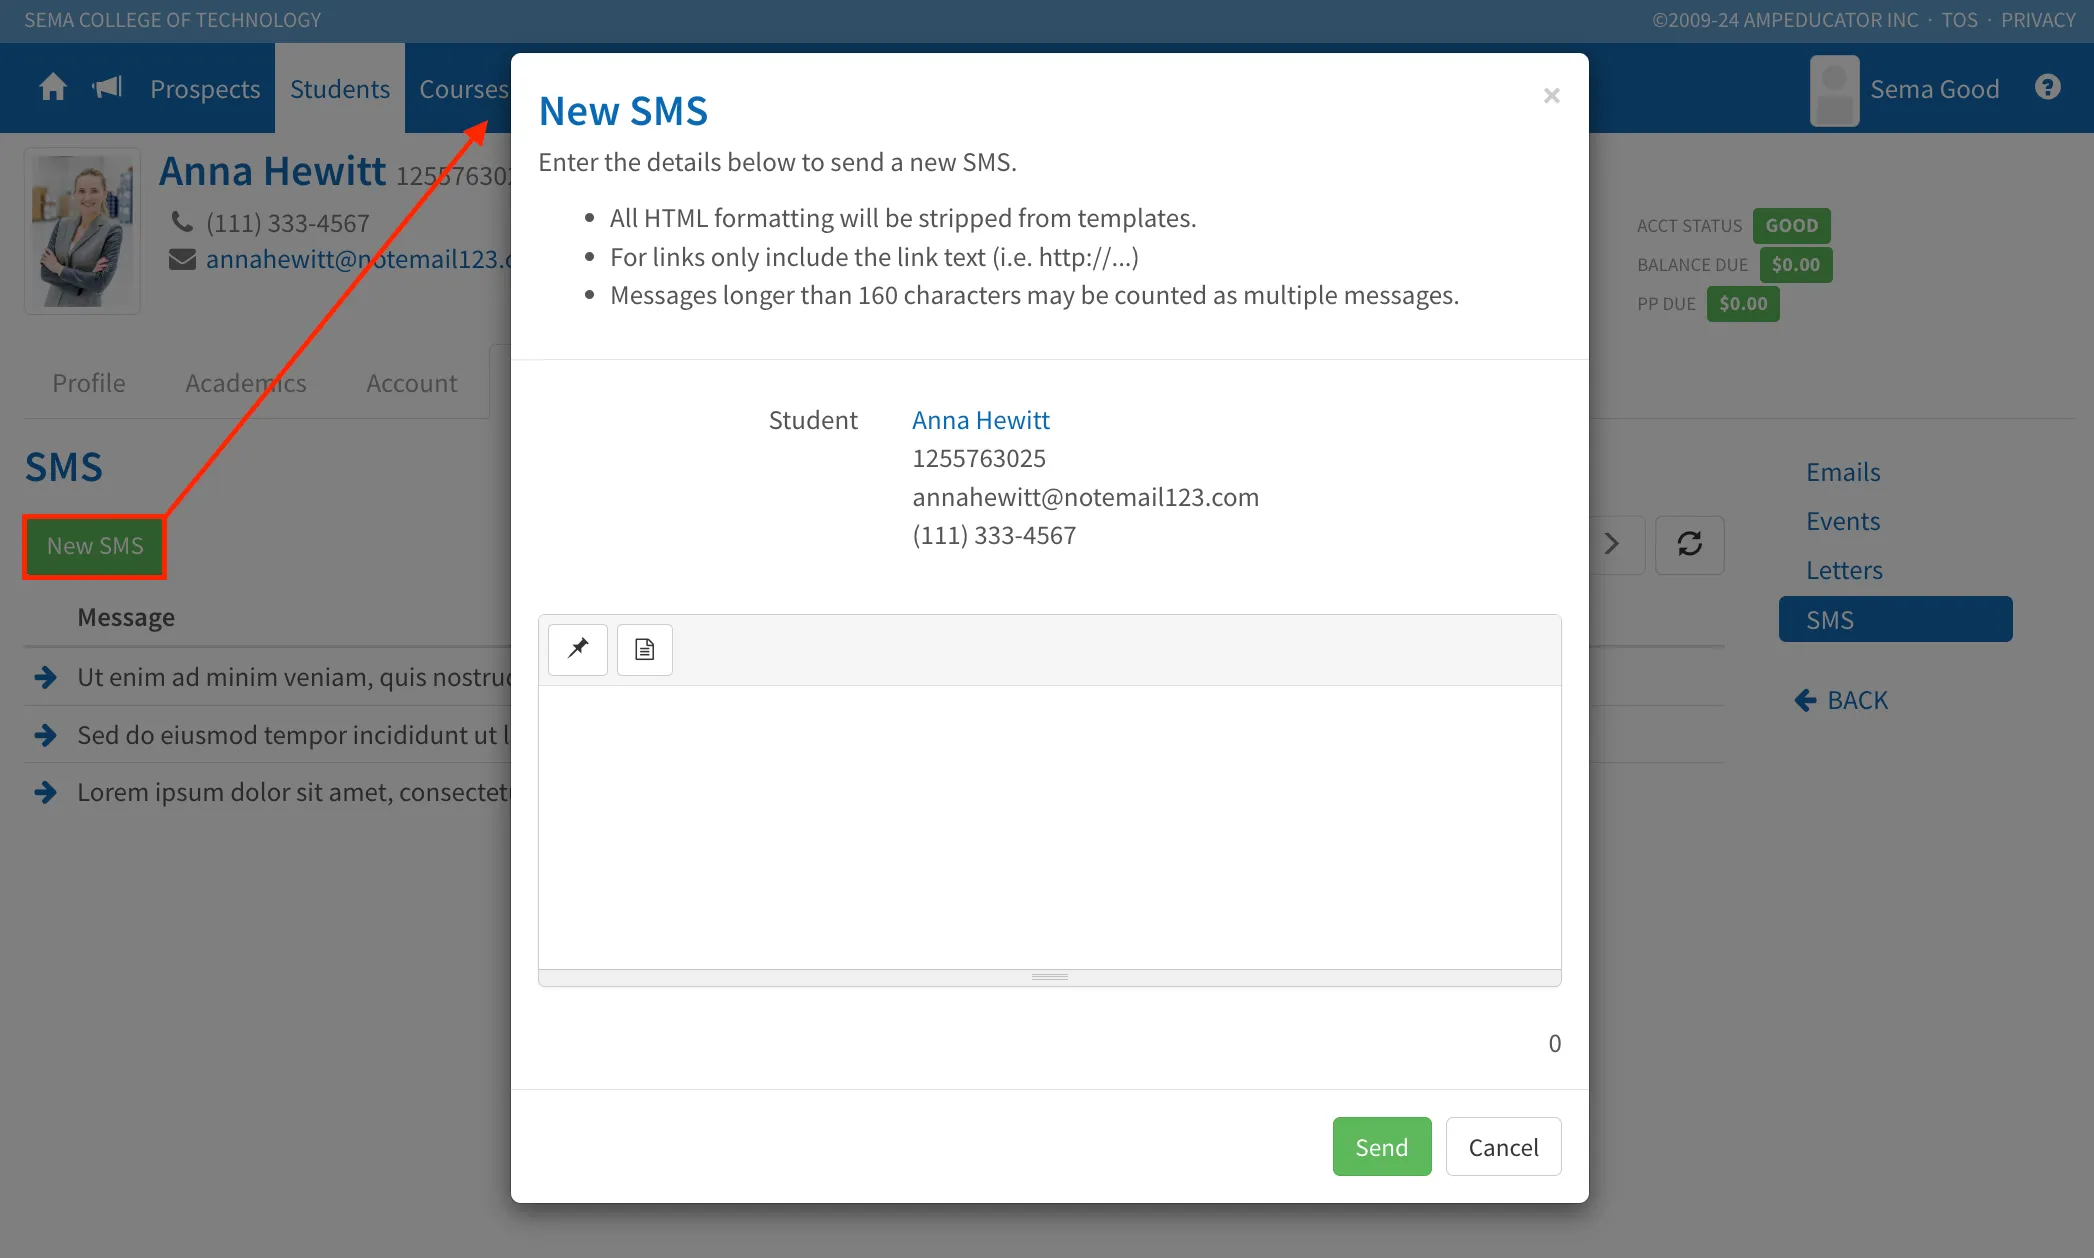
The Student’s contact details will auto-fill, and you’ll be able to:
- Insert merge text for personalization
- Keep your message under 160 characters to avoid multiple charges
Keep in mind:
- SMS does not support HTML formatting.
- If including links, use plain text URLs (e.g., http://example.com).
Once you're ready, click Send to deliver the message.
Sending Bulk Messages and Events
If you’d like to send emails, SMS messages, or event invitations to multiple Students at once, the best way to do this is through Groups. Groups let you organize Students (and Prospects) using your own filters and selections, and make it easy to send bulk communications to everyone in the group.
To learn more about setting up and using Groups, head to the Home / Groups section of this guide.