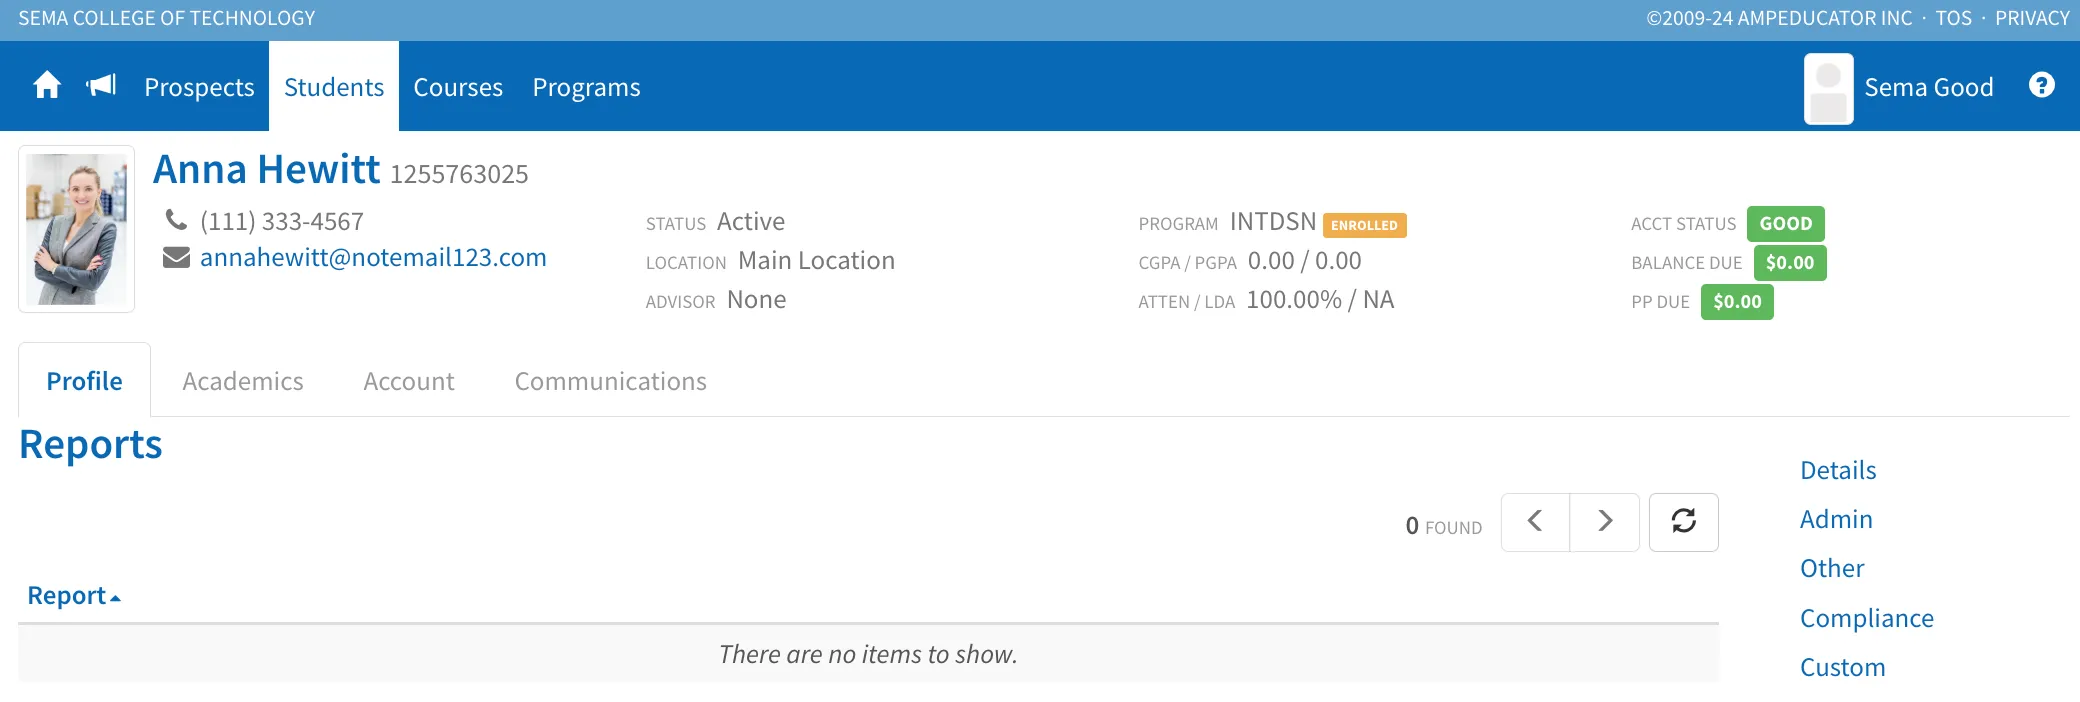
Student Profile Tab
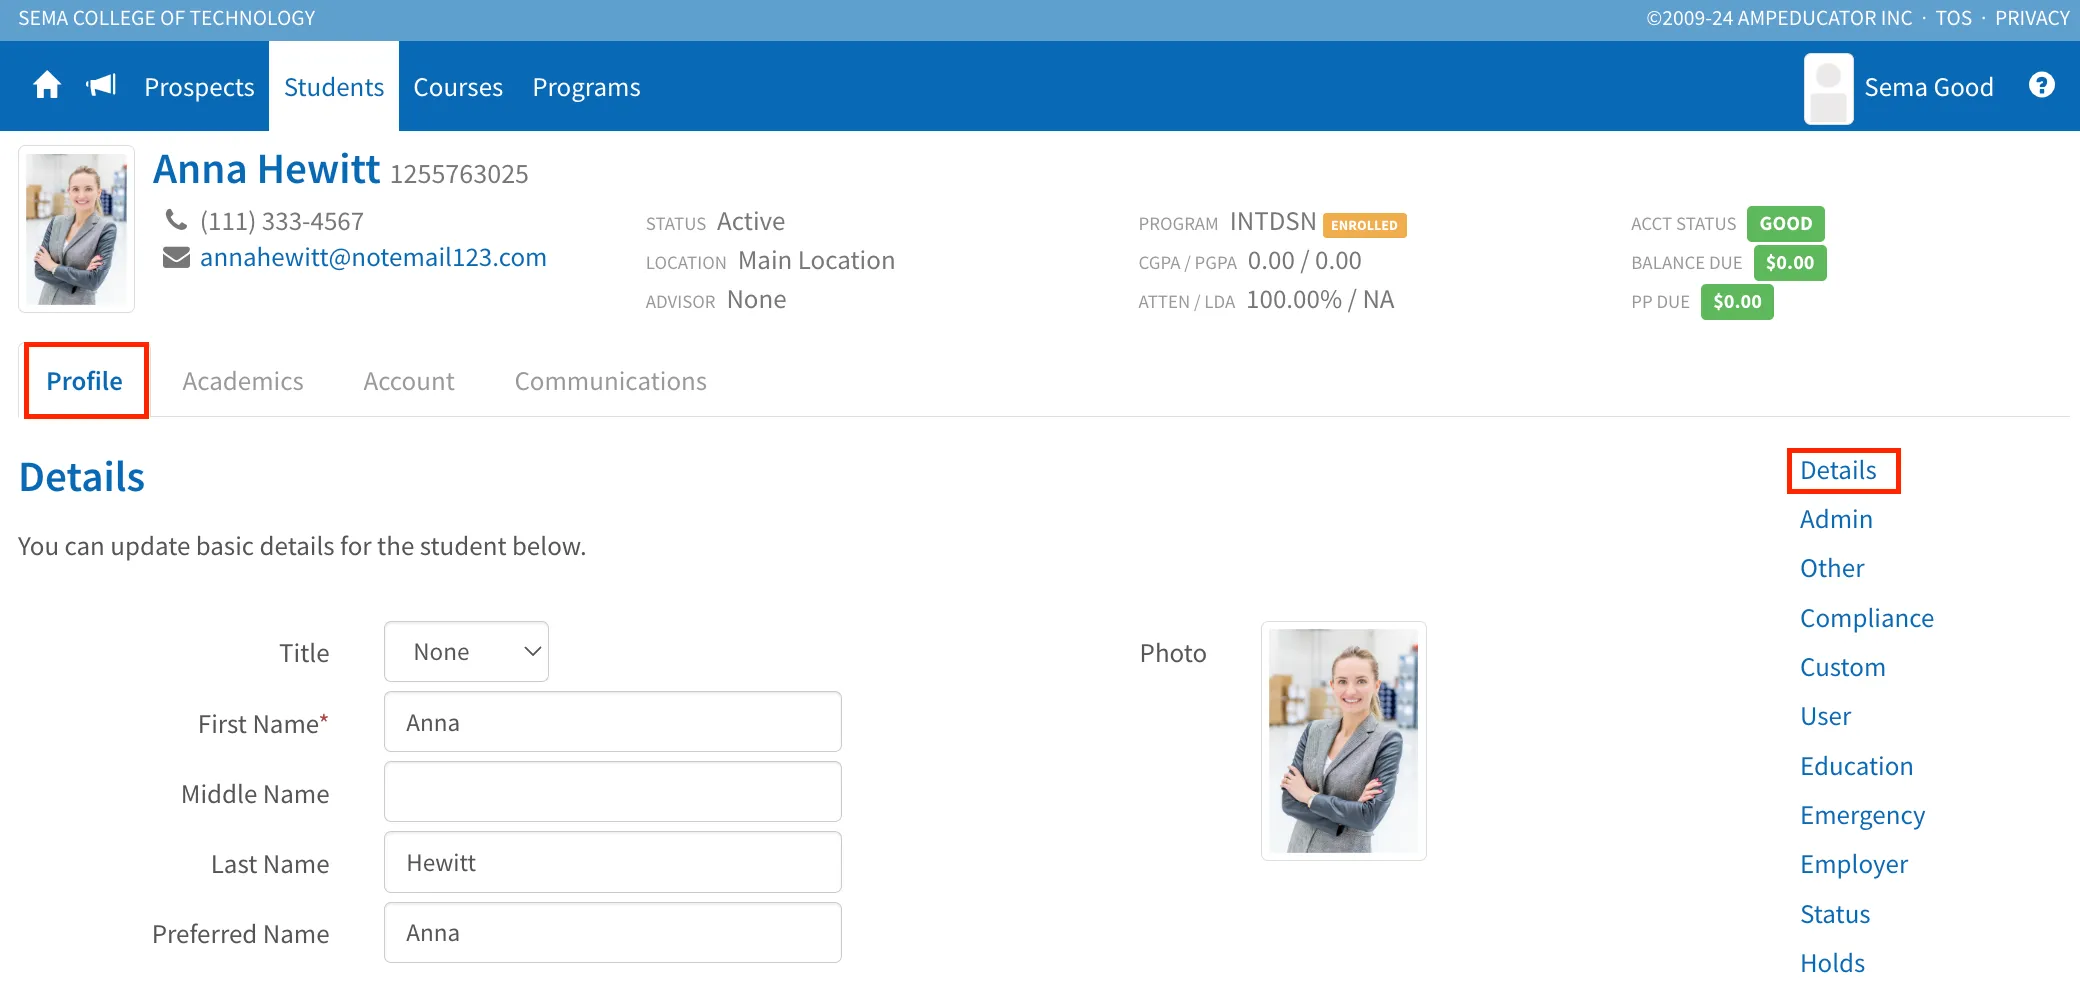
Details
This section includes the Student’s personal and contact info, such as their name, email, address, phone number, and date of birth. Any custom fields added to a section will appear at the bottom of the section.
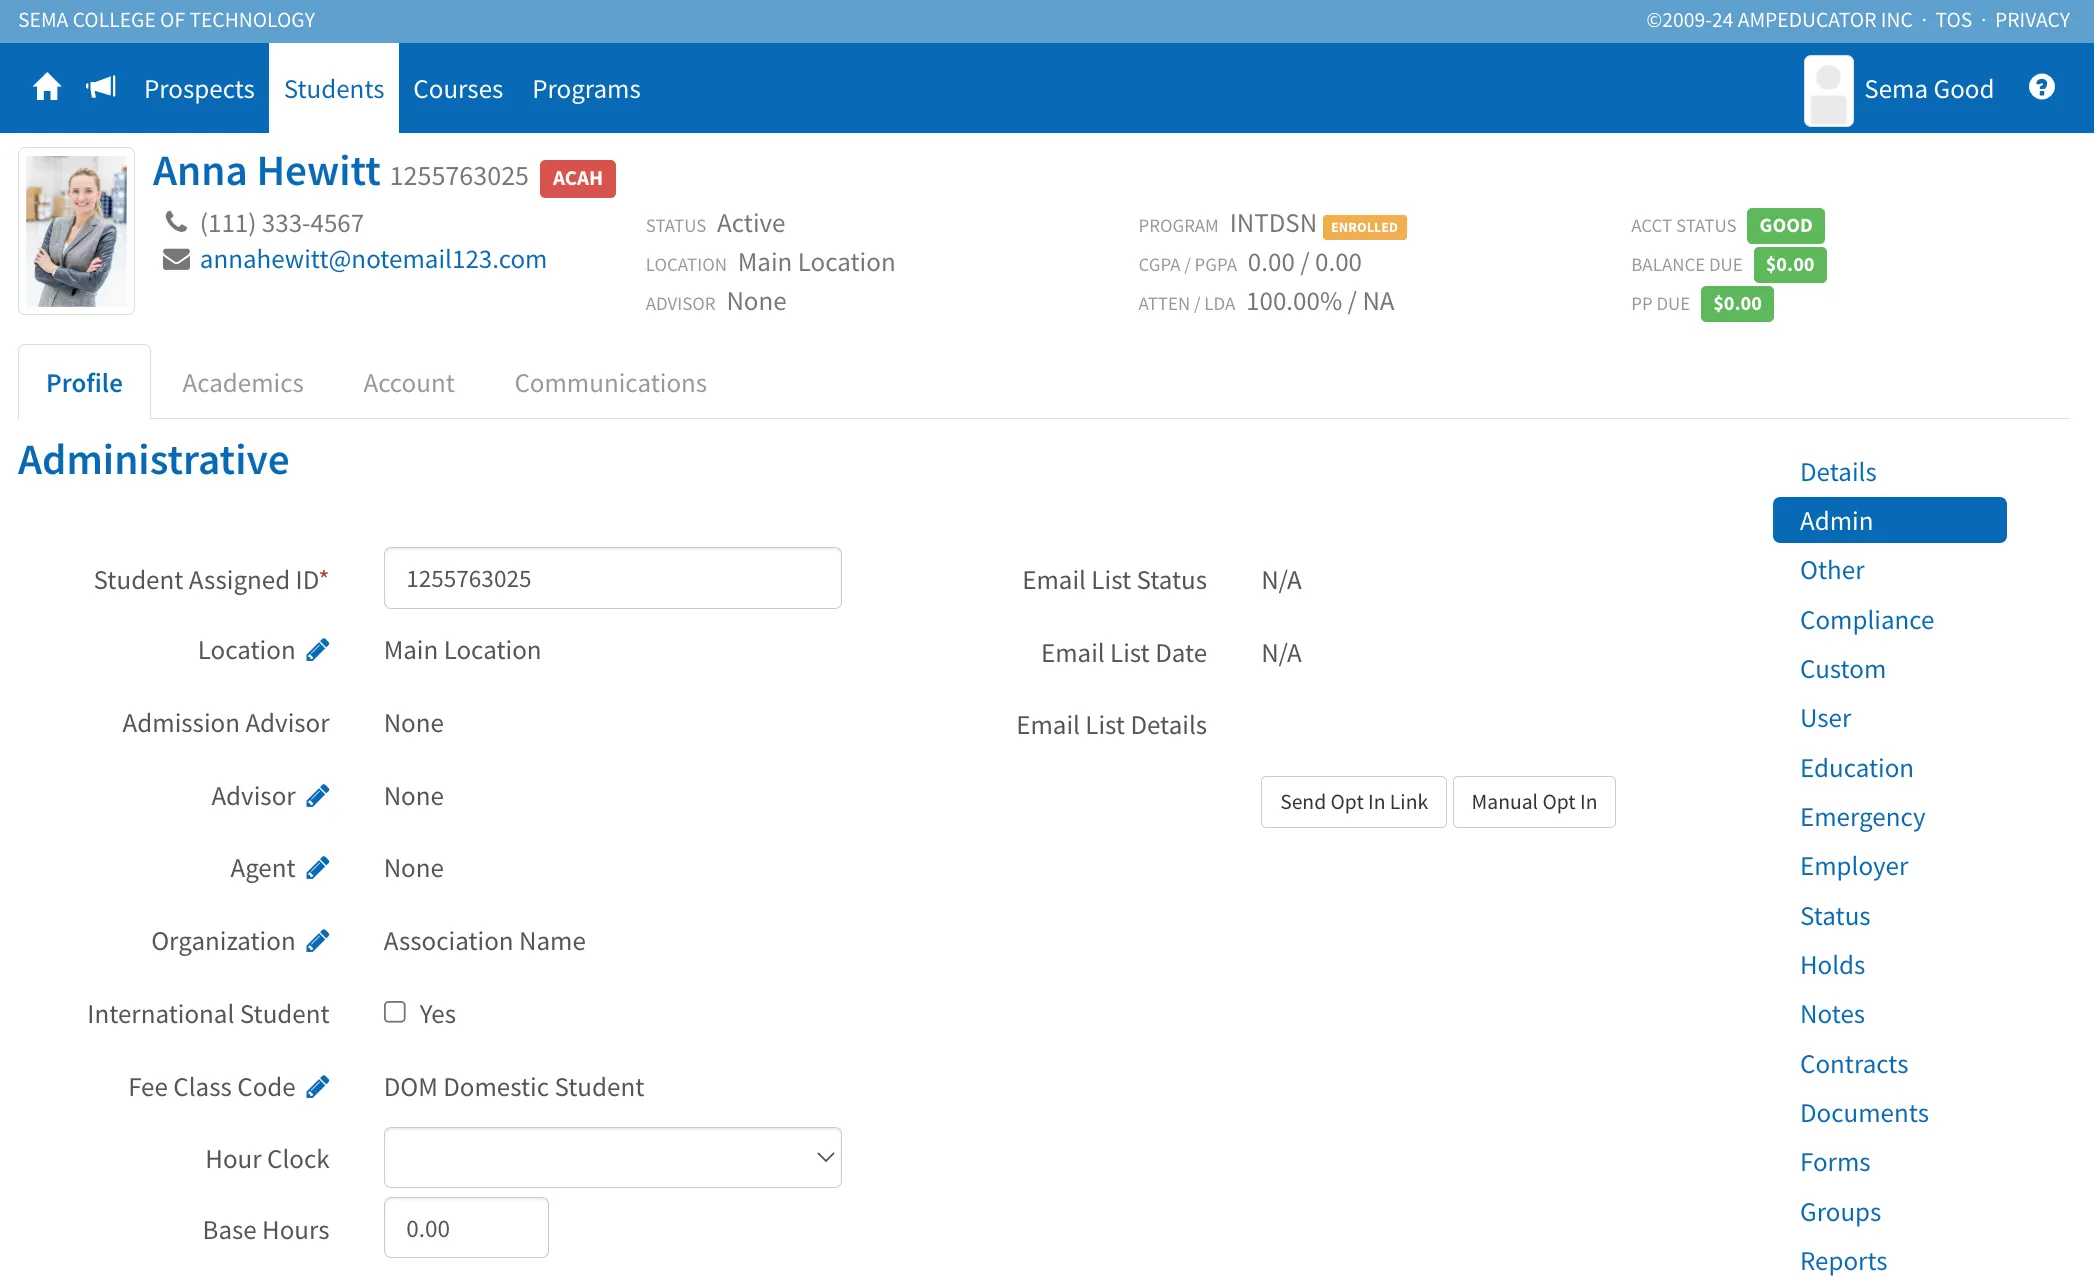
Admin
This section includes administrative fields like Location, assigned Advisors or Agents, Fee Class, and Organization. You can also track communication consent (with buttons to manually opt in or send a consent link), mark a Student as International, and configure Hour Clock and Base Hours settings. Any custom admin fields will appear at the bottom.
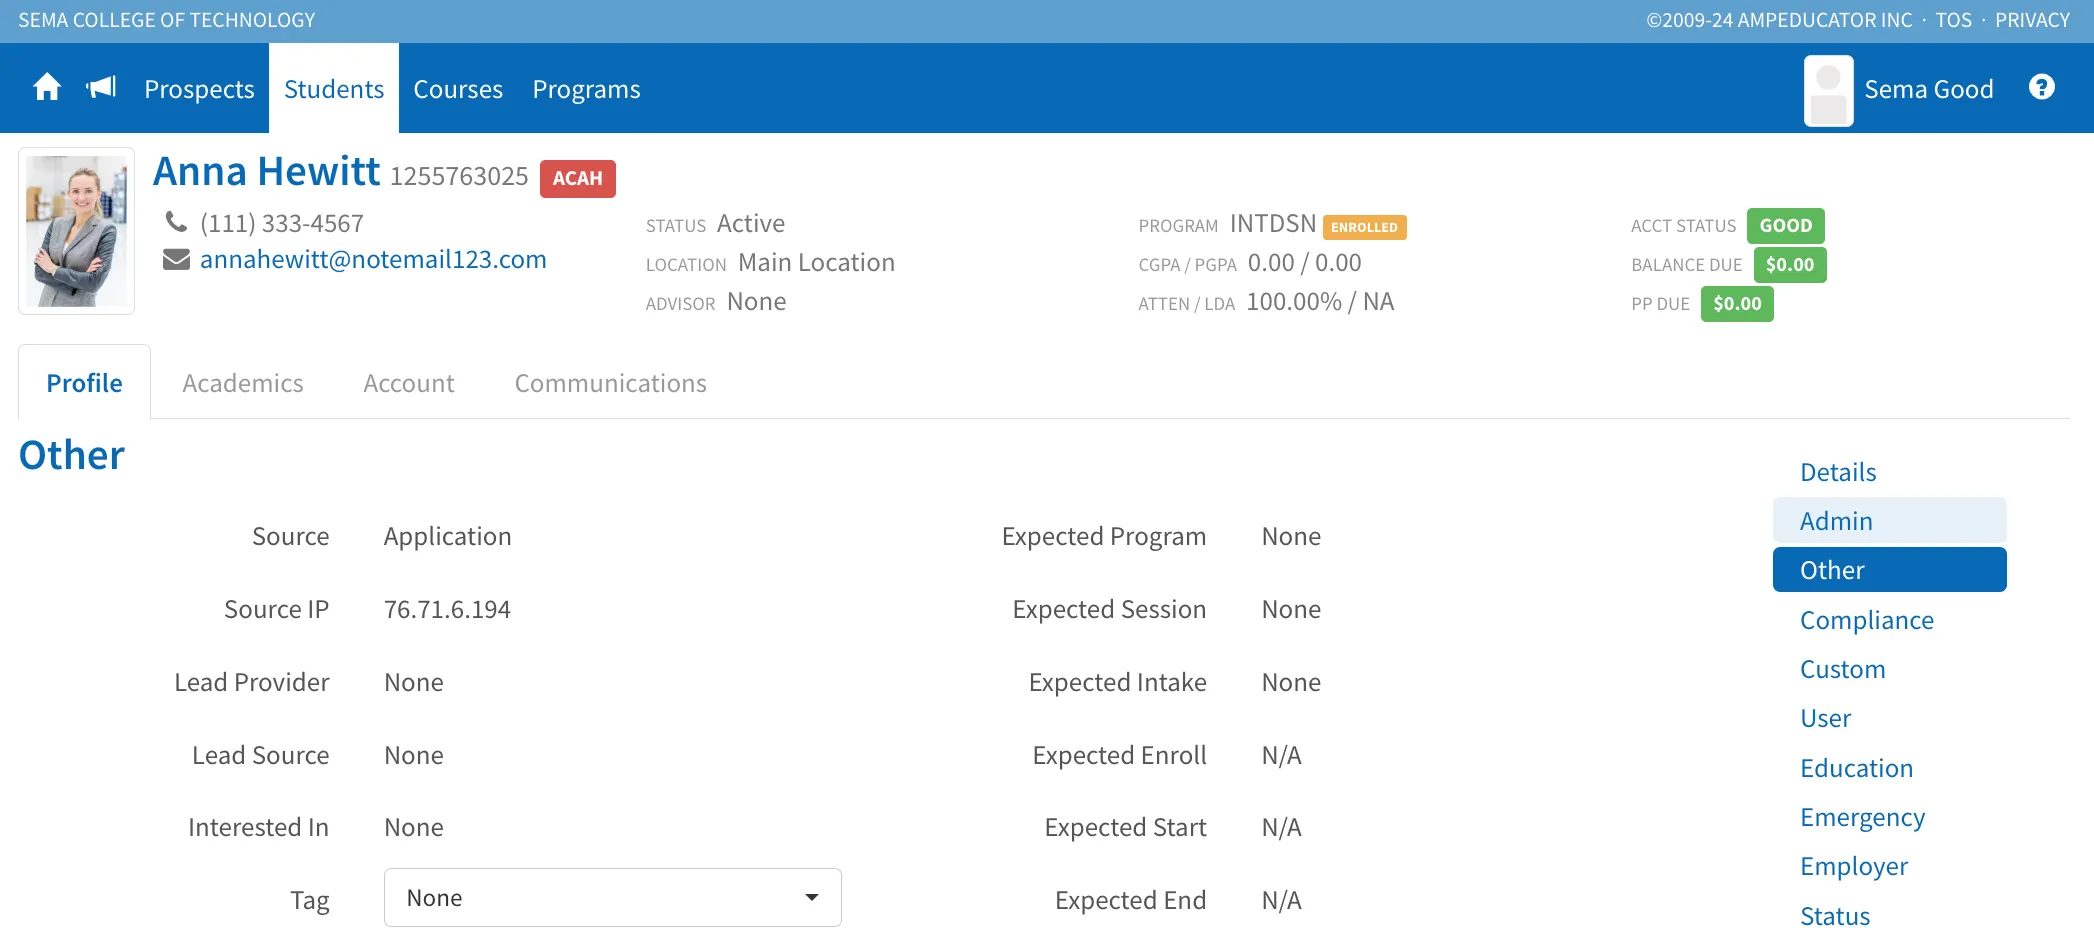
Other
This section tracks lead-related data like source, provider, and Tags, along with expected program details and revenue projections. It also shows the latest contact activity—when and how the Student was last contacted, and by whom. Custom fields assigned to this section appear at the bottom.
Compliance
This section only appears for Ontario schools that have requested compliance tracking. It allows institutions to record required data like visa status, funding details, accommodations, and transfer information for regulatory reporting.
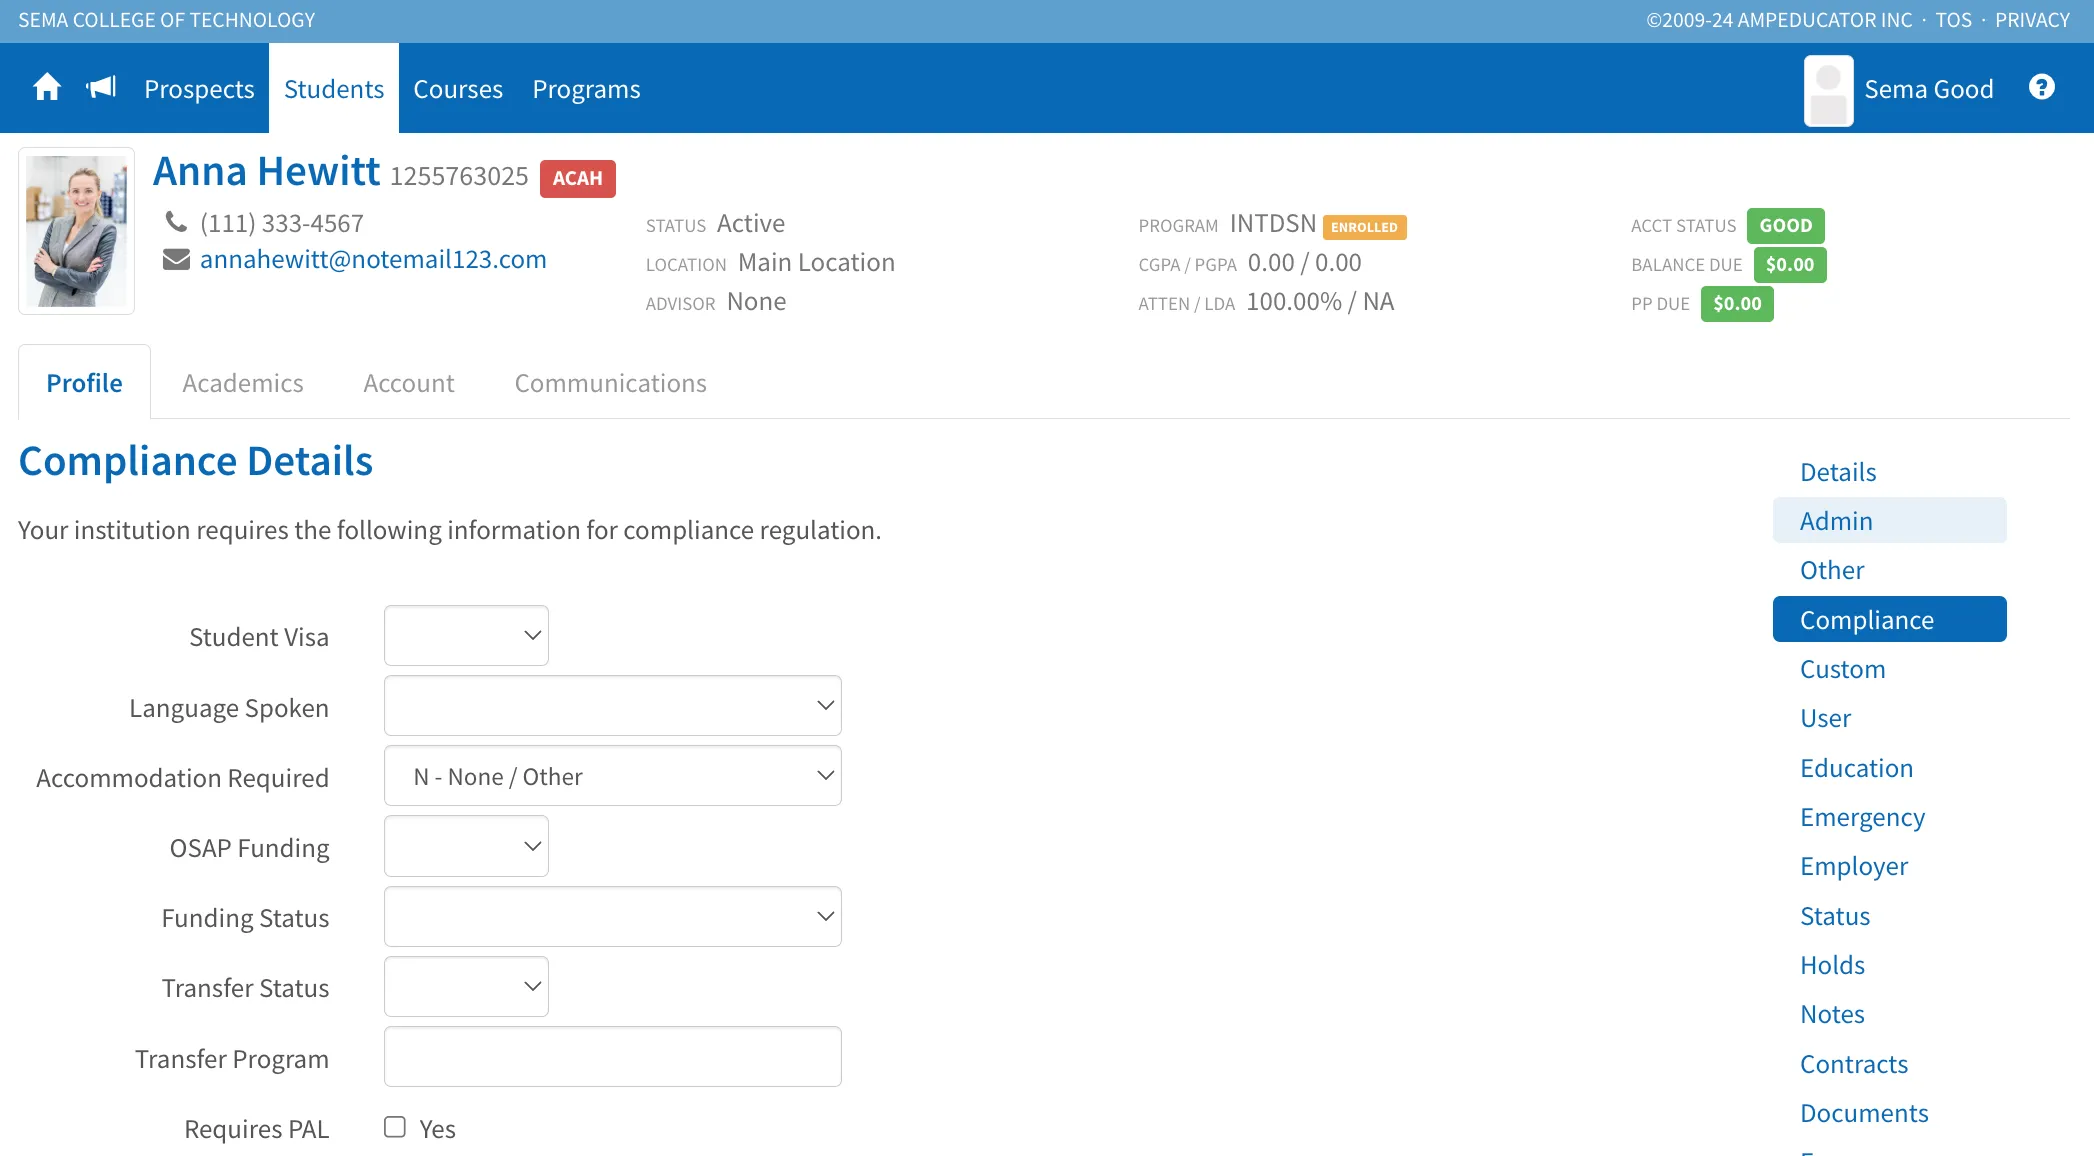
If you're a school in Ontario and are interested in enabling this feature, please contact [email protected] to learn more.
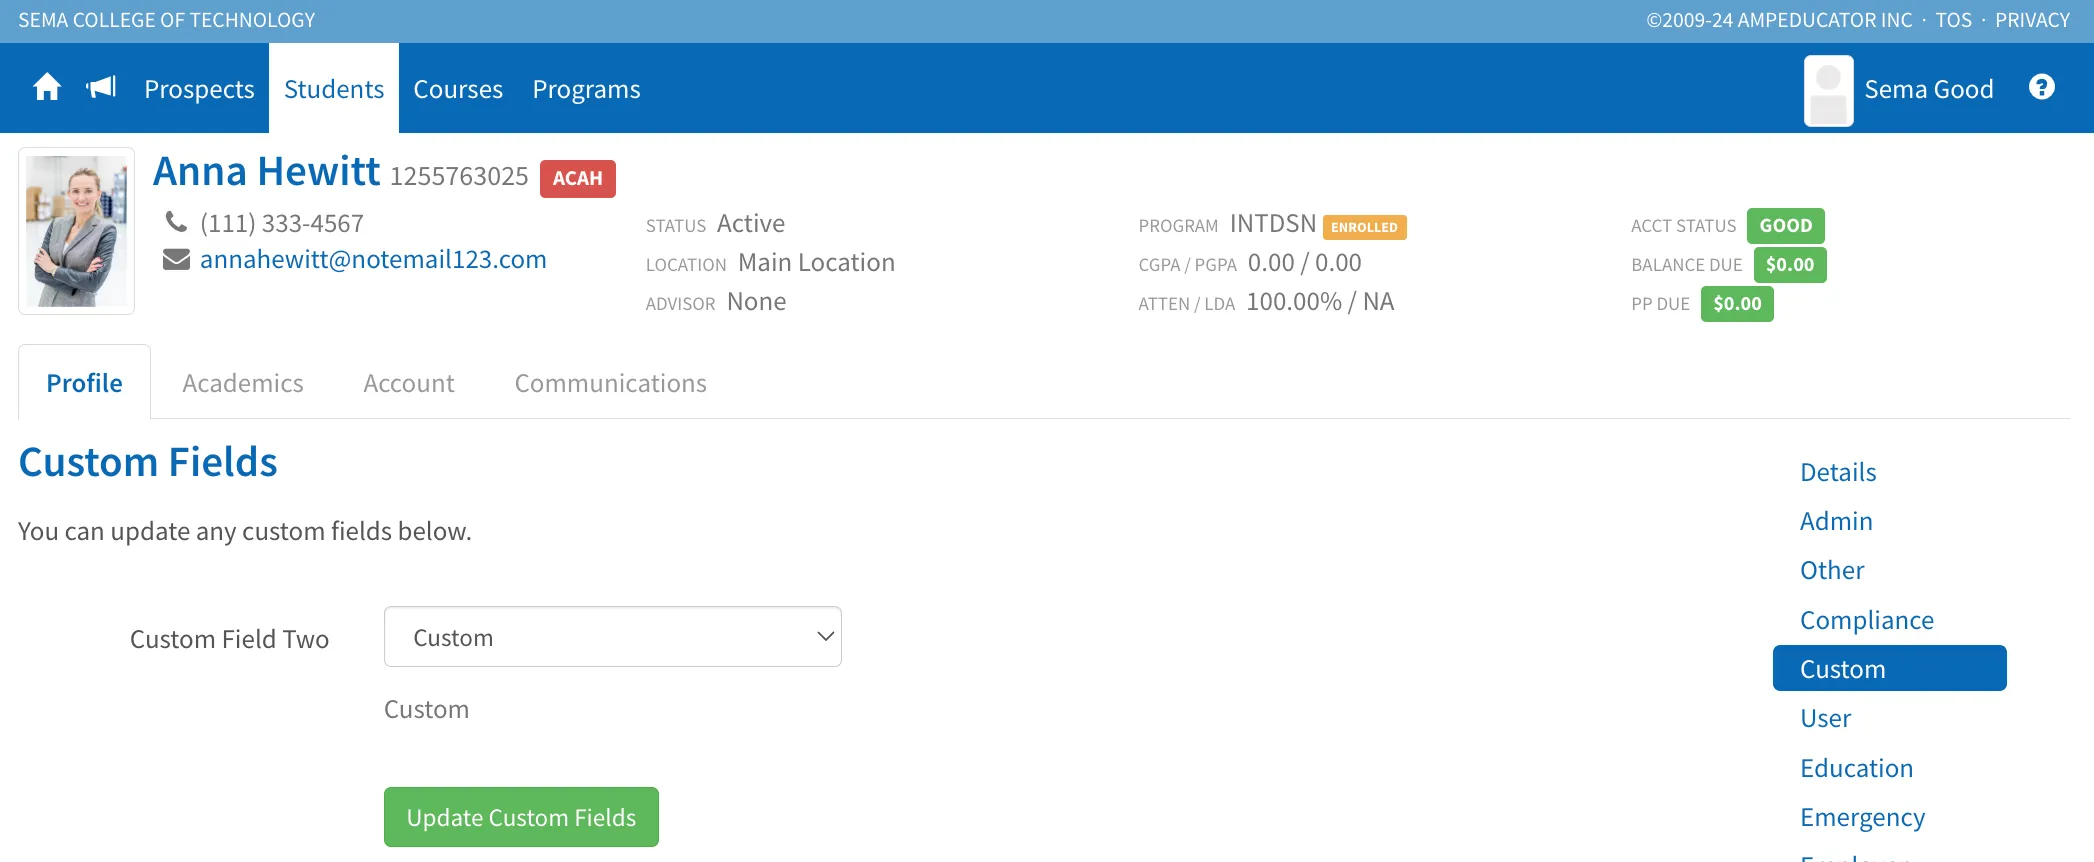
Custom
This section displays any custom fields that have not been assigned to a specific section of the Student Profile. Initially, all custom fields appeared here by default, but you now have the flexibility to organize them into other relevant sections (such as Details, Education, or Emergency) when setting them up.
User
The User section contains login and access details for the Student Portal. By default, the username is the Student’s ID, but you can change it if needed. Each Student is also assigned a Software Email, which is used for internal system communications. You can view the Student’s last login date and time, update their account status, and assign location access if your institution has more than one location.
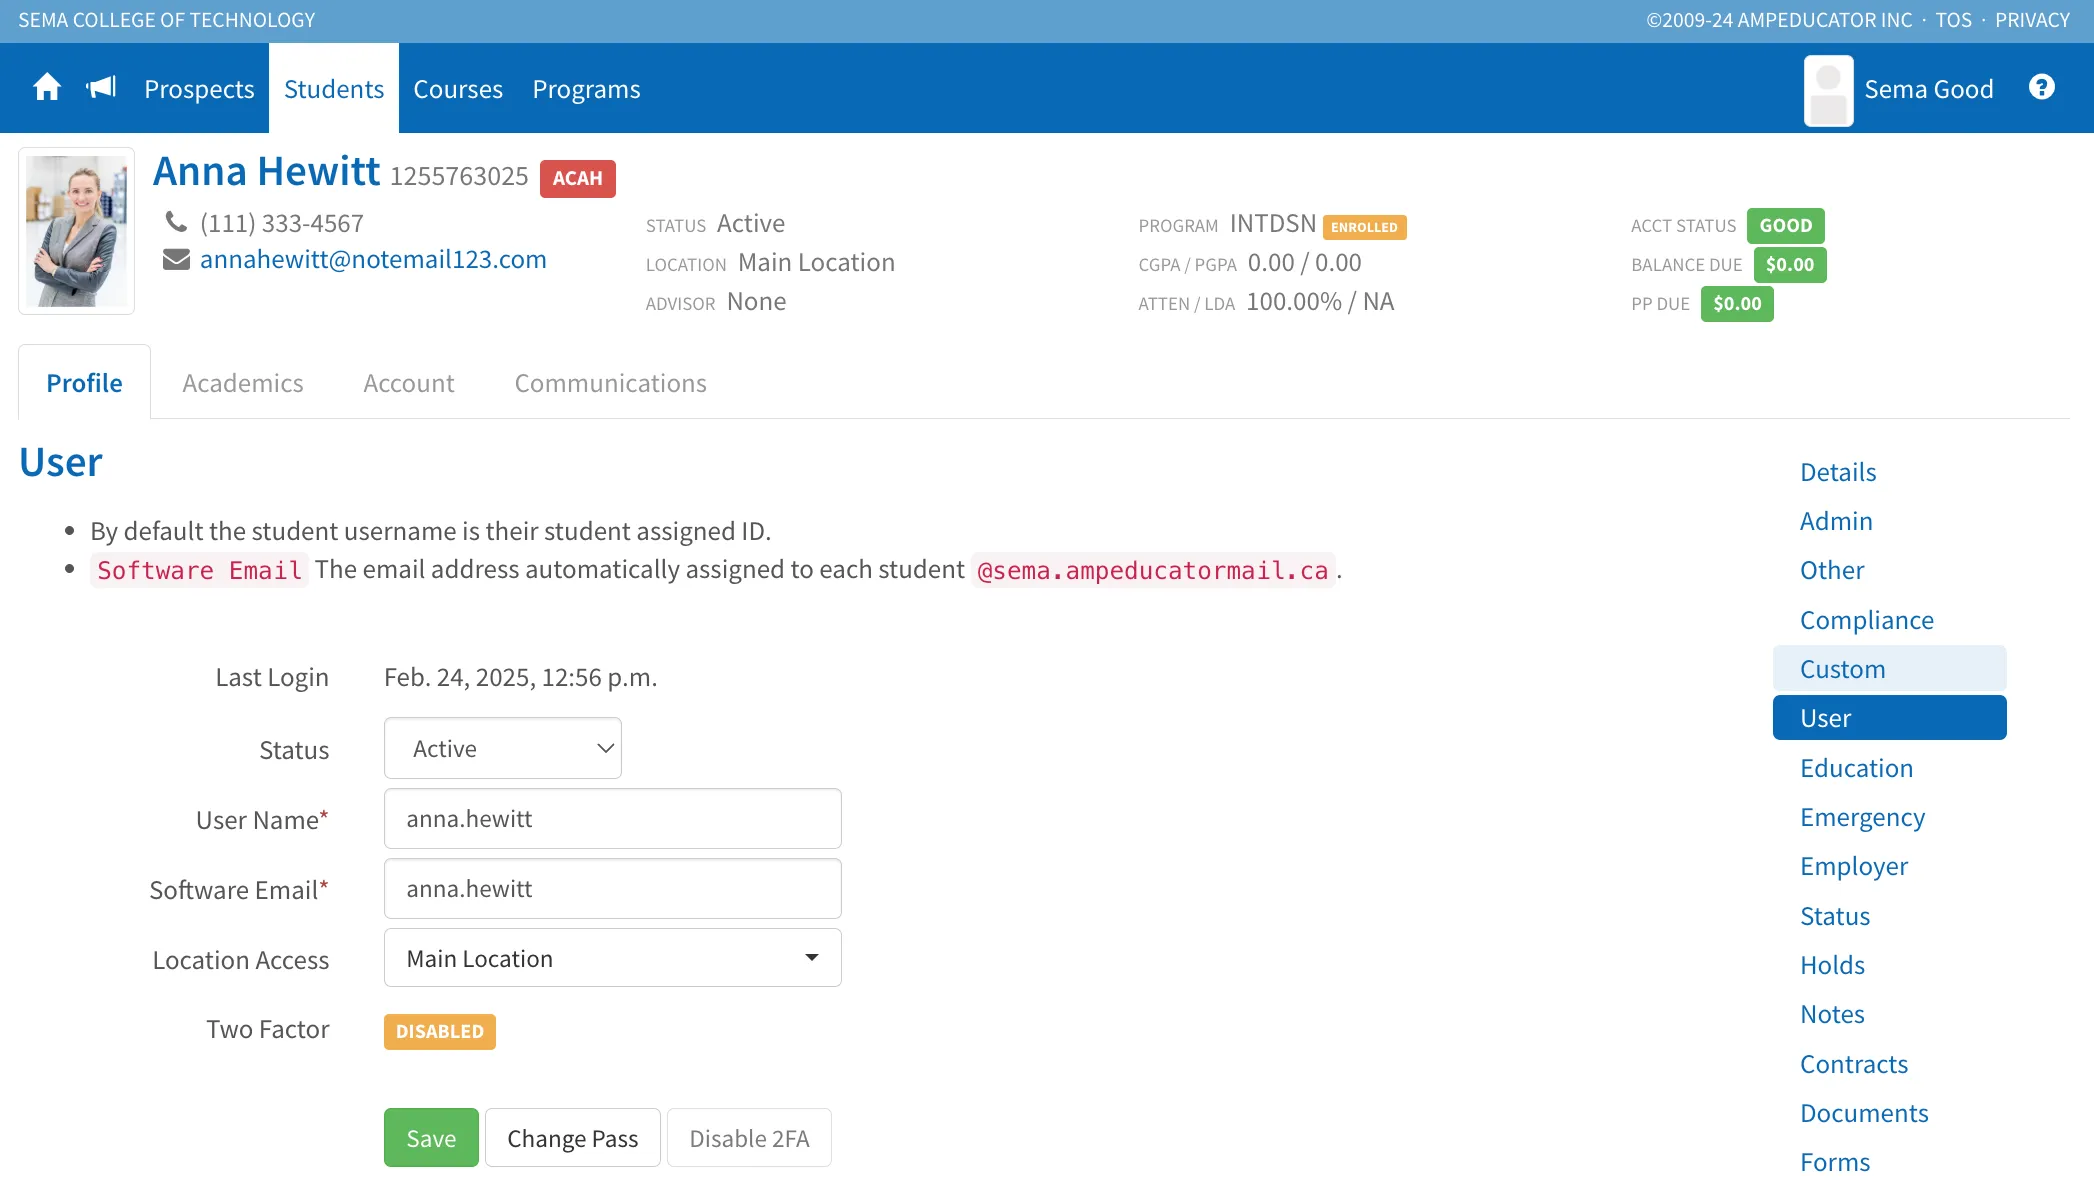
You can manually change a Student’s login password if needed using the Change Pass button. If Two Factor Authentication (2FA) has been enabled for the Student, you’ll see its status here and have the option to disable it if necessary.
User Logins
Under Student Profile → User Logins, you can view a detailed log of the student’s login activity.
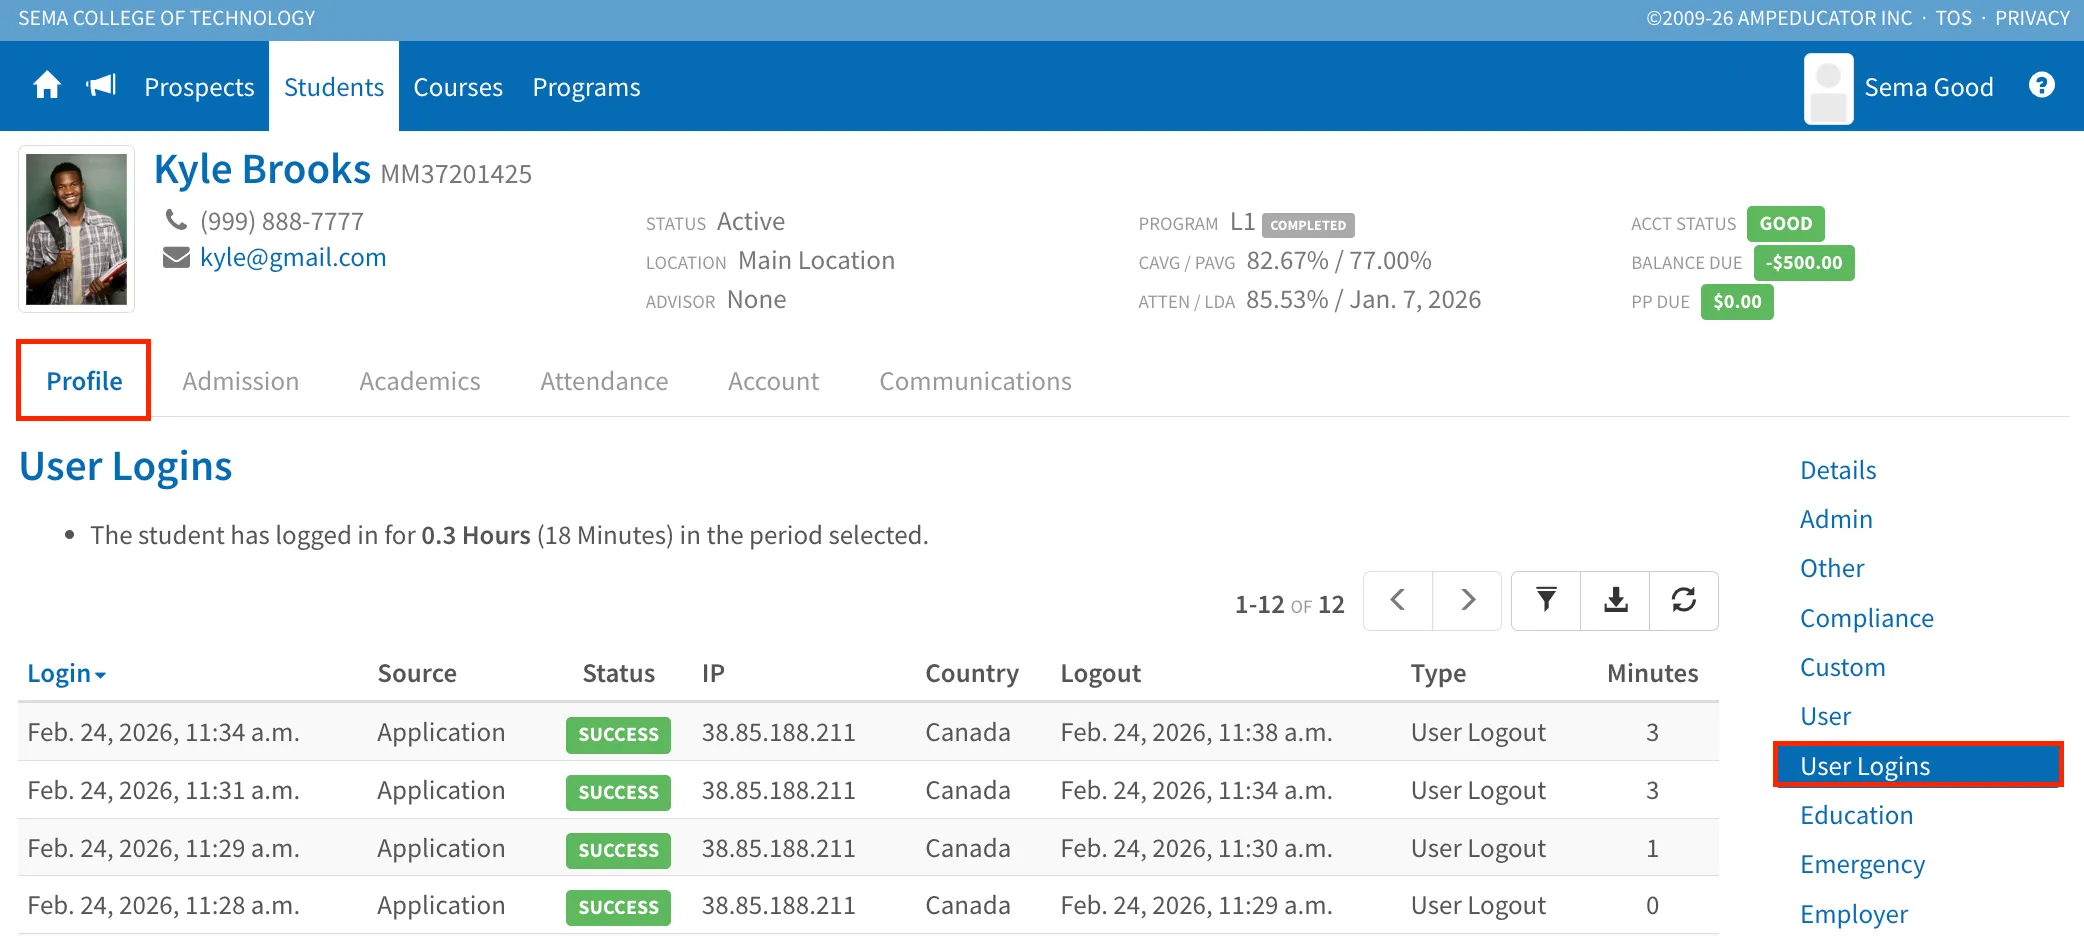
Access to the User Logins section is restricted based on Role Sensitivity settings. Only roles with Highly Sensitive role access can view login activity. Users without this level of access will not be able to access this section.
At the top of the page, you’ll see the total amount of time the student has logged in during the selected date range (displayed in hours and minutes). Below this is a table listing each login session with the following information:
- Login and Logout timestamps
- Source – Indicates how the user logged in (e.g., Application or an SSO provider such as Google or Microsoft)
- Status – Displays the result of the login attempt. This may include successful logins or reasons a login was blocked (e.g., Bad Password, Bad 2FA, Blocked IP, or Blocked VPN)
- IP address used
- Country
- Type of logout (e.g., User Logout or Session Expired)
- Minutes spent during that session
Filtering Login Records
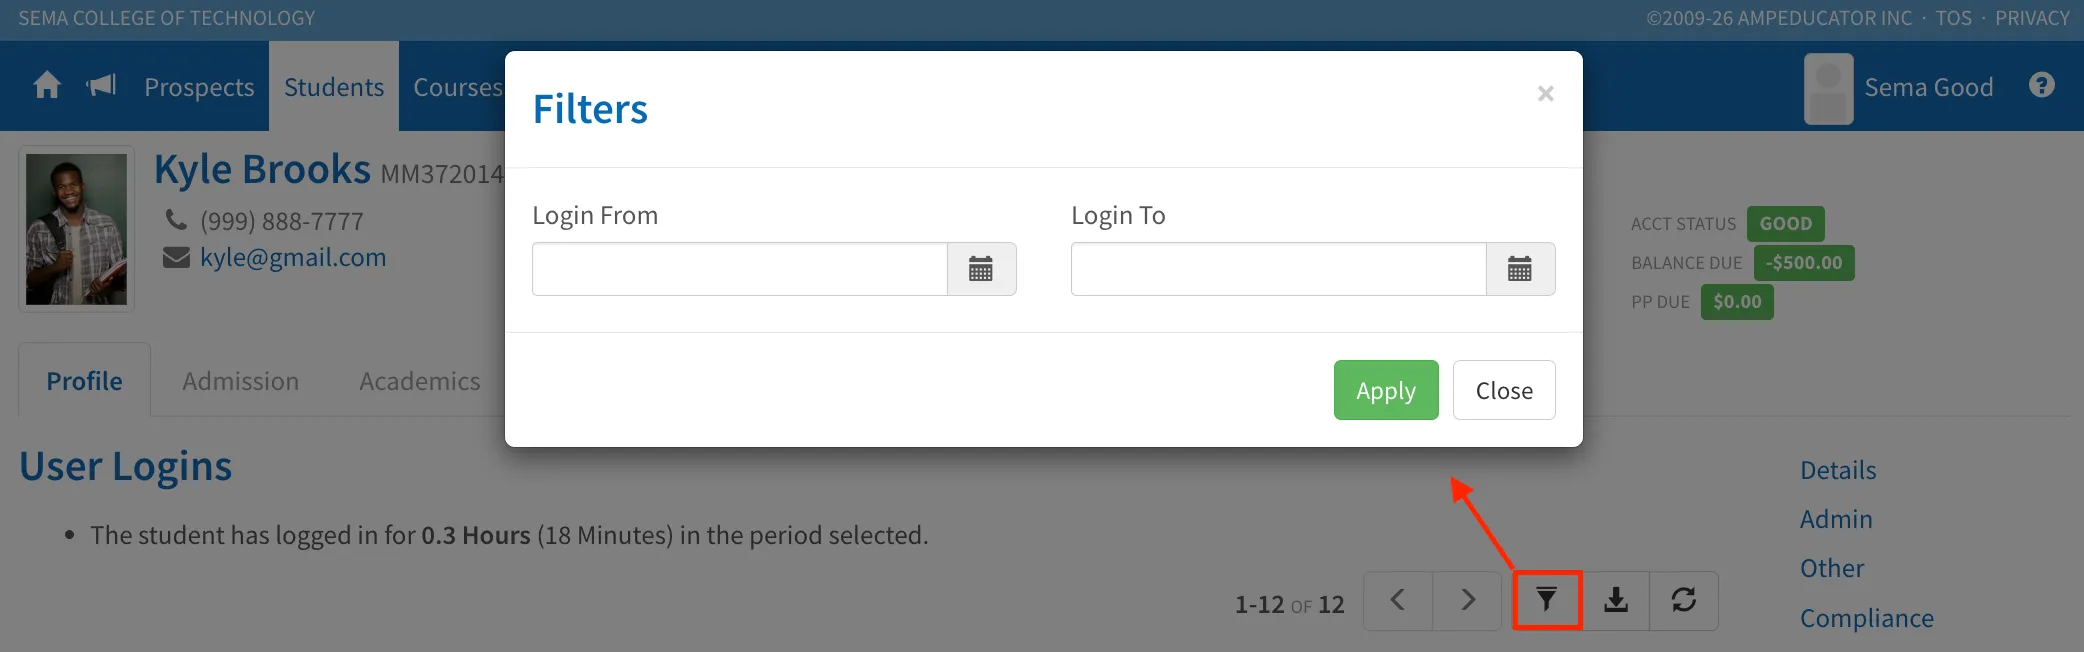
To narrow down the data, click the filter icon (funnel symbol) to open the filter window. You can filter records by Login From and Login To dates, then click Apply to update the view.
Exporting Login Data
Click the export icon (download symbol) to open the Export Data window. Here, you can choose which columns you’d like to include in the export and select your preferred file format: PDF, CSV, or XML. The file will be downloaded to your device.
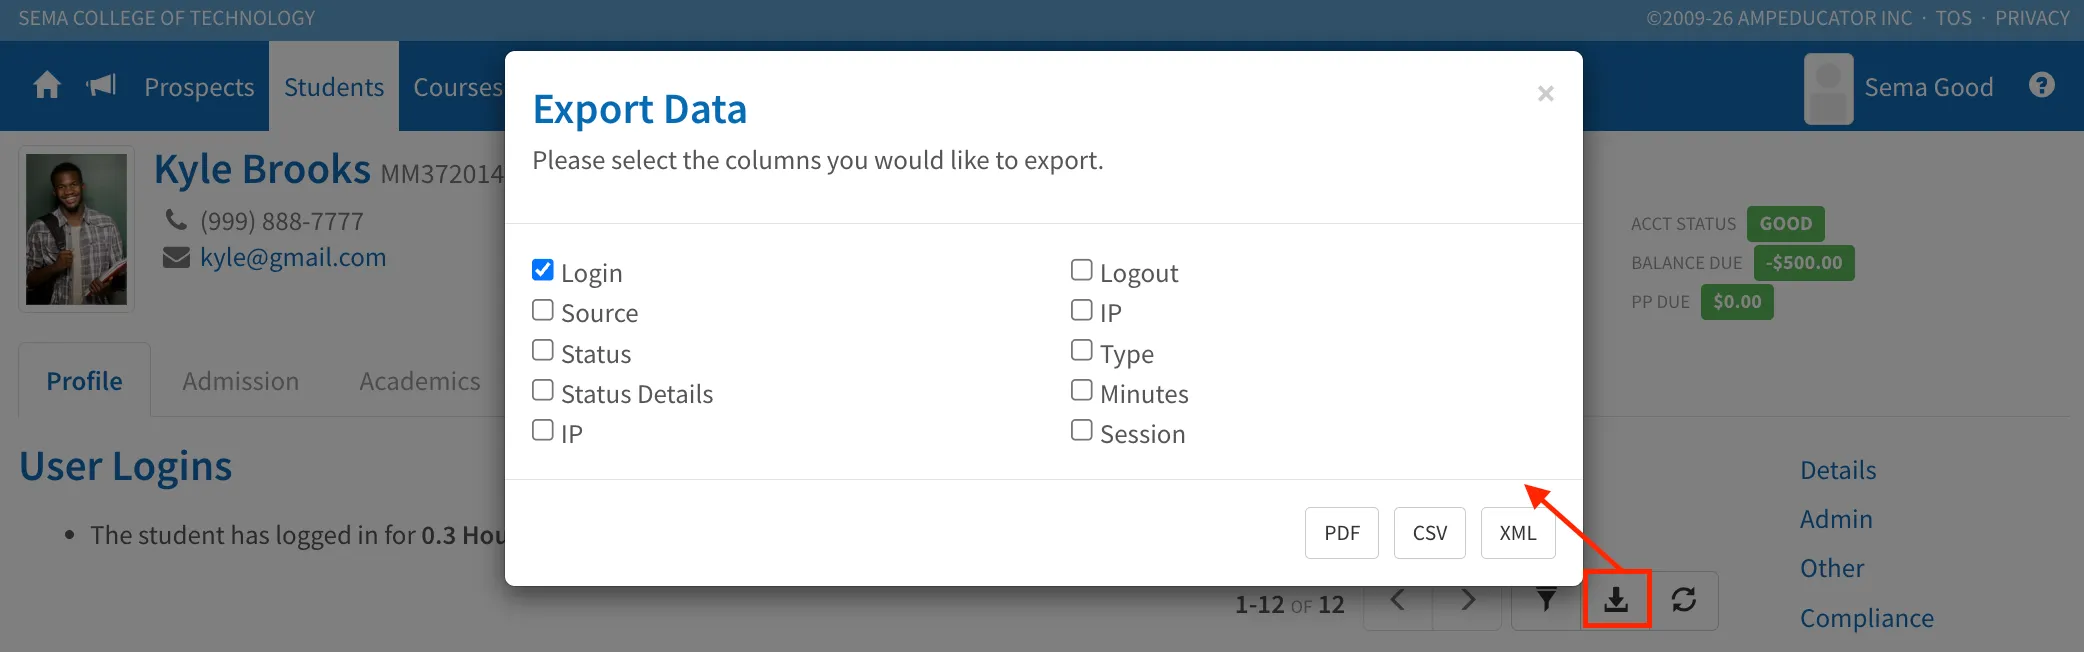
Exported data may also include additional details such as Status Details, which can provide more information (for example, identifying a VPN provider if applicable).
VPN Blocking
Login access can be restricted based on VPN usage. If VPN blocking is enabled, login attempts from detected VPNs may be prevented and reflected in the Status column.
VPN blocking is configured under Institution Config → General → Login.
Education
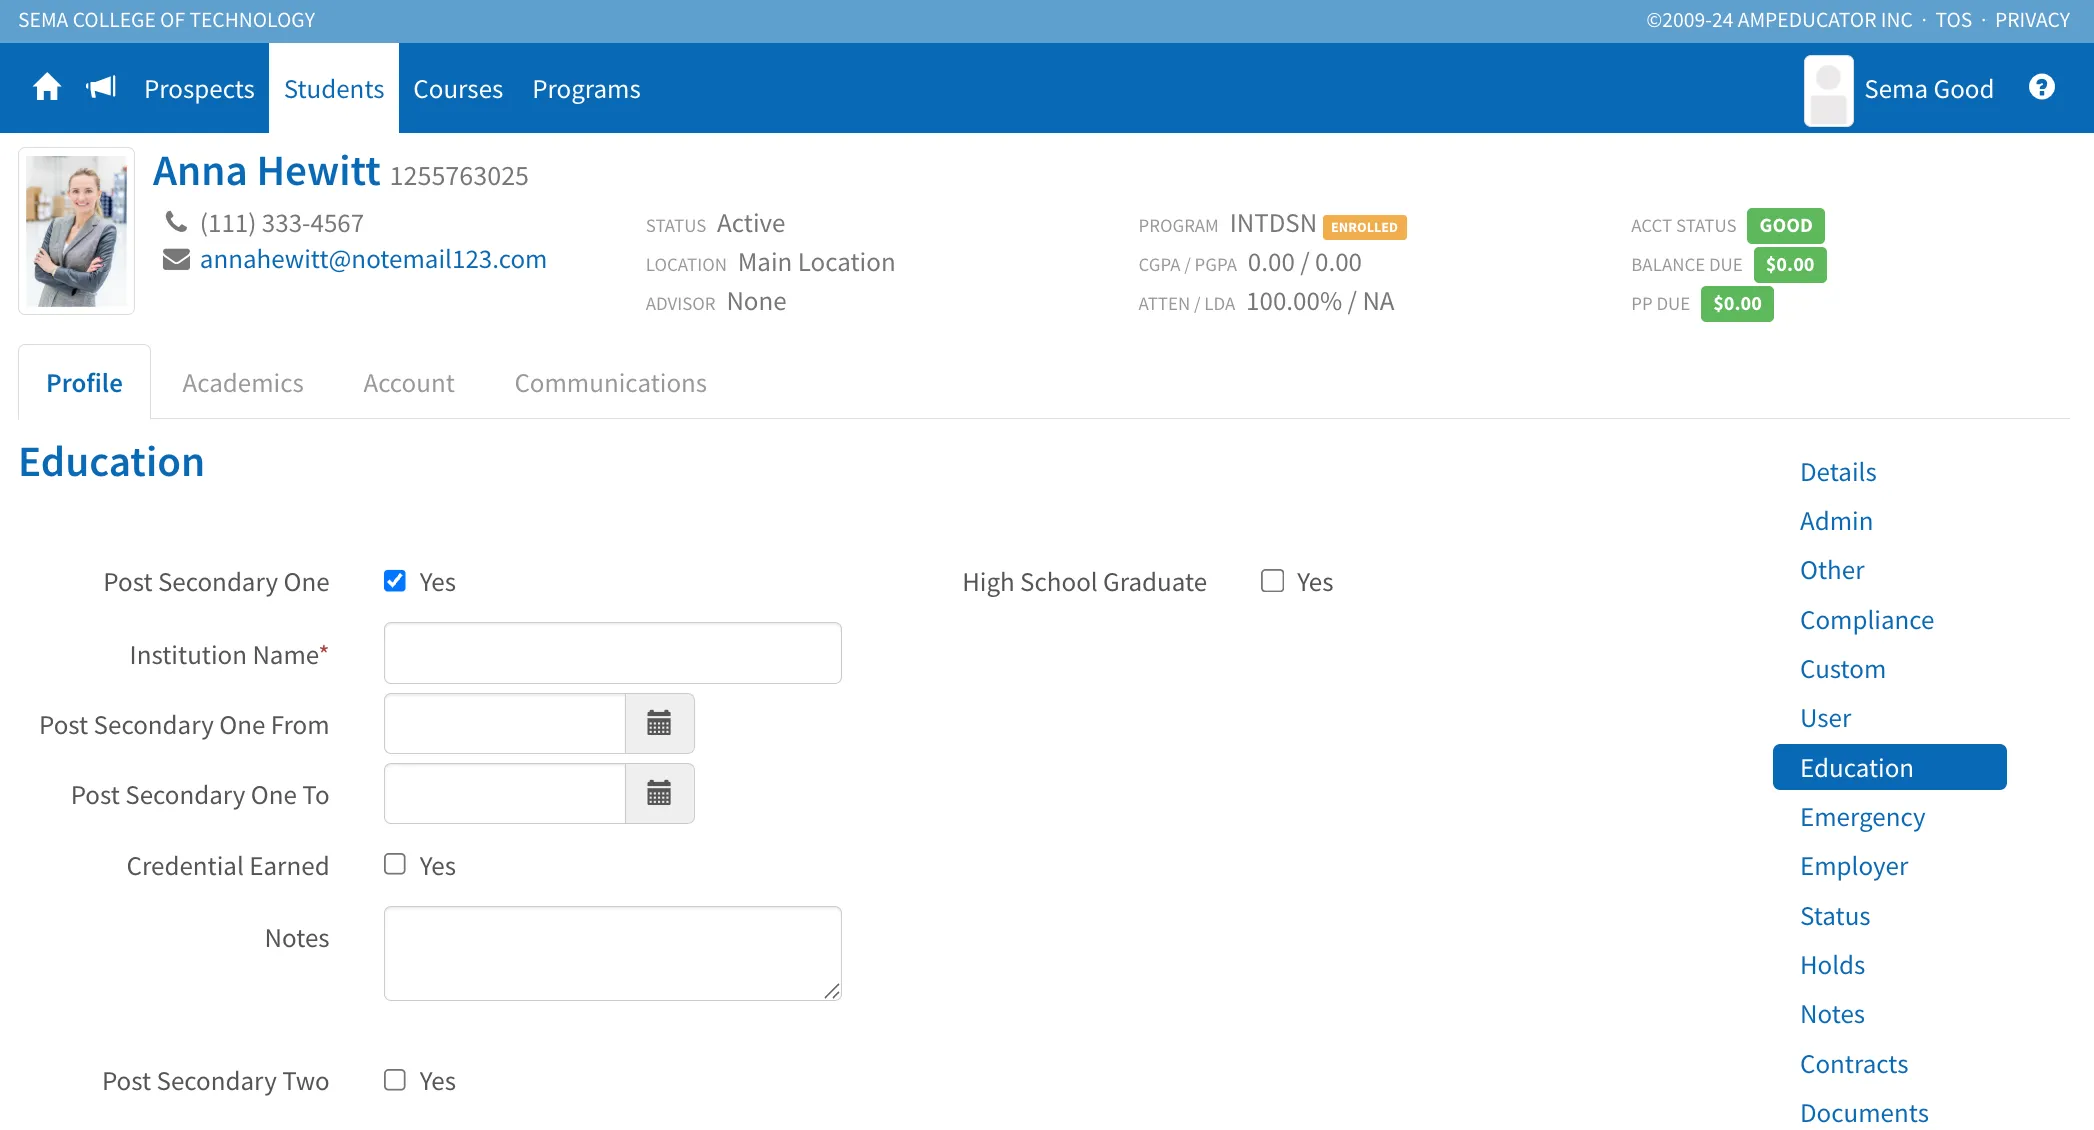
This section allows you to record the Student’s educational background. When you check a box, such as Post Secondary One, additional fields will appear so you can enter more detailed information.
Emergency
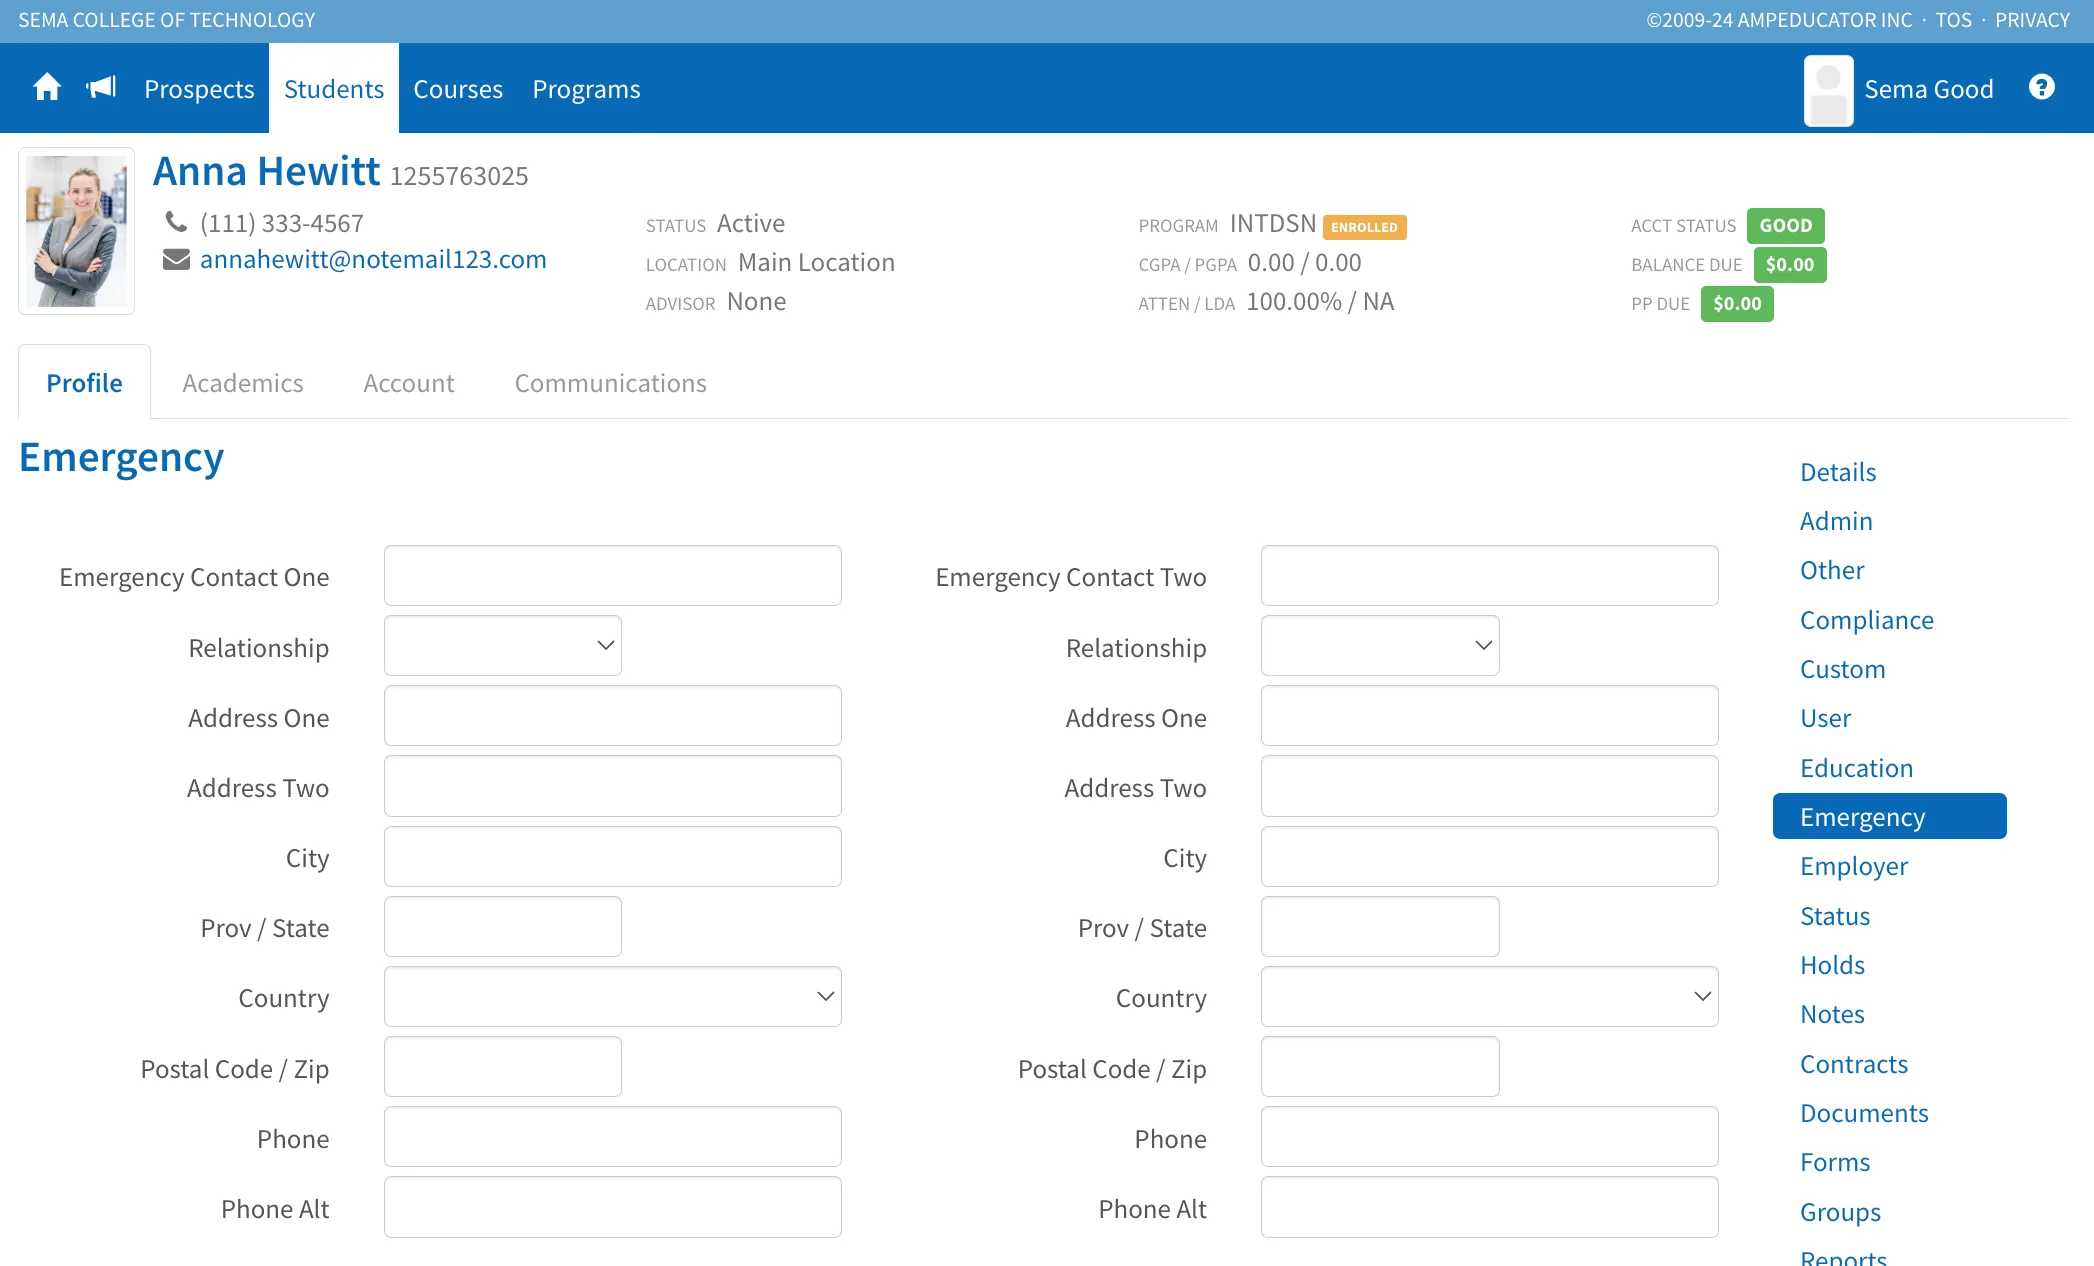
This section is used to store up to two emergency contacts for the Student. It's important to keep this information up to date in case the institution ever needs to reach someone quickly on the Student's behalf.
Employer
This is where a Student’s employers will be listed once added. This section is useful for tracking employment details for programs that include co-op, work placements, or where employment history is required for admission, immigration, or visa documentation.
Note: If an employer is responsible for covering tuition or fees, that setup is managed under Home / Organizations. From there, the employer can be added to invoices and billed directly.
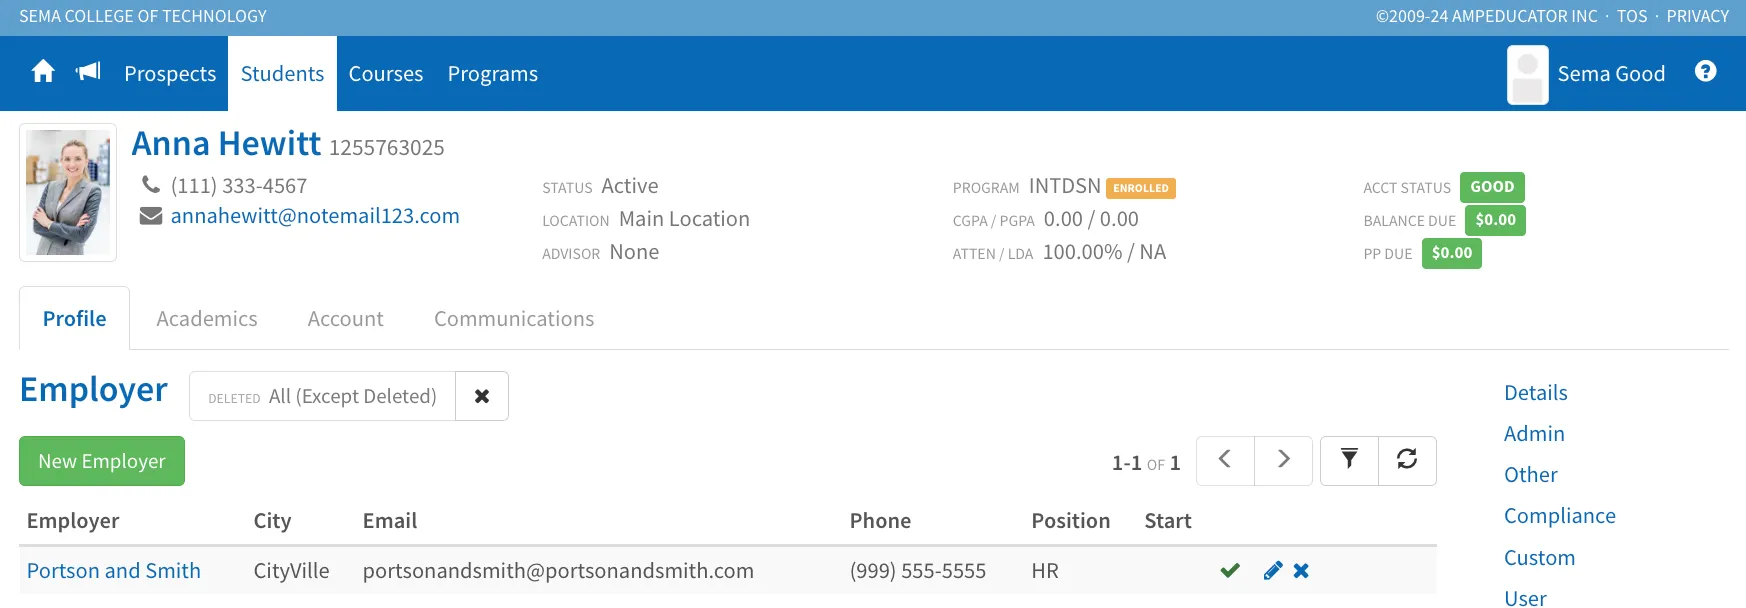
To add a new employer, click New Employer. A pop-up will appear where you can enter details such as the employer’s name, address, contact info, position, start date, salary, and whether it’s their current employer.
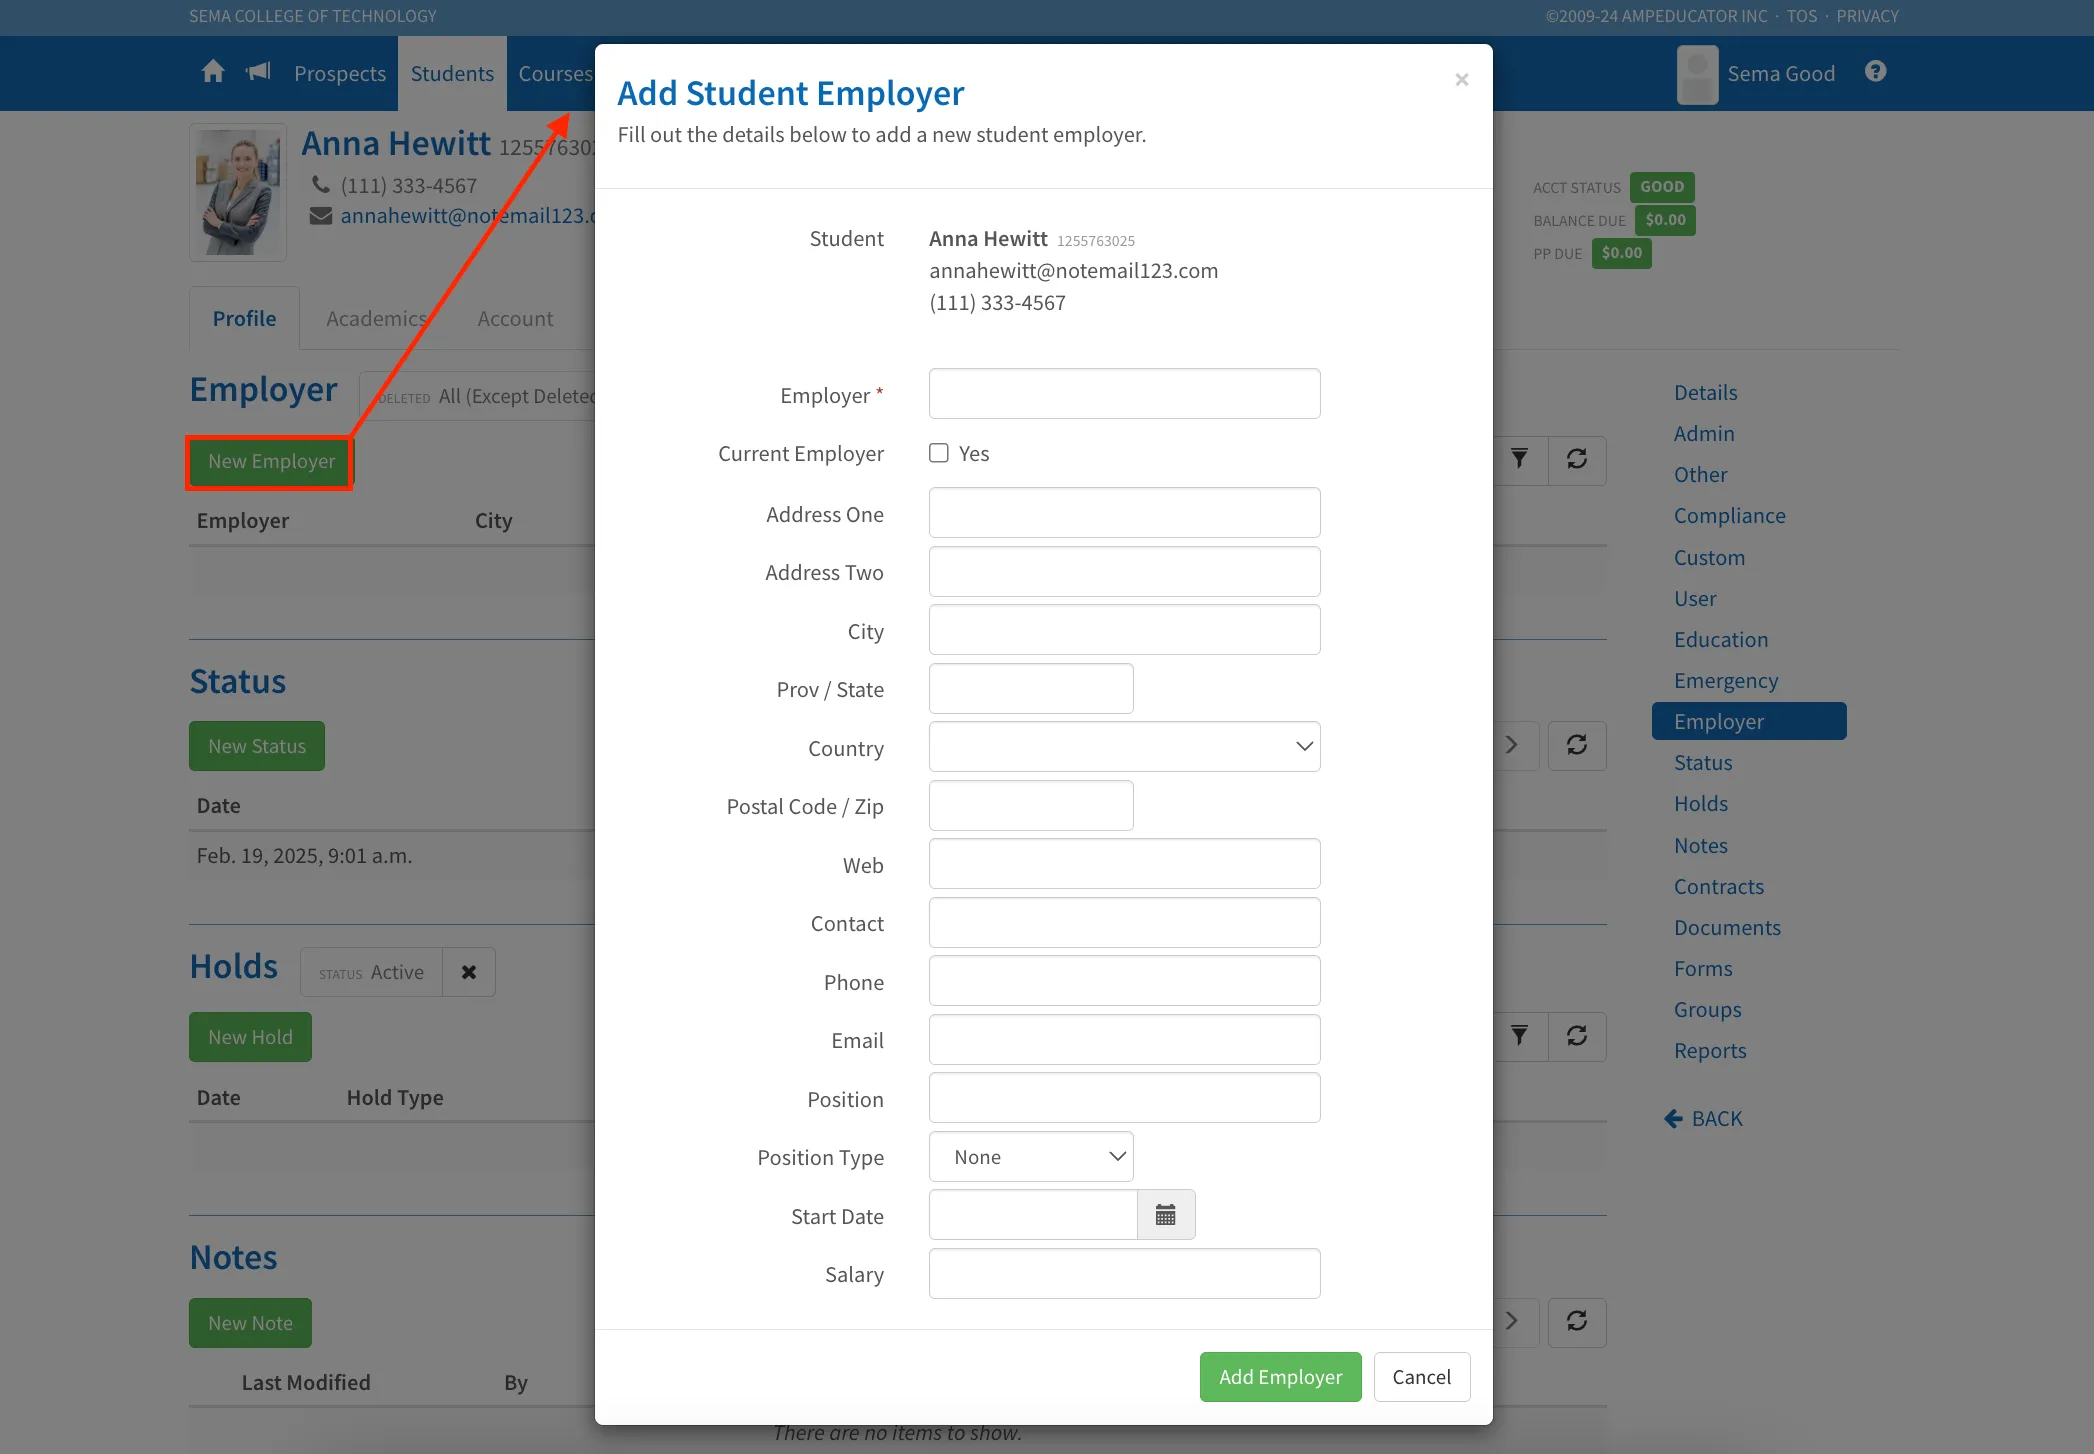
Click Add Employer to save the information.
Status
This section shows a history of the Student’s status updates. The default options include Active, Graduated, and Inactive. You can configure additional statuses under Institution Config / Students / Status to match your institution’s processes.
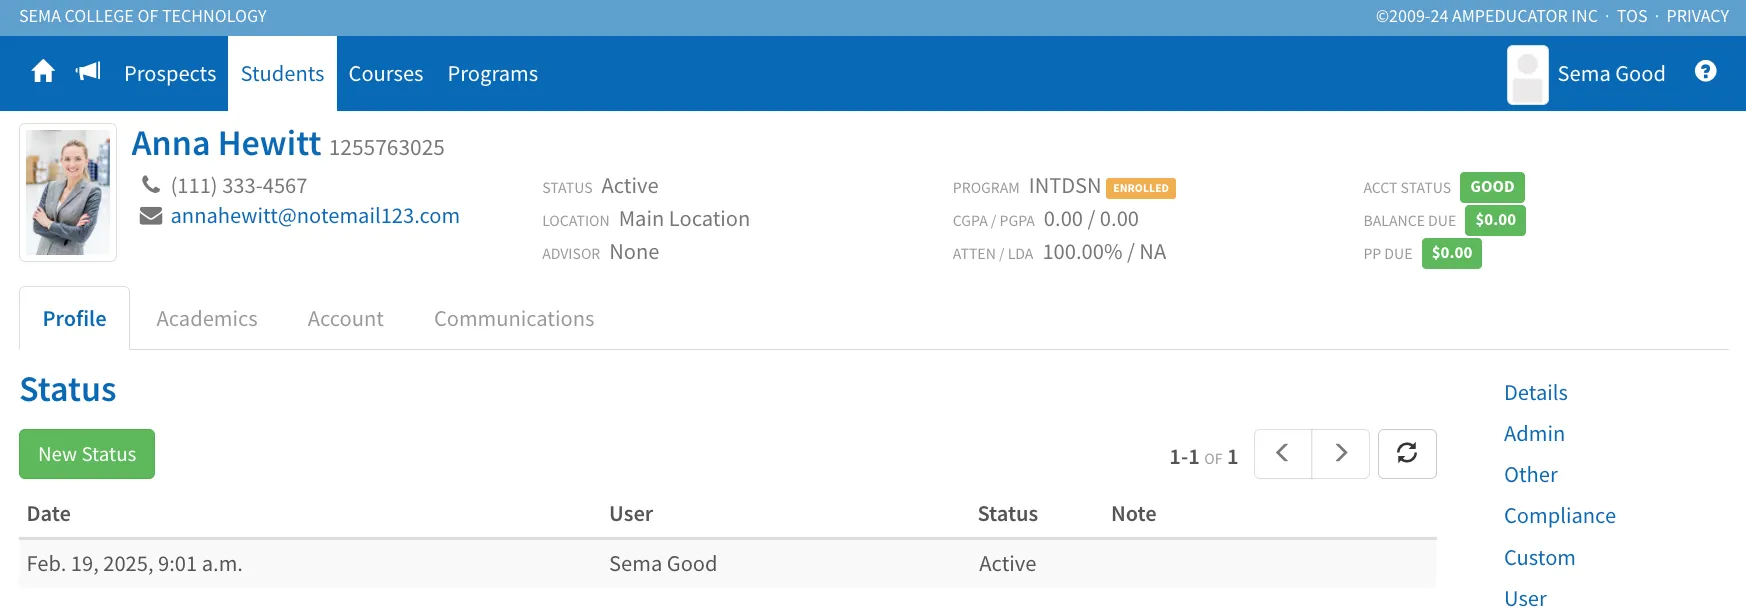
To create a new status entry, click the New Status button. A modal will appear where you can choose a status from the dropdown menu and optionally add a note.
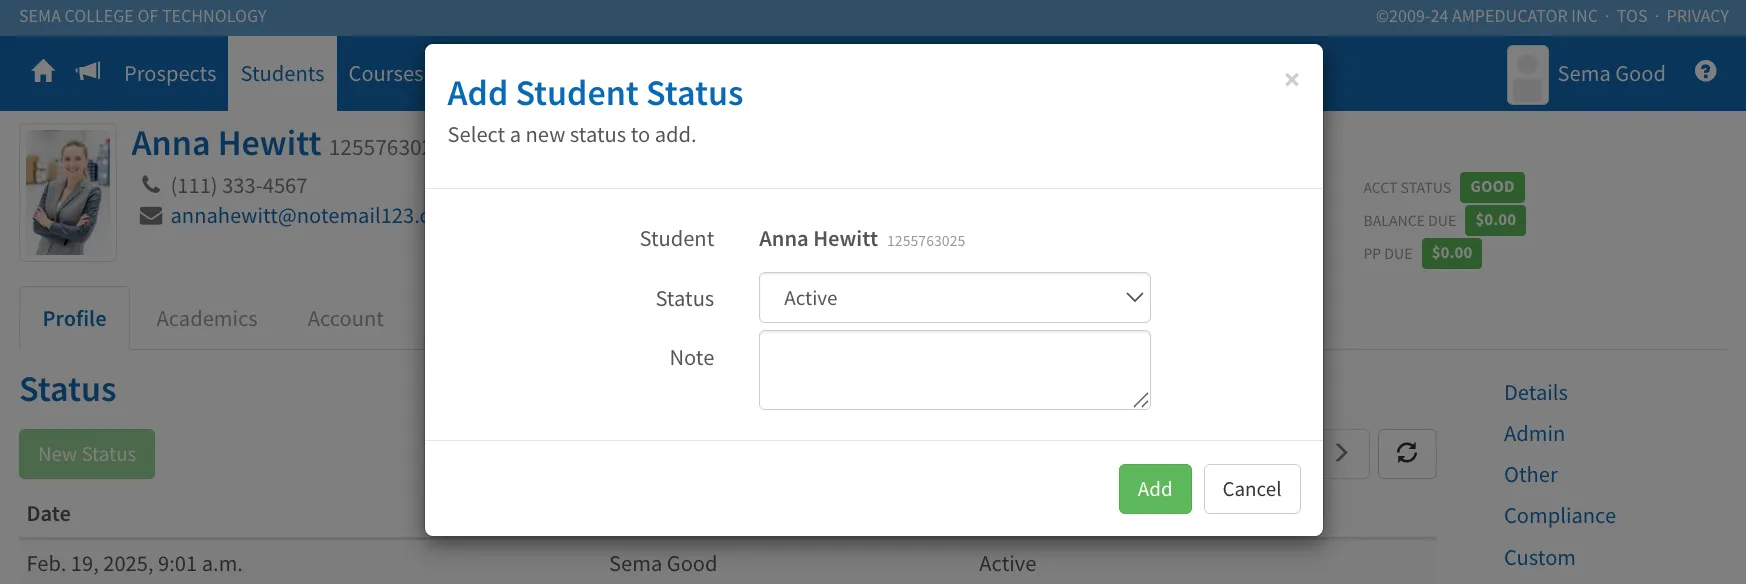
Maintaining a clear status history helps track a Student’s progression over time and ensures consistency across departments.
Holds
This section displays any holds currently applied to the Student’s account. Holds can be configured to trigger automatically based on a Student’s academic performance, attendance, or account balance. To learn more about managing these settings see Institution Config / Students / Holds.
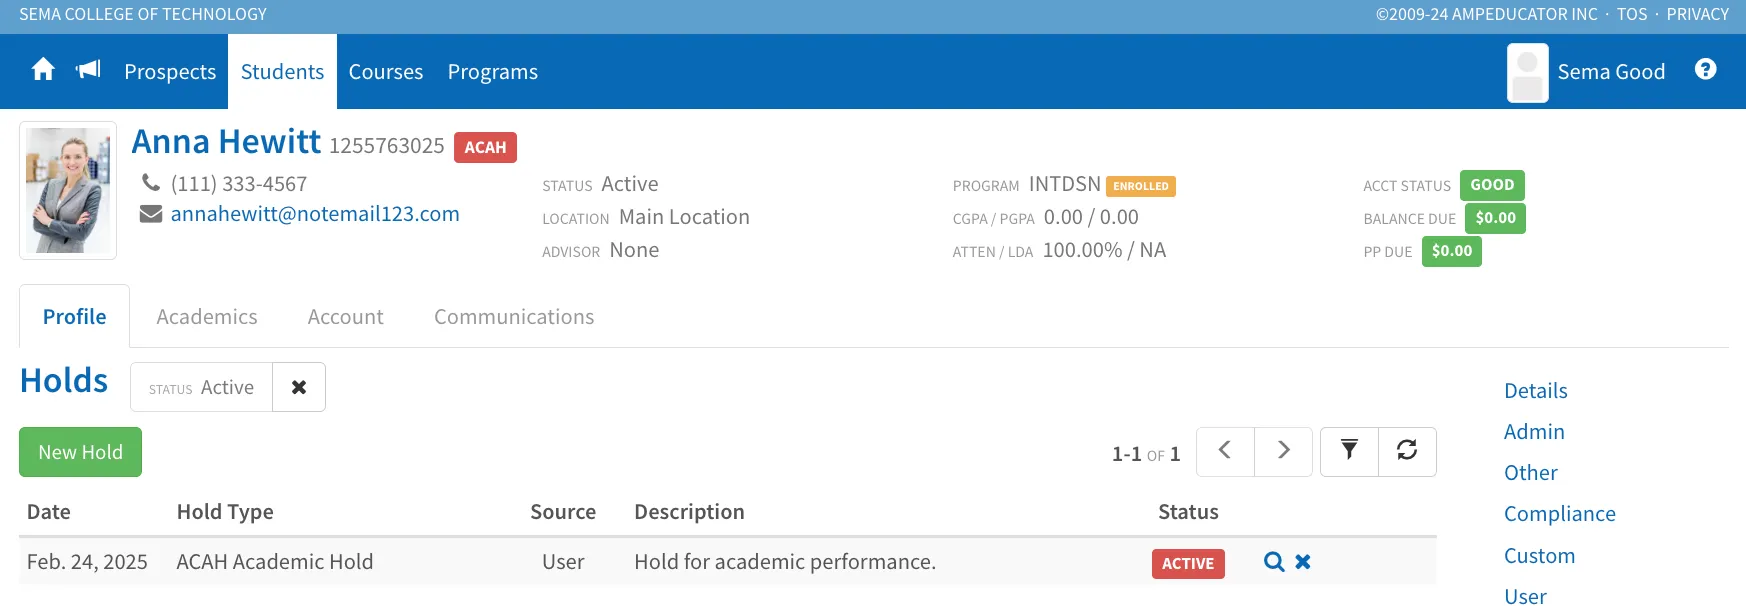
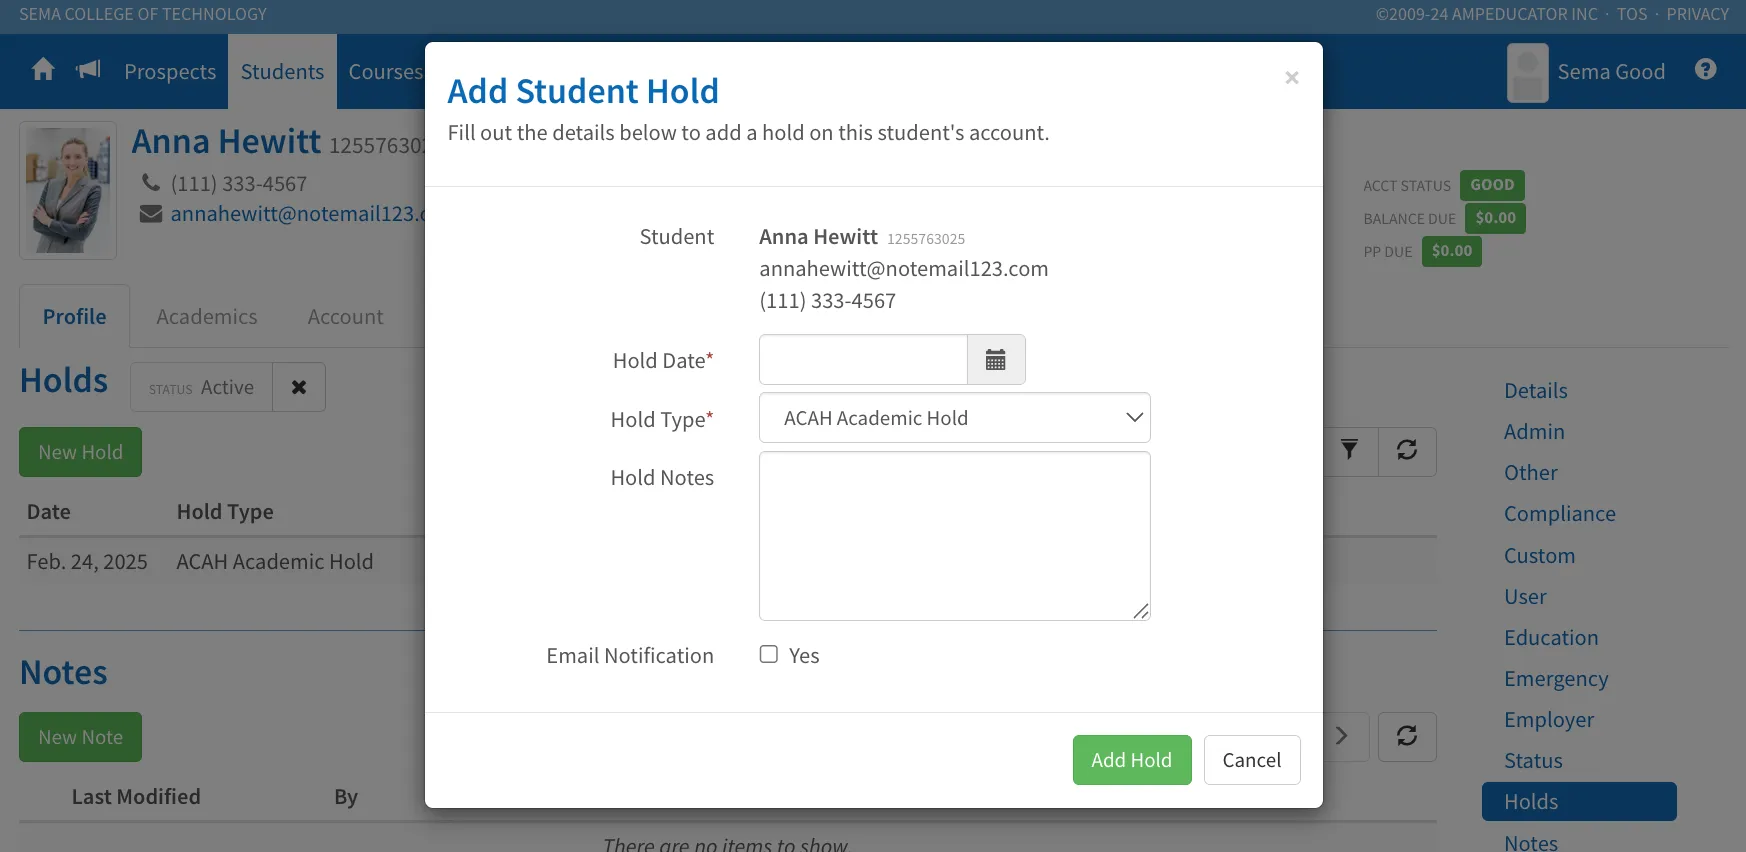
You can also manually add a hold from this section. Click New Hold and fill out the form by selecting a Hold Date, choosing a Hold Type (such as Academic, Attendance, or Financial), and optionally entering Hold Notes. You can also check Email Notification if you’d like the Student to be notified.
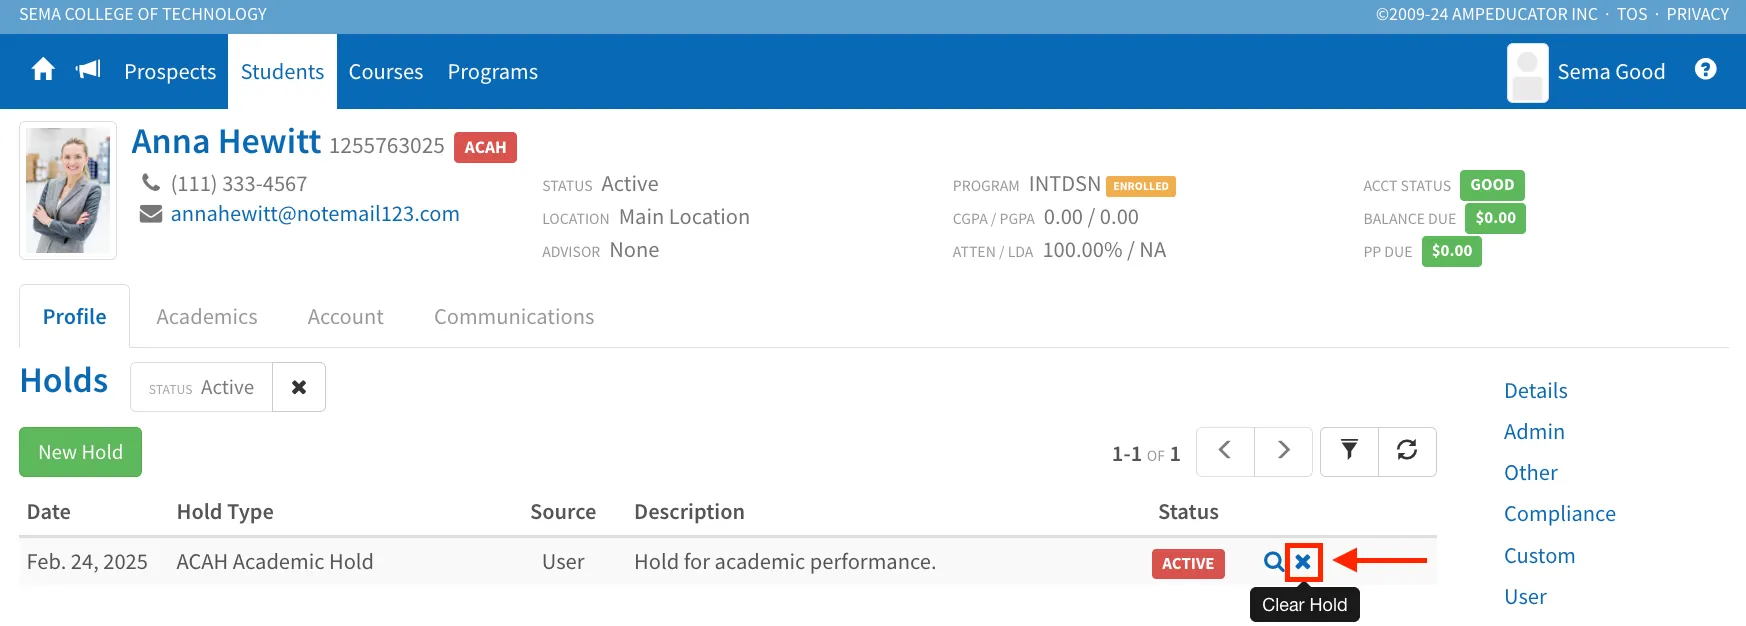
Active holds may restrict actions like registration, transcript requests, or graduation until they are resolved. To remove a hold, simply click the Clear Hold icon next to its status label.
Notes
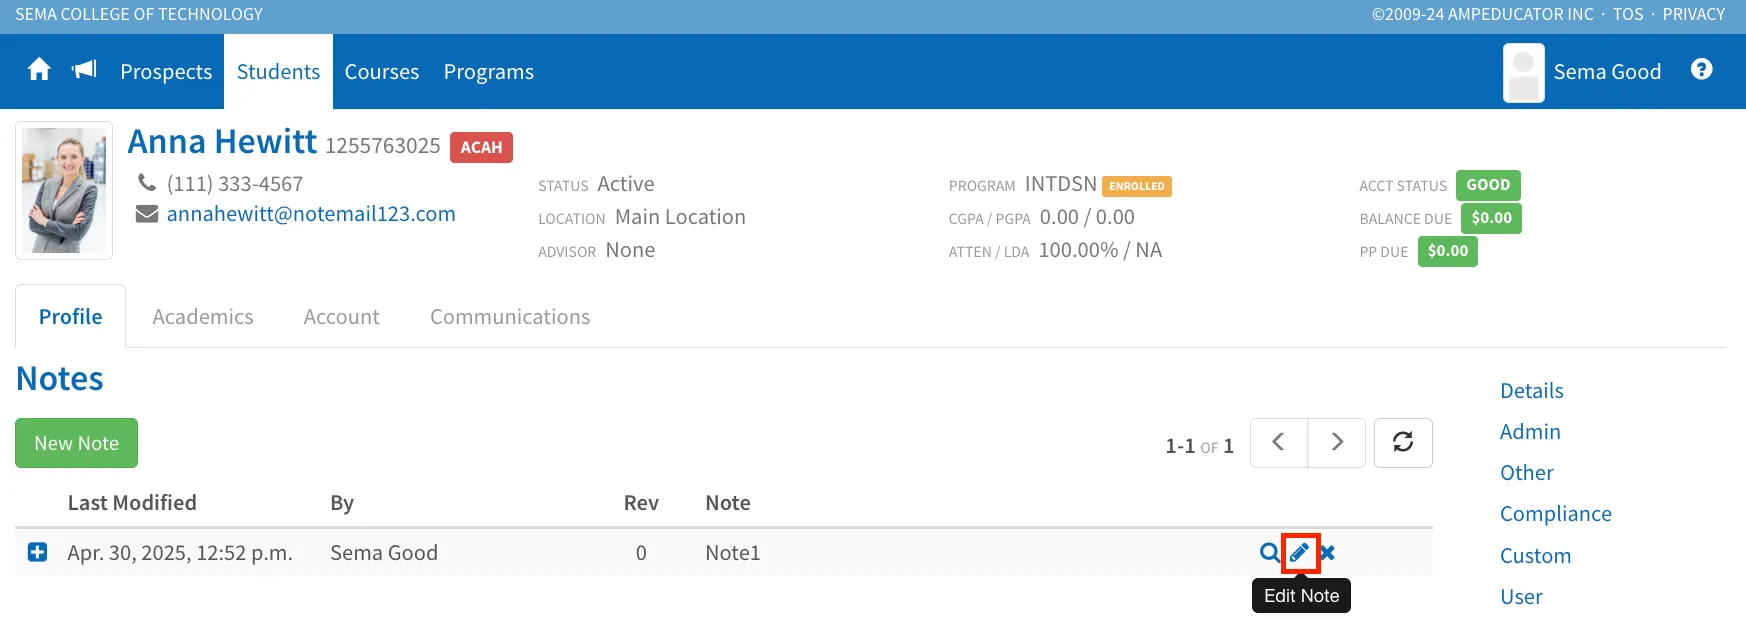
This section is used to add internal notes about the Student. Notes can help track important updates, observations, or decisions related to the Student that may not be reflected elsewhere in their profile. Note revisions can be viewed by expanding the + icon.
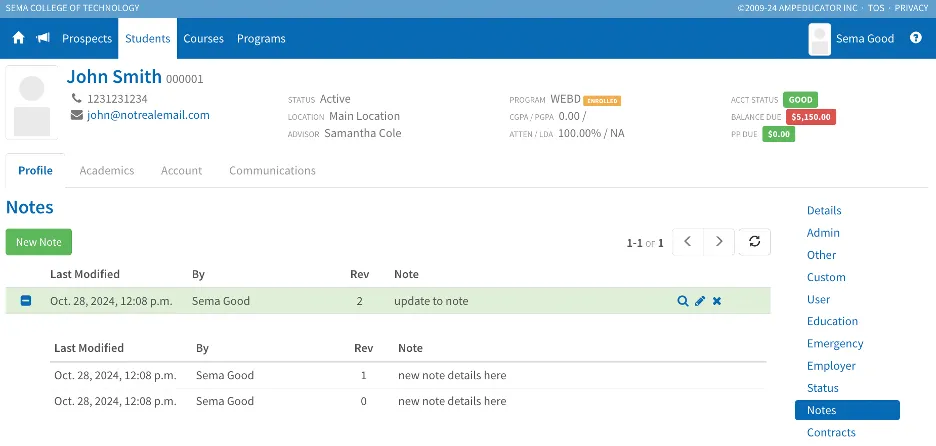
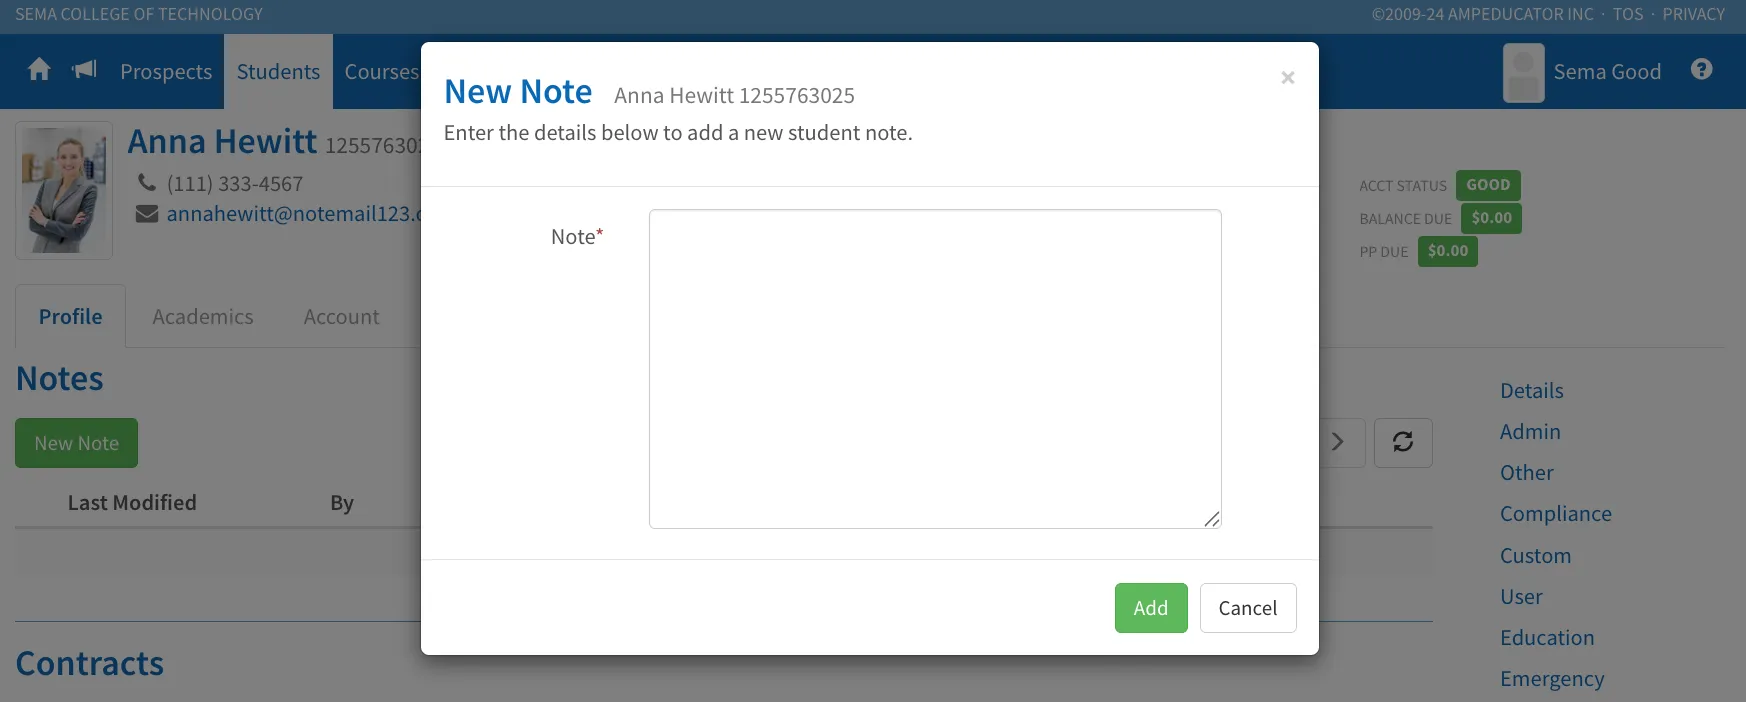
Click New Note to open a simple text box modal where you can enter and save your note. Once saved, each note will display the last modified date, the user who entered it, the revision number, and the note content.
You can edit an existing note at any time by clicking the edit note icon beside it—this allows you to update or add to the note as needed.
Notes are only visible to staff and are not shared with Students.
Contracts
Contracts are more detailed and customizable, so they’re covered in a separate article. This section is where you can view, send, and manage contracts associated with the Student, including digital signatures, fees, and other required information. See Student Contracts for full instructions.
Documents
The Documents section allows you to upload, organize, and manage files related to the Student. This includes things like transcripts, ID copies, and other supporting documents. See Student Documents for detailed steps on uploading and organizing files.
Forms
his section displays any forms that have been submitted by or assigned to the Student. Forms can be used for applications, declarations, surveys, and more. See Student Forms for detailed guidance on creating, assigning, and reviewing forms.
Groups
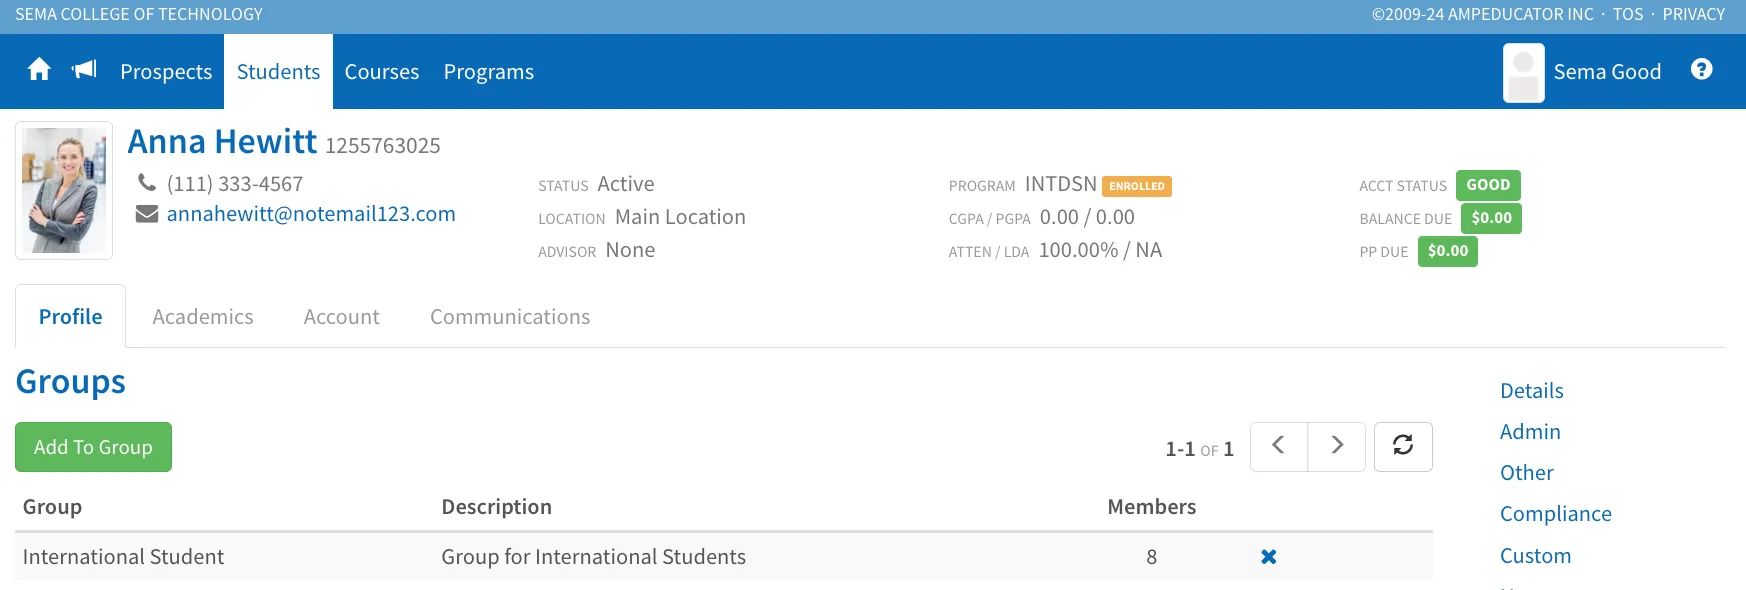
This section displays any Groups the Student belongs to. Groups are useful for organizing Students by shared characteristics such as program type, enrollment track, or support needs (e.g., International Students, Program100, or Cohort A).
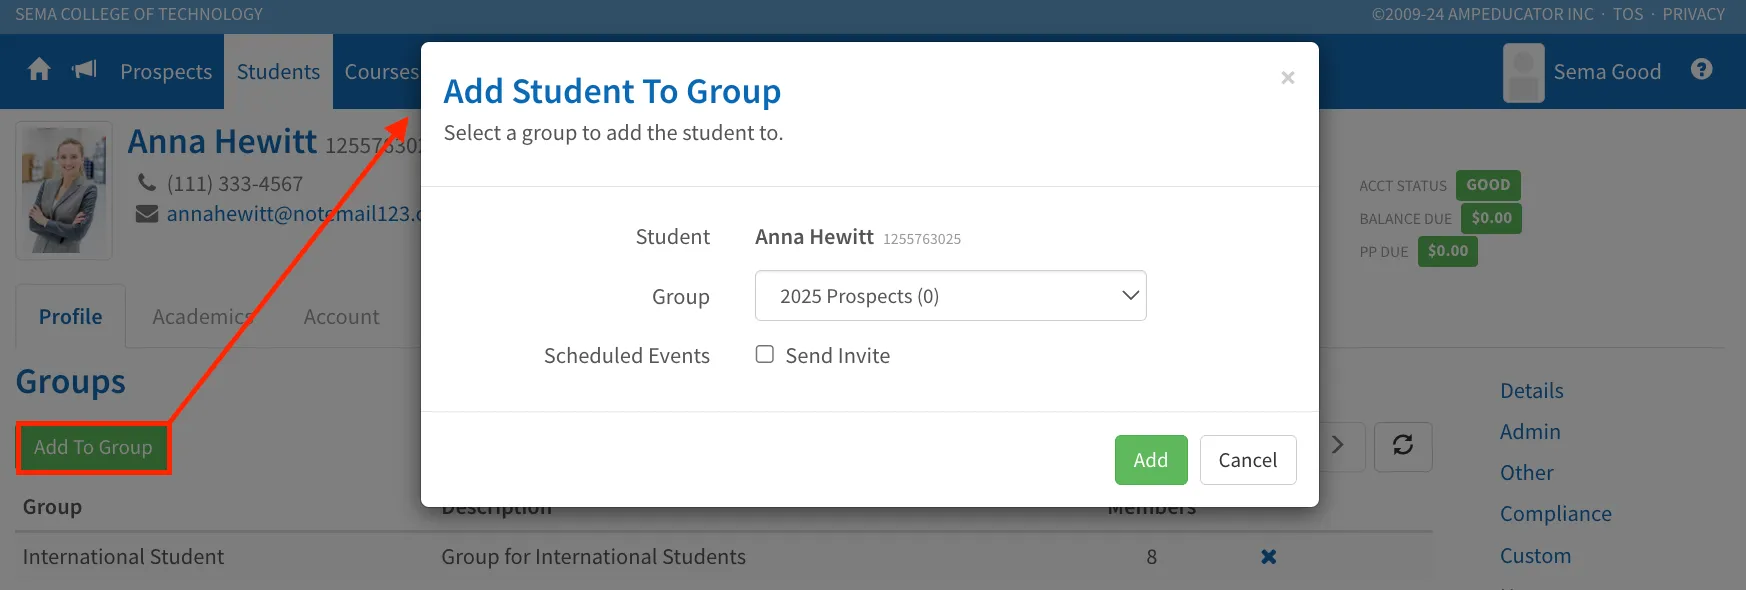
Click Add To Group to open a modal where you can select a Group from the dropdown list. If the Group includes Scheduled Events, you can choose to send an invite to the Student upon adding them.
Each Group listed will show its name, description, and number of members, and you can remove a Student from a Group by clicking the Remove From Group icon next to it.
Reports
This section displays any custom reports that have been generated specifically for the Student. To learn more about setting up and using custom reports, see Custom Reports.