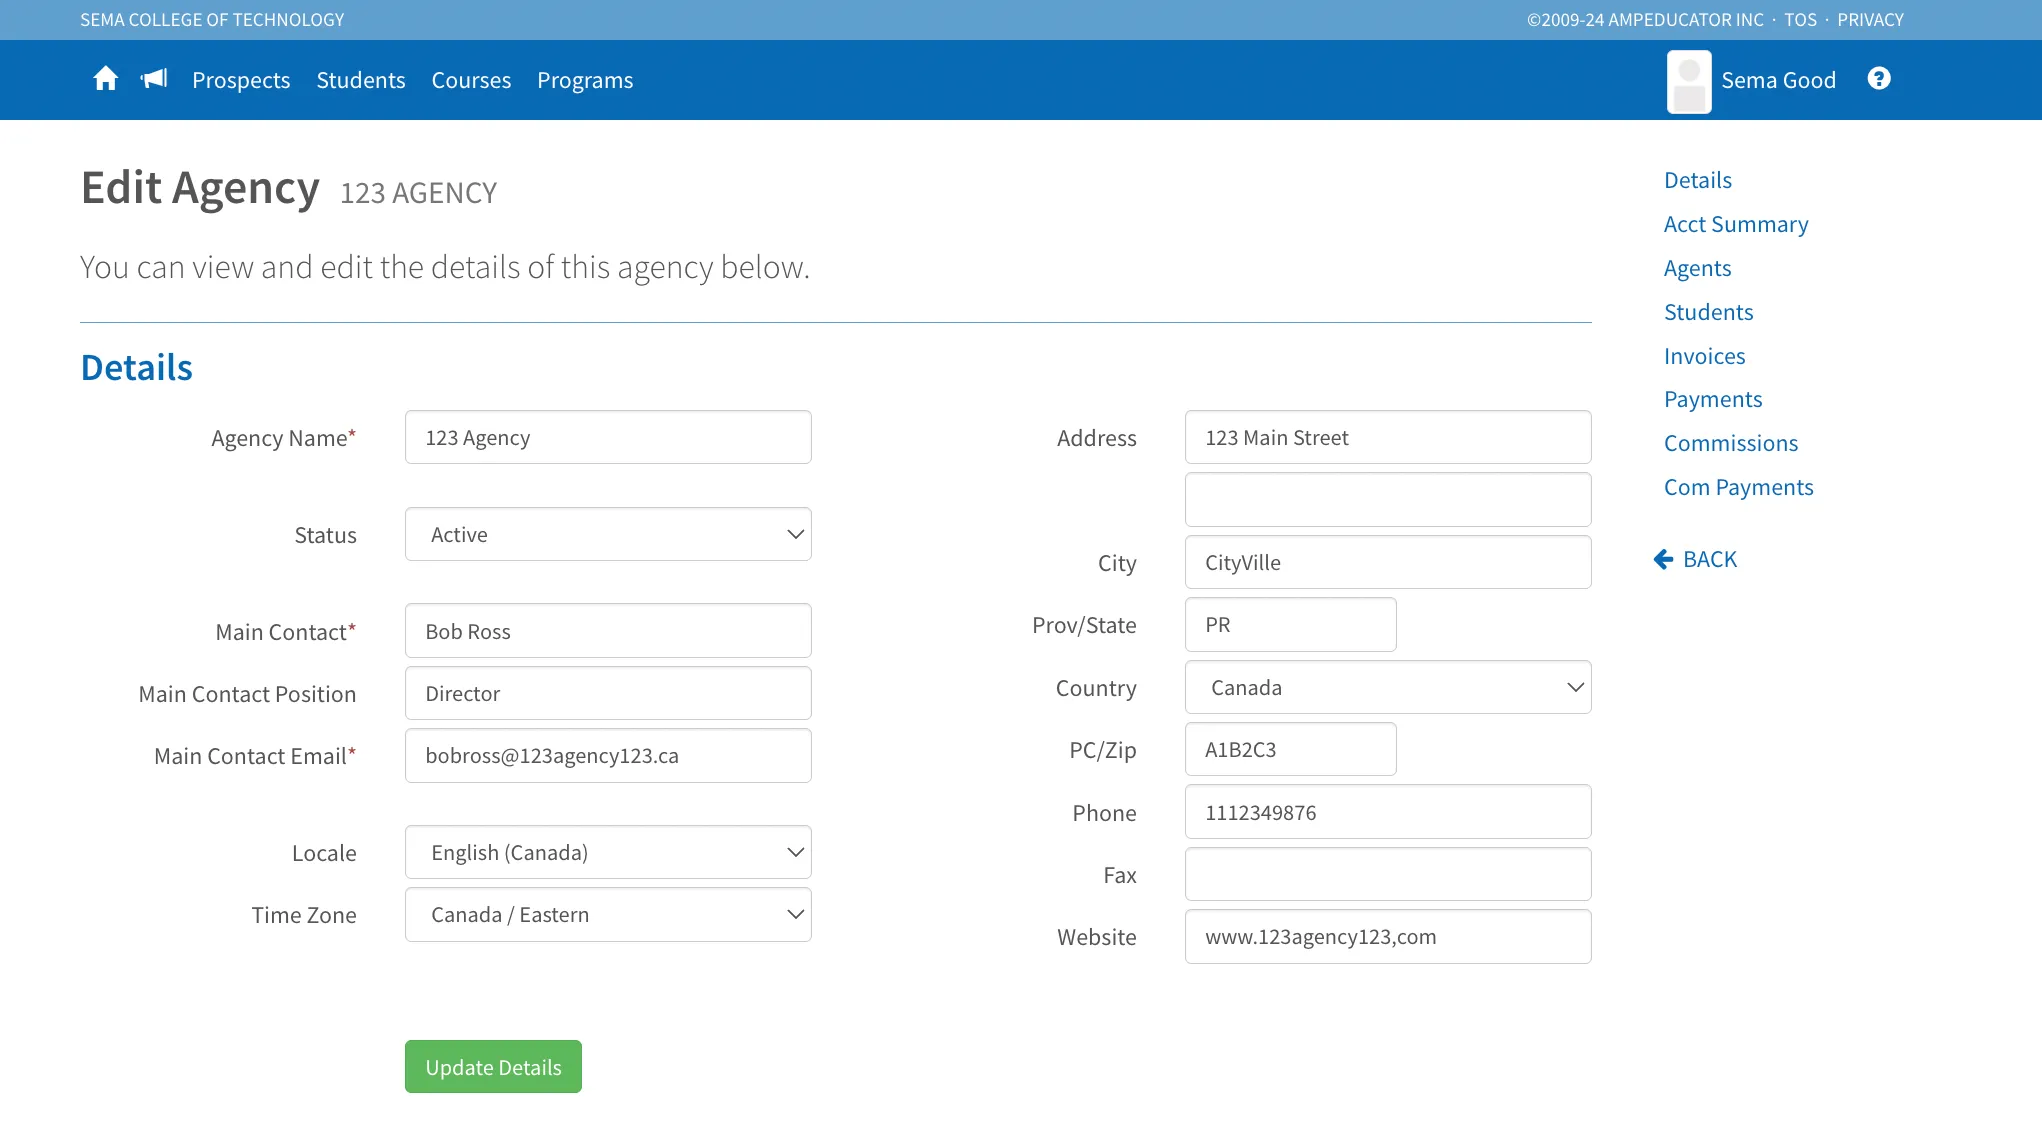
Agency Profile
Once an agency has been created, clicking on its name or the edit icon will take you to the full Agency Profile. From here, you can view and manage everything related to the agency—including contact details, assigned agents, associated students, invoices, payments, commissions, and commission payments.
The menu on the right side of the profile allows you to easily navigate between each section, while the main page displays key financial figures such as account balance, total revenue, and total commissions. You can update agency information at any time and use the tabs to dig into more detailed records.
Details
The Details section includes all the basic information you entered when creating the agency—such as the agency name, main contact person, contact email, phone number, address, website, and status. If anything changes, you can update these fields at any time.
Account Summary
The Account Summary tab provides a snapshot of the agency’s financial activity. It’s divided into three parts:
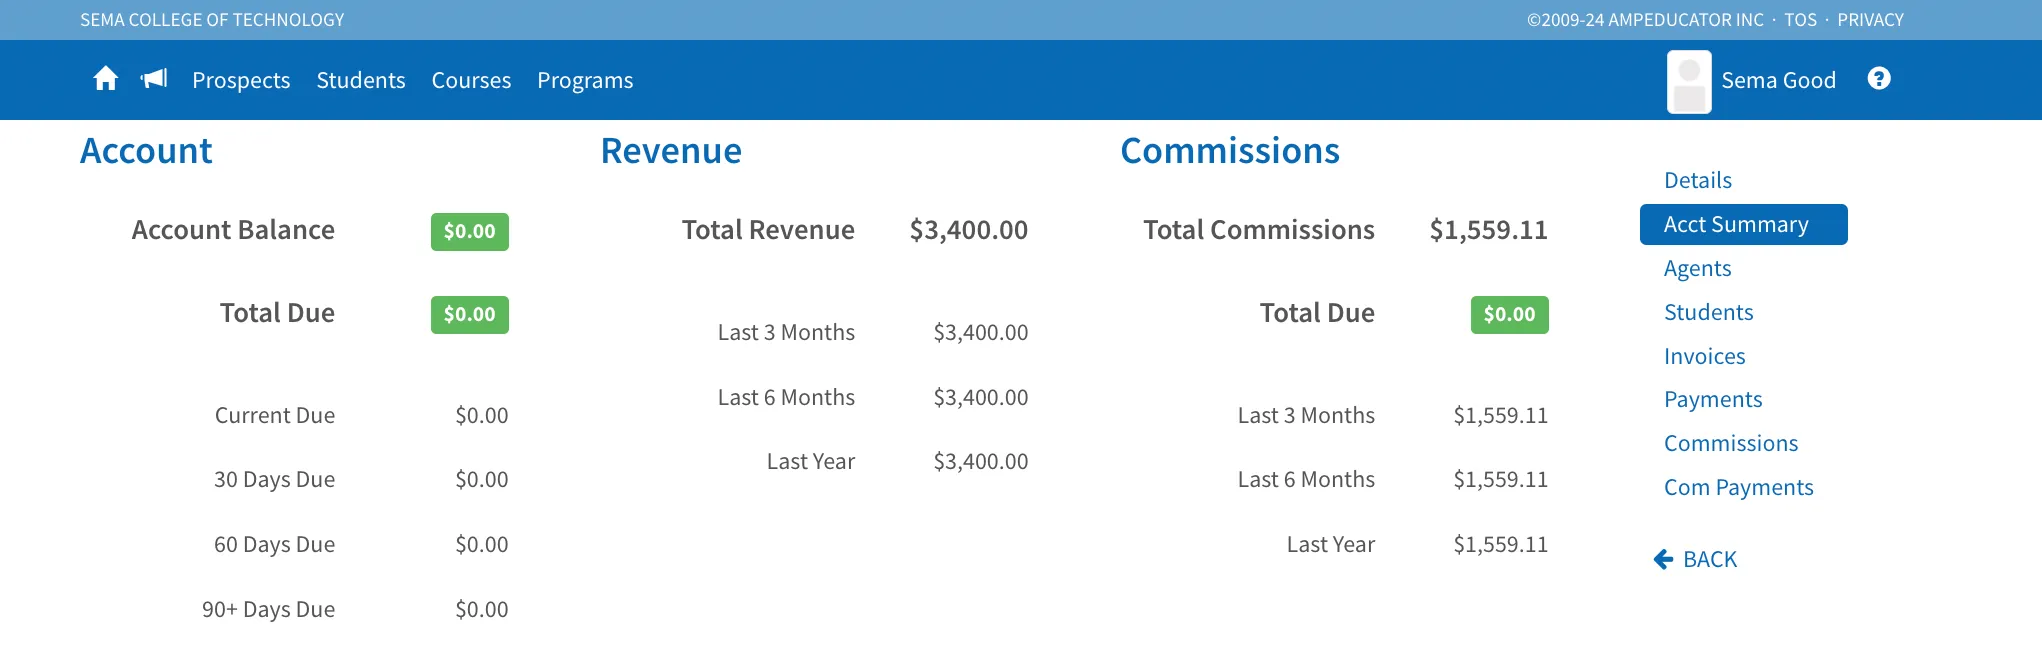
- Account: Displays the agency’s current Account Balance and any Total Due, broken down into aging categories (Current, 30 Days, 60 Days, 90+ Days).
- Revenue: Shows the Total Revenue generated by students associated with this agency, including breakdowns for the Last 3 Months, Last 6 Months, and Last Year.
- Commissions: Summarizes the Total Commissions earned by the agency and what’s still Due, with the same time-based breakdowns.
This section helps you quickly monitor the agency’s financial performance and outstanding obligations.
Agents
This section lists all agents associated with the agency, along with key information such as their contact details, status, number of Students, revenue generated, and commission balance.
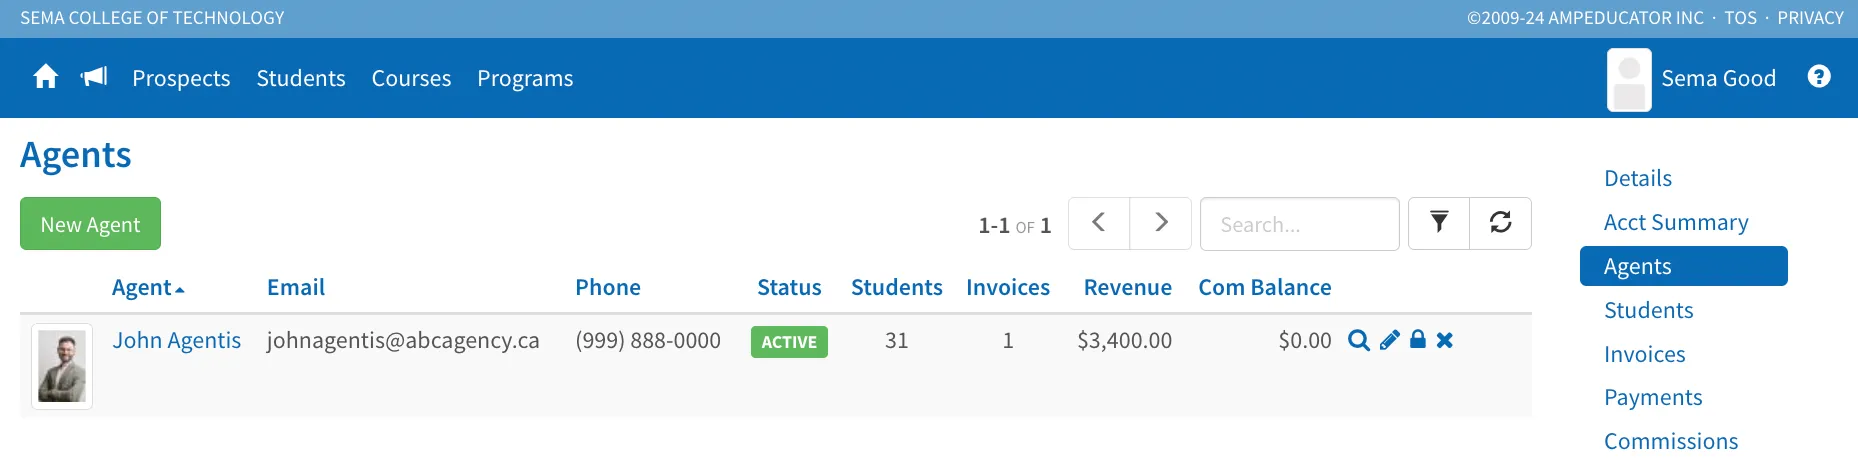
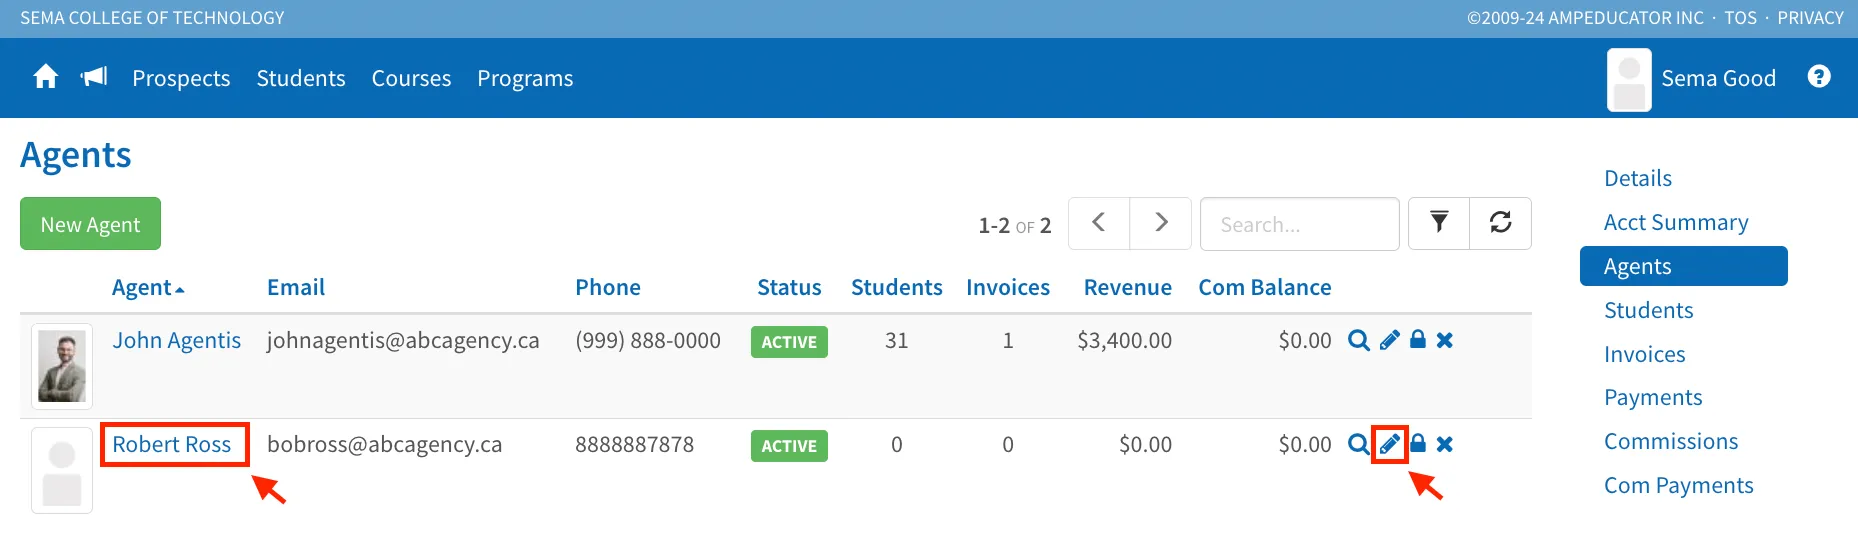
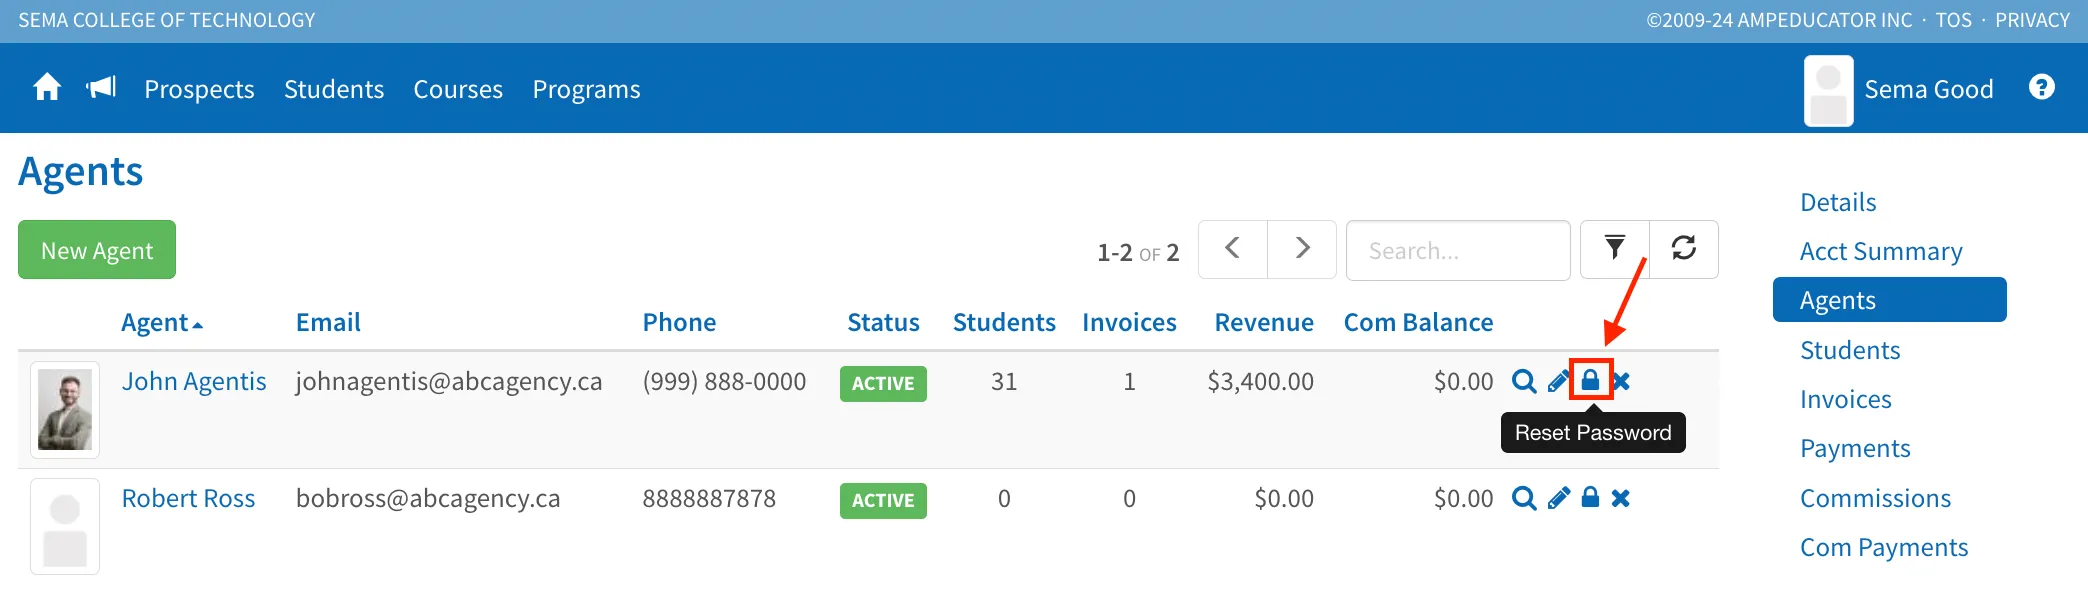
You can click on an Agent’s name or the Edit Agent icon to open their full profile. Use the Reset Password icon to resend their login credentials if needed.
Adding a New Agent
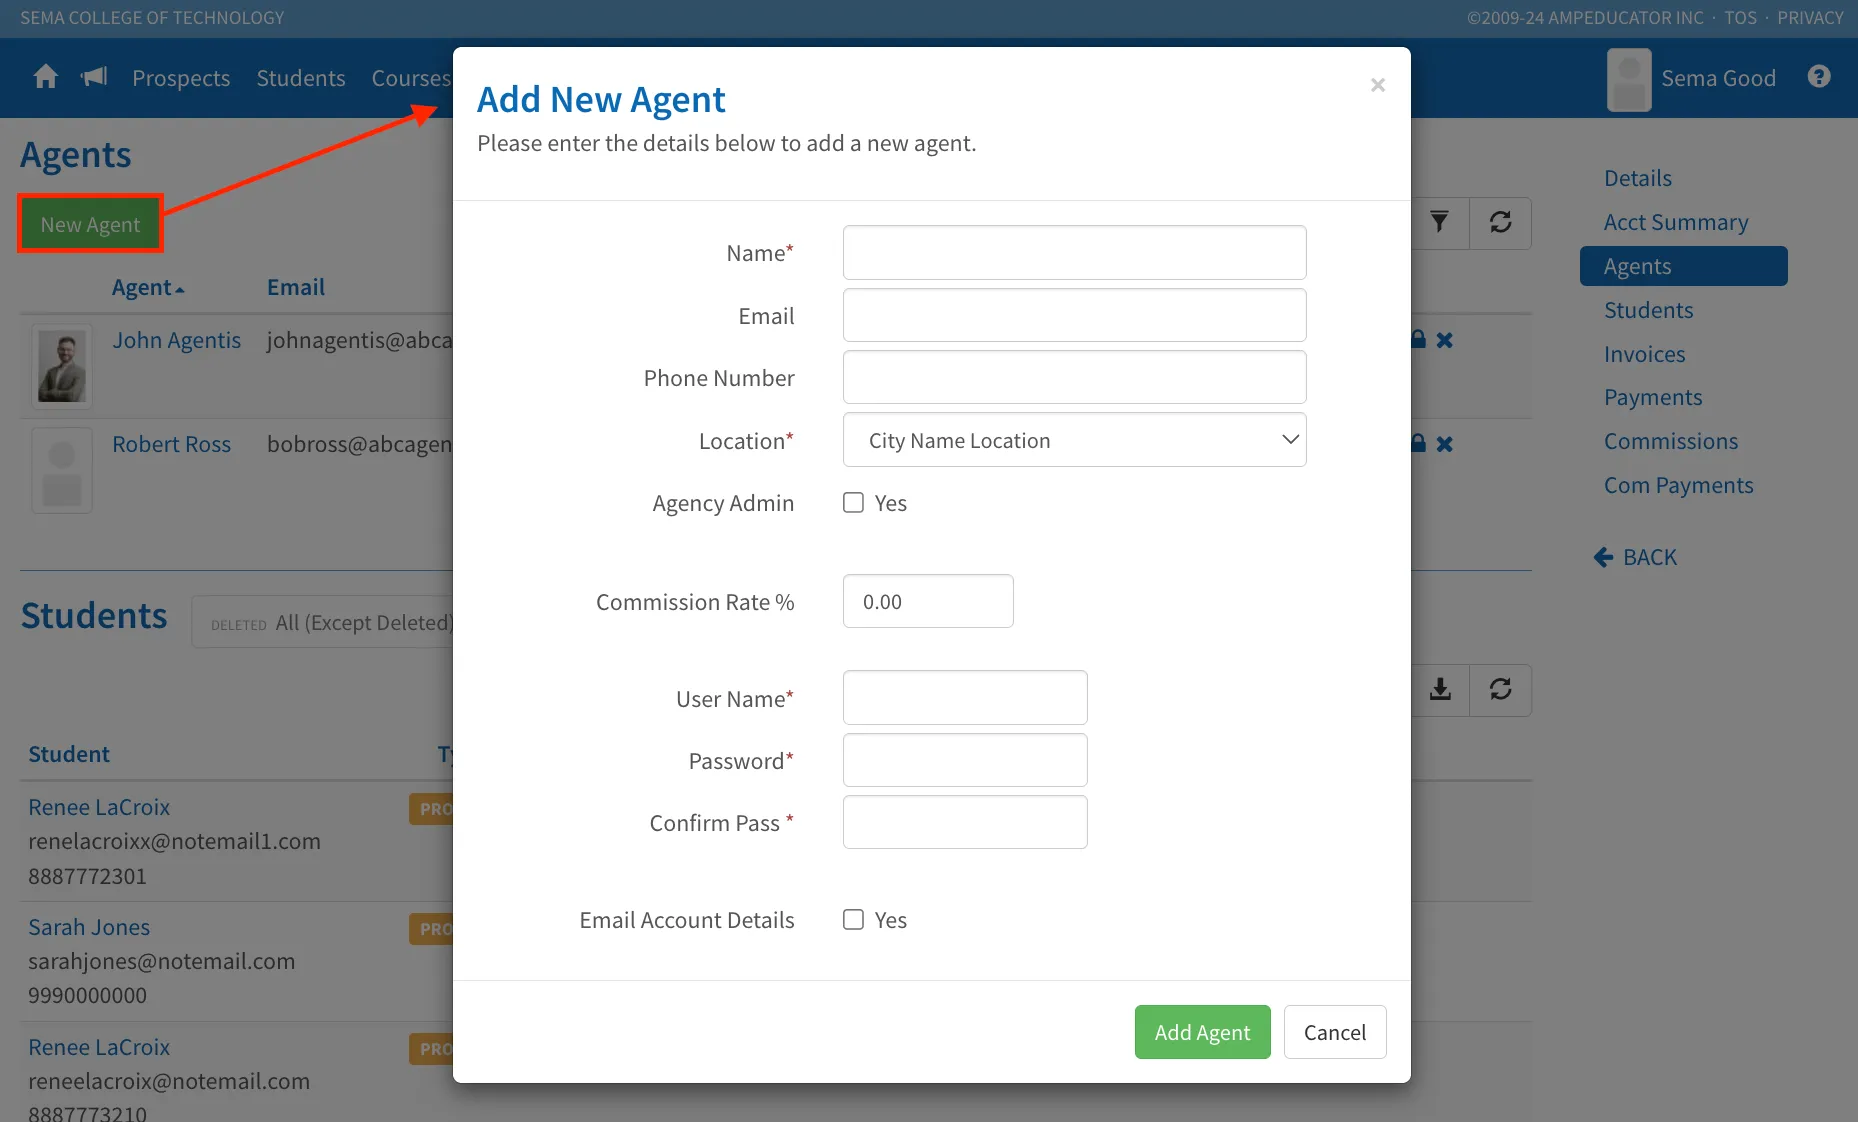
To add a new agent, click the New Agent button. This will open a modal where you can fill out key details such as name, email, location, commission rate, and login credentials.
Assigning an Agency Admin
When adding or editing an agent, you have the option to designate them as an Agency Admin by selecting the checkbox labeled Agency Admin.
Regular agents can only view students, invoices, and commissions that are specifically assigned to them. They cannot update any agency information or manage other agents.
Agency Admins, on the other hand, have full access to all students, invoices, and commissions linked to the agency. They can also edit agency details and manage other agents within the agency.
Editing and Updating Agent Profiles
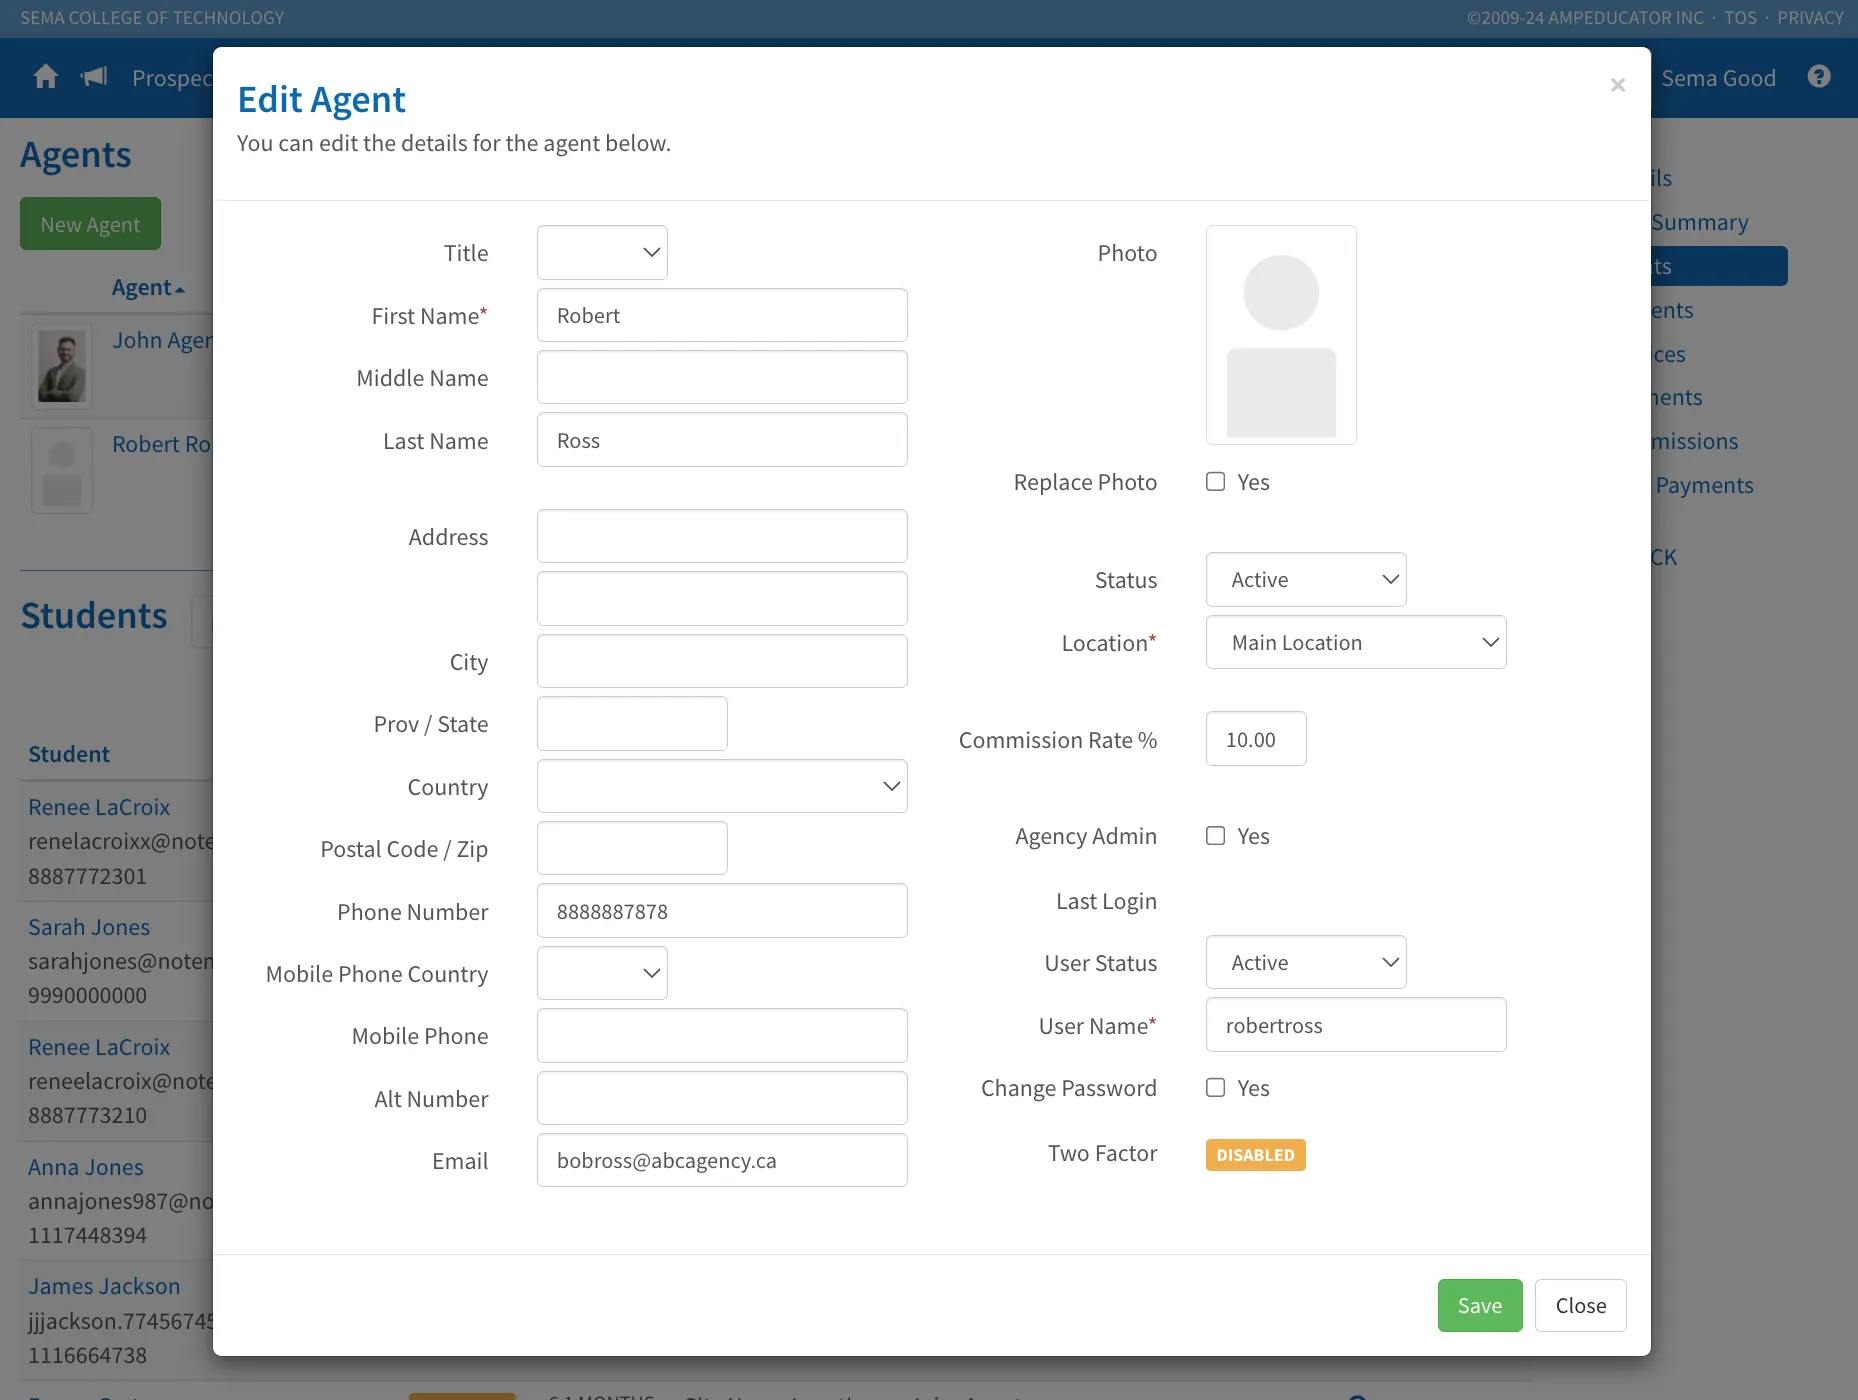
Once added, the agent will appear on the list. Clcik on their name or the edit icon to add more detailed information, or update changes such as commission and agency admin
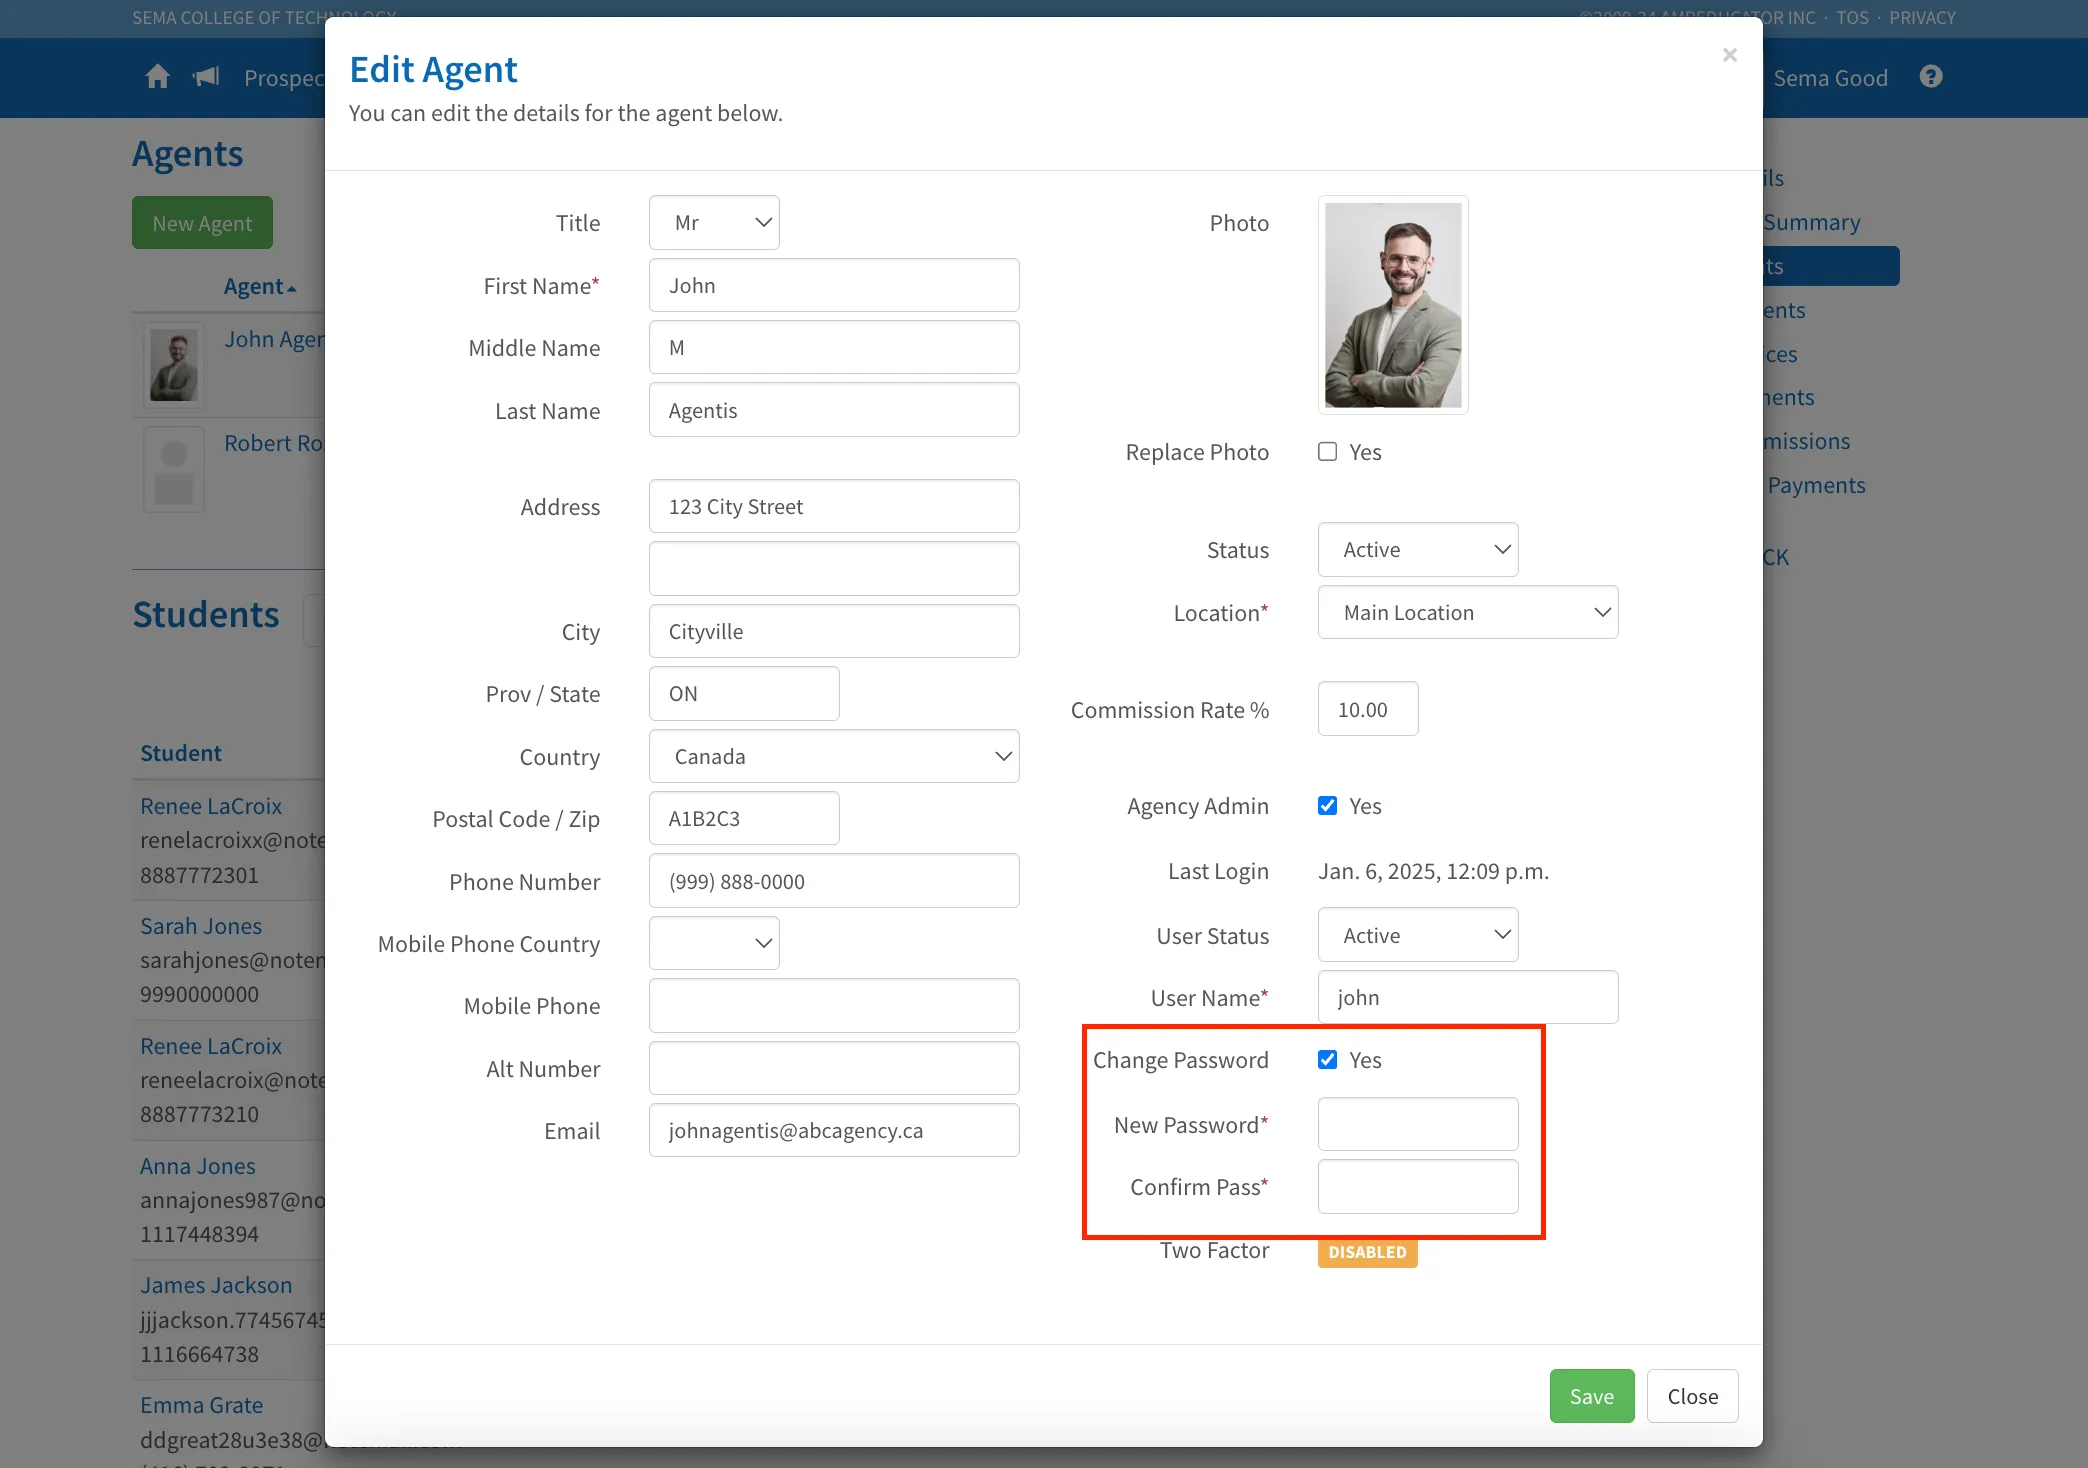
The edit modal allows you to add more information about the agent, including their address, phone number, profile picture, commission rate, and user access details.
Viewing Agent Details
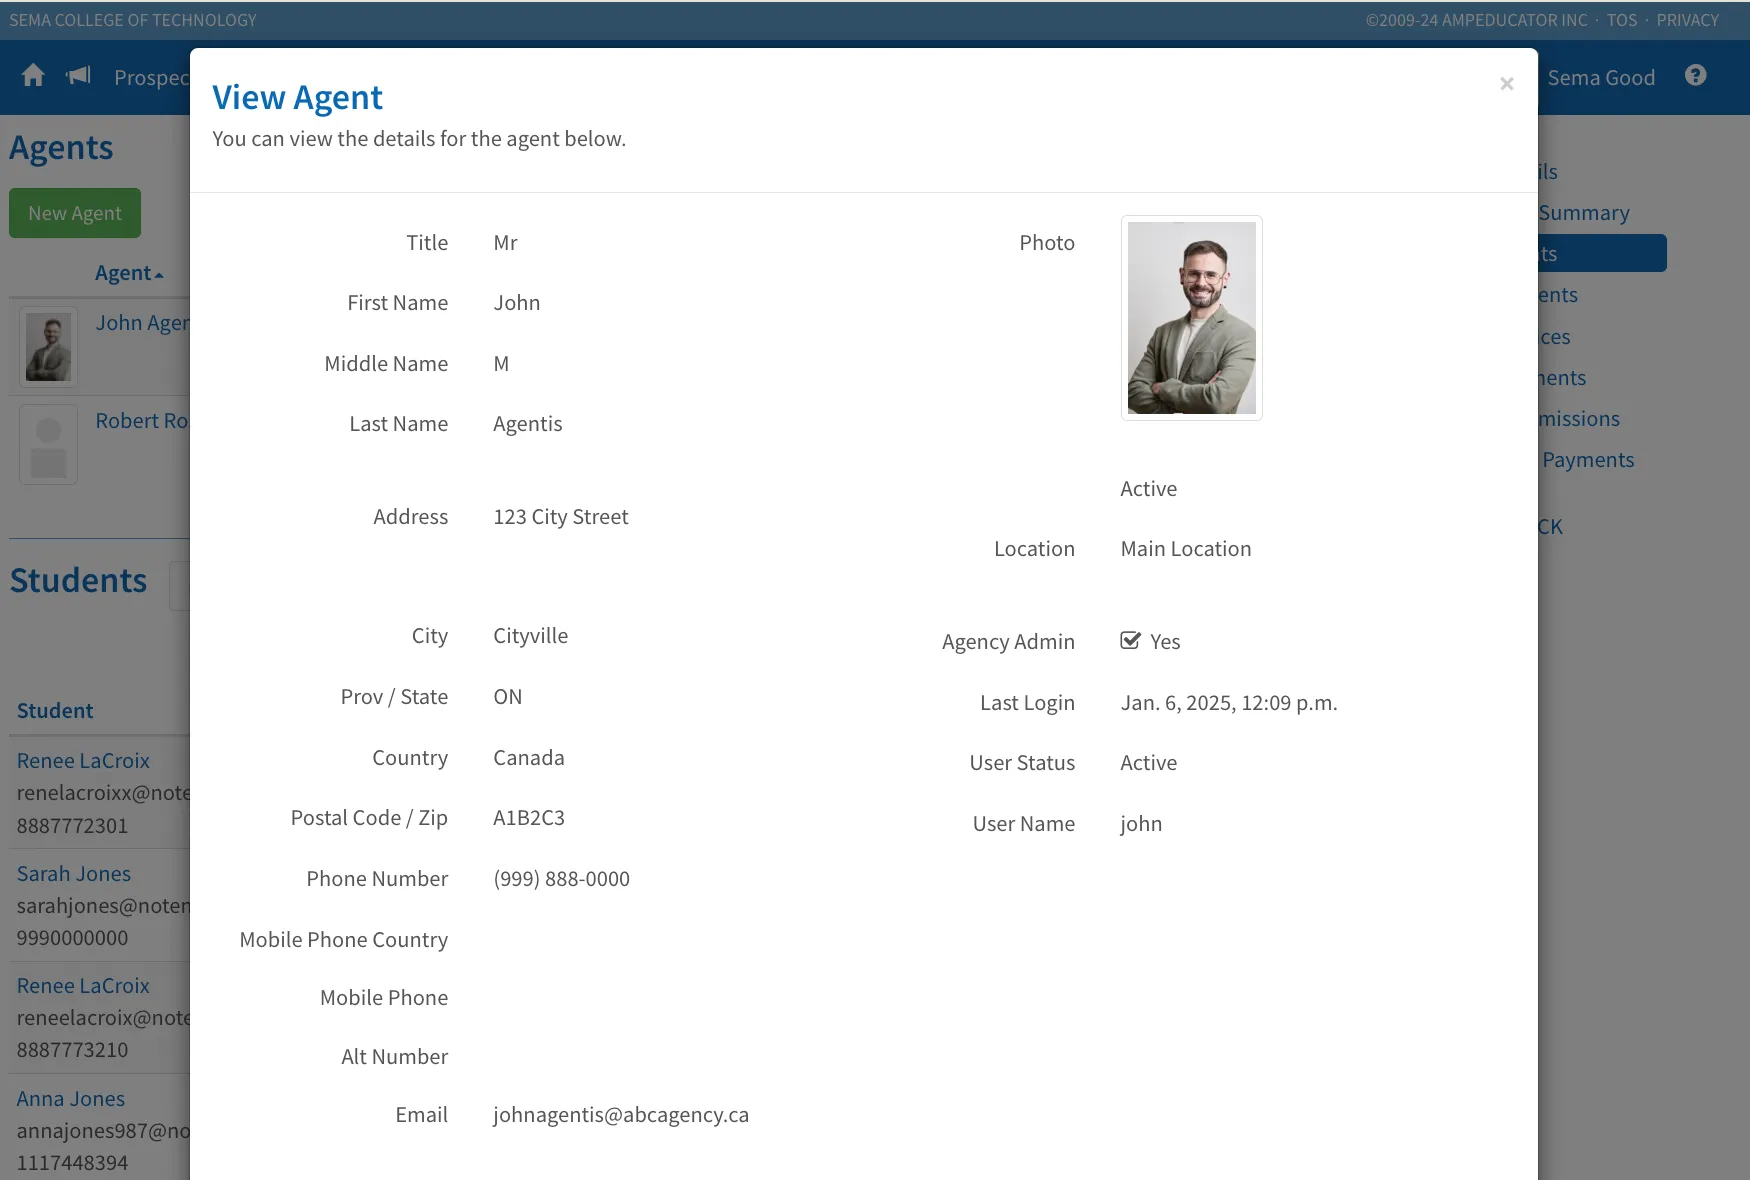
Clicking the view icon next to an agent’s name opens a full profile summary. This includes all available details about the agent, such as their contact information, login status, and user access.
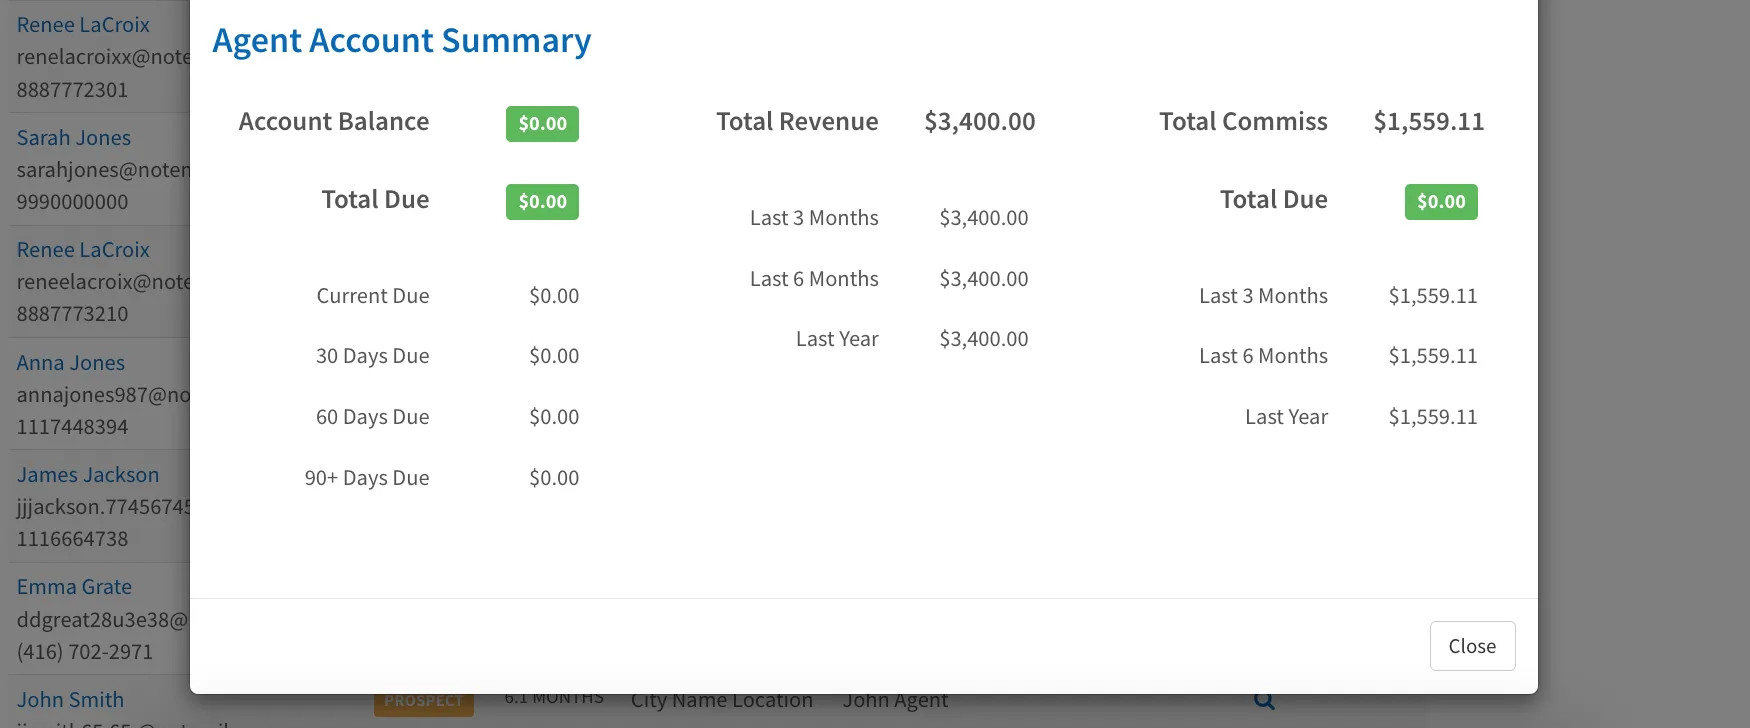
At the bottom, you'll also see their Agent Account Summary, which displays their account balance, total revenue, total commissions, and amounts due.
Resetting an Agent’s Password
Click the Reset Password icon beside an agent’s name to instantly email them a password reset link.
If you'd prefer to manually update their password, click the edit icon and check the box labeled Change Password to enter and confirm a new one yourself.
Students
The Students tab within the Agency profile displays all Students who have been assigned to Agents under this agency. Each entry shows key information such as their type (Student or Prospect), contact info, location, assigned agent, and enrollment status.
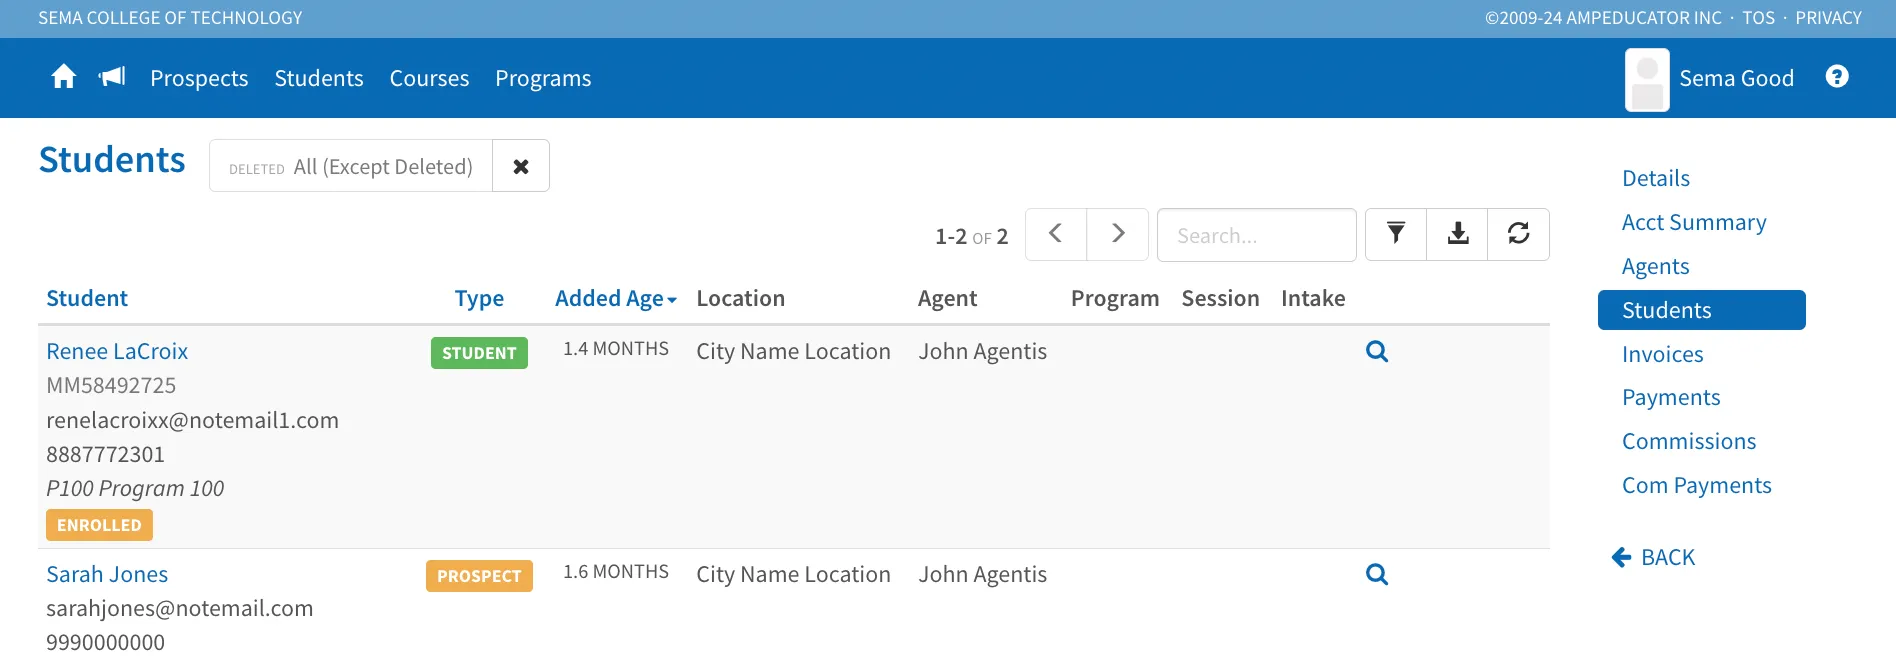
To open a Student’s full profile, you can either click on the Student’s name or use the magnifying glass icon on the right. This allows you to view or edit their details as needed.
Invoices
The Invoices tab shows all invoices linked to Students under the agency and the Agent they are assigned to. You can view the invoice number, status (e.g., Paid or Pending), Agent, Student, due date, total amount, commission earned, and remaining balance.
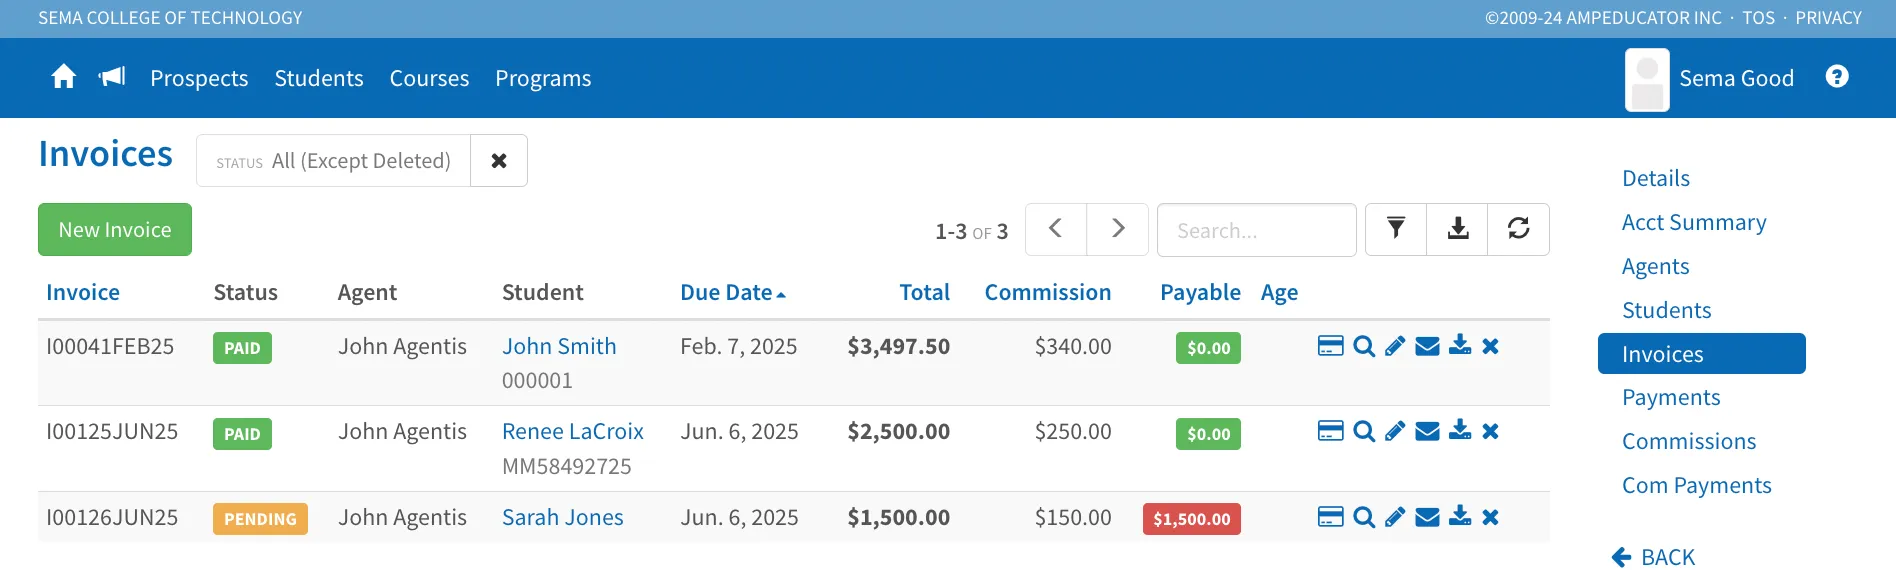
Use the quick action icons on the right to make a payment, view or edit the invoice, email it, download it as a PDF, or delete it. You can also click the Student’s name to go directly to their Student Profile.
To create a new invoice, click the green New Invoice button. The process is the same as creating one from Student / Account / Invoices.
Payments
The Payments tab shows a list of payments associated with Students under the agency. Each entry includes the payment ID, Student, Agent, payment date, status, and amount.
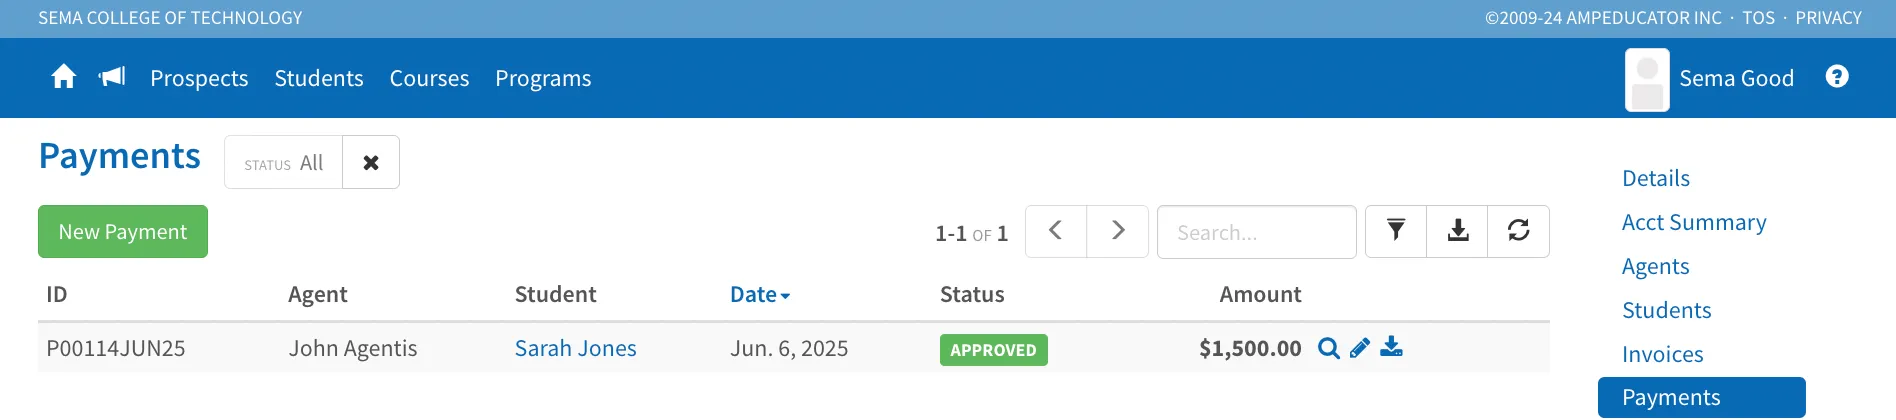
You can click the Student’s name to go to their profile, or use the quick action icons on the right to:
- View the payment
- Edit the payment
- Download a PDF of the payment record
To add a new payment, click the green New Payment button. The process is the same as creating one from Student / Account / Payments.
Commissions
The Commissions tab shows a list of commissions associated with each Student under the agency, including the Agent, Student, Date, Amount, Balance, and Status.
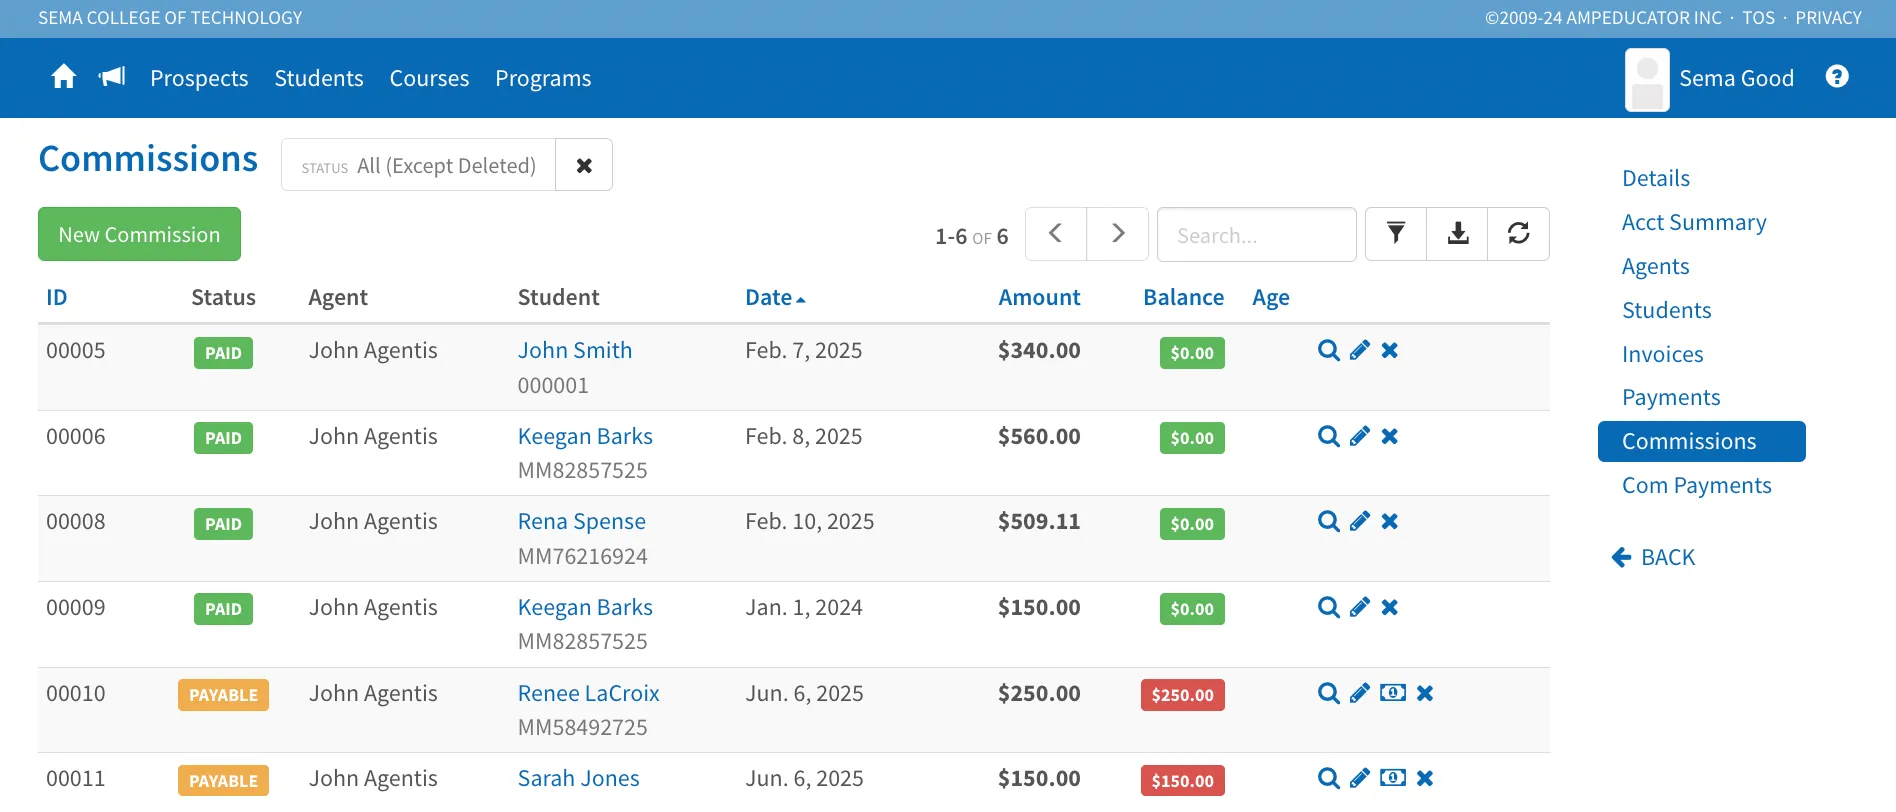
You can click on the Student’s name to go directly to their profile. On the right-hand side, the quick action icons allow you to manage the commission record.
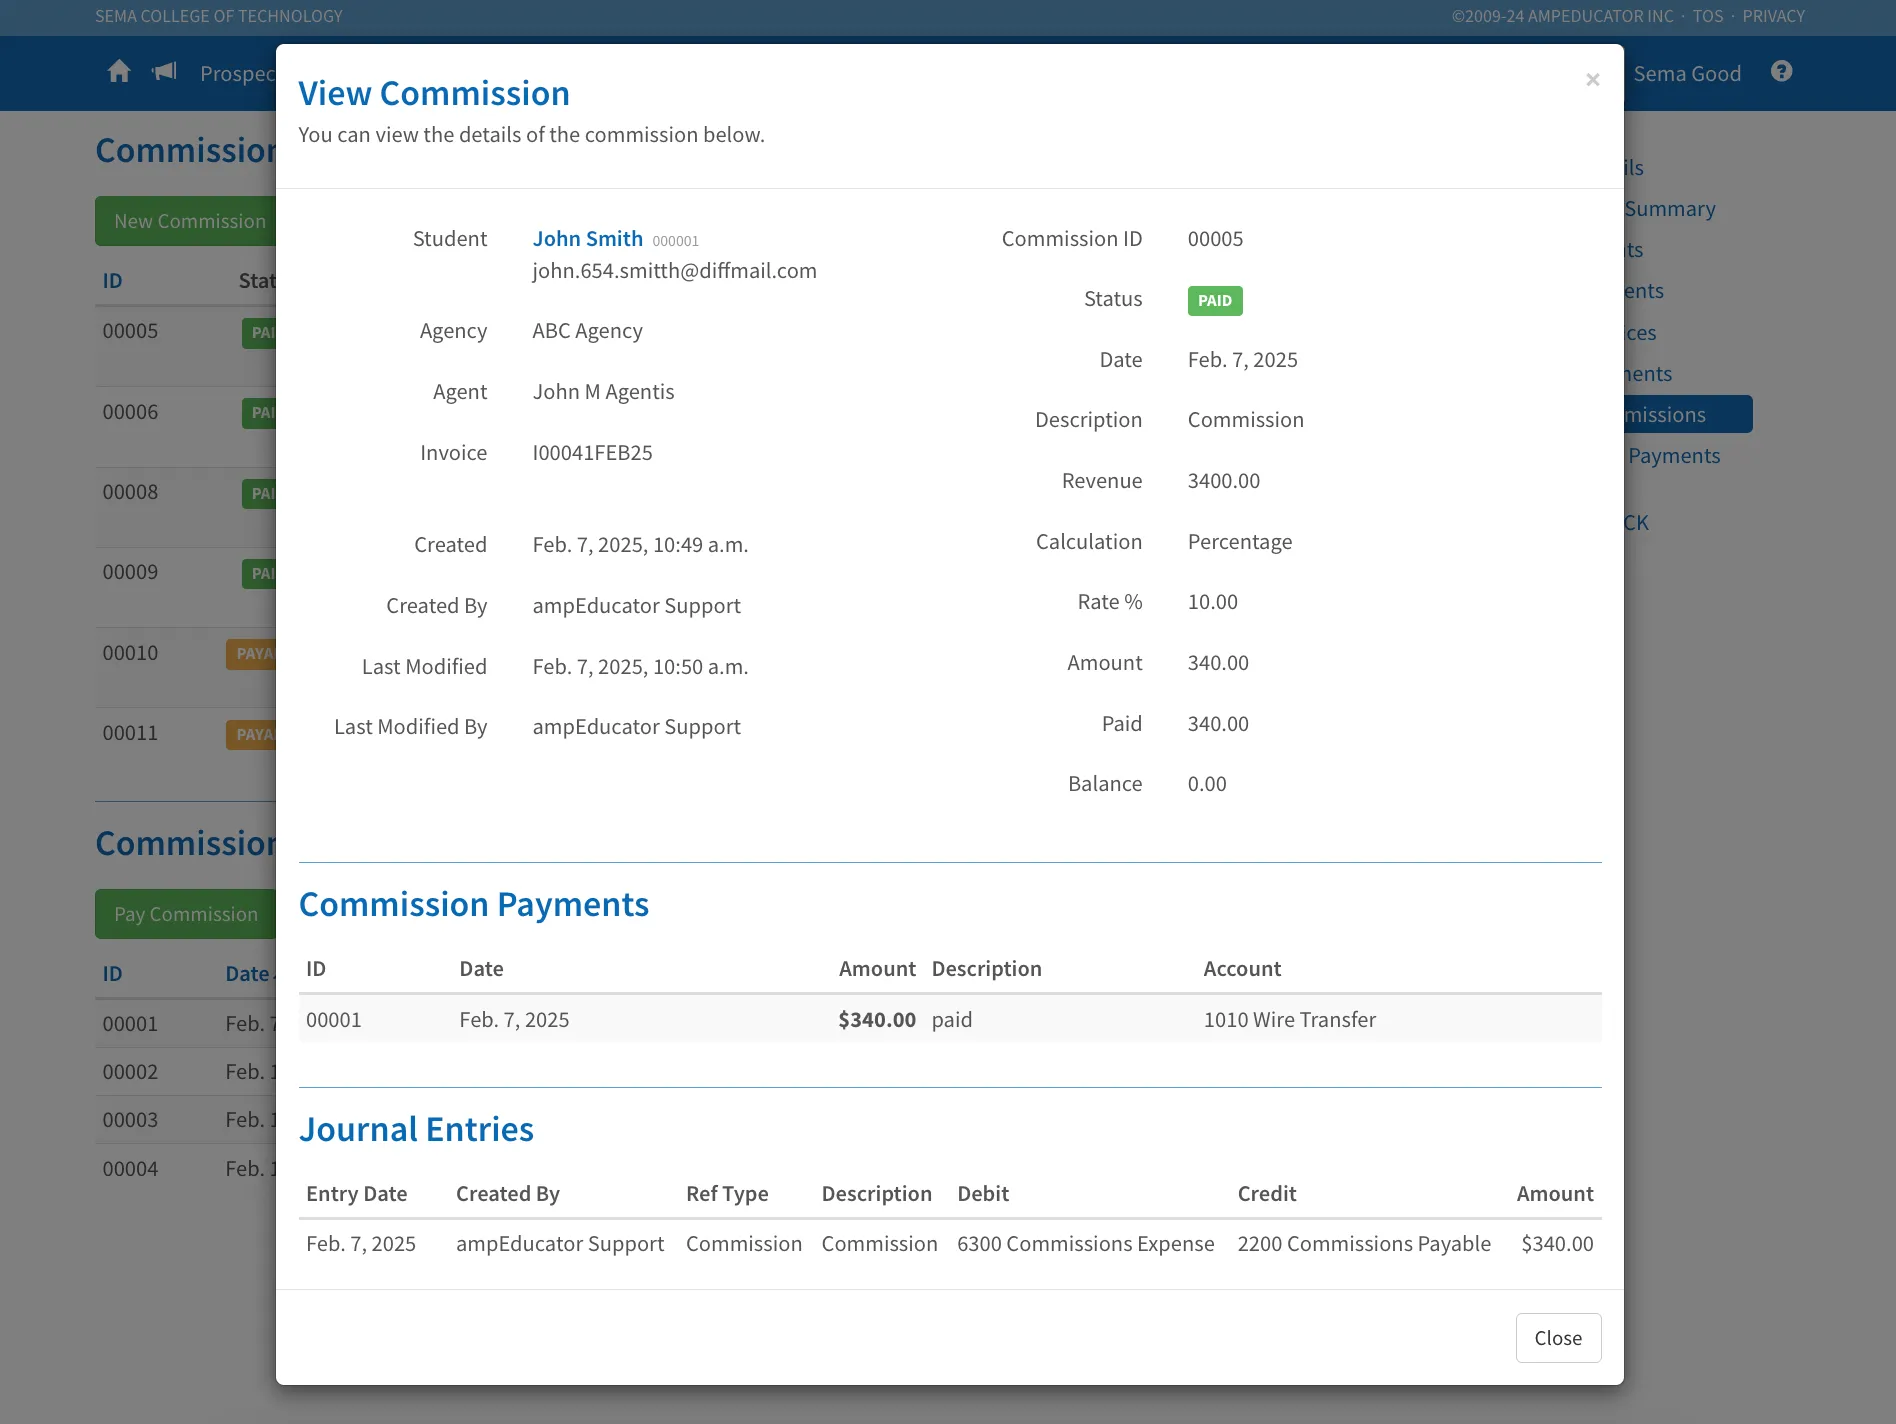
Click the View icon to open a detailed summary of the commission. This includes information like the student, agent, invoice, calculation method, and associated payments.
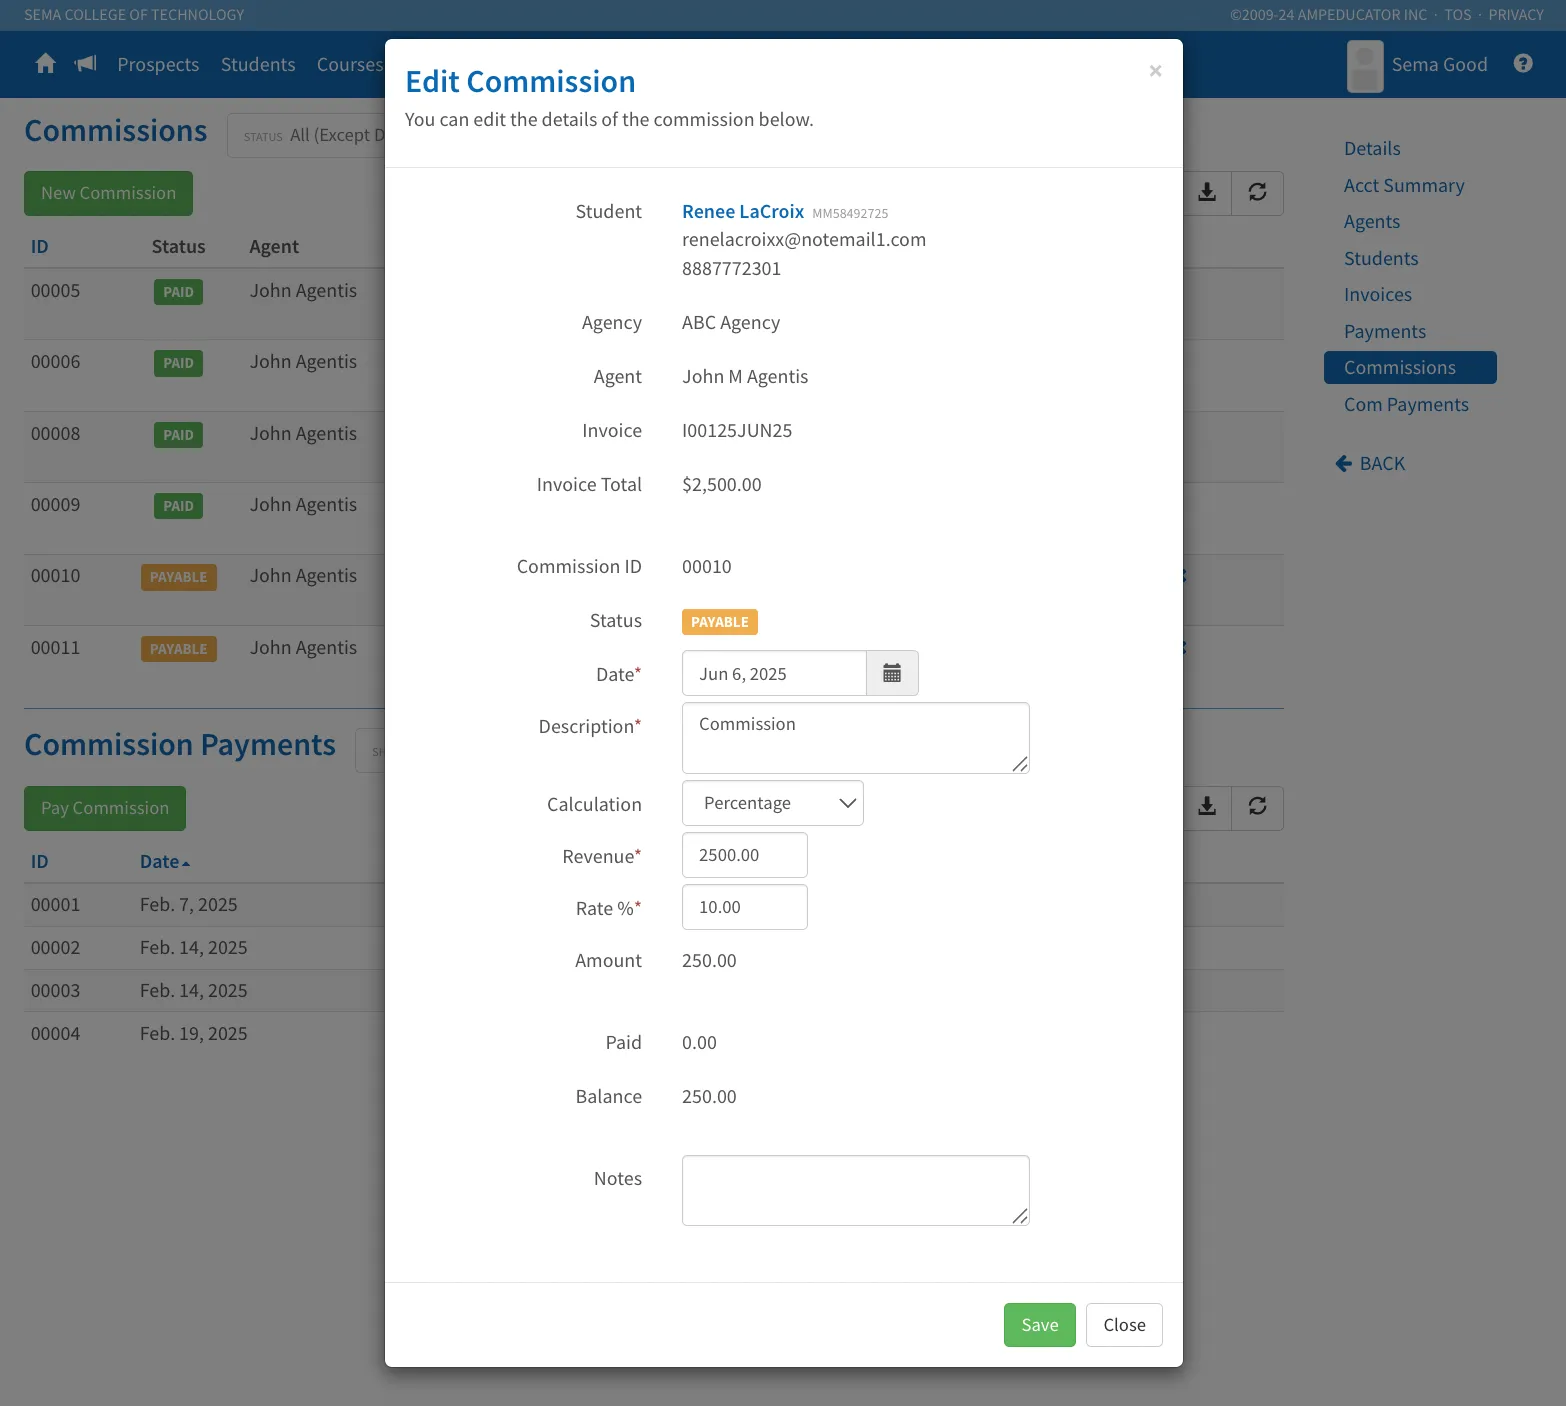
Click the Edit icon to update the commission details such as date, percentage rate, description, or revenue total.
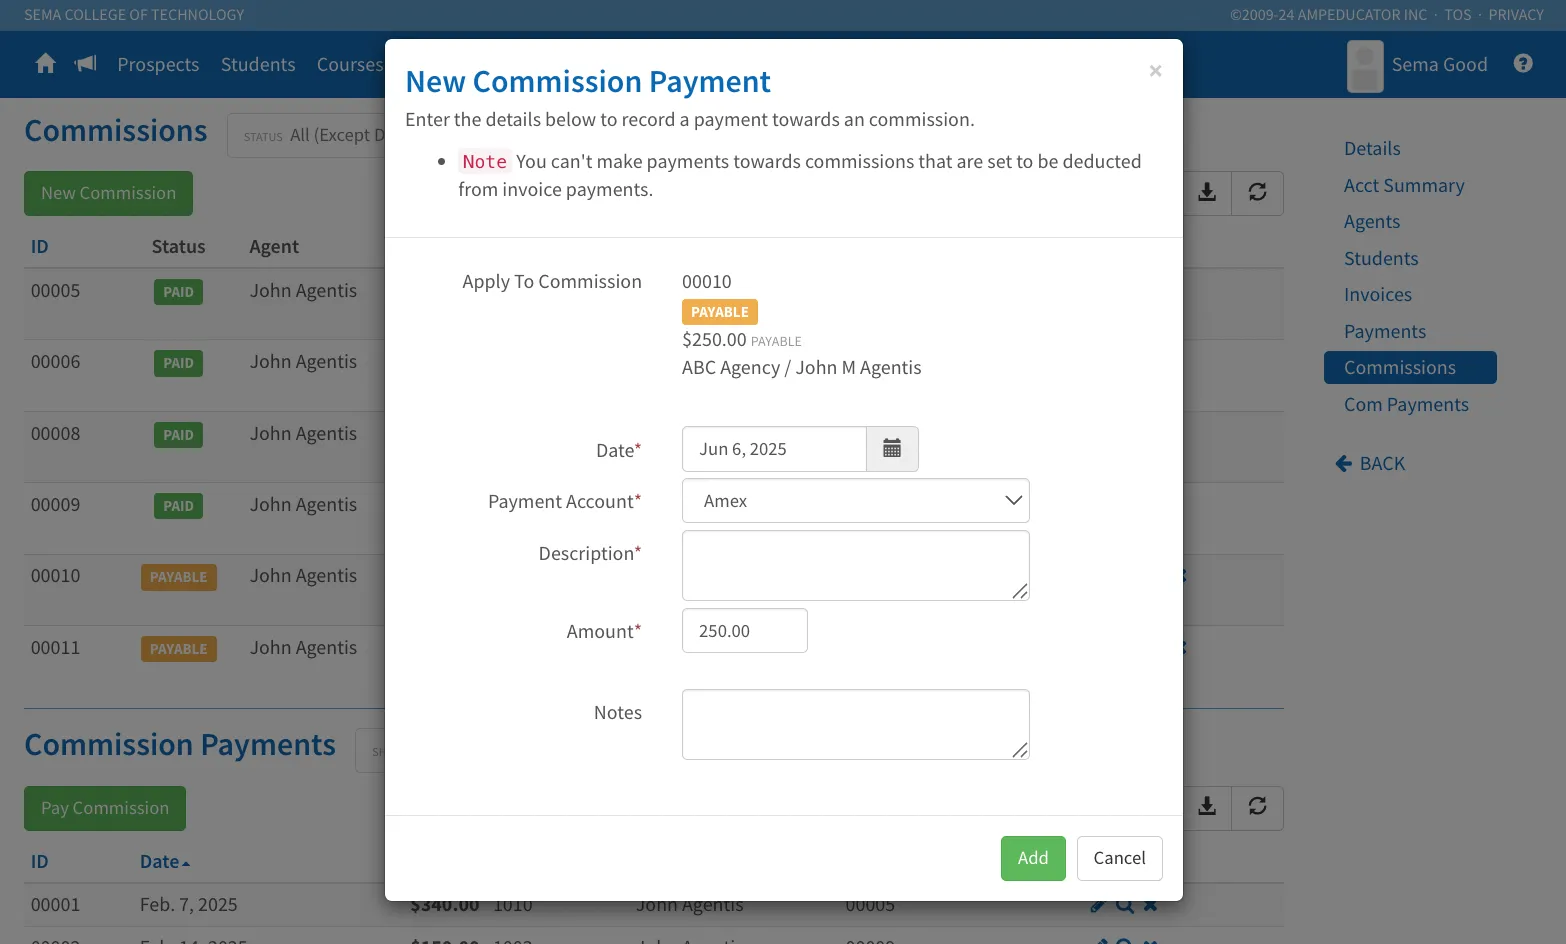
Click the Pay icon to record a commission payment. This opens a modal where you can select the payment account, enter an amount, and save the record.
Click the Delete icon to remove the commission record from the list.
To create a new commission manually, click New Commission.
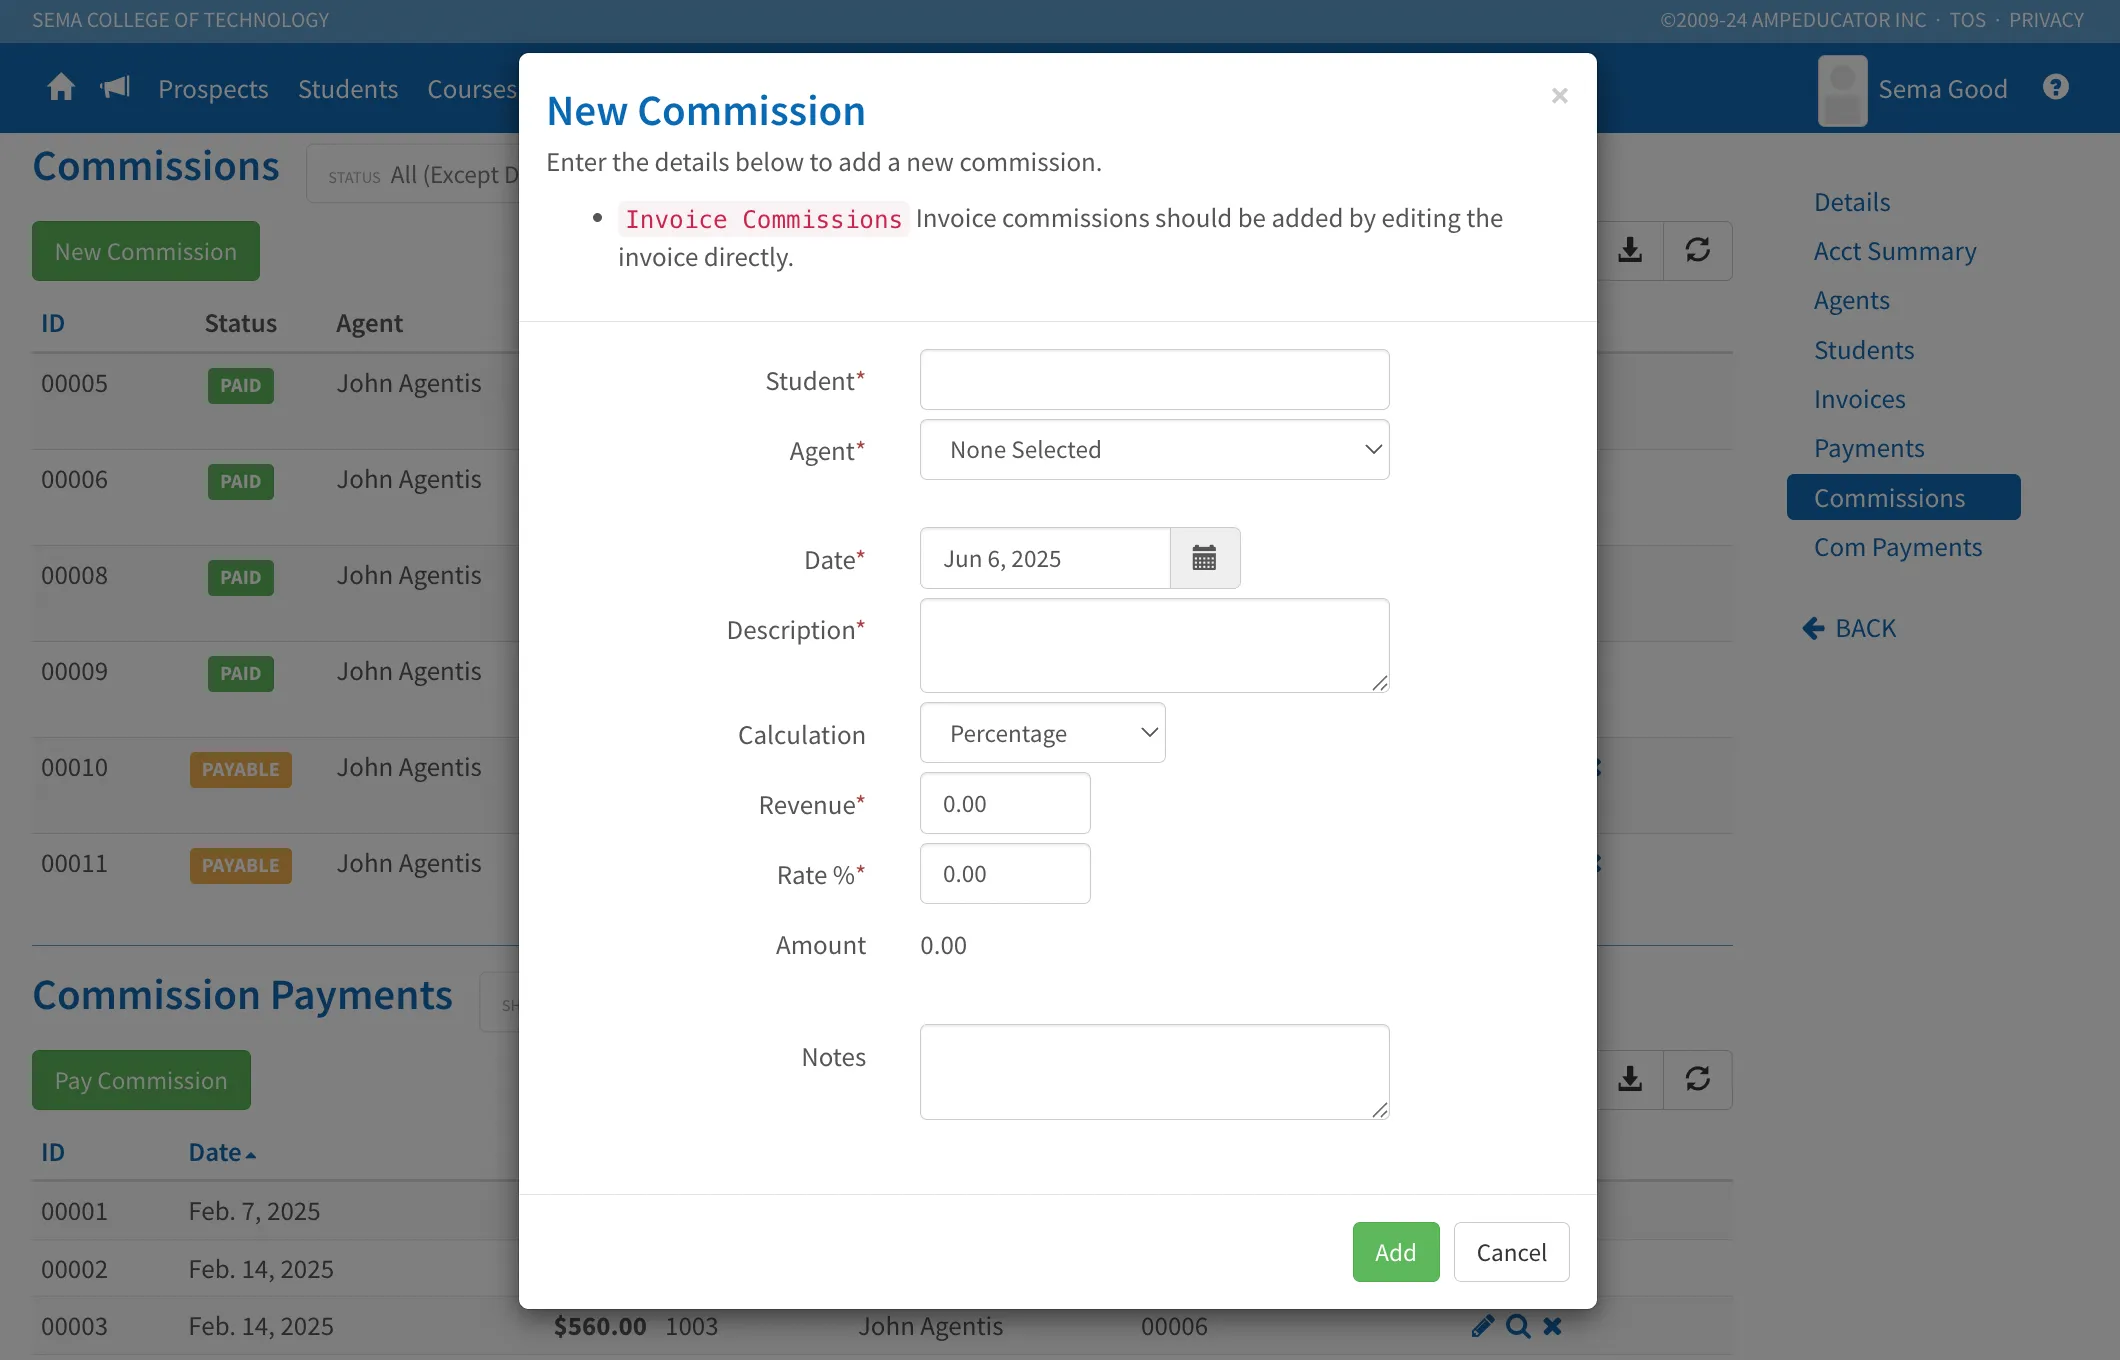
For invoice-based commissions, you should add the commission by editing the invoice directly. This form is intended for manually added commissions not tied to invoices.
Commission Payments
This tab shows a record of all commission payments made to agents. Each entry lists the payment ID, date, amount, account used, agent, and the related commission ID.
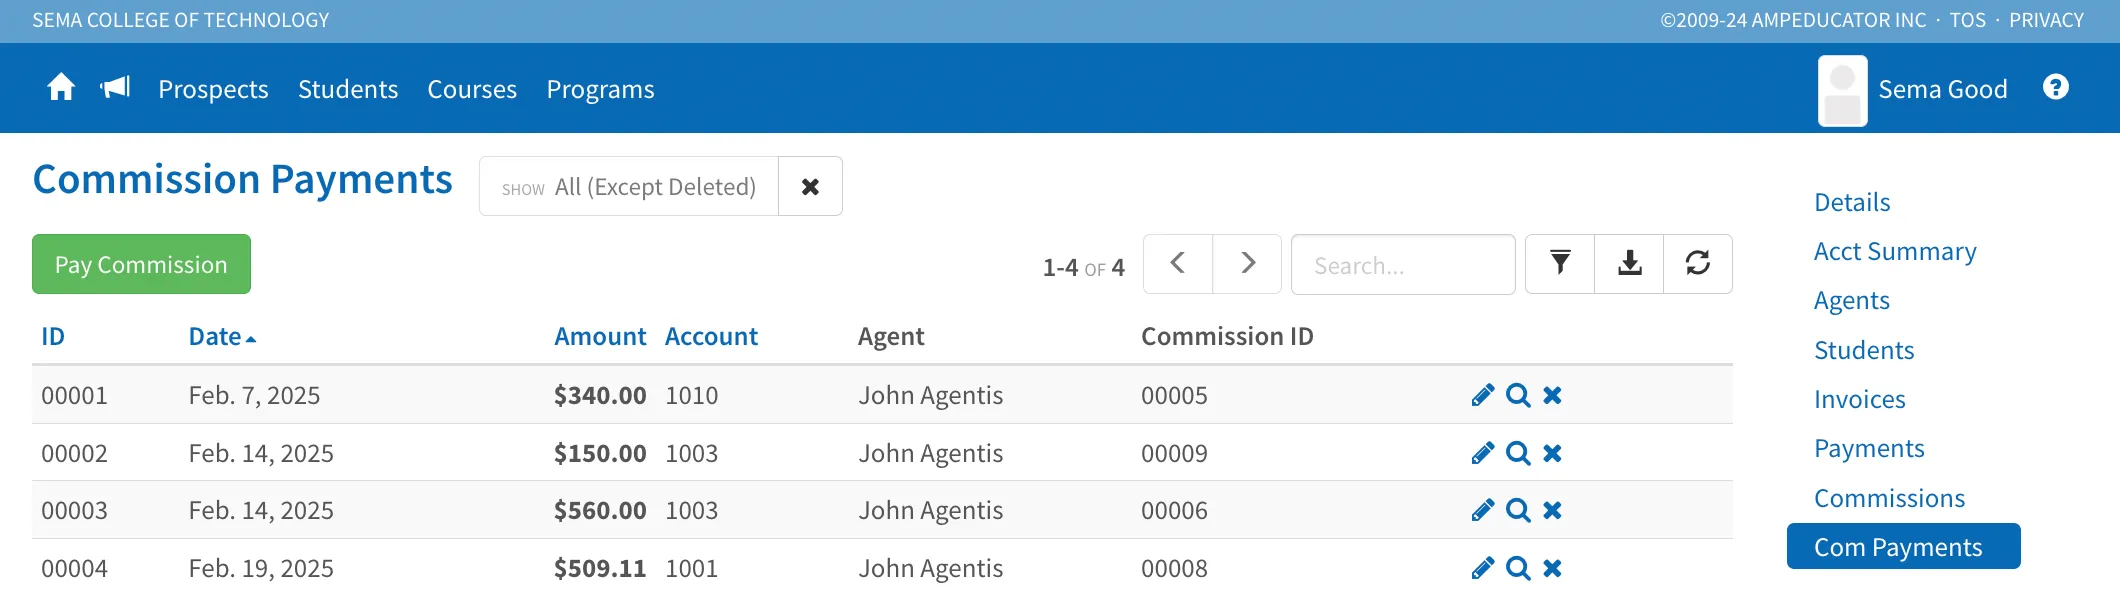
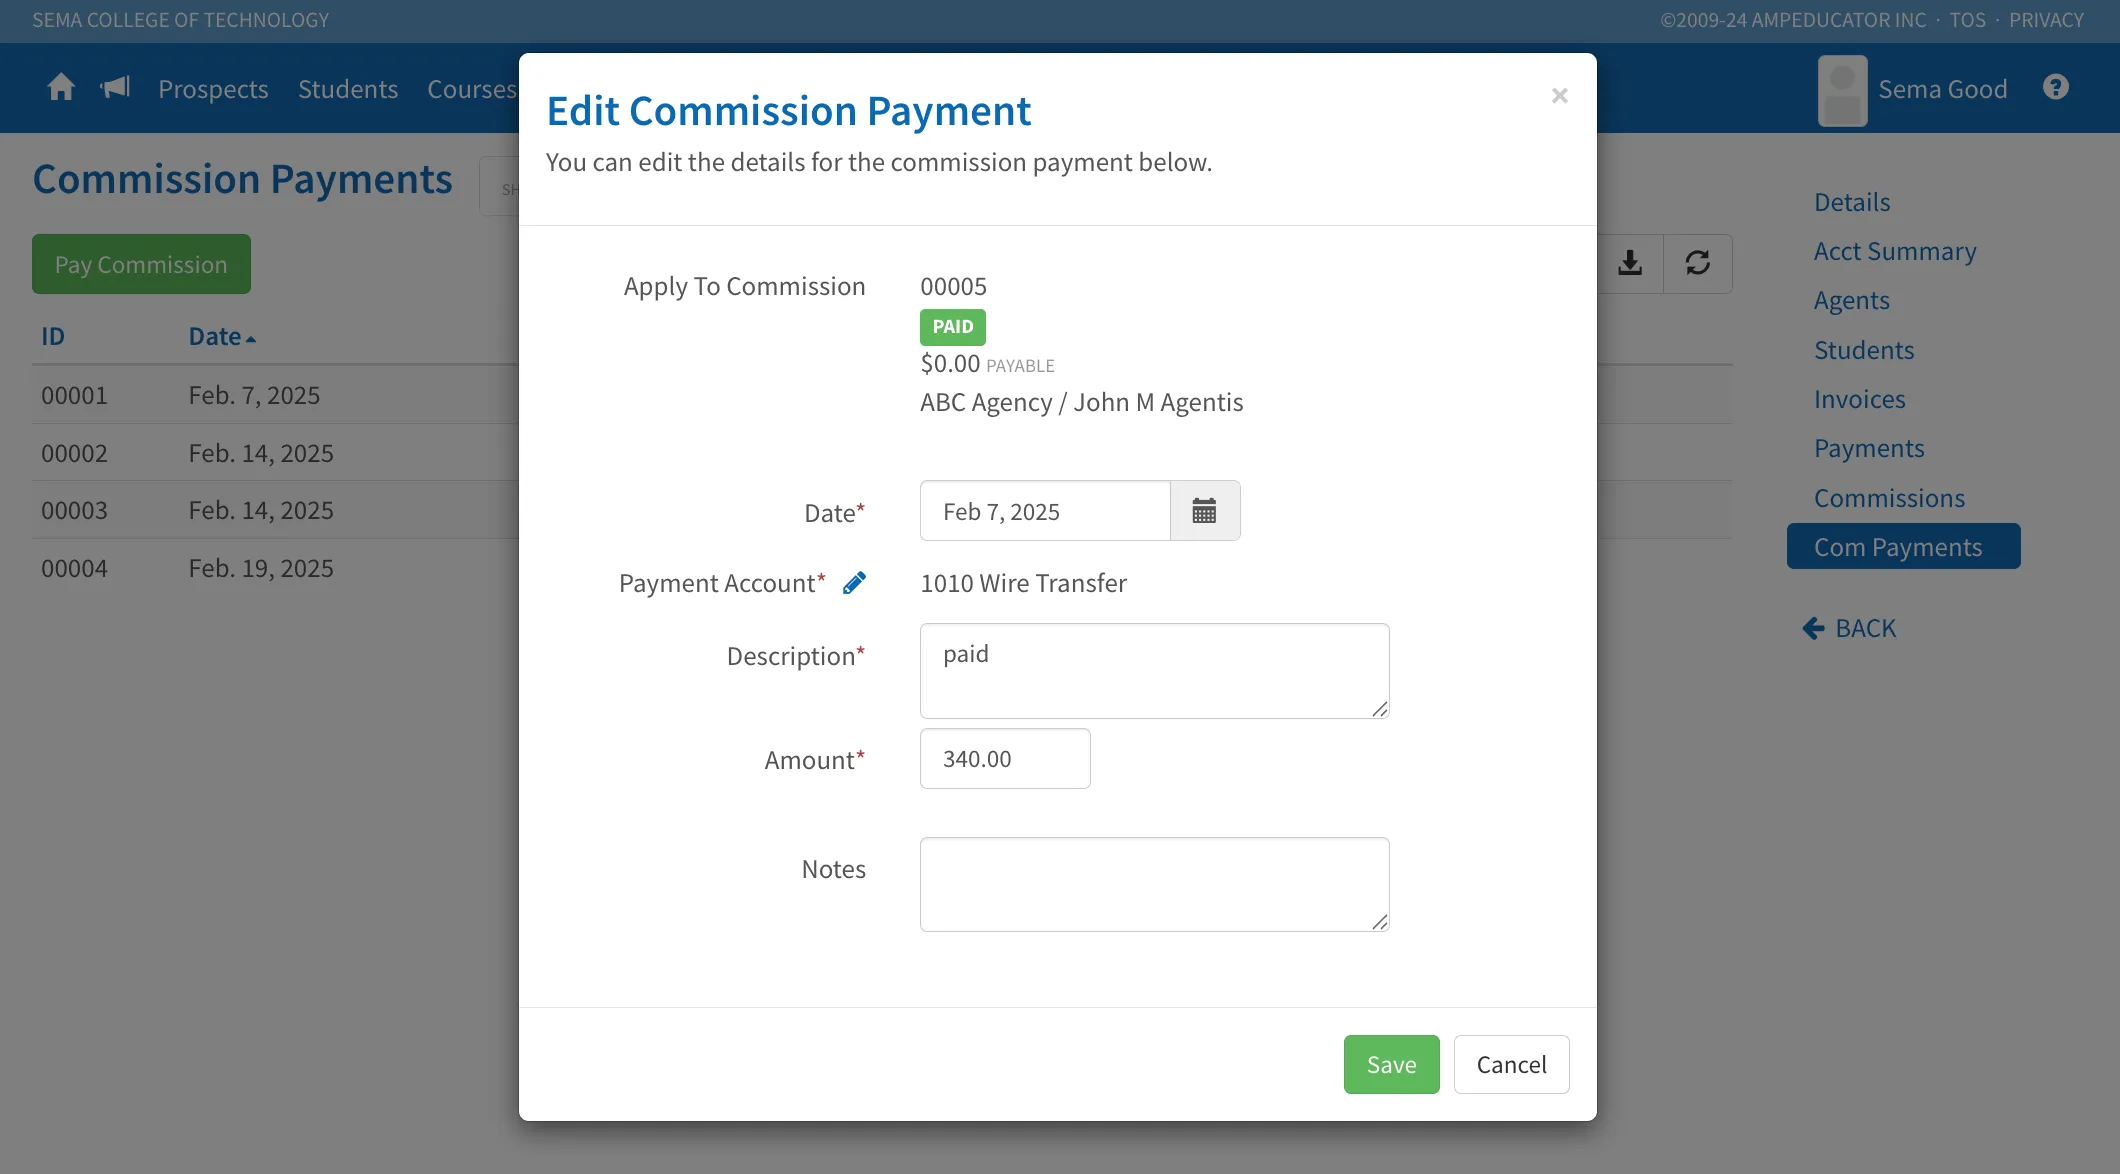
To manage an existing commission payment, click the Edit Commission Payment icon next to the payment. This allows you to update details like the date, payment account, description, amount, and any notes you want to include. This is helpful if you need to correct an error or make an adjustment after the payment has been logged.
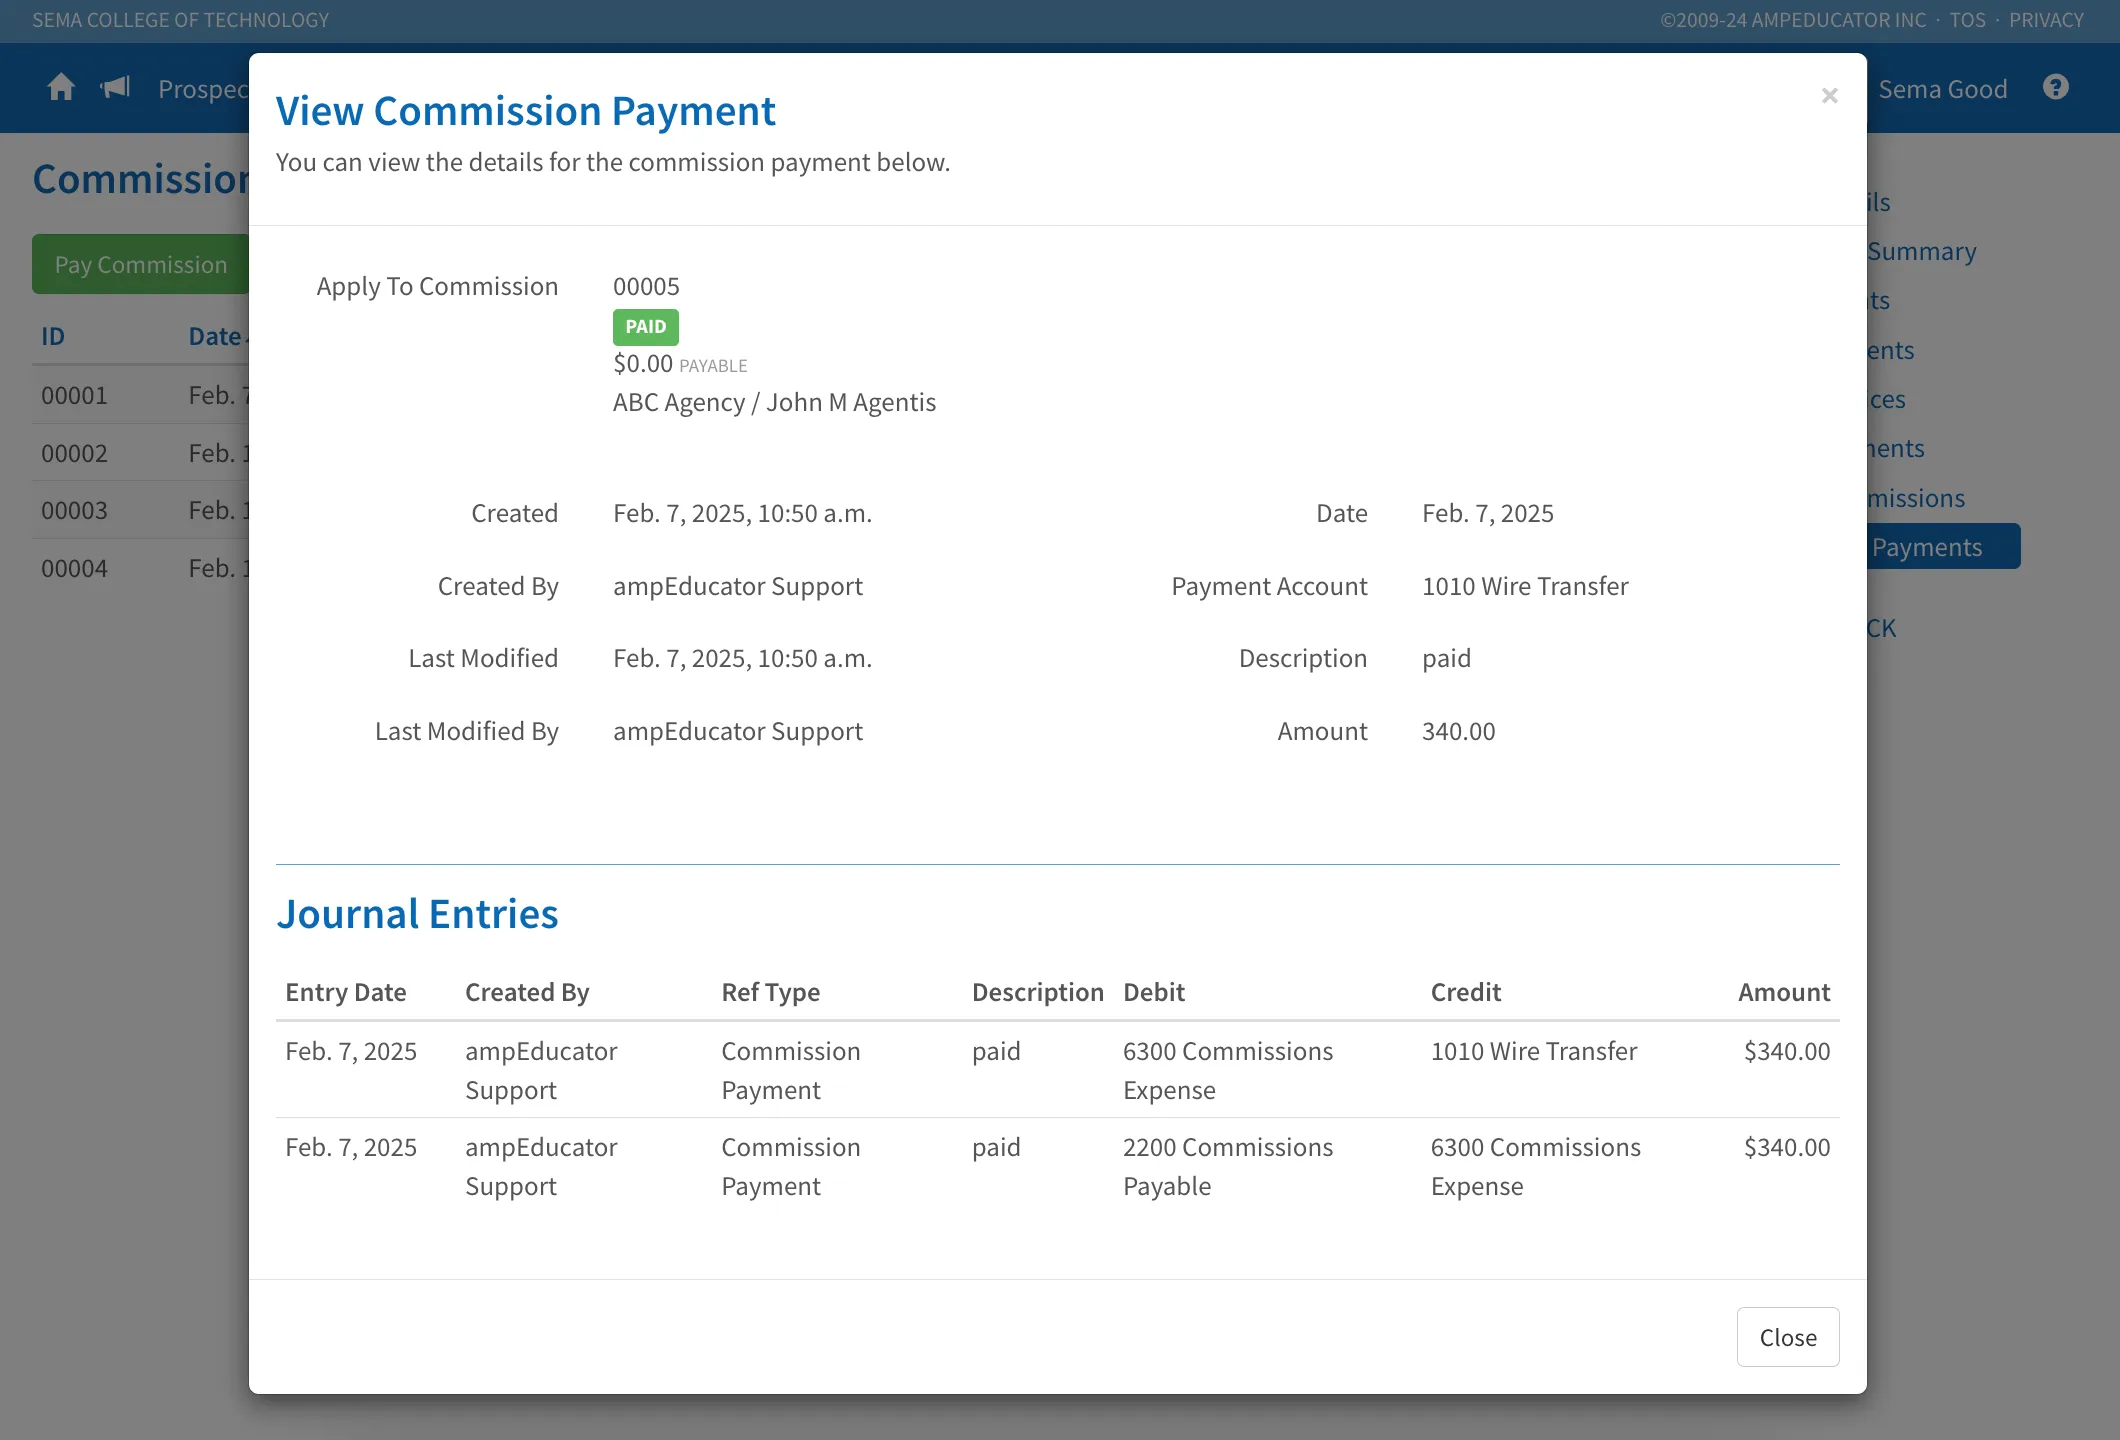
You can also view a commission payment by clicking the View Commission Payment icon. This opens a read-only modal that shows all the payment details, including when and by whom it was created or modified. At the bottom, you'll also see a Journal Entries section showing the accounting breakdown of the payment. This is useful for verifying financial records or auditing past transactions.