Admissions
This section allows you to create and manage Admission Templates, which are customized checklists of items a Prospect must complete during the admissions process. Templates help streamline your workflow and ensure consistency across different programs, courses, or student types.
You can also automatically link Admission Templates to specific Lead Providers to trigger the appropriate checklist as Prospects come in. To learn how, see Lead Providers / Actions.
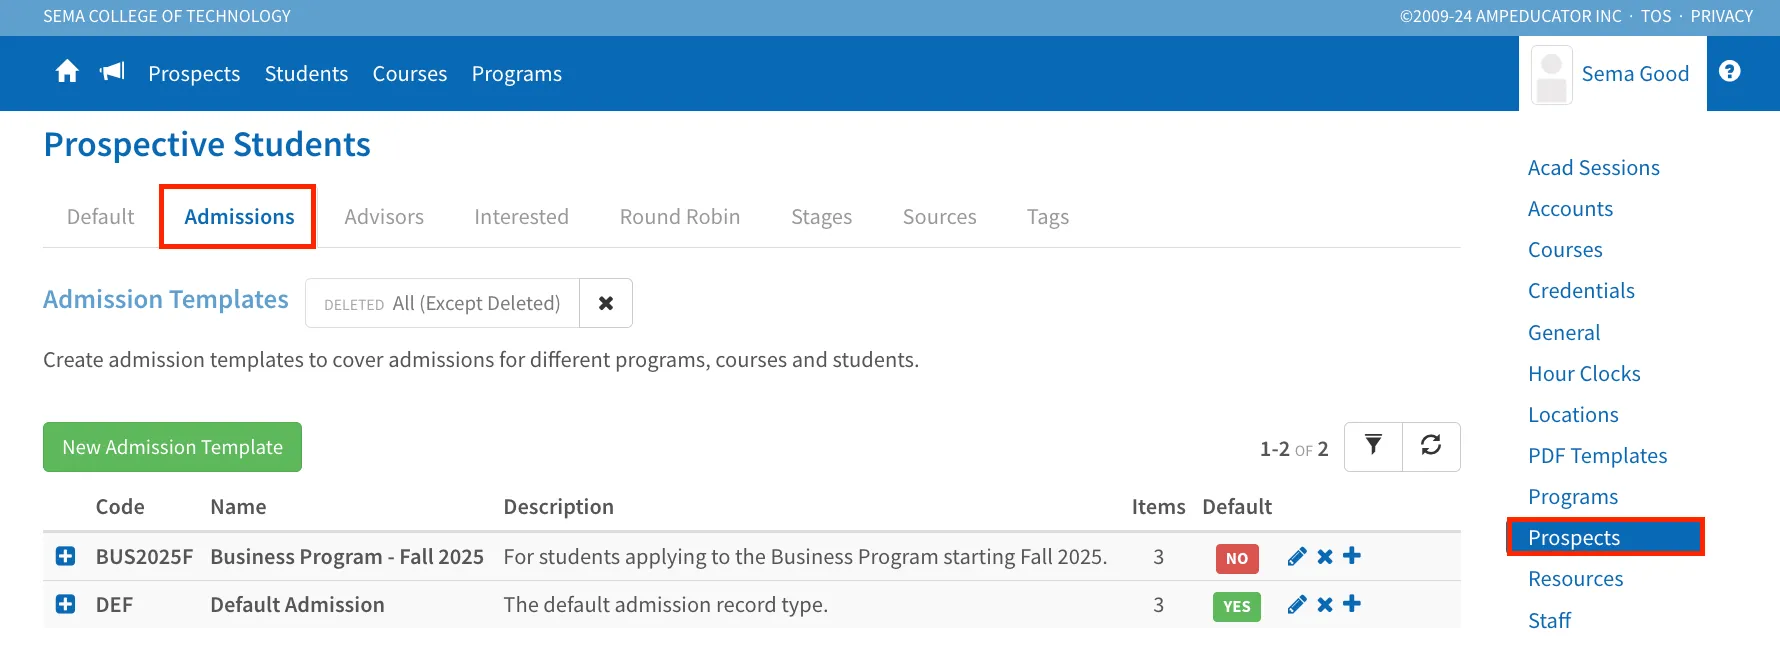
Each row in the list represents an existing Admission Template and includes the following details:
- Code – A short identifier for the template
- Name – The internal or descriptive name
- Description – A brief explanation of what the template is for
- Items – The number of Admission Items included
- Default – Indicates whether this is the default template for new Prospects
To the right of each template, you’ll see quick action icons that allow you to:
- Edit the template details
- Delete the template if it's no longer needed
- Add Admission Items to the template
Viewing Admission Items in a Template
To view the individual admission items in a template, click the expansion (+) icon to the left of the template name.
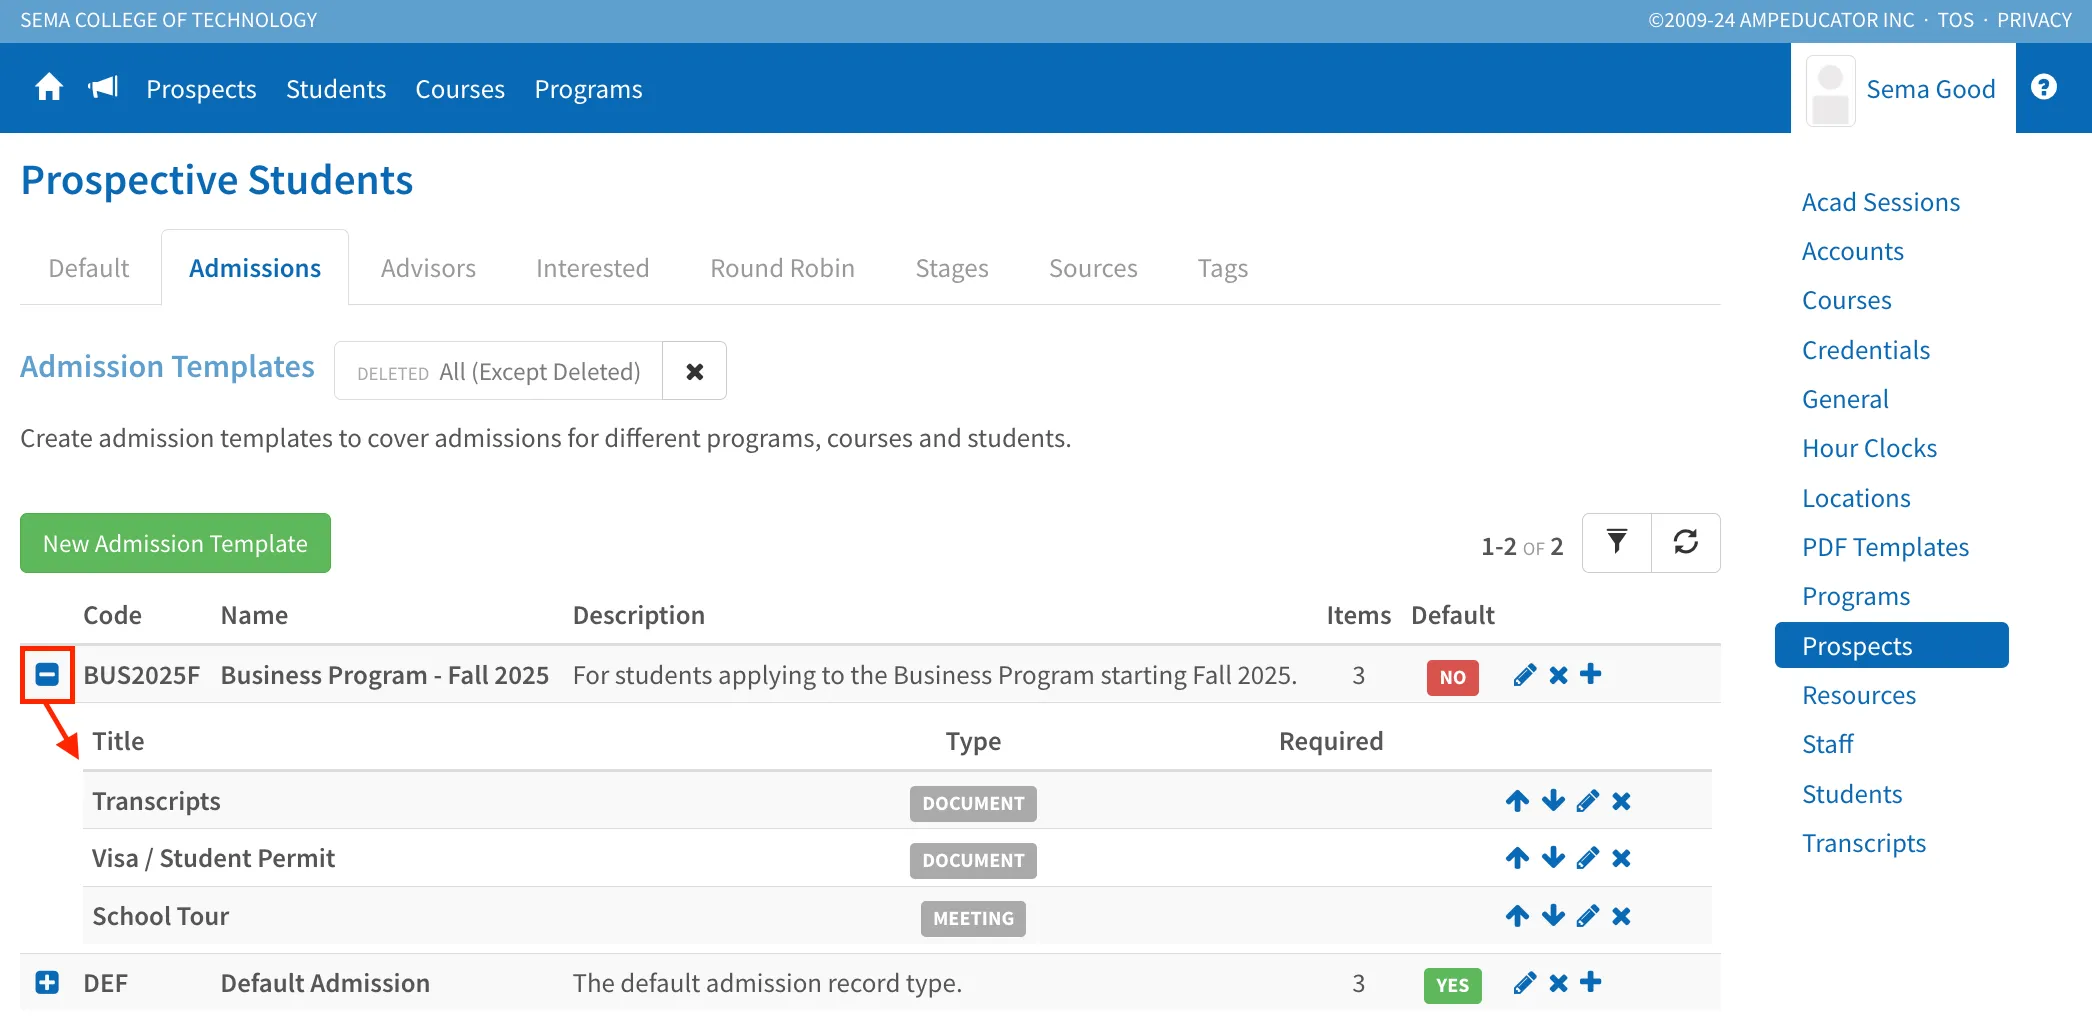
This reveals the checklist of admission items that are included—such as required documents, meetings, or forms—giving you a clear view of what’s involved in the admissions process for that template.
Creating a New Admission Template
To create a new admission template, click the green New Admission Template button. This will open a modal where you can fill out the details for your new template.
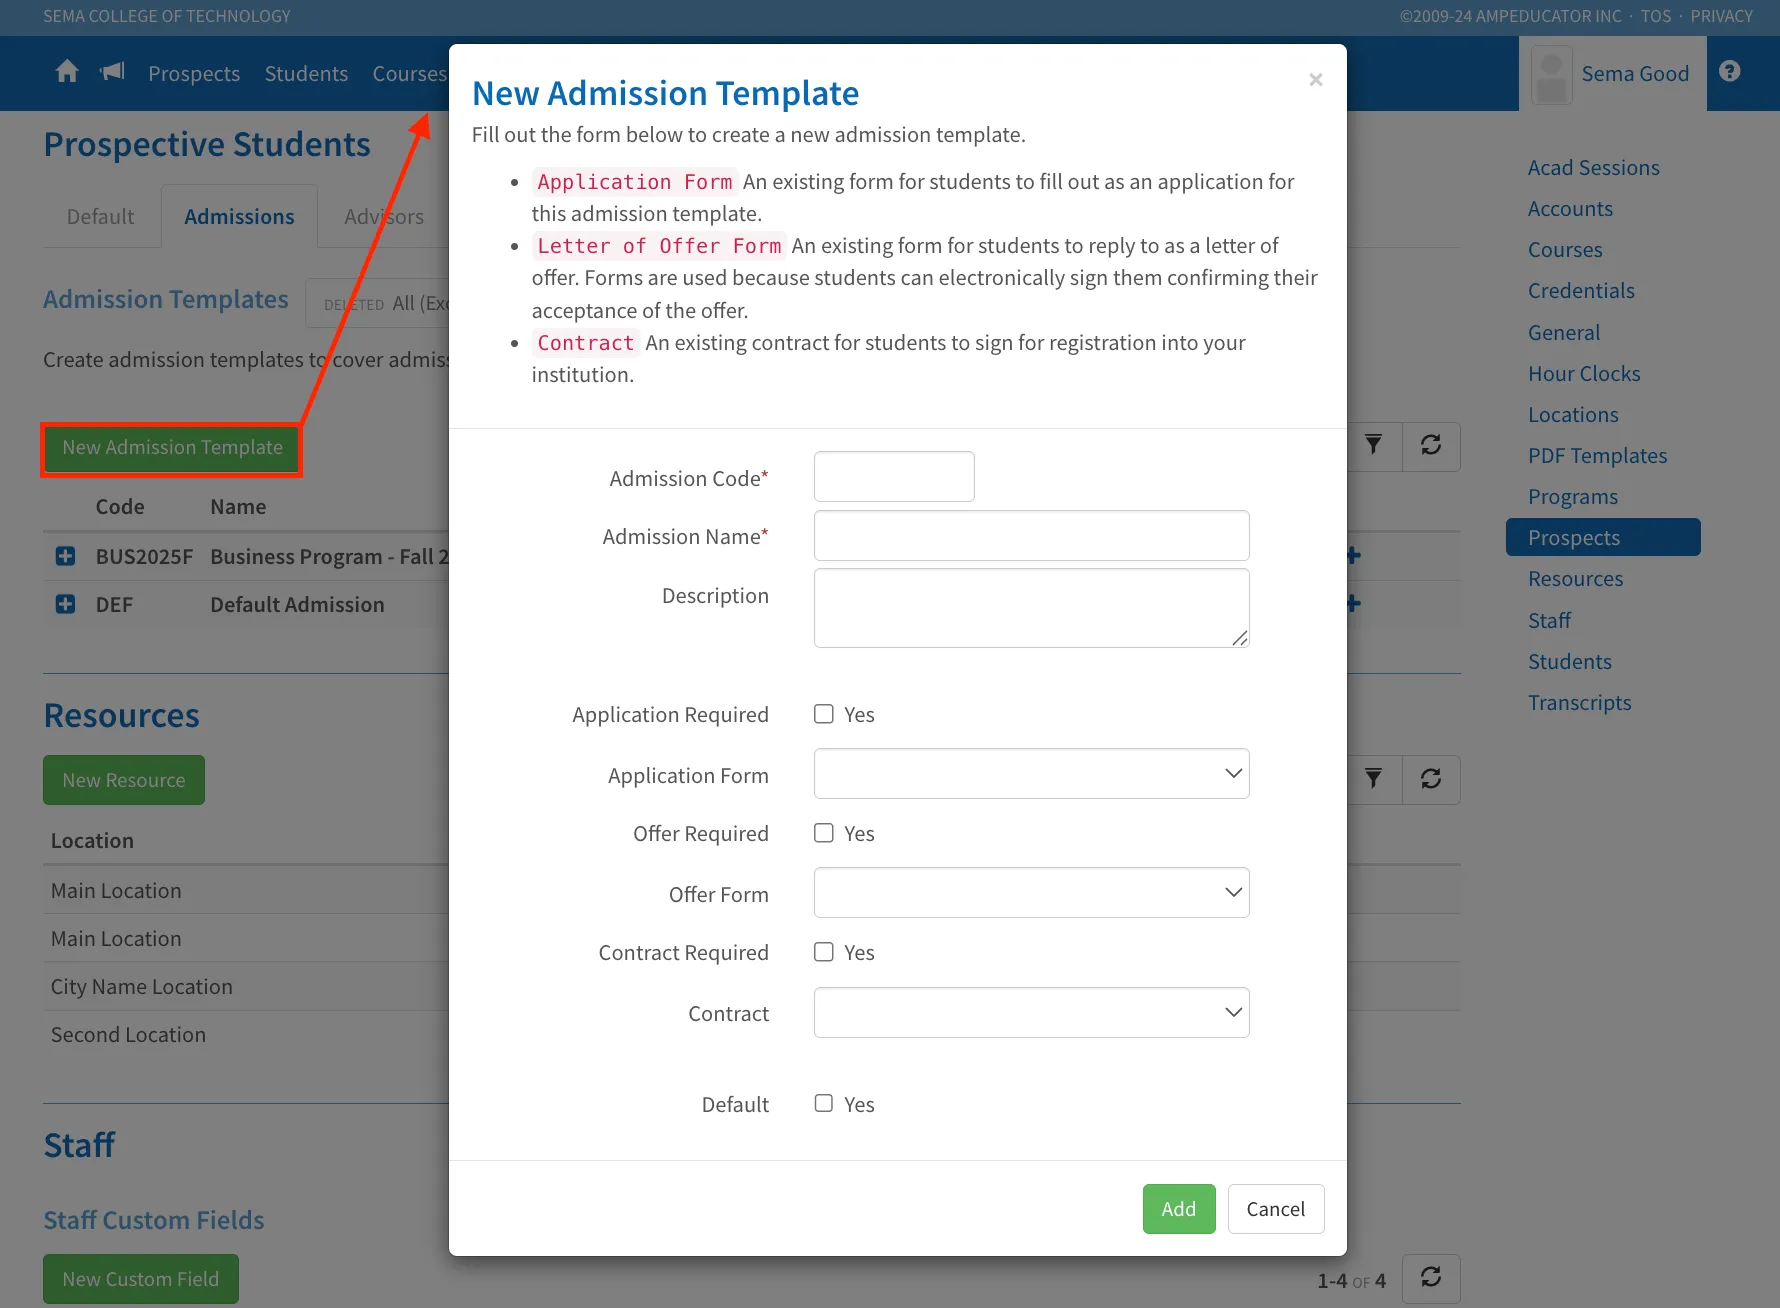
In the modal, enter the Admission Code, Admission Name, and an optional description. You’ll also decide whether to require any of the three core admission documents: an application form that students fill out to apply, an offer form that students complete to accept their offer, and a contract used to register students.
For each item you choose to require, you can select the specific form or contract you want to use from the dropdown list. These selections act as a guide for Admissions Advisors or other staff who will be following up with students.
You can also check the box to make this template the default if it will be used most often.
Once added, the template will appear in the list where you can continue to add customizable admission items.
Adding Admission Items to a Template
Once you’ve created an admission template, you can customize it further by adding specific admission items that staff or Admissions Advisors need to complete with the student. These items help define the process and ensure consistent follow-up, whether it's sending a form, uploading a document, or confirming a meeting.
To add items to a template, click the plus (+) icon to the right of the template you want to customize.
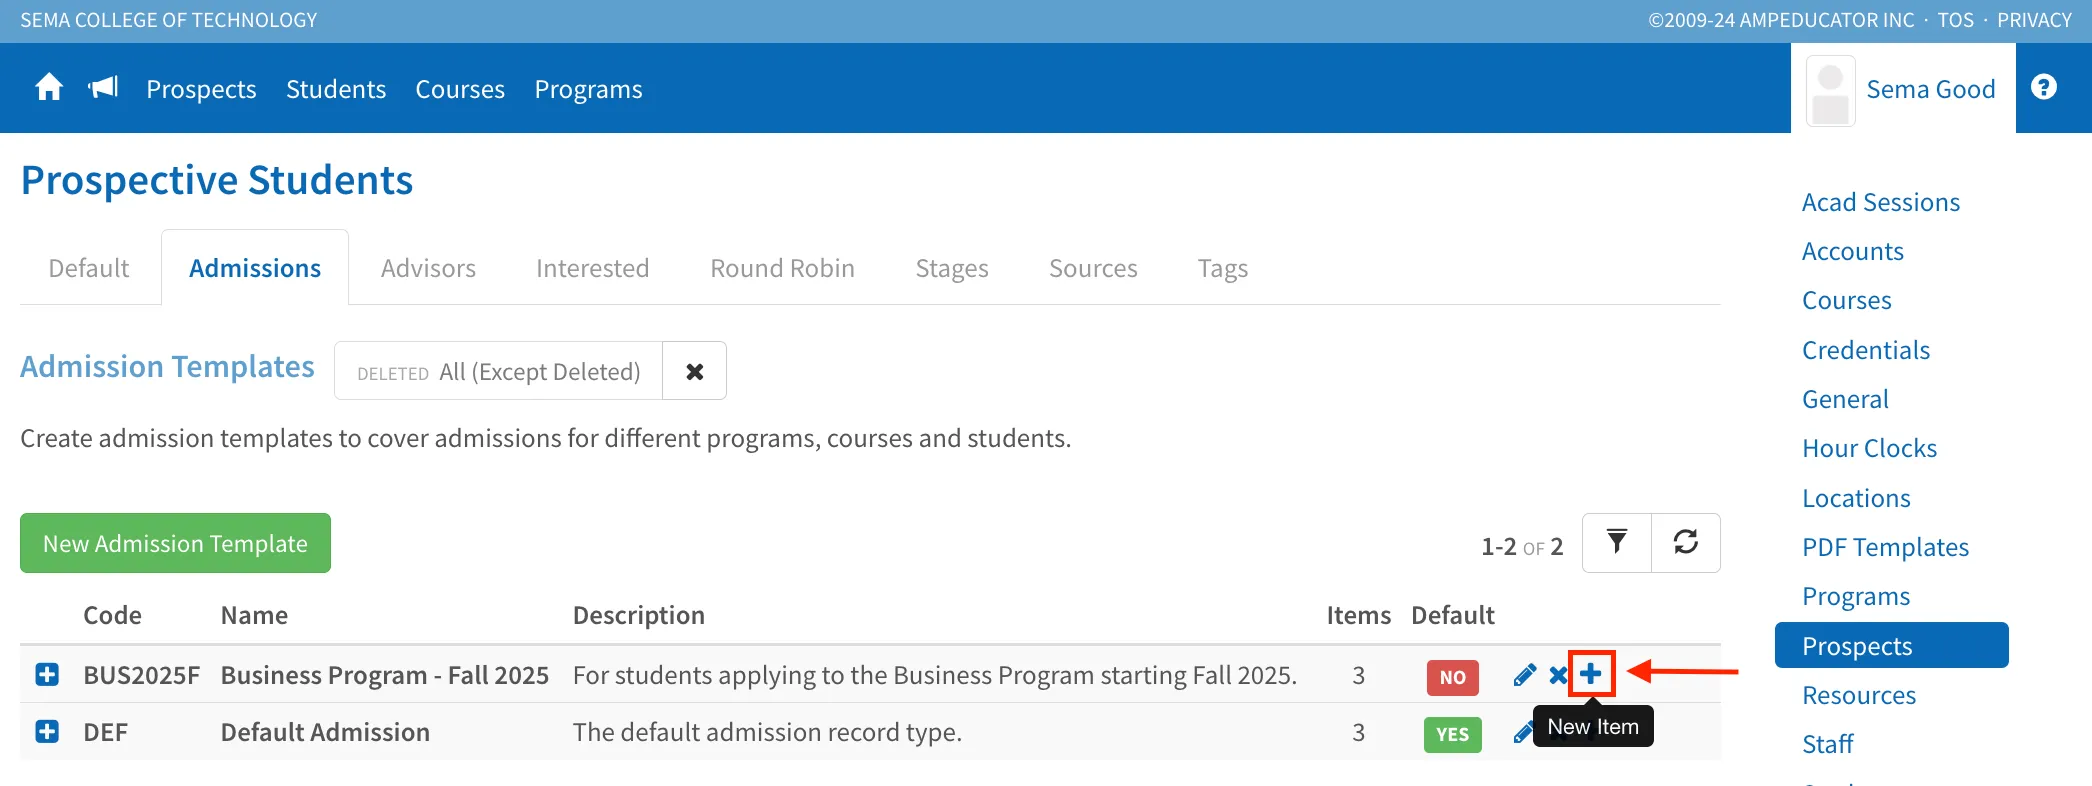
This will open a modal where you can select the type of item you want to add (such as a form, email, meeting, or contract), give it a title, and add instructions if needed. You can also choose whether the item must be completed before the Prospect can progress.
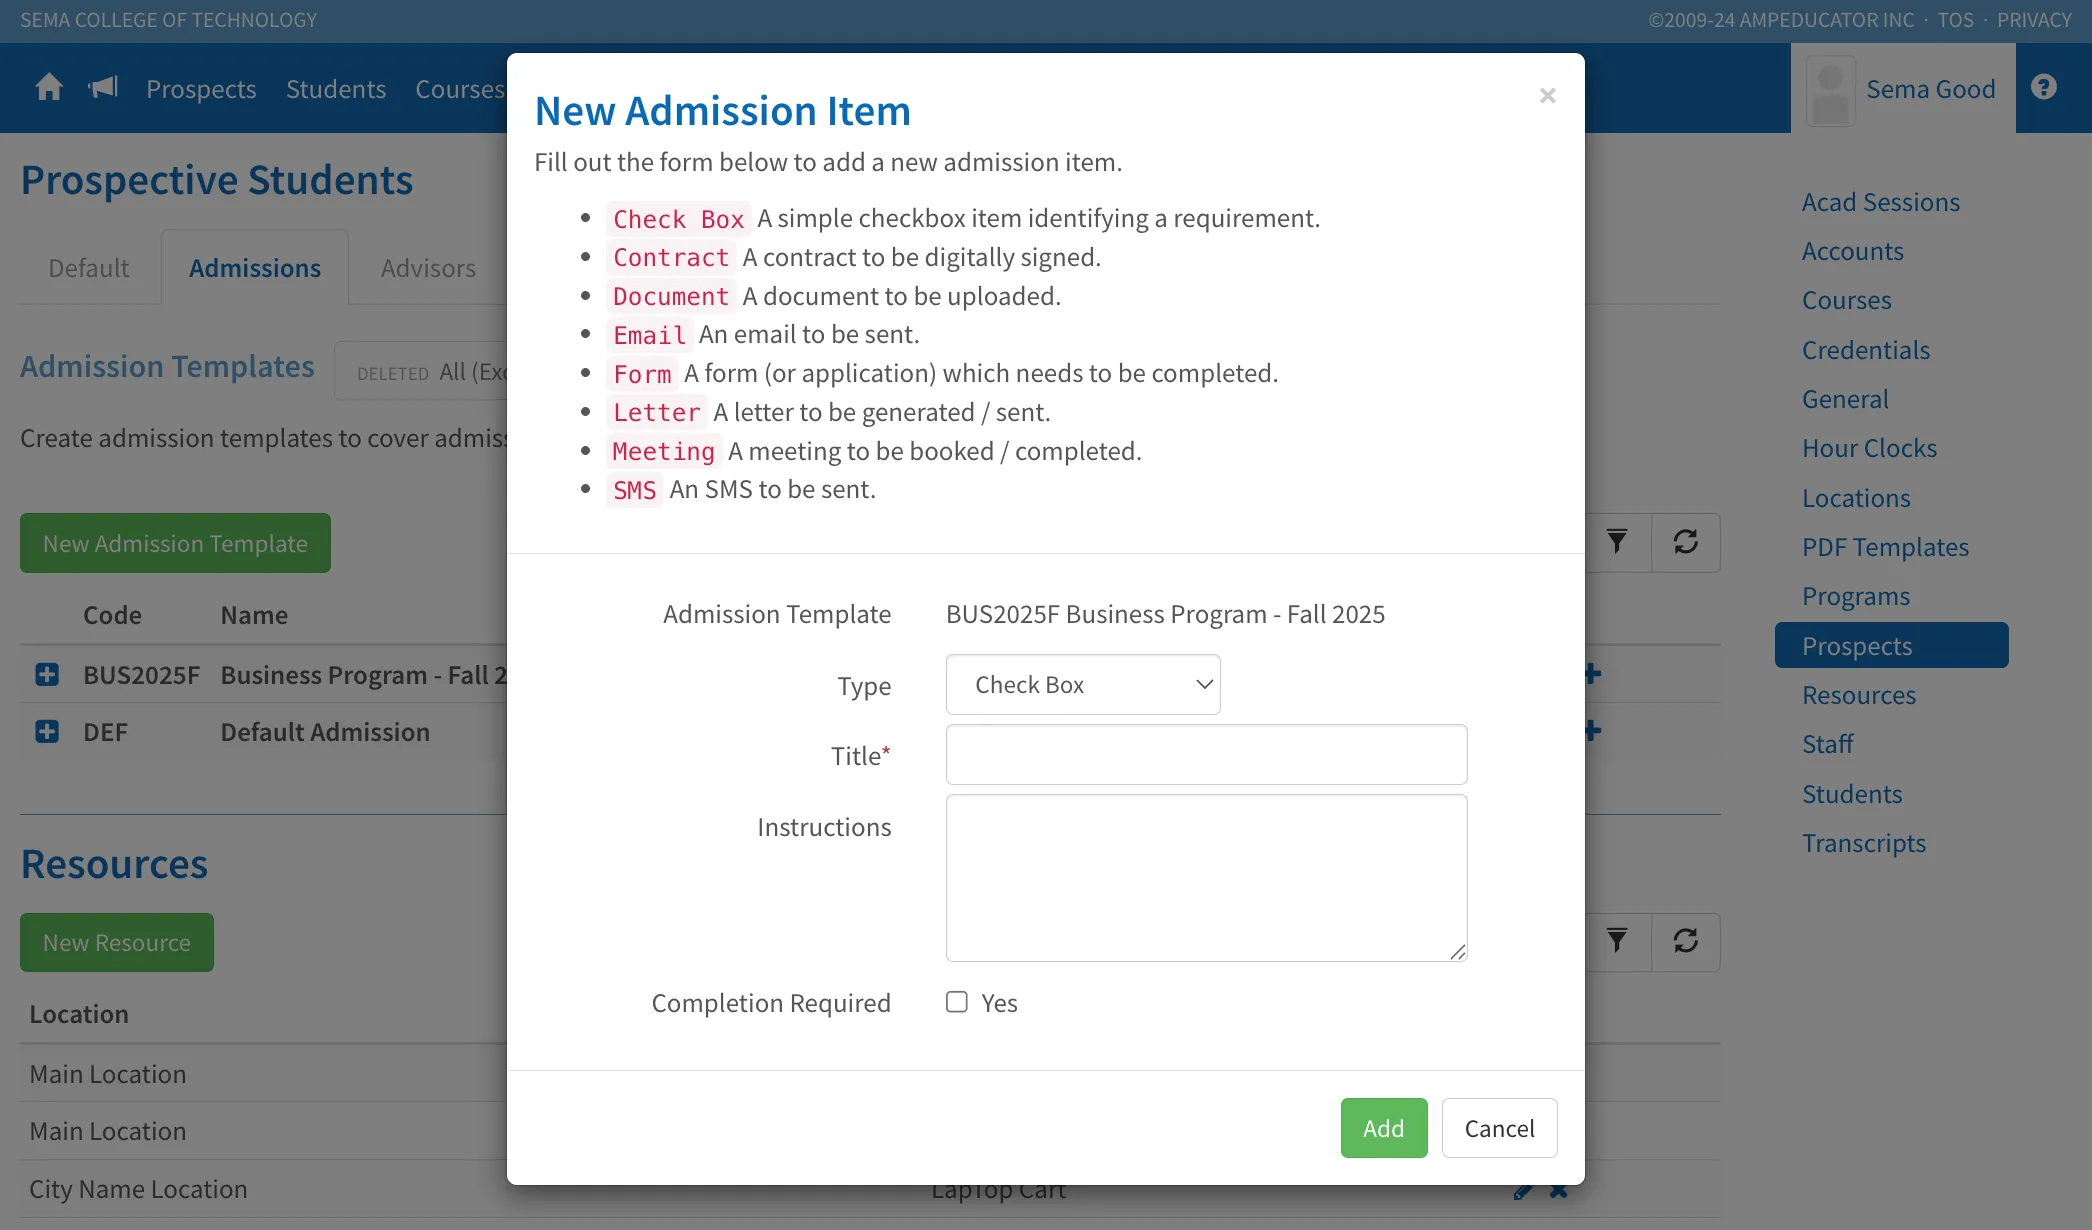
Each item you add appears under that template and becomes part of the admission checklist for Prospects assigned to it.